[태그:] Productivity Tools

English articles about tools that improve personal or team productivity.

  • When Your Obsidian Notes Stop Staying Organized: How to Use Note Sweep to Rework Old Notes

    When Your Obsidian Notes Stop Staying Organized: How to Use Note Sweep to Rework Old Notes

    As you use Obsidian for a long time, there comes a moment when the vault feels like a ‘repository of unopened records’ rather than a ‘knowledge base.’ New notes keep being created, but checking if notes written six months ago are still usable tends to be put off.

    The video ‘Why Can’t I Organize My Obsidian Notes? Note Organization Plugin That’s Done with One Click!’ from the Learning Master channel grasps this problem quite realistically. The key is not a technique to create more notes, but a routine to review and organize the notes that have already been created.

    In this article, based on the Obsidian community plugin introduced in the video Note Sweepwe organized how to select, delete, store, and update old notes.
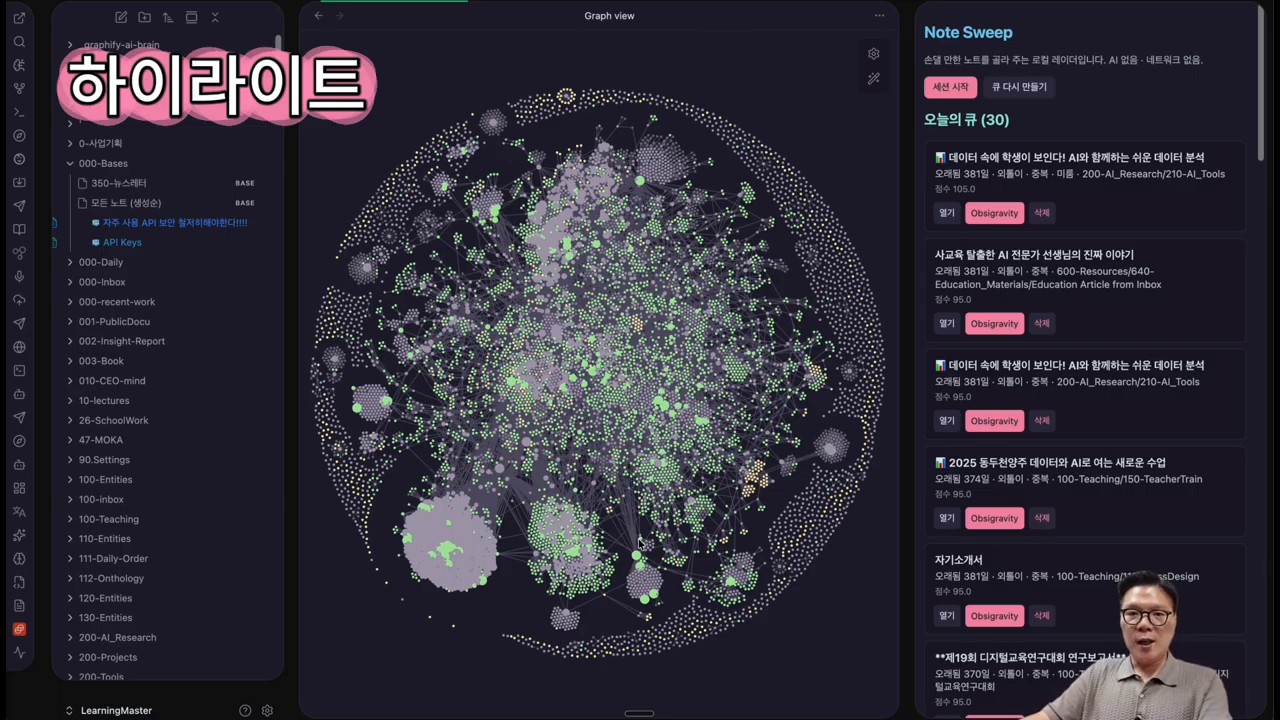
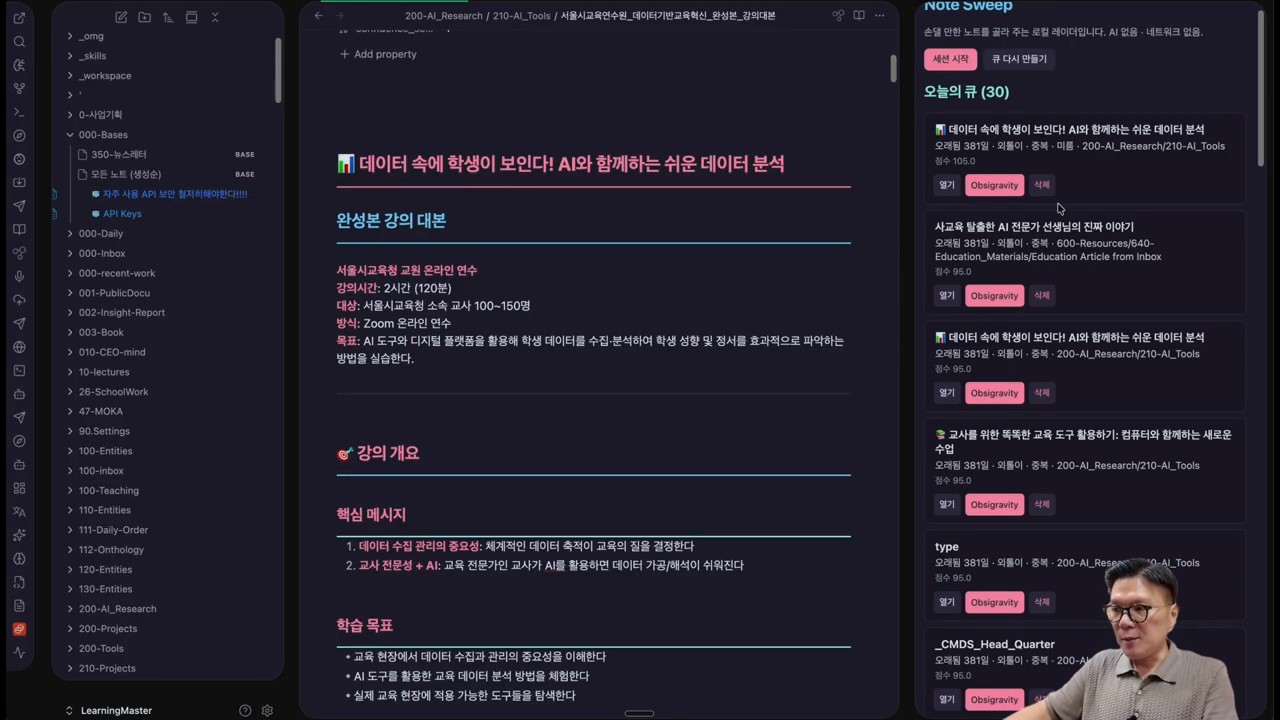
    A video scene explaining the old note organization problem in Obsidian
    Source: Capture of the Learning Master YouTube video
    ※ We captured the original YouTube video scene for review and explanation purposes.

    Why it becomes harder to organize as the number of notes increases

    When you first start using Obsidian, the increasing number of notes feels like productivity. However, as time passes, the problem changes. The more notes you have, the harder it is to distinguish between notes to re-read and notes to discard.

    The host of the video, Kim Mun-jung, also talks about similar concerns. Even if nearly 10,000 notes are densely connected, if those notes are not actually re-used, the question remains as to whether they are ‘really my knowledge.’

    At this point, the important criterion is simple.

    • Has it been opened recently?
    • Is it updated to match the current judgment and information?
    • Is it connected to other notes and used for actual work?
    • Is there a reason to keep it, or can it be deleted?

    Note organization is not about creating a beautiful folder structure. It’s more about distinguishing between reusable knowledge and unnecessary records.

    What kind of plugin is Note Sweep?

    Note Sweep is an Obsidian community plugin that gathers long-abandoned notes and helps users review them one by one over a certain period of time. In the video, it sounds like ‘note import,’ but the core function is about reviewing and organizing old notes.

    The installation flow is the same as that of a general community plugin.

    • Open the community plugin browser in Obsidian settings.
    • Search for `Note Sweep`.
    • Install and activate the plugin.
    • Run Note Sweep from the left ribbon or command palette.
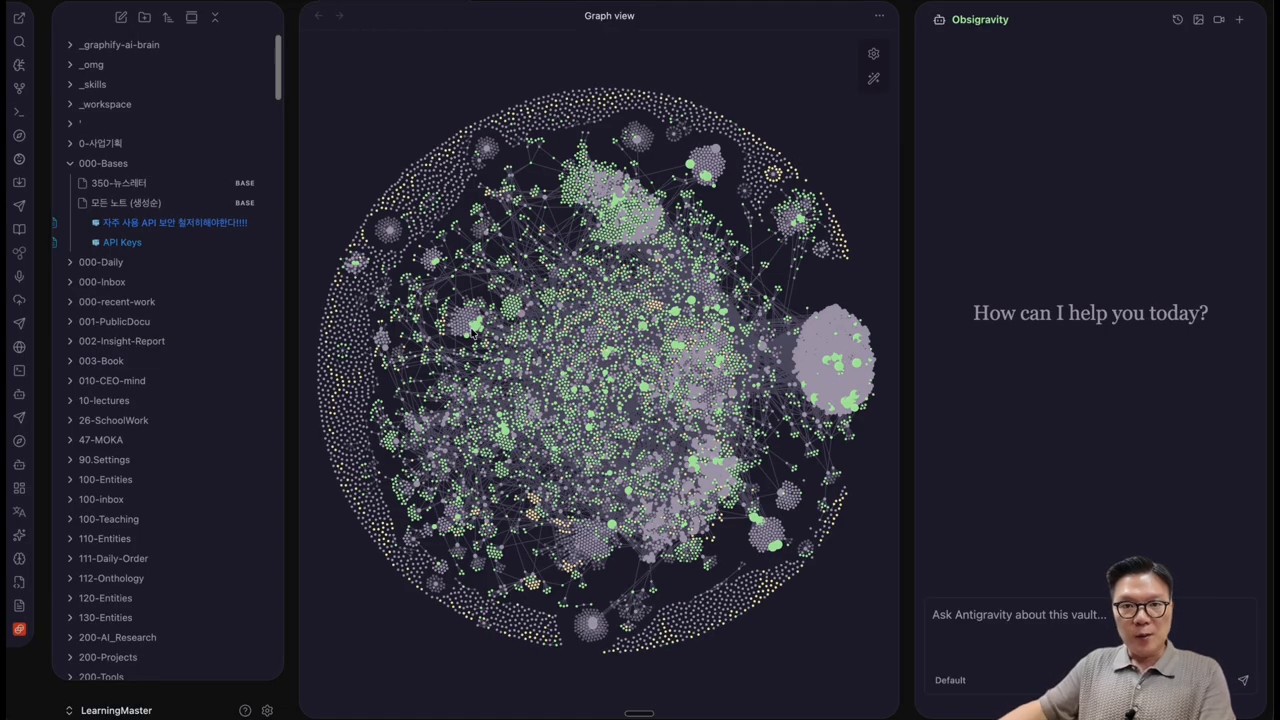
    Installing Note Sweep in Obsidian community plugins
    Source: Screenshot from the ‘Master of Learning’ YouTube video
    ※ I captured the original YouTube video scene for review and explanation purposes.

    The key is not the installation itself, but the settings. If you try to open all notes at once, you will get tired soon. So, in the video, it is suggested to limit the target of organization and divide it into a manageable amount per day.

    Recommended settings: 180 days, 20 minutes, 30 notes

    The default values suggested in the video are quite practical.

    • Days to leave: 180 days or more
    • Session time: 20 minutes
    • Number of notes to process per day: about 30
    • Maximum number of notes per folder: about 5
    • Excluded folders: folders that should be excluded from automatic organization or permanently stored
    • Storage folder: the location to move notes that will not be deleted but stored separately
    • Snooze: to review notes that are difficult to judge at the moment after a certain period

    This setting focuses on “sustainable organization” rather than “perfect organization”. If you try to organize 10,000 notes at once, you are likely to fail. On the other hand, if you organize for 20 minutes a day, note management becomes a kind of habit.
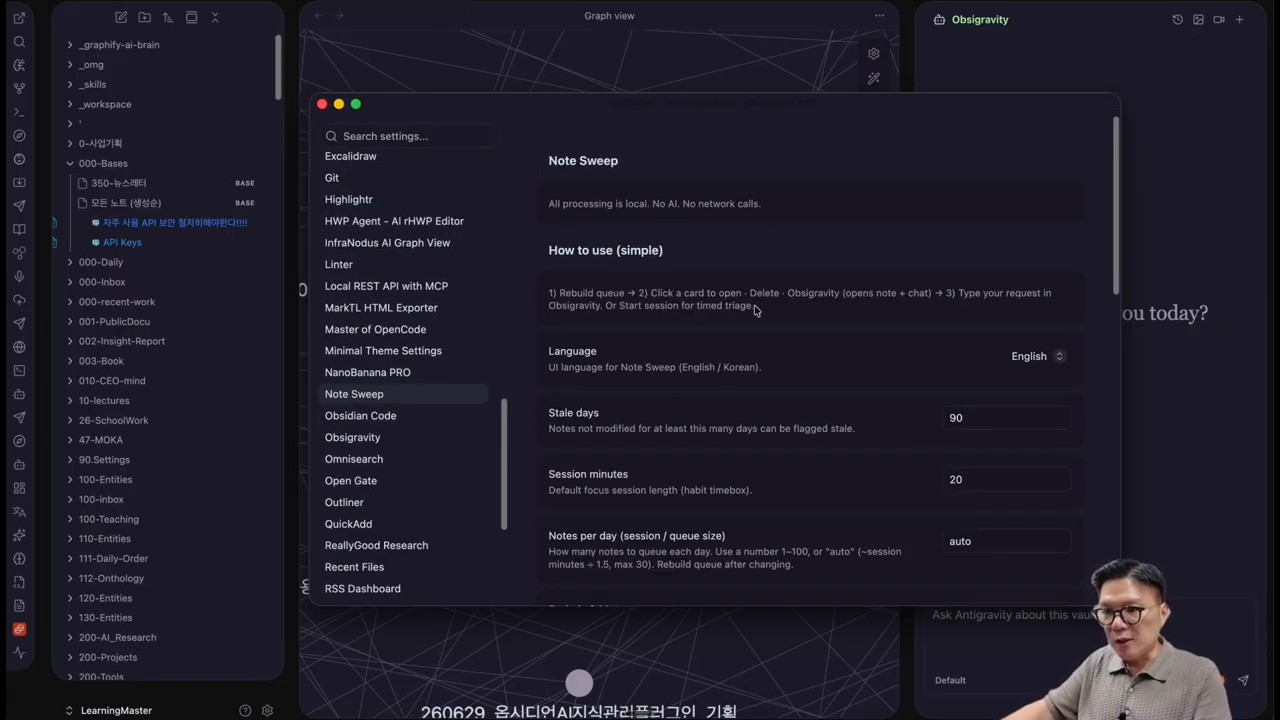
    Scene of setting the number of idle days and session time in Note Sweep
    Source: Capture of the video from the YouTube channel, Master of Learning
    ※ I captured the original YouTube video scene for review and description purposes.

    In particular, the 180-day standard is also suitable for beginners. If you set it too short, even notes that are still in use will be included in the cleaning list. If you set it too long, the cleaning effect will appear late. Checking notes that have not been opened for about half a year is a realistic starting point.

    Three judgment criteria: deletion, storage, and update

    When you open an old note, there is one thing you must decide immediately. That is how to deal with this note in the future. Based on the video flow, there are three options for cleaning.

    1. Notes to be deleted

    Notes that are no longer meaningful or duplicated are subject to deletion. These include old tests, temporary memos, records that have already been absorbed into other notes, and data that are completely unrelated to current interests.

    However, deletion should be done with caution. As mentioned in the video, there is a risk of accidentally deleting important notes while quickly cleaning. Therefore, it is okay to choose storage more often than deletion at first.

    2. Notes to be stored

    Notes that are not frequently used at the moment but may be referenced later can be safely moved to a storage folder. Storage means “I won’t delete it” but rather “I’ll lower its priority in the current workspace”.

    3. Notes to be updated

    The most important target is notes to be updated. Old notes that still have value can be revived by adding the latest information, new links, related notes, and one’s own interpretation.

    In the video, AI-based workflows like OpsyGravity and Note Surgeon are also mentioned. This doesn’t mean assigning old notes directly to AI, but rather having humans review them and then using AI to supplement the necessary parts.

    AI updates should be referred to as ‘review assistance’, not ‘auto-organization’.

    When updating old notes with AI, the most important thing to be careful about is accountability. While AI can organize the content, it’s up to the user to decide if the note is still needed.

    The recommended order of use is as follows:

    • Use Note Sweep to select old notes.
    • The user first determines whether to delete, store, or update them.
    • Only request AI tools to summarize, update, and reinforce connections for notes that need to be updated.
    • Do not paste the results as is, but modify them to fit your own expression and current context.
    • Reconnect related notes and links.
    The flow of updating old Obsidian notes using AI tools
    Source: Capture of the YouTube video by the master of learning
    ※ I captured the original YouTube video scene for review and explanation purposes.

    This method may be slower than simple automation. However, in knowledge management, speed is not the only thing that matters. The traces of me re-reading and judging must remain for the note to be actually used in the next task.

    How to create a 20-minute daily organization routine

    The advantage of Note Sweep is that it turns the abstract determination to ‘organize’ into a concrete session. Having a daily 20-minute limit reduces the burden.

    The recommended routine is as follows.

    • Open a 20-minute session before starting work or at the end of the day.
    • In the first 5 minutes, quickly process notes to be deleted or stored.
    • In the next 10 minutes, select 1-2 notes to update.
    • In the last 5 minutes, organize connection links and tags.
    • For notes that are difficult to judge, snooze them and move on to the next session.

    This way, note organization becomes a small, repeatable habit, rather than a separate large project.

    Managing Obsidian Vault like a data lake

    The impressive expression in the video is to create a note repository close to a ‘first-class data lake’. A data lake is not complete just by collecting a lot of data. Quality, accessibility, and reusability must be managed together.

    The same applies to Obsidian Vault. What’s more important than the fact that there are many notes is the following question.

    • Can you find the necessary notes again?
    • Are old notes updated based on current standards?
    • Is duplicate and garbage data continuously accumulating?
    • Are past notes used as actual materials when starting new tasks?

    Note Sweep is a tool that regularly raises these questions. So, the value of this plugin lies in being a device that makes you review your notes, rather than just organizing them.
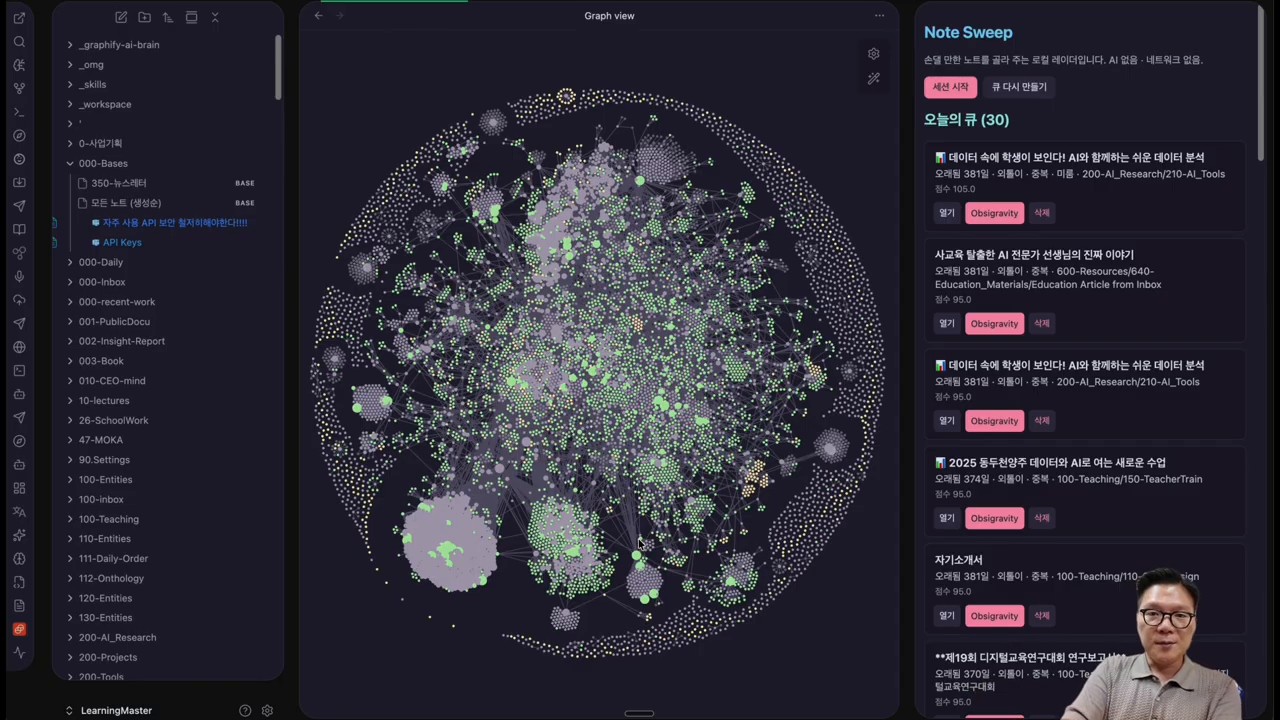
    Turning old notes into a usable knowledge repository through an organizing routine
    Source: Capture of Baemuiui Dalin YouTube video
    ※ I captured the original YouTube video scene for review and explanation purposes.

    Who would benefit from using this plugin?

    Note Sweep is especially suitable for the following users.

    • Those who have accumulated over a thousand Obsidian notes
    • Those who create notes daily but have a low rate of reopening them
    • Those whose vaults have become heavy with old memos and latest thoughts mixed together
    • Those who want to update their notes with AI tools but find it difficult to choose the target
    • Those who want to make note organization a daily routine, not a big project

    On the other hand, if the number of notes is not yet large, or if all notes are managed in clear project units, it may not be an essential tool. In this case, it is more effective to check the folder structure and linking habits first.

    Let’s read together

    FAQ

    Does Note Sweep automatically delete notes?

    Based on the video, it is a tool that helps list and organize old notes, rather than automatically deleting them. The user must judge whether to delete them. For important notes, it is safer to store or snooze them instead of deleting them immediately.

    Do I have to set the abandonment period to 180 days?

    It’s not necessary. However, when starting out, around 180 days is a good starting point. If it’s set too short, there will be too many notes to organize, and if it’s set too long, the organizing effect will be delayed.

    Can I update old notes directly with AI?

    It’s possible, but the recommended order is for humans to first determine the necessity of the notes. It’s safer to ask AI to summarize, update, and reinforce connections only for notes that are worth updating.

    Do Obsidian beginners need Note Sweep?

    If you don’t have many notes, it’s not essential yet. Beginners should first establish note writing rules, linking habits, and folder structures. Note Sweep is more useful when you need a cleaning routine after accumulating many notes.

    Reference

    ※ The images in this article are captured from the original YouTube video for review and explanation purposes.

    Original Korean article: https://www.thinknote.co.kr/obsidian-note-sweep-plugin-note-cleanup/

  • How to Open and Manage SQLite Files on Windows 11

    SQLite files are a way of storing data in a single file without a separate database server. The file extension is usually .db, .sqlite, .sqlite3 In the form. Even in Windows 11, you can open SQLite files, check the table structure, query data, and modify it with SQL queries if you have the right tools installed.

    For beginners, the easiest choice is DB Browser for SQLiteIf you need to check with the development environment VS Code extension programis convenient, and if you need repetitive tasks or automation SQLite command-line toolis useful.

    What is an SQLite file?

    SQLite is a lightweight database that can be used without running a separate server. Unlike MySQL or PostgreSQL, which connect to a server, the entire database is contained in a single file.

    For example, the following file can be an SQLite database.

    data.db
    database.sqlite
    app.sqlite3
    backup.db

    SQLite is often used in mobile apps, desktop programs, browser local data, test databases, and small web applications. The advantage is that you can open and view the contents with just one file, but if you modify the original file incorrectly, it can affect the entire data.

    Three Ways to Open SQLite Files in Windows 11

    There are three main ways to check SQLite files in Windows 11.

    MethodRecommended forAdvantages
    DB Browser for SQLiteBeginners, general usersEasily view tables and data on the screen
    SQLite CLIDevelopers, automation usersQuickly query with commands and enable scripting
    VS Code extensionDevelopers in progressDB verification possible within code editor

    If you just need to check the file contents and modify some data, it’s better to use DB Browser for SQLite first.

    Method 1. Open with DB Browser for SQLite

    DB Browser for SQLite is a free tool that allows you to open and manage SQLite files in a graphical interface. You can view table data like in Excel and execute SQL queries directly.

    Installation

    1. Access the official DB Browser for SQLite website.
    2. Download the installation file for Windows.
    3. Run the installation file.
    4. After installation, run DB Browser for SQLite from the start menu.

    The official download page is organized at the bottom of this article in the references.

    Open an SQLite file

    After running the program, proceed in the following order:

    1. Top Open DatabaseClick
    2. Open .db, .sqlite, .sqlite3 Select a file
    3. When the file is opened, the database structure is displayed on the screen

    The screen usually displays the following tabs

    TabsFunction
    Database StructureCheck table, column, and index structure
    Browse DataInquire and modify table data
    Edit PragmasCheck SQLite settings
    Execute SQLExecute SQL queries

    Check table structure

    If you have opened the file, first check the tabs. Database Structure This is where you can see what tables are in the database.

    For example, there may be tables like the following.

    users
    orders
    products
    settings
    logs

    By selecting each table, you can check the column name, data type, and whether it is a primary key.

    Column NameTypeMeaning
    idINTEGERUnique Number
    nameTEXTName
    emailTEXTEmail
    created_atTEXTCreation Date

    If it’s your first time seeing an SQLite file, it’s safe to check the table structure before modifying the data.

    Viewing and Editing Data

    If you want to view the data directly Browse Data Use the tabs.

    1. Click the Browse Data tab.
    2. Select the desired table from the table selection list at the top.
    3. The data is displayed in a table format.

    Clicking a cell allows you to modify its value. After modification, you must click the Write Changes button at the top to save it to the actual file. On the other hand, to cancel without saving, use the Revert Changesbutton.

    If it’s an important file, it’s recommended to make a copy and test it instead of modifying the original directly.

    Executing SQL Queries

    DB Browser for SQLite’s Execute SQL You can execute SQL queries directly in the tab.

    To check all the data, enter the following:

    SELECT * FROM users;

    If you want to see only the last 10 data, run the following:

    SELECT *
    FROM users
    ORDER BY id DESC
    LIMIT 10;

    You can also find only the data that matches specific conditions.

    SELECT *
    FROM users
    WHERE email LIKE '%gmail.com';

    Before executing a delete or modify query, you must first check the target data with SELECT.

    SELECT *
    FROM users
    WHERE id = 10;

    After checking, execute UPDATE only when necessary.

    UPDATE users
    SET name = '김철수'
    WHERE id = 10;

    UPDATE or DELETE without conditions can affect all data, so be especially careful.

    Frequently used SQLite commands

    When checking SQLite files, the following queries are often used:

    Check the list of all tables

    SELECT name
    FROM sqlite_master
    WHERE type = 'table';

    Check the columns of a specific table

    PRAGMA table_info(users);

    Check the number of data

    SELECT COUNT(*)
    FROM users;

    Check for duplicate values

    SELECT DISTINCT category
    FROM products;

    Search for specific strings

    SELECT *
    FROM users
    WHERE name LIKE '%홍길동%';

    Method 2. Using the SQLite command-line tool

    If you’re a developer, you can use sqlite3.exethe official SQLite command-line tool.

    After downloading the tool for Windows from the official SQLite download page and unzipping it, you can use sqlite3.exe the file.

    Run it in PowerShell or the command prompt as follows:

    sqlite3 database.db

    Once the SQLite prompt opens, you can use the following commands.

    .tables

    If you want to see the table structure, run the following command.

    .schema users

    To view some data, enter the following:

    SELECT * FROM users LIMIT 10;

    To finish the task, terminate with the following command:

    .quit

    The command-line tool is beneficial for repetitive tasks, backup checks, and simple automation. However, for first-time users, GUI tools are more intuitive.

    Method 3. Open SQLite file in VS Code

    If you are already using Visual Studio Code, you can install the SQLite extension to open the file.

    The order of use is as follows:

    1. Run VS Code.
    2. Open the Extensions menu.
    3. SQLite Or SQLite ViewerSearch for
    4. Install the extension.
    5. .db Or .sqlite Open the file to check the table.

    It is useful when you need to quickly check the database contents within a project under development. Another advantage is that you can view SQL files, code, and databases together on one screen.

    If you are not familiar with VS Code, it is a good idea to learn the basic installation and terminal usage first. For more information, you can also refer to Thinknote’s Reasons why Vib coding beginners get stuck, IT map that you should know before codingYou can also refer to this.

    Exporting and importing as CSV

    In DB Browser for SQLite, you can export table data as a CSV file.

    1. Select a table in the Browse Data tab.
    2. Click File in the top menu.
    3. Select Export.
    4. Select Table(s) as CSV file.
    5. Specify the save location.

    You can check the data in Excel or Google Sheets by exporting it as a CSV file.

    Conversely, you can also import a CSV file into an SQLite table.

    1. Open the File menu.
    2. Select Import.
    3. Select Table from CSV file.
    4. Select the CSV file.
    5. Check the delimiter and encoding.
    6. Run the import.

    If the Korean text is broken, you need to check the encoding again based on UTF-8 or CP949.

    Things to check when an SQLite file cannot be opened

    If the SQLite file cannot be opened, check the following items.

    Do not judge based on the extension alone.

    .db Not all files with extensions are SQLite files. Some programs use extensions for their own data formats as well. .db If it doesn’t open in DB Browser for SQLite, it may not be in SQLite format.

    Close the program being used

    If a program is using the file, it may be locked and cannot be modified. In this case, close the program or create a copy of the file and try opening the copy.

    Check integrity

    If you suspect file damage, you can run the following command in the SQLite CLI.

    PRAGMA integrity_check;

    If the result is okthen the basic integrity check has passed.

    Always back up before modifying

    SQLite stores the entire database in a single file, so backing up before modifying is crucial.

    For example, you can copy the original like this.

    database.db
    database_backup.db

    In particular, backup is essential in the following situations.

    • When modifying the database of a program in operation
    • When customer data or business data is included
    • When executing DELETE, UPDATE, DROP TABLE commands
    • When changing the table structure
    • When importing bulk data with CSV import

    Directly editing an SQLite file may seem simple, but if you make a mistake, it can be difficult to recover. It’s a good habit to always test modifications in a copy first.

    What tools should I choose?

    The recommended tools vary slightly depending on the purpose.

    PurposeRecommended tool
    Quickly check the file contentsDB Browser for SQLite
    Directly edit dataDB Browser for SQLite
    Checking DB during developmentVS Code SQLite extension
    Command-based inspectionSQLite CLI
    Automating repetitive tasksSQLite CLI or Python
    Excel integrationExporting and importing CSV

    If it’s your first time, it’s best to start with DB Browser for SQLite and then use SQLite CLI and VS Code extensions together once you get used to it.

    Conclusion

    Opening an SQLite file in Windows 11 is not difficult. The easiest way is to install DB Browser for SQLite and .db, .sqlite, .sqlite3 open the file.

    Once the file is opened, you can check the table structure, query data, and search or modify it using SQL queries if necessary. However, since all data is stored in a single SQLite file, it’s essential to back it up before making any modifications.

    To summarize, the following applies.

    • For beginners, DB Browser for SQLite is the easiest to use.
    • Developers can use VS Code extensions or SQLite CLI together for convenience.
    • Before modifying data, you must back up the original file.
    • Delete and modify queries must be executed after verifying the target with SELECT first.
    • Using CSV export and import makes it easy to work with Excel.

    SQLite is a lightweight but very practical database. With the right tools, you can safely open and manage SQLite files even on Windows 11.

    FAQ

    Do I need to install an SQLite server to open an SQLite file?

    No, SQLite is not server-based. You only need a program or command-line tool that can open SQLite files.

    .db Are all files SQLite files?

    No. .db Even if a file has an extension, it may be a proprietary format file that is not SQLite. If it does not open in DB Browser for SQLite, you need to check the file format again.

    Are changes to SQLite files saved immediately?

    In DB Browser for SQLite, you need to click Write Changes after modifying values to save them to the actual file. Before saving, you can revert changes using Revert Changes.

    Can SQLite files be opened directly in Excel?

    It’s not common to open SQLite files directly in Excel. The easiest way is to export them as CSV from DB Browser for SQLite and then open them in Excel.

    What is the most recommended SQLite tool for Windows 11?

    For first-time users, DB Browser for SQLite is recommended. For developers, using SQLite CLI and VS Code extension together is a good option.

    Reference materials

    Original Korean article: https://www.thinknote.co.kr/windows-11-sqlite-file-open-manage/

  • 옵시디언 노트 정리가 막힐 때: Note Sweep으로 오래된 노트를 다시 쓰는 방법

    옵시디언 노트 정리가 막힐 때: Note Sweep으로 오래된 노트를 다시 쓰는 방법

    옵시디언을 오래 쓰다 보면 어느 순간 볼트가 ‘지식 창고’가 아니라 ‘열어보지 않는 기록 보관함’처럼 느껴질 때가 있습니다. 새 노트는 계속 생기지만, 반년 전 작성한 노트가 지금도 쓸 만한지 확인하는 일은 뒤로 밀리기 쉽습니다.

    배움의 달인 채널의 영상 「왜 내 옵시디언 노트는 정리가 안 될까? 클릭 한번에 끝내는 노트 정리 플러그인!」은 이 문제를 꽤 현실적으로 짚습니다. 핵심은 노트를 더 많이 만드는 기술이 아니라, 이미 만든 노트를 다시 살펴보고 정리하는 루틴입니다.

    이 글에서는 영상에서 소개한 Obsidian 커뮤니티 플러그인 Note Sweep을 기준으로, 오래된 노트를 어떻게 선별하고 삭제·보관·업데이트할지 정리했습니다.

    옵시디언 오래된 노트 정리 문제를 설명하는 영상 장면
    출처: 배움의 달인 YouTube 영상 캡처
    ※ 원본 YouTube 영상 장면을 리뷰·설명 목적으로 캡처했습니다.

    노트가 많아질수록 정리가 더 어려워지는 이유

    처음 옵시디언을 쓸 때는 노트가 늘어나는 것이 곧 생산성처럼 느껴집니다. 하지만 시간이 지나면 문제가 달라집니다. 노트 수가 많아질수록 다시 읽을 노트와 버릴 노트를 구분하기 어려워집니다.

    영상 속 진행자 김문정 님도 비슷한 고민을 이야기합니다. 만 개 가까운 노트가 촘촘히 연결되어 있어도, 그 노트가 실제로 다시 쓰이지 않는다면 “정말 내 지식인가”라는 질문이 남는다는 것입니다.

    이 지점에서 중요한 기준은 단순합니다.

    • 최근에 다시 열어본 적이 있는가
    • 지금의 판단과 정보에 맞게 업데이트되어 있는가
    • 다른 노트와 연결되어 실제 작업에 쓰이는가
    • 보관할 이유가 있는가, 아니면 삭제해도 되는가

    노트 정리는 예쁜 폴더 구조를 만드는 일이 아닙니다. 다시 쓸 수 있는 지식과 더 이상 필요 없는 기록을 구분하는 일에 가깝습니다.

    Note Sweep은 어떤 플러그인인가

    Note Sweep은 오래 방치된 노트를 모아 보여주고, 사용자가 일정 시간 동안 하나씩 검토하도록 돕는 Obsidian 커뮤니티 플러그인입니다. 영상에서는 “노트 수입”처럼 들리지만, 맥락상 핵심 기능은 오래된 노트를 쓸어보고 정리하는 데 있습니다.

    설치 흐름은 일반적인 커뮤니티 플러그인과 같습니다.

    • Obsidian 설정에서 커뮤니티 플러그인 브라우저를 엽니다.
    • `Note Sweep`을 검색합니다.
    • 플러그인을 설치하고 활성화합니다.
    • 왼쪽 리본 또는 명령 팔레트에서 Note Sweep을 실행합니다.
    Obsidian 커뮤니티 플러그인에서 Note Sweep을 설치하는 장면
    출처: 배움의 달인 YouTube 영상 캡처
    ※ 원본 YouTube 영상 장면을 리뷰·설명 목적으로 캡처했습니다.

    핵심은 설치 자체보다 설정입니다. 무작정 모든 노트를 한꺼번에 열어보면 금방 지칩니다. 그래서 영상에서는 정리 대상을 제한하고, 매일 처리할 수 있는 분량으로 쪼개는 방식을 제안합니다.

    추천 설정: 180일, 20분, 30개

    영상에서 제안한 기본값은 꽤 실용적입니다.

    • 방치일수: 180일 이상
    • 세션 시간: 20분
    • 하루 처리 노트 수: 약 30개
    • 폴더당 최대 노트 수: 5개 정도
    • 제외 폴더: 영구 보관하거나 자동 정리 대상에서 빼야 하는 폴더
    • 보관 폴더: 삭제하지 않고 따로 모아둘 노트의 이동 위치
    • 스누즈: 당장 판단하기 어려운 노트를 일정 기간 뒤 다시 보기

    이 설정은 “완벽한 정리”보다 “지속 가능한 정리”에 초점을 둡니다. 1만 개 노트를 한 번에 정리하려고 하면 실패할 가능성이 큽니다. 반대로 하루 20분만 정리하면 노트 관리가 일종의 습관이 됩니다.

    Note Sweep에서 방치일수와 세션 시간을 설정하는 장면
    출처: 배움의 달인 YouTube 영상 캡처
    ※ 원본 YouTube 영상 장면을 리뷰·설명 목적으로 캡처했습니다.

    특히 180일 기준은 초보자에게도 무난합니다. 너무 짧게 잡으면 아직 쓰임이 남아 있는 노트까지 정리 목록에 올라옵니다. 너무 길게 잡으면 정리 효과가 늦게 나타납니다. 반년 정도 열어보지 않은 노트를 먼저 살펴보는 방식이 현실적인 출발점입니다.

    삭제, 보관, 업데이트의 세 가지 판단 기준

    오래된 노트를 열었을 때 바로 결정해야 할 것은 하나입니다. 이 노트를 앞으로 어떻게 다룰 것인가입니다. 영상 흐름을 기준으로 정리하면 세 가지 선택지가 있습니다.

    1. 삭제할 노트

    이제 의미가 없거나 중복된 노트는 삭제 대상입니다. 예전 테스트, 임시 메모, 이미 다른 노트로 흡수된 기록, 지금의 관심사와 완전히 멀어진 자료가 여기에 해당합니다.

    다만 삭제는 조심해야 합니다. 영상에서도 빠르게 정리하다가 중요한 노트를 실수로 지울 수 있다는 우려가 나옵니다. 그래서 처음에는 삭제보다 보관을 더 많이 선택해도 괜찮습니다.

    2. 보관할 노트

    지금 당장 자주 쓰지는 않지만, 나중에 참고할 가능성이 있는 노트는 보관 폴더로 옮기는 방식이 안전합니다. 보관은 “삭제하지 않겠다”가 아니라 “현재 작업 공간에서는 비중을 낮추겠다”는 의미로 이해하는 편이 좋습니다.

    3. 업데이트할 노트

    가장 중요한 대상은 업데이트할 노트입니다. 오래됐지만 여전히 가치가 있는 노트는 최신 정보, 새 링크, 관련 노트, 자신의 해석을 덧붙이면 다시 살아납니다.

    영상에서는 OpsyGravity와 Note Surgeon 같은 AI 기반 작업 흐름을 함께 언급합니다. 오래된 노트를 AI에게 바로 맡긴다는 의미가 아니라, 사람이 검토한 뒤 필요한 부분을 AI로 보강하는 방식에 가깝습니다.

    AI 업데이트는 ‘자동 정리’가 아니라 ‘검토 보조’로 써야 한다

    오래된 노트를 AI로 업데이트할 때 가장 조심해야 할 점은 책임 소재입니다. AI가 내용을 정리해 줄 수는 있지만, 그 노트가 여전히 필요한지 판단하는 주체는 사용자입니다.

    좋은 활용 순서는 다음과 같습니다.

    • Note Sweep으로 오래된 노트를 선별합니다.
    • 사용자가 삭제·보관·업데이트 중 하나를 먼저 판단합니다.
    • 업데이트 대상만 AI 도구로 요약, 최신화, 연결 보강을 요청합니다.
    • 결과를 그대로 붙이지 말고 자신의 표현과 현재 맥락에 맞게 수정합니다.
    • 관련 노트와 링크를 다시 연결합니다.
    AI 도구를 활용해 오래된 옵시디언 노트를 업데이트하는 흐름
    출처: 배움의 달인 YouTube 영상 캡처
    ※ 원본 YouTube 영상 장면을 리뷰·설명 목적으로 캡처했습니다.

    이 방식은 단순한 자동화보다 느릴 수 있습니다. 하지만 지식관리에서 중요한 것은 속도만이 아닙니다. 내가 다시 읽고 판단한 흔적이 남아야 그 노트가 다음 작업에서 실제로 쓰입니다.

    매일 20분 정리 루틴을 만드는 법

    Note Sweep의 장점은 “정리해야지”라는 추상적인 결심을 구체적인 세션으로 바꿔준다는 점입니다. 매일 20분이라는 제한이 있으면 부담이 줄어듭니다.

    추천 루틴은 다음과 같습니다.

    • 하루 작업 시작 전 또는 마무리 전에 20분 세션을 엽니다.
    • 첫 5분은 삭제 또는 보관할 노트를 빠르게 처리합니다.
    • 다음 10분은 업데이트할 노트를 1~2개만 고릅니다.
    • 마지막 5분은 연결 링크와 태그를 정리합니다.
    • 판단이 어려운 노트는 스누즈하고 다음 세션으로 넘깁니다.

    이렇게 하면 노트 정리가 별도의 대형 프로젝트가 아니라 반복 가능한 작은 습관이 됩니다.

    옵시디언 볼트를 데이터레이크처럼 관리한다는 것

    영상에서 인상적인 표현은 “1등급 데이터레이크”에 가까운 노트 저장소를 만들자는 관점입니다. 데이터레이크는 데이터를 많이 모으는 것만으로 완성되지 않습니다. 품질, 접근성, 재사용성이 함께 관리되어야 합니다.

    옵시디언 볼트도 마찬가지입니다. 노트가 많다는 사실보다 중요한 것은 다음 질문입니다.

    • 필요한 노트를 다시 찾을 수 있는가
    • 오래된 노트가 현재 기준으로 업데이트되어 있는가
    • 중복과 쓰레기 데이터가 계속 쌓이지 않는가
    • 새 작업을 시작할 때 과거 노트가 실제 재료로 쓰이는가

    Note Sweep은 이 질문을 정기적으로 마주하게 만드는 도구입니다. 그래서 이 플러그인의 가치는 “노트를 정리해 주는 기능”보다 “노트를 다시 보게 만드는 장치”에 있습니다.

    오래된 노트를 다시 활용 가능한 지식 저장소로 만드는 정리 루틴
    출처: 배움의 달인 YouTube 영상 캡처
    ※ 원본 YouTube 영상 장면을 리뷰·설명 목적으로 캡처했습니다.

    누가 이 플러그인을 써보면 좋을까

    Note Sweep은 특히 다음 사용자에게 잘 맞습니다.

    • 옵시디언 노트가 수천 개 이상 쌓인 사람
    • 매일 노트를 만들지만 다시 열어보는 비율이 낮은 사람
    • 예전 메모와 최신 생각이 뒤섞여 볼트가 무거워진 사람
    • AI 도구로 노트를 업데이트하고 싶지만 대상을 고르기 어려운 사람
    • 노트 정리를 큰 프로젝트가 아니라 매일의 루틴으로 만들고 싶은 사람

    반대로 노트 수가 아직 많지 않거나, 모든 노트를 명확한 프로젝트 단위로 관리하고 있다면 당장 필수 도구는 아닐 수 있습니다. 이 경우에는 폴더 구조와 링크 습관부터 점검하는 편이 더 효과적입니다.

    함께 읽어볼 글

    FAQ

    Note Sweep은 노트를 자동으로 삭제하나요?

    영상 기준으로는 오래된 노트를 목록화하고 정리 세션을 돕는 도구에 가깝습니다. 삭제 여부는 사용자가 판단해야 합니다. 중요한 노트는 바로 삭제하기보다 보관하거나 스누즈하는 방식이 안전합니다.

    방치일수는 꼭 180일로 설정해야 하나요?

    필수는 아닙니다. 다만 처음 시작할 때는 180일 정도가 무난합니다. 너무 짧게 잡으면 정리 대상이 과도하게 많아지고, 너무 길게 잡으면 정리 효과가 늦게 나타납니다.

    AI로 오래된 노트를 바로 업데이트해도 될까요?

    가능하지만 권장 순서는 먼저 사람이 노트의 필요성을 판단하는 것입니다. 업데이트할 가치가 있는 노트만 AI로 요약, 최신화, 연결 보강을 요청하는 편이 안전합니다.

    옵시디언 초보자도 Note Sweep이 필요할까요?

    노트가 많지 않다면 당장 필수는 아닙니다. 초보자는 먼저 노트 작성 규칙, 링크 습관, 폴더 구조를 잡는 것이 좋습니다. Note Sweep은 노트가 많이 쌓인 뒤 정리 루틴이 필요할 때 더 유용합니다.

    참고자료

    ※ 본문 이미지는 원본 YouTube 영상의 주요 장면을 리뷰·설명 목적으로 캡처한 것입니다.

  • Python Beginner 20-Lesson Course Guide: Learn from Installation to a Mini Project

    When you first start learning Python, it is hard to know where to begin. Should you install something first, memorize syntax, or jump straight into a project? This article is a complete guide to the 20-lesson Python beginner course designed to reduce that confusion.

    This series is not just a list of grammar topics. Each lesson includes a small example that beginners can actually run and a practice task they can modify. Installation, variables, conditions, loops, data structures, functions, files, exceptions, classes, automation, data analysis, and APIs are arranged in the order a beginner should encounter them.

    Original Korean article

    Who This Series Is For

    • People installing Python for the first time
    • Non-majors with little or no coding experience
    • Learners who need fundamentals before office automation or data analysis
    • People who want to use AI tools better by understanding Python syntax
    • Readers who have opened a syntax book but do not know what to build

    Beginner 20-Lesson Learning Roadmap

    Python Beginner 20-Lesson Course Guide: Learn from Installation to a Mini Project - The roadmap reduces the burden of learning by showing the full path first.
    The Python beginner course is a long journey from installation and basic syntax to data handling and projects, so seeing the whole flow first reduces the learning burden.
    SectionLessonsLearning Goal
    PreparationLesson 1Install Python, run it, and write the first code.
    Basic syntaxLessons 2–5Variables, input/output, conditionals, and loops.
    Handling dataLessons 6–9Lists, dictionaries, strings, and functions.
    First projectLesson 10Combine syntax in a console To-Do app.
    Practical basicsLessons 11–15Modules, files, exceptions, classes, and an address book project.
    Expansion previewLessons 16–20Standard library, automation, data analysis, APIs, and final project.

    Complete Lesson List

    OrderLesson TitleCore Outcome
    1Python Beginner Lesson 1: From Installation to Your First RunCreate and run a Python file on your own computer.
    2Python Beginner Lesson 2: Understanding Variables and Data Types EasilyStore numbers, strings, and Boolean values in variables and convert types for calculation.
    3Python Beginner Lesson 3: Showing Calculation Results with Input, Output, and f-stringsReceive values from users and print calculated results in readable sentences.
    4Python Beginner Lesson 4: Running Different Code with if ConditionsUnderstand the flow that runs different code depending on a condition.
    5Python Beginner Lesson 5: Automating Repetition with for and while LoopsRepeat the same task automatically and stop at the right moment.
    6Python Beginner Lesson 6: Handling Multiple Values with Lists and TuplesStore and retrieve multiple values in order.
    7Python Beginner Lesson 7: Managing Labeled Data with Dictionaries and SetsStore data in key-value form and remove duplicates.
    8Python Beginner Lesson 8: Searching, Splitting, and Cleaning StringsSearch, split, clean, and combine text.
    9Python Beginner Lesson 9: Splitting Repeated Code into FunctionsGive a name to repeated code and separate it into reusable features.
    10Python Beginner Lesson 10: Console To-Do List Mini ProjectCombine variables, conditions, loops, lists, and functions into a small app.
    11Python Beginner Lesson 11: Understanding Modules, Packages, and importUse the standard library and features made by others with import.
    12Python Beginner Lesson 12: Reading and Writing Files and CSV BasicsRead and write text and CSV files to save program results.
    13Python Beginner Lesson 13: Errors and Exception Handling with try exceptHandle expected errors so a program does not stop suddenly.
    14Python Beginner Lesson 14: Understanding Classes and Objects EasilyThink of related data and behavior as one structure.
    15Python Beginner Lesson 15: Address Book Project Saved to a FileConnect adding, searching, saving, and loading contacts.
    16Python Beginner Lesson 16: Handling Dates, Paths, and Patterns with the Standard LibraryUse built-in tools for dates, paths, and patterns without extra installation.
    17Python Beginner Lesson 17: Introduction to Folder and File AutomationCollect file information from a folder and create a CSV report.
    18Python Beginner Lesson 18: A Taste of Data Analysis with pandas and matplotlibRead CSV data as a table, summarize it, and save a graph.
    19Python Beginner Lesson 19: Getting Web Data and APIs with requestsSend requests to a web API and read JSON responses.
    20Python Beginner Lesson 20: Completing a Mini App as the Final ProjectCombine beginner syntax into an input, processing, saving, and visualization flow.

    How Should You Study?

    Python Beginner 20-Lesson Course Guide: Learn from Installation to a Mini Project - Short repeated practice and notes on errors are key study habits.
    For beginners, repeating small practices and briefly recording execution results and errors matters more than studying for a long block of time once.

    If you are new, it is best to study lessons 1 through 20 in order. Lessons 1–5 build the basic structure of Python statements. If this section is weak, file handling and data analysis later will feel blocked again and again.

    Lessons 6–10 group data and split features. Once lists, dictionaries, strings, and functions become familiar, you can build small programs yourself. The Lesson 10 To-Do project is the first checkpoint for the first half of the beginner course.

    Lessons 11–20 widen your practical sense. Modules, files, exceptions, classes, the standard library, automation, data analysis, and APIs are not explored in advanced depth. Instead, they help you experience where Python is actually used before moving to an intermediate course.

    Study Habits Every Beginner Needs

    • Do not only look at code; run it yourself.
    • Do not change many lines at once; change one line at a time.
    • When an error appears, check the last line and line number first.
    • After an example runs, change values and sentences to fit your own situation.
    • Use the checkpoint at the end of each lesson before moving on.

    What You Can Do After the Beginner Course

    • Create and run Python files.
    • Write basic logic with conditionals and loops.
    • Manage multiple values with lists and dictionaries.
    • Create functions to divide code.
    • Read and write text and CSV files.
    • Build the habit of finding causes from error messages.
    • Experience simple automation, data summaries, and API requests.

    FAQ

    Is it okay if I am completely new to programming?

    Yes. This series is written for beginners. Rather than memorizing terms first, follow the lessons by running code and checking results.

    How many lessons should I study per day?

    At first, one lesson per day is the most stable pace. If you have enough time, one or two lessons can work, but make sure you do the practice tasks yourself.

    If I get stuck during installation, can I move to the next lesson?

    If possible, solve the installation problem first. Python is best learned by running code directly. If installation is difficult, you can start temporarily in an online execution environment.

    What should I learn after the beginner course?

    For the intermediate stage, expand into virtual environments, package management, testing, pandas data analysis, web scraping, API automation, databases, and simple web apps.

    References

  • Python Beginner Lesson 1: From Installation to Your First Run

    In Python Beginner Lesson 1: From Installation to Your First Run, we cover Python installation and your first run in a beginner-friendly way. The final goal of this lesson is to create a Python file on your own computer and run it yourself. Instead of merely copying code, you will also see why the syntax is used and where beginners commonly make mistakes.

    This topic is a basic frame for later automation, data analysis, and web API work. The example is small, but it trains the habit of reading input, processing it in order, and checking output.

    Original Korean article

    What You Will Learn in This Lesson

    • Core topic: Python installation and your first run
    • Today’s goal: create a Python file on your own computer and run it yourself
    • Practice flow: understand the concept → run the example → read the code line by line → try variations
    • Recommended study time: 30–50 minutes

    Start with the Big Picture

    Python Beginner Lesson 1: From Installation to Your First Run - In the first lesson, the key is not just installation; it is experiencing the moment when one line of code runs and produces a result.
    In the first lesson, the key is not just installation; it is experiencing the moment when one line of code runs and produces a result.

    When learning Python installation and your first run, the most important task is not memorizing grammar names. You need to understand what role the concept plays inside an actual program. At the beginner stage, keep asking these three questions.

    • Where did this value come from?
    • In what order does this code run?
    • Where should I store the result if I want to use it again?

    Core Concept in Detail

    • Python is an interpreted language, so it reads and runs code line by line.
    • The terminal is the window where you type commands, while the editor is the tool where you write code.
    • Python files usually use the .py extension. Save a file such as hello.py, then run it.

    At first, the explanation may feel abstract. That is why it is best to run the example below and confirm the idea with your own eyes.

    Terms Beginners Should Know

    TermSimple Explanation
    InterpreterA program that reads the code you wrote at run time and executes it.
    TerminalA window where you type commands to run programs.
    PATHAn environment setting that helps your computer find the python command from any folder.

    Practice Setup

    Create a new Python file and run the example below. Using lowercase English letters and numbers in file names reduces avoidable errors. Save files as lesson.py or practice_01.py. After typing the code, avoid changing many things at once; run it, check the result, and then adjust small parts.

    Example Code

    print("Hello, Python")
    print("Hello. I ran Python for the first time today.")
    name = "Zeus"
    print(name, "is starting to learn Python.")

    Understanding the Code Line by Line

    1. The first line prints the sentence Hello, Python on the screen.
    2. The second line shows that Python can print ordinary text strings.
    3. The third line stores a name in a variable called name.
    4. The final line prints a variable and a sentence together.

    At this stage, the key is the order in which you read the code. Python normally runs from top to bottom. Even when functions or conditions create special flow later, beginners should first get used to the default top-to-bottom execution flow.

    Change Values and Check the Result

    Once the example runs, change only a very small part. Start with one number, one string, or one variable name so that errors are easy to find. After each change, save the file and run it again.

    Part to ChangeWhat to Check
    Input or variable valueCheck how the result sentence changes.
    Output sentenceCheck whether the message is clearer for the user.
    Code orderCheck whether changing the order creates an error or changes the result.

    Common Errors and How to Fix Them

    Python Beginner Lesson 1: From Installation to Your First Run - When the first run fails, calmly checking installation status, execution location, and whether the file was saved narrows down most problems.
    When the first run fails, calmly checking installation status, execution location, and whether the file was saved narrows down most problems.
    Error or SituationWhy It HappensHow to Fix It
    The python command is not foundA common setup issue at the beginner stage.Restart the terminal after installation or check whether Python was added to PATH.
    SyntaxErrorA common beginner error.Check for missing quotation marks, parentheses, commas, or other punctuation.
    Text appears brokenA common encoding issue.Save the file with UTF-8 encoding.

    When an error appears, first read the last line of the error message. Then check the file name and line number. Most beginner errors come from parentheses, quotation marks, indentation, variable names, or type conversion.

    Practice Problems to Try on Your Own

    • Check the version with python --version or python3 --version.
    • Create a hello.py file and run the example code.
    • Change the sentence and name to match your own situation.

    When solving exercises, do not look for the answer code immediately. First write the input → process → output flow on paper. Once you can see the flow, writing the code becomes much easier.

    Where This Connects in Real Work

    Python installation and your first run does not end with a small example. It appears again when automating files, reading table data for analysis, and handling response values from web APIs. The beginner syntax you learn now becomes the shared language for tools such as pandas, requests, and FastAPI.

    A Beginner-Friendly Analogy

    When you first encounter Python installation and your first run, symbols may stand out before meaning. But grammar becomes tiring if you see it only as symbols. A better approach is to understand its role. The core of this lesson is to create a Python file on your own computer and run it yourself. In other words, you decide what task to give Python and practice writing the order of that task as code.

    Think of a cooking recipe. You prepare ingredients, handle them in order, control the heat, and put the result on a plate. Python code is similar: prepare values, process them in a fixed order, and print or save the result. For beginners, gaining this sense of sequence matters most.

    Follow the Execution Flow Visually

    Before running code, divide your thinking into the three boxes below. This habit helps not only with simple examples but also with longer projects later.

    SectionQuestion to AskMeaning in This Lesson
    InputWhat value does the program receive first?The value the user enters or the value already written in the Python installation and your first run example.
    ProcessWhat calculation or judgment happens?The part Python runs step by step to achieve the goal: create a Python file on your own computer and run it yourself.
    OutputWhat result does the user confirm?Printed results, saved files, created graphs, or changed data.

    Filling in this table by yourself improves code comprehension. Beginners struggle not only because they do not know syntax, but more often because they cannot separate input, processing, and output.

    Debugging Routine: What to Check When an Error Happens

    Do not delete code randomly when an error appears. Follow this order and you can find most beginner errors yourself.

    1. Read the last line of the error message.
    2. Check the file name and line number.
    3. On that line, check parentheses, quotation marks, colons, and commas.
    4. Make sure variable names exactly match the names defined above.
    5. Check whether values that must be calculated as numbers are still strings.
    6. Undo the part you just changed and run the code again.

    After repeating this routine, errors start to look less frightening and more like clues. Python skill grows more from reading and fixing errors than from avoiding them entirely.

    Application Direction: Grow Today’s Example a Little

    Once this example feels familiar, keep the Python installation and your first run structure and change one of the input values, output sentences, storage methods, or repetition counts. You do not need to create a completely new example. At the beginner stage, many small variations are best.

    • Change variable names to make them more meaningful.
    • Rewrite output sentences as messages a real user would read.
    • Intentionally try invalid input and observe what happens.
    • Add comments to explain the code and check your understanding.
    • Try to produce the same result in a slightly different way.

    Lesson Checkpoints

    • ☐ I can explain why Python installation and your first run is needed.
    • ☐ I ran the example code myself.
    • ☐ I can explain the role of at least three lines of code.
    • ☐ When an error appeared, I checked the last line and line number.
    • ☐ I changed and ran at least one practice problem on my own.

    Related Articles

    FAQ

    Can I follow Python installation and your first run even if I am completely new to Python?

    Yes. This lesson is written for readers who are learning programming for the first time. Focus less on memorizing code and more on understanding the execution result and flow.

    I copied the example exactly, but I get an error. What should I check first?

    Check parentheses, quotation marks, colons, indentation, and variable names first. Many beginner errors come from a single missing character or a variable name typed differently.

    The example code looks too short. Should I study longer code?

    Short code is better at the beginner stage. Understand a short program accurately first, then change values and add features one at a time.

    What should I do next?

    Change and run at least one exercise from this lesson. Then move on to Python Beginner Lesson 2: Understanding Variables and Data Types Easily, where the concepts from earlier lessons will naturally appear again.

    Next Lesson Preview

    The next lesson is Python Beginner Lesson 2: Understanding Variables and Data Types Easily. We will build on today’s execution flow and make the next concept more concrete.

    References

  • Python Beginner Lesson 2: Understanding Variables and Data Types Easily

    In Python Beginner Lesson 2: Understanding Variables and Data Types Easily, we cover variables and data types in a beginner-friendly way. The final goal of this lesson is to store numbers, strings, and Boolean values in variables and convert types for calculation. Instead of merely copying code, you will also see why the syntax is used and where beginners commonly make mistakes.

    This topic is a basic frame for later automation, data analysis, and web API work. The example is small, but it trains the habit of reading input, processing it in order, and checking output.

    Original Korean article

    What You Will Learn in This Lesson

    • Core topic: variables and data types
    • Today’s goal: store numbers, strings, and Boolean values in variables and convert types for calculation
    • Practice flow: understand the concept → run the example → read the code line by line → try variations
    • Recommended study time: 30–50 minutes

    Start with the Big Picture

    Python Beginner Lesson 2: Understanding Variables and Data Types Easily - A variable is a label attached to a value, and a data type is the rule that tells Python how to calculate and handle that value.
    A variable is a label attached to a value, and a data type is the rule that tells Python how to calculate and handle that value.

    When learning variables and data types, the most important task is not memorizing grammar names. You need to understand what role the concept plays inside an actual program. At the beginner stage, keep asking these three questions.

    • Where did this value come from?
    • In what order does this code run?
    • Where should I store the result if I want to use it again?

    Core Concept in Detail

    • A variable is a name attached to a value. It lets you reuse the value later.
    • A data type tells Python whether a value is a number, text, true/false value, and so on.
    • Values entered as text must often be converted with int() or float() before calculation.

    At first, the explanation may feel abstract. That is why it is best to run the example below and confirm the idea with your own eyes.

    Terms Beginners Should Know

    TermSimple Explanation
    VariableA name that stores a value so the program can use it again.
    Data typeA classification such as integer, float, string, or Boolean.
    Type conversionChanging one type of value into another, such as text into a number.

    Practice Setup

    Create a new Python file and run the example below. Using lowercase English letters and numbers in file names reduces avoidable errors. Save files as lesson.py or practice_01.py. After typing the code, avoid changing many things at once; run it, check the result, and then adjust small parts.

    Example Code

    celsius = 25
    fahrenheit = celsius * 9 / 5 + 32
    print(f"{celsius} degrees Celsius is {fahrenheit} degrees Fahrenheit.")
    
    price_text = "12000"
    price = int(price_text)
    print(price + 3000)

    Understanding the Code Line by Line

    1. The first line stores the Celsius temperature in a variable.
    2. The second line calculates Fahrenheit using that variable.
    3. The third line prints the calculation result with an f-string.
    4. price_text starts as text, so int() converts it before adding 3000.

    At this stage, the key is the order in which you read the code. Python normally runs from top to bottom. Even when functions or conditions create special flow later, beginners should first get used to the default top-to-bottom execution flow.

    Change Values and Check the Result

    Once the example runs, change only a very small part. Start with one number, one string, or one variable name so that errors are easy to find. After each change, save the file and run it again.

    Part to ChangeWhat to Check
    Input or variable valueCheck how the result sentence changes.
    Output sentenceCheck whether the message is clearer for the user.
    Code orderCheck whether changing the order creates an error or changes the result.

    Common Errors and How to Fix Them

    Python Beginner Lesson 2: Understanding Variables and Data Types Easily - Converting a price entered as text into a number for calculation is one of the easiest ways to feel why data type conversion matters.
    Converting a price entered as text into a number for calculation is one of the easiest ways to feel why data type conversion matters.
    Error or SituationWhy It HappensHow to Fix It
    TypeErrorA string and a number were used together incorrectly.Convert text to a number with int() or float() before calculating.
    NameErrorA variable name was typed differently from where it was created.Check capitalization and spelling exactly.
    ValueErrorText that cannot become a number was passed to int() or float().Make sure the input contains only a valid numeric value.

    When an error appears, first read the last line of the error message. Then check the file name and line number. Most beginner errors come from parentheses, quotation marks, indentation, variable names, or type conversion.

    Practice Problems to Try on Your Own

    • Change the Celsius value and check how the Fahrenheit result changes.
    • Try a different price string and add a shipping fee.
    • Create variables for name, age, and membership status, then print them.

    When solving exercises, do not look for the answer code immediately. First write the input → process → output flow on paper. Once you can see the flow, writing the code becomes much easier.

    Where This Connects in Real Work

    Variables and data types does not end with a small example. It appears again when automating files, reading table data for analysis, and handling response values from web APIs. The beginner syntax you learn now becomes the shared language for tools such as pandas, requests, and FastAPI.

    A Beginner-Friendly Analogy

    When you first encounter variables and data types, symbols may stand out before meaning. But grammar becomes tiring if you see it only as symbols. A better approach is to understand its role. The core of this lesson is to store numbers, strings, and Boolean values in variables and convert types for calculation. In other words, you decide what task to give Python and practice writing the order of that task as code.

    Think of a cooking recipe. You prepare ingredients, handle them in order, control the heat, and put the result on a plate. Python code is similar: prepare values, process them in a fixed order, and print or save the result. For beginners, gaining this sense of sequence matters most.

    Follow the Execution Flow Visually

    Before running code, divide your thinking into the three boxes below. This habit helps not only with simple examples but also with longer projects later.

    SectionQuestion to AskMeaning in This Lesson
    InputWhat value does the program receive first?The value the user enters or the value already written in the variables and data types example.
    ProcessWhat calculation or judgment happens?The part Python runs step by step to achieve the goal: store numbers, strings, and Boolean values in variables and convert types for calculation.
    OutputWhat result does the user confirm?Printed results, saved files, created graphs, or changed data.

    Filling in this table by yourself improves code comprehension. Beginners struggle not only because they do not know syntax, but more often because they cannot separate input, processing, and output.

    Debugging Routine: What to Check When an Error Happens

    Do not delete code randomly when an error appears. Follow this order and you can find most beginner errors yourself.

    1. Read the last line of the error message.
    2. Check the file name and line number.
    3. On that line, check parentheses, quotation marks, colons, and commas.
    4. Make sure variable names exactly match the names defined above.
    5. Check whether values that must be calculated as numbers are still strings.
    6. Undo the part you just changed and run the code again.

    After repeating this routine, errors start to look less frightening and more like clues. Python skill grows more from reading and fixing errors than from avoiding them entirely.

    Application Direction: Grow Today’s Example a Little

    Once this example feels familiar, keep the variables and data types structure and change one of the input values, output sentences, storage methods, or repetition counts. You do not need to create a completely new example. At the beginner stage, many small variations are best.

    • Change variable names to make them more meaningful.
    • Rewrite output sentences as messages a real user would read.
    • Intentionally try invalid input and observe what happens.
    • Add comments to explain the code and check your understanding.
    • Try to produce the same result in a slightly different way.

    Lesson Checkpoints

    • ☐ I can explain why variables and data types is needed.
    • ☐ I ran the example code myself.
    • ☐ I can explain the role of at least three lines of code.
    • ☐ When an error appeared, I checked the last line and line number.
    • ☐ I changed and ran at least one practice problem on my own.

    Related Articles

    FAQ

    Can I follow variables and data types even if I am completely new to Python?

    Yes. This lesson is written for readers who are learning programming for the first time. Focus less on memorizing code and more on understanding the execution result and flow.

    I copied the example exactly, but I get an error. What should I check first?

    Check parentheses, quotation marks, colons, indentation, and variable names first. Many beginner errors come from a single missing character or a variable name typed differently.

    The example code looks too short. Should I study longer code?

    Short code is better at the beginner stage. Understand a short program accurately first, then change values and add features one at a time.

    What should I do next?

    Change and run at least one exercise from this lesson. Then move on to Python Beginner Lesson 3: Showing Calculation Results with Input, Output, and f-strings, where the concepts from earlier lessons will naturally appear again.

    Next Lesson Preview

    The next lesson is Python Beginner Lesson 3: Showing Calculation Results with Input, Output, and f-strings. We will build on today’s execution flow and make the next concept more concrete.

    References

  • Python Beginner Lesson 3: Showing Calculation Results with Input, Output, and f-strings

    In Python Beginner Lesson 3: Showing Calculation Results with Input, Output, and f-strings, we cover input, output, and f-strings in a beginner-friendly way. The final goal of this lesson is to receive values from users and print calculated results in readable sentences. Instead of merely copying code, you will also see why the syntax is used and where beginners commonly make mistakes.

    This topic is a basic frame for later automation, data analysis, and web API work. The example is small, but it trains the habit of reading input, processing it in order, and checking output.

    Original Korean article

    What You Will Learn in This Lesson

    • Core topic: input, output, and f-strings
    • Today’s goal: receive values from users and print calculated results in readable sentences
    • Practice flow: understand the concept → run the example → read the code line by line → try variations
    • Recommended study time: 30–50 minutes

    Start with the Big Picture

    Python Beginner Lesson 3: Showing Calculation Results with Input, Output, and f-strings - Input is the path that brings user information into the program, and output is the window that shows calculation results back to the user.
    Input is the path that brings user information into the program, and output is the window that shows calculation results back to the user.

    When learning input, output, and f-strings, the most important task is not memorizing grammar names. You need to understand what role the concept plays inside an actual program. At the beginner stage, keep asking these three questions.

    • Where did this value come from?
    • In what order does this code run?
    • Where should I store the result if I want to use it again?

    Core Concept in Detail

    • input() brings a value from the user into the program.
    • Input values arrive as strings, so numeric input must be converted before calculation.
    • An f-string lets you insert variables and calculated values naturally inside a sentence.

    At first, the explanation may feel abstract. That is why it is best to run the example below and confirm the idea with your own eyes.

    Terms Beginners Should Know

    TermSimple Explanation
    InputA value the user gives to the program.
    OutputThe result the program shows back to the user.
    f-stringA formatted string that places variables inside text with braces.

    Practice Setup

    Create a new Python file and run the example below. Using lowercase English letters and numbers in file names reduces avoidable errors. Save files as lesson.py or practice_01.py. After typing the code, avoid changing many things at once; run it, check the result, and then adjust small parts.

    Example Code

    name = input("Enter your name: ")
    height = float(input("Enter your height in meters: "))
    weight = float(input("Enter your weight in kg: "))
    bmi = weight / (height ** 2)
    print(f"{name}, your BMI is {bmi:.1f}.")

    Understanding the Code Line by Line

    1. The first line asks for the user’s name and stores it.
    2. The next two lines receive height and weight, then convert them to floating-point numbers.
    3. The BMI formula uses exponentiation with height ** 2.
    4. The final line prints the result to one decimal place with an f-string.

    At this stage, the key is the order in which you read the code. Python normally runs from top to bottom. Even when functions or conditions create special flow later, beginners should first get used to the default top-to-bottom execution flow.

    Change Values and Check the Result

    Once the example runs, change only a very small part. Start with one number, one string, or one variable name so that errors are easy to find. After each change, save the file and run it again.

    Part to ChangeWhat to Check
    Input or variable valueCheck how the result sentence changes.
    Output sentenceCheck whether the message is clearer for the user.
    Code orderCheck whether changing the order creates an error or changes the result.

    Common Errors and How to Fix Them

    Python Beginner Lesson 3: Showing Calculation Results with Input, Output, and f-strings - With f-strings, calculated values can be placed naturally inside sentences and shown in a user-friendly form.
    With f-strings, calculated values can be placed naturally inside sentences and shown in a user-friendly form.
    Error or SituationWhy It HappensHow to Fix It
    ValueErrorThe user entered text that cannot be converted to a number.Enter only numeric values for height and weight.
    ZeroDivisionErrorHeight was entered as zero.Check that height is greater than zero before calculating.
    Formatting confusionThe f-string braces or format specifier were typed incorrectly.Use a pattern such as {bmi:.1f} for one decimal place.

    When an error appears, first read the last line of the error message. Then check the file name and line number. Most beginner errors come from parentheses, quotation marks, indentation, variable names, or type conversion.

    Practice Problems to Try on Your Own

    • Change the prompts so they are easier for a user to understand.
    • Print BMI with two decimal places instead of one.
    • Add a short guide message after the BMI result.

    When solving exercises, do not look for the answer code immediately. First write the input → process → output flow on paper. Once you can see the flow, writing the code becomes much easier.

    Where This Connects in Real Work

    Input, output, and f-strings does not end with a small example. It appears again when automating files, reading table data for analysis, and handling response values from web APIs. The beginner syntax you learn now becomes the shared language for tools such as pandas, requests, and FastAPI.

    A Beginner-Friendly Analogy

    When you first encounter input, output, and f-strings, symbols may stand out before meaning. But grammar becomes tiring if you see it only as symbols. A better approach is to understand its role. The core of this lesson is to receive values from users and print calculated results in readable sentences. In other words, you decide what task to give Python and practice writing the order of that task as code.

    Think of a cooking recipe. You prepare ingredients, handle them in order, control the heat, and put the result on a plate. Python code is similar: prepare values, process them in a fixed order, and print or save the result. For beginners, gaining this sense of sequence matters most.

    Follow the Execution Flow Visually

    Before running code, divide your thinking into the three boxes below. This habit helps not only with simple examples but also with longer projects later.

    SectionQuestion to AskMeaning in This Lesson
    InputWhat value does the program receive first?The value the user enters or the value already written in the input, output, and f-strings example.
    ProcessWhat calculation or judgment happens?The part Python runs step by step to achieve the goal: receive values from users and print calculated results in readable sentences.
    OutputWhat result does the user confirm?Printed results, saved files, created graphs, or changed data.

    Filling in this table by yourself improves code comprehension. Beginners struggle not only because they do not know syntax, but more often because they cannot separate input, processing, and output.

    Debugging Routine: What to Check When an Error Happens

    Do not delete code randomly when an error appears. Follow this order and you can find most beginner errors yourself.

    1. Read the last line of the error message.
    2. Check the file name and line number.
    3. On that line, check parentheses, quotation marks, colons, and commas.
    4. Make sure variable names exactly match the names defined above.
    5. Check whether values that must be calculated as numbers are still strings.
    6. Undo the part you just changed and run the code again.

    After repeating this routine, errors start to look less frightening and more like clues. Python skill grows more from reading and fixing errors than from avoiding them entirely.

    Application Direction: Grow Today’s Example a Little

    Once this example feels familiar, keep the input, output, and f-strings structure and change one of the input values, output sentences, storage methods, or repetition counts. You do not need to create a completely new example. At the beginner stage, many small variations are best.

    • Change variable names to make them more meaningful.
    • Rewrite output sentences as messages a real user would read.
    • Intentionally try invalid input and observe what happens.
    • Add comments to explain the code and check your understanding.
    • Try to produce the same result in a slightly different way.

    Lesson Checkpoints

    • ☐ I can explain why input, output, and f-strings is needed.
    • ☐ I ran the example code myself.
    • ☐ I can explain the role of at least three lines of code.
    • ☐ When an error appeared, I checked the last line and line number.
    • ☐ I changed and ran at least one practice problem on my own.

    Related Articles

    FAQ

    Can I follow input, output, and f-strings even if I am completely new to Python?

    Yes. This lesson is written for readers who are learning programming for the first time. Focus less on memorizing code and more on understanding the execution result and flow.

    I copied the example exactly, but I get an error. What should I check first?

    Check parentheses, quotation marks, colons, indentation, and variable names first. Many beginner errors come from a single missing character or a variable name typed differently.

    The example code looks too short. Should I study longer code?

    Short code is better at the beginner stage. Understand a short program accurately first, then change values and add features one at a time.

    What should I do next?

    Change and run at least one exercise from this lesson. Then move on to Python Beginner Lesson 4: Running Different Code with if Conditions, where the concepts from earlier lessons will naturally appear again.

    Next Lesson Preview

    The next lesson is Python Beginner Lesson 4: Running Different Code with if Conditions. We will build on today’s execution flow and make the next concept more concrete.

    References

  • Python Beginner Lesson 4: Running Different Code with if Conditions

    In Python Beginner Lesson 4: Running Different Code with if Conditions, we cover if conditions in a beginner-friendly way. The final goal of this lesson is to understand the flow that runs different code depending on a condition. Instead of merely copying code, you will also see why the syntax is used and where beginners commonly make mistakes.

    This topic is a basic frame for later automation, data analysis, and web API work. The example is small, but it trains the habit of reading input, processing it in order, and checking output.

    Original Korean article

    What You Will Learn in This Lesson

    • Core topic: if conditions
    • Today’s goal: understand the flow that runs different code depending on a condition
    • Practice flow: understand the concept → run the example → read the code line by line → try variations
    • Recommended study time: 30–50 minutes

    Start with the Big Picture

    Python Beginner Lesson 4: Running Different Code with if Conditions - A conditional statement chooses one execution path among several options by judging the situation.
    A conditional statement chooses one execution path among several options by judging the situation.

    When learning if conditions, the most important task is not memorizing grammar names. You need to understand what role the concept plays inside an actual program. At the beginner stage, keep asking these three questions.

    • Where did this value come from?
    • In what order does this code run?
    • Where should I store the result if I want to use it again?

    Core Concept in Detail

    • An if statement checks whether a condition is true before running a block.
    • elif adds another condition when the previous one was false.
    • else handles every remaining case that did not match earlier conditions.

    At first, the explanation may feel abstract. That is why it is best to run the example below and confirm the idea with your own eyes.

    Terms Beginners Should Know

    TermSimple Explanation
    ConditionAn expression that becomes true or false.
    BranchA path the program chooses based on a condition.
    IndentationSpaces at the beginning of a line that show which code belongs to a block.

    Practice Setup

    Create a new Python file and run the example below. Using lowercase English letters and numbers in file names reduces avoidable errors. Save files as lesson.py or practice_01.py. After typing the code, avoid changing many things at once; run it, check the result, and then adjust small parts.

    Example Code

    score = int(input("Score: "))
    
    if score >= 90:
        grade = "A"
    elif score >= 80:
        grade = "B"
    elif score >= 70:
        grade = "C"
    else:
        grade = "D"
    
    print(f"A score of {score} gets grade {grade}.")

    Understanding the Code Line by Line

    1. The first line receives a score and converts it to an integer.
    2. The if line checks the highest range first.
    3. Each elif is checked only if the previous condition was false.
    4. The else block handles scores below 70, and the final line prints the result.

    At this stage, the key is the order in which you read the code. Python normally runs from top to bottom. Even when functions or conditions create special flow later, beginners should first get used to the default top-to-bottom execution flow.

    Change Values and Check the Result

    Once the example runs, change only a very small part. Start with one number, one string, or one variable name so that errors are easy to find. After each change, save the file and run it again.

    Part to ChangeWhat to Check
    Input or variable valueCheck how the result sentence changes.
    Output sentenceCheck whether the message is clearer for the user.
    Code orderCheck whether changing the order creates an error or changes the result.

    Common Errors and How to Fix Them

    Python Beginner Lesson 4: Running Different Code with if Conditions - A score-to-grade practice is a good way to understand the order in which if, elif, and else are evaluated.
    A score-to-grade practice is a good way to understand the order in which if, elif, and else are evaluated.
    Error or SituationWhy It HappensHow to Fix It
    IndentationErrorThe lines inside the condition are not indented consistently.Use the same number of spaces, usually four, for each block.
    Wrong order of conditionsA broad condition was checked before a narrower one.Check higher score ranges first in this example.
    ValueErrorThe input could not be converted to an integer.Enter a number, or add input validation later.

    When an error appears, first read the last line of the error message. Then check the file name and line number. Most beginner errors come from parentheses, quotation marks, indentation, variable names, or type conversion.

    Practice Problems to Try on Your Own

    • Change the score ranges and check whether the grade changes correctly.
    • Add a message for perfect scores.
    • Try entering boundary values such as 69, 70, 79, 80, 89, and 90.

    When solving exercises, do not look for the answer code immediately. First write the input → process → output flow on paper. Once you can see the flow, writing the code becomes much easier.

    Where This Connects in Real Work

    If conditions does not end with a small example. It appears again when automating files, reading table data for analysis, and handling response values from web APIs. The beginner syntax you learn now becomes the shared language for tools such as pandas, requests, and FastAPI.

    A Beginner-Friendly Analogy

    When you first encounter if conditions, symbols may stand out before meaning. But grammar becomes tiring if you see it only as symbols. A better approach is to understand its role. The core of this lesson is to understand the flow that runs different code depending on a condition. In other words, you decide what task to give Python and practice writing the order of that task as code.

    Think of a cooking recipe. You prepare ingredients, handle them in order, control the heat, and put the result on a plate. Python code is similar: prepare values, process them in a fixed order, and print or save the result. For beginners, gaining this sense of sequence matters most.

    Follow the Execution Flow Visually

    Before running code, divide your thinking into the three boxes below. This habit helps not only with simple examples but also with longer projects later.

    SectionQuestion to AskMeaning in This Lesson
    InputWhat value does the program receive first?The value the user enters or the value already written in the if conditions example.
    ProcessWhat calculation or judgment happens?The part Python runs step by step to achieve the goal: understand the flow that runs different code depending on a condition.
    OutputWhat result does the user confirm?Printed results, saved files, created graphs, or changed data.

    Filling in this table by yourself improves code comprehension. Beginners struggle not only because they do not know syntax, but more often because they cannot separate input, processing, and output.

    Debugging Routine: What to Check When an Error Happens

    Do not delete code randomly when an error appears. Follow this order and you can find most beginner errors yourself.

    1. Read the last line of the error message.
    2. Check the file name and line number.
    3. On that line, check parentheses, quotation marks, colons, and commas.
    4. Make sure variable names exactly match the names defined above.
    5. Check whether values that must be calculated as numbers are still strings.
    6. Undo the part you just changed and run the code again.

    After repeating this routine, errors start to look less frightening and more like clues. Python skill grows more from reading and fixing errors than from avoiding them entirely.

    Application Direction: Grow Today’s Example a Little

    Once this example feels familiar, keep the if conditions structure and change one of the input values, output sentences, storage methods, or repetition counts. You do not need to create a completely new example. At the beginner stage, many small variations are best.

    • Change variable names to make them more meaningful.
    • Rewrite output sentences as messages a real user would read.
    • Intentionally try invalid input and observe what happens.
    • Add comments to explain the code and check your understanding.
    • Try to produce the same result in a slightly different way.

    Lesson Checkpoints

    • ☐ I can explain why if conditions is needed.
    • ☐ I ran the example code myself.
    • ☐ I can explain the role of at least three lines of code.
    • ☐ When an error appeared, I checked the last line and line number.
    • ☐ I changed and ran at least one practice problem on my own.

    Related Articles

    FAQ

    Can I follow if conditions even if I am completely new to Python?

    Yes. This lesson is written for readers who are learning programming for the first time. Focus less on memorizing code and more on understanding the execution result and flow.

    I copied the example exactly, but I get an error. What should I check first?

    Check parentheses, quotation marks, colons, indentation, and variable names first. Many beginner errors come from a single missing character or a variable name typed differently.

    The example code looks too short. Should I study longer code?

    Short code is better at the beginner stage. Understand a short program accurately first, then change values and add features one at a time.

    What should I do next?

    Change and run at least one exercise from this lesson. Then move on to Python Beginner Lesson 5: Automating Repetition with for and while Loops, where the concepts from earlier lessons will naturally appear again.

    Next Lesson Preview

    The next lesson is Python Beginner Lesson 5: Automating Repetition with for and while Loops. We will build on today’s execution flow and make the next concept more concrete.

    References

  • Python Beginner Lesson 5: Automating Repetition with for and while Loops

    In Python Beginner Lesson 5: Automating Repetition with for and while Loops, we cover for and while loops in a beginner-friendly way. The final goal of this lesson is to automatically repeat the same task and stop at the right moment. Instead of merely copying code, you will also see why the syntax is used and where beginners commonly make mistakes.

    This topic is a basic frame for later automation, data analysis, and web API work. The example is small, but it trains the habit of reading input, processing it in order, and checking output.

    Original Korean article

    What You Will Learn in This Lesson

    • Core topic: for and while loops
    • Today’s goal: automatically repeat the same task and stop at the right moment
    • Practice flow: understand the concept → run the example → read the code line by line → try variations
    • Recommended study time: 30–50 minutes

    Start with the Big Picture

    Python Beginner Lesson 5: Automating Repetition with for and while Loops - Loops are the basic tool that lets a program repeat the same work automatically instead of making a person do it many times.
    Loops are the basic tool that lets a program repeat the same work automatically instead of making a person do it many times.

    When learning for and while loops, the most important task is not memorizing grammar names. You need to understand what role the concept plays inside an actual program. At the beginner stage, keep asking these three questions.

    • Where did this value come from?
    • In what order does this code run?
    • Where should I store the result if I want to use it again?

    Core Concept in Detail

    • Use for when the thing you want to repeat over is already defined.
    • Use while when you want to keep repeating while a condition remains true.
    • A loop needs a clear target, a repeated action, and a way to finish.

    At first, the explanation may feel abstract. That is why it is best to run the example below and confirm the idea with your own eyes.

    Terms Beginners Should Know

    TermSimple Explanation
    LoopA structure that repeats the same code several times.
    range()A function that creates a sequence of numbers for repetition.
    AccumulatorA variable that keeps adding or collecting values during a loop.

    Practice Setup

    Create a new Python file and run the example below. Using lowercase English letters and numbers in file names reduces avoidable errors. Save files as lesson.py or practice_01.py. After typing the code, avoid changing many things at once; run it, check the result, and then adjust small parts.

    Example Code

    dan = int(input("Which multiplication table should be printed? "))
    for i in range(1, 10):
        print(f"{dan} x {i} = {dan * i}")
    
    total = 0
    for n in range(1, 101):
        total += n
    print(f"The sum from 1 to 100 is {total}.")

    Understanding the Code Line by Line

    1. The first line receives the multiplication table number.
    2. The first for loop repeats from 1 through 9 and prints each multiplication result.
    3. total = 0 prepares an accumulator before the loop.
    4. The second loop adds numbers from 1 through 100, then prints the final sum.

    At this stage, the key is the order in which you read the code. Python normally runs from top to bottom. Even when functions or conditions create special flow later, beginners should first get used to the default top-to-bottom execution flow.

    Change Values and Check the Result

    Once the example runs, change only a very small part. Start with one number, one string, or one variable name so that errors are easy to find. After each change, save the file and run it again.

    Part to ChangeWhat to Check
    Input or variable valueCheck how the result sentence changes.
    Output sentenceCheck whether the message is clearer for the user.
    Code orderCheck whether changing the order creates an error or changes the result.

    Common Errors and How to Fix Them

    Python Beginner Lesson 5: Automating Repetition with for and while Loops - Repeated output and accumulated calculation help you read the repetition target, repeat count, and stopping condition together.
    Repeated output and accumulated calculation help you read the repetition target, repeat count, and stopping condition together.
    Error or SituationWhy It HappensHow to Fix It
    Infinite loopA while condition never becomes false.Make sure the value used in the condition changes inside the loop.
    Off-by-one resultThe ending value of range() was misunderstood.Remember that range(1, 10) stops before 10.
    IndentationErrorThe repeated lines are not indented correctly.Indent the code that belongs inside the loop consistently.

    When an error appears, first read the last line of the error message. Then check the file name and line number. Most beginner errors come from parentheses, quotation marks, indentation, variable names, or type conversion.

    Practice Problems to Try on Your Own

    • Print only even numbers from 1 to 20.
    • Change the multiplication table range to 1 through 12.
    • Use a loop to add only numbers that are multiples of 3.

    When solving exercises, do not look for the answer code immediately. First write the input → process → output flow on paper. Once you can see the flow, writing the code becomes much easier.

    Where This Connects in Real Work

    For and while loops does not end with a small example. It appears again when automating files, reading table data for analysis, and handling response values from web APIs. The beginner syntax you learn now becomes the shared language for tools such as pandas, requests, and FastAPI.

    A Beginner-Friendly Analogy

    When you first encounter for and while loops, symbols may stand out before meaning. But grammar becomes tiring if you see it only as symbols. A better approach is to understand its role. The core of this lesson is to automatically repeat the same task and stop at the right moment. In other words, you decide what task to give Python and practice writing the order of that task as code.

    Think of a cooking recipe. You prepare ingredients, handle them in order, control the heat, and put the result on a plate. Python code is similar: prepare values, process them in a fixed order, and print or save the result. For beginners, gaining this sense of sequence matters most.

    Follow the Execution Flow Visually

    Before running code, divide your thinking into the three boxes below. This habit helps not only with simple examples but also with longer projects later.

    SectionQuestion to AskMeaning in This Lesson
    InputWhat value does the program receive first?The value the user enters or the value already written in the for and while loops example.
    ProcessWhat calculation or judgment happens?The part Python runs step by step to achieve the goal: automatically repeat the same task and stop at the right moment.
    OutputWhat result does the user confirm?Printed results, saved files, created graphs, or changed data.

    Filling in this table by yourself improves code comprehension. Beginners struggle not only because they do not know syntax, but more often because they cannot separate input, processing, and output.

    Debugging Routine: What to Check When an Error Happens

    Do not delete code randomly when an error appears. Follow this order and you can find most beginner errors yourself.

    1. Read the last line of the error message.
    2. Check the file name and line number.
    3. On that line, check parentheses, quotation marks, colons, and commas.
    4. Make sure variable names exactly match the names defined above.
    5. Check whether values that must be calculated as numbers are still strings.
    6. Undo the part you just changed and run the code again.

    After repeating this routine, errors start to look less frightening and more like clues. Python skill grows more from reading and fixing errors than from avoiding them entirely.

    Application Direction: Grow Today’s Example a Little

    Once this example feels familiar, keep the for and while loops structure and change one of the input values, output sentences, storage methods, or repetition counts. You do not need to create a completely new example. At the beginner stage, many small variations are best.

    • Change variable names to make them more meaningful.
    • Rewrite output sentences as messages a real user would read.
    • Intentionally try invalid input and observe what happens.
    • Add comments to explain the code and check your understanding.
    • Try to produce the same result in a slightly different way.

    Lesson Checkpoints

    • ☐ I can explain why for and while loops is needed.
    • ☐ I ran the example code myself.
    • ☐ I can explain the role of at least three lines of code.
    • ☐ When an error appeared, I checked the last line and line number.
    • ☐ I changed and ran at least one practice problem on my own.

    Related Articles

    FAQ

    Can I follow for and while loops even if I am completely new to Python?

    Yes. This lesson is written for readers who are learning programming for the first time. Focus less on memorizing code and more on understanding the execution result and flow.

    I copied the example exactly, but I get an error. What should I check first?

    Check parentheses, quotation marks, colons, indentation, and variable names first. Many beginner errors come from a single missing character or a variable name typed differently.

    The example code looks too short. Should I study longer code?

    Short code is better at the beginner stage. Understand a short program accurately first, then change values and add features one at a time.

    What should I do next?

    Change and run at least one exercise from this lesson. Then move on to Python Beginner Lesson 6: Handling Multiple Values with Lists and Tuples, where the concepts from earlier lessons will naturally appear again.

    Next Lesson Preview

    The next lesson is Python Beginner Lesson 6: Handling Multiple Values with Lists and Tuples. We will build on today’s execution flow and make the next concept more concrete.

    References

  • Python Beginner Lesson 6: Working with Multiple Values Using Lists and Tuples

    In Python Beginner Lesson 6, we cover lists and tuples in detail at a beginner-friendly level. The final goal of this lesson is to store multiple values in order and retrieve them when needed. Instead of stopping at copying code, we also check why this syntax is used and where beginners often make mistakes.

    Few programs work with only one piece of data. Shopping lists, student rosters, and sales records all require multiple values, and that is where lists become useful. Today’s example is small, but it becomes a basic skeleton for later automation, data analysis, and web API learning.

    What You Will Learn in This Lesson

    • Core topic: lists and tuples
    • Today’s goal: store multiple values in order and retrieve them when needed
    • Practice flow: understand the concept → run the example → review the code → try an applied task
    • Recommended study time: 30–50 minutes

    Understand the Big Picture First

    Python Beginner Lesson 6: Working with Multiple Values Using Lists and Tuples - Lists and tuples are basic data structures used to group multiple pieces of data and manage them in order.
    Lists and tuples are basic data structures used to group multiple pieces of data and manage them in order.

    When learning lists and tuples, the most important thing is not memorizing grammar names. You need to understand what role this concept plays inside a real program. At the beginner stage, keep asking the following three questions.

    • Where did this value come from?
    • In what order does this code run?
    • Where should I save the result if I want to use it again?

    Look Closely at the Core Concepts

    • A list stores multiple values in order.
    • An index is a position number, and it starts at 0.
    • Slicing is syntax for taking only part of a list.
    • A tuple is suitable for data that should not change after it is created.

    At first, explanations alone may feel abstract. That is why it is helpful to run the example below right away and check the concept with your own eyes.

    Beginner Terms You Should Know

    TermSimple explanation
    IndexA number that represents the position of a value in a list
    SlicingSyntax for taking only a selected range from a sequence
    Mutable/immutableLists can be changed, while tuples cannot be changed

    Practice Setup

    Create a new Python file and run the example below. Using lowercase English letters and numbers in the file name helps reduce errors. For example, save it as lesson.py or practice_01.py. After entering the code, do not change many things at once. Change it little by little while checking the result each time.

    Example Code

    Python Beginner Lesson 6: Working with Multiple Values Using Lists and Tuples - A shopping-list exercise where you add, delete, and review items in order helps you understand list operations in a practical situation.
    A shopping-list exercise where you add, delete, and review items in order helps you understand list operations in a practical situation.

    A shopping-list exercise where you add, delete, and review items in order helps you understand list operations in a practical situation.

    shopping = ["milk", "eggs", "apples"]
    shopping.append("coffee")
    shopping.remove("eggs")
    
    print("First item:", shopping[0])
    print("Full list")
    for item in shopping:
        print("-", item)
    
    point = (37.5, 127.0)
    print("Coordinates:", point)

    Understand the Code Line by Line

    • Lists are created with square brackets, and values are separated by commas.
    • append() adds a value to the end.
    • remove() removes the specified value.
    • Tuples are created with parentheses and work well for fixed groups such as coordinates.

    At this stage, the important thing is the “reading order” of the code. Python runs from top to bottom. Even when there are exceptional flows such as functions or conditionals, beginners should first get used to the basic top-to-bottom flow.

    Change Values and Check the Result

    If the example code ran successfully, now change only a very small part. Start with small changes such as one number, one string, or one variable name so errors are easier to find. After each change, always save and run the code again.

    Part to changeWhat to check
    Input value or variable valueCheck how the result sentence changes.
    Output sentenceCheck whether it becomes a friendlier explanation for the user.
    Code orderCheck whether changing the order causes an error or changes the result.

    Common Errors and How to Fix Them

    Error or situationWhy it happensHow to fix it
    IndexErrorThis is a common beginner-level problem.It occurs when you try to retrieve a position that does not exist.
    remove failureThis is a common beginner-level problem.An error occurs if you call remove() with a value that is not in the list.
    Tuple modification errorThis is a common beginner-level problem.A tuple cannot be changed after it is created.

    When an error appears, first look at the last line of the error message. Then check the file name and line number. Most beginner errors come from parentheses, quotation marks, indentation, variable names, and type conversion.

    Practice Problems to Try on Your Own

    • Create a list of five favorite foods and print them one by one.
    • Add a new value to a list and delete one existing value.
    • Use slicing to print only the first three values of a list.

    When solving practice problems, do not search for the answer code right away. First write the input, processing, and output flow on paper. Once the flow is visible, the code becomes much easier to write.

    Where Does This Connect in Real Work?

    Lists and tuples does not end with a small example. It keeps appearing in business automation when organizing files, in data analysis when reading table data, and in web API work when handling response values. The beginner syntax you learn now also becomes the basic language for using tools such as pandas, requests, and FastAPI later.

    An Analogy for Beginners

    When you first see lists and tuples, syntax symbols may catch your eye before anything else. But if you see syntax only as symbols, you get tired quickly. A better method is to understand it by role. The core of this lesson is store multiple values in order and retrieve them when needed. In other words, you are practicing how to decide what task to give Python and write the processing order as code.

    Think of a cooking recipe. You prepare ingredients, process them in order, control the heat, and finally put the result on a plate. Python code is similar. You prepare the necessary values, process them in a defined order, and print or save the result. For beginners, developing this sense of order is most important.

    Follow the Execution Flow Visually

    Before running code, divide your thinking into the three columns below. This habit helps not only with simple examples but also later when you build longer projects.

    SectionCheck questionMeaning in this lesson
    InputWhat value does the program receive first?Values entered by the user or written in advance in the lists and tuples example.
    ProcessingWhat calculation or decision is made?The part Python runs in order to achieve: store multiple values in order and retrieve them when needed.
    OutputWhat result does the user check?This may be a print result, saved file, generated graph, or changed data.

    Simply filling in this table yourself improves your code-reading ability. Beginners often struggle because they do not know syntax, but more often because they cannot separate input, processing, and output flow.

    Debugging Routine: What to Check When an Error Happens

    When an error occurs, do not delete code at random. If you check in the following order, you can find most beginner errors on your own.

    • Read the last line of the error message.
    • Check the file name and line number.
    • On that line, check whether parentheses, quotation marks, colons, and commas match.
    • Check whether the variable name is exactly the same as the name defined earlier.
    • Check whether a value that should be calculated as a number is still a string.
    • Undo the part you just changed and run the code again.

    If you repeat this routine, errors begin to look less scary and more like clues. Python skill grows more from reading and fixing errors than from avoiding errors.

    Application Direction: Grow Today’s Lesson a Little Further

    Once you are comfortable with this example, keep lists and tuples as the base and change one thing among the input value, output message, storage method, or repeat count. You do not need to build a completely new example. At the beginner stage, many small variations are best.

    • Change the variable names in the example to make them more meaningful.
    • Refine the output sentence so it reads like a guide shown to a real user.
    • Intentionally test what happens when invalid input is entered.
    • Explain the code with comments and check what you understand.
    • Try making the same result in a slightly different way.

    Lesson Checkpoints

    • ☐ I can explain in words why lists and tuples is needed.
    • ☐ I ran the example code myself.
    • ☐ I can explain the role of at least three lines of code.
    • ☐ When an error occurred, I checked the last line and the line number.
    • ☐ I changed and ran at least one practice problem on my own.

    Related Articles

    FAQ

    Can I follow Python lists and tuples even if I am completely new to Python?

    Yes. This lesson is written for readers who are learning programming for the first time. Focus on understanding the execution result and flow rather than memorizing the code.

    I followed the example exactly, but I get an error. What should I check first?

    Check parentheses, quotation marks, colons, indentation, and variable names first. Many beginner errors happen because quotation marks were entered strangely or a variable name differs by one character.

    The example code looks too short. Should I study longer code?

    At the beginner level, short code is better. The most stable way to improve is to understand short code accurately, then change values and add features one by one.

    What should I do next?

    Change and run at least one practice problem from this lesson. Then move to the next lesson, where the concepts you learned earlier will appear again naturally.

    Next Lesson Preview

    The next lesson is Python Beginner Lesson 7: Managing Labeled Data with Dictionaries and Sets. Based on the flow you practiced here, you will explore dictionaries and sets in more detail.

    References

    Original Korean article: https://www.thinknote.co.kr/python-beginner-06-list-tuple/

  • Python Beginner Lesson 7: Managing Labeled Data with Dictionaries and Sets

    In Python Beginner Lesson 7, we cover dictionaries and sets in detail at a beginner-friendly level. The final goal of this lesson is to store data in key-value structures and remove duplicates. Instead of stopping at copying code, we also check why this syntax is used and where beginners often make mistakes.

    Lists find values by order, but real work data is often labeled with names, phone numbers, or scores. In those cases, dictionaries are convenient. Today’s example is small, but it becomes a basic skeleton for later automation, data analysis, and web API learning.

    What You Will Learn in This Lesson

    • Core topic: dictionaries and sets
    • Today’s goal: store data in key-value structures and remove duplicates
    • Practice flow: understand the concept → run the example → review the code → try an applied task
    • Recommended study time: 30–50 minutes

    Understand the Big Picture First

    Python Beginner Lesson 7: Managing Labeled Data with Dictionaries and Sets - A dictionary finds values by key, and a set is useful when you want to remove duplicates or check membership.
    A dictionary finds values by key, and a set is useful when you want to remove duplicates or check membership.

    When learning dictionaries and sets, the most important thing is not memorizing grammar names. You need to understand what role this concept plays inside a real program. At the beginner stage, keep asking the following three questions.

    • Where did this value come from?
    • In what order does this code run?
    • Where should I save the result if I want to use it again?

    Look Closely at the Core Concepts

    • A dictionary stores keys and values as pairs.
    • Keys usually use unchanging values such as strings or numbers.
    • get() lets you provide a safe default value even when a key does not exist.
    • A set automatically removes duplicates.

    At first, explanations alone may feel abstract. That is why it is helpful to run the example below right away and check the concept with your own eyes.

    Beginner Terms You Should Know

    TermSimple explanation
    KeyA label used to find a value
    ValueThe actual data connected to a key
    SetA group of values without duplicates

    Practice Setup

    Create a new Python file and run the example below. Using lowercase English letters and numbers in the file name helps reduce errors. For example, save it as lesson.py or practice_01.py. After entering the code, do not change many things at once. Change it little by little while checking the result each time.

    Example Code

    Python Beginner Lesson 7: Managing Labeled Data with Dictionaries and Sets - A contact-search example is a good way to learn the feel of finding a phone-number value through a name key.
    A contact-search example is a good way to learn the feel of finding a phone-number value through a name key.

    A contact-search example is a good way to learn the feel of finding a phone-number value through a name key.

    contacts = {
        "Minsu": "010-1111-2222",
        "Jiyoung": "010-3333-4444",
    }
    contacts["Seoyeon"] = "010-5555-6666"
    
    name = input("Name to search: ")
    print(contacts.get(name, "No contact found."))
    
    emails = ["a@test.com", "b@test.com", "a@test.com"]
    unique_emails = set(emails)
    print(unique_emails)

    Understand the Code Line by Line

    • contacts stores names as keys and phone numbers as values.
    • contacts[“Seoyeon”] adds a new contact.
    • get() shows a default message instead of an error when the key does not exist.
    • set() removes duplicates from the email list.

    At this stage, the important thing is the “reading order” of the code. Python runs from top to bottom. Even when there are exceptional flows such as functions or conditionals, beginners should first get used to the basic top-to-bottom flow.

    Change Values and Check the Result

    If the example code ran successfully, now change only a very small part. Start with small changes such as one number, one string, or one variable name so errors are easier to find. After each change, always save and run the code again.

    Part to changeWhat to check
    Input value or variable valueCheck how the result sentence changes.
    Output sentenceCheck whether it becomes a friendlier explanation for the user.
    Code orderCheck whether changing the order causes an error or changes the result.

    Common Errors and How to Fix Them

    Error or situationWhy it happensHow to fix it
    KeyErrorThis is a common beginner-level problem.It occurs when you directly look up a missing key with square brackets.
    Duplicate keysThis is a common beginner-level problem.If you add the same key again, the existing value is overwritten.
    Expecting orderThis is a common beginner-level problem.Sets are mainly for removing duplicates, so use a list if order matters.

    When an error appears, first look at the last line of the error message. Then check the file name and line number. Most beginner errors come from parentheses, quotation marks, indentation, variable names, and type conversion.

    Practice Problems to Try on Your Own

    • Store student names and scores in a dictionary.
    • Use items() to print every name and score.
    • Leave only unique tags from a list that contains duplicates.

    When solving practice problems, do not search for the answer code right away. First write the input, processing, and output flow on paper. Once the flow is visible, the code becomes much easier to write.

    Where Does This Connect in Real Work?

    Dictionaries and sets does not end with a small example. It keeps appearing in business automation when organizing files, in data analysis when reading table data, and in web API work when handling response values. The beginner syntax you learn now also becomes the basic language for using tools such as pandas, requests, and FastAPI later.

    An Analogy for Beginners

    When you first see dictionaries and sets, syntax symbols may catch your eye before anything else. But if you see syntax only as symbols, you get tired quickly. A better method is to understand it by role. The core of this lesson is store data in key-value structures and remove duplicates. In other words, you are practicing how to decide what task to give Python and write the processing order as code.

    Think of a cooking recipe. You prepare ingredients, process them in order, control the heat, and finally put the result on a plate. Python code is similar. You prepare the necessary values, process them in a defined order, and print or save the result. For beginners, developing this sense of order is most important.

    Follow the Execution Flow Visually

    Before running code, divide your thinking into the three columns below. This habit helps not only with simple examples but also later when you build longer projects.

    SectionCheck questionMeaning in this lesson
    InputWhat value does the program receive first?Values entered by the user or written in advance in the dictionaries and sets example.
    ProcessingWhat calculation or decision is made?The part Python runs in order to achieve: store data in key-value structures and remove duplicates.
    OutputWhat result does the user check?This may be a print result, saved file, generated graph, or changed data.

    Simply filling in this table yourself improves your code-reading ability. Beginners often struggle because they do not know syntax, but more often because they cannot separate input, processing, and output flow.

    Debugging Routine: What to Check When an Error Happens

    When an error occurs, do not delete code at random. If you check in the following order, you can find most beginner errors on your own.

    • Read the last line of the error message.
    • Check the file name and line number.
    • On that line, check whether parentheses, quotation marks, colons, and commas match.
    • Check whether the variable name is exactly the same as the name defined earlier.
    • Check whether a value that should be calculated as a number is still a string.
    • Undo the part you just changed and run the code again.

    If you repeat this routine, errors begin to look less scary and more like clues. Python skill grows more from reading and fixing errors than from avoiding errors.

    Application Direction: Grow Today’s Lesson a Little Further

    Once you are comfortable with this example, keep dictionaries and sets as the base and change one thing among the input value, output message, storage method, or repeat count. You do not need to build a completely new example. At the beginner stage, many small variations are best.

    • Change the variable names in the example to make them more meaningful.
    • Refine the output sentence so it reads like a guide shown to a real user.
    • Intentionally test what happens when invalid input is entered.
    • Explain the code with comments and check what you understand.
    • Try making the same result in a slightly different way.

    Lesson Checkpoints

    • ☐ I can explain in words why dictionaries and sets is needed.
    • ☐ I ran the example code myself.
    • ☐ I can explain the role of at least three lines of code.
    • ☐ When an error occurred, I checked the last line and the line number.
    • ☐ I changed and ran at least one practice problem on my own.

    Related Articles

    FAQ

    Can I follow Python dictionaries and sets even if I am completely new to Python?

    Yes. This lesson is written for readers who are learning programming for the first time. Focus on understanding the execution result and flow rather than memorizing the code.

    I followed the example exactly, but I get an error. What should I check first?

    Check parentheses, quotation marks, colons, indentation, and variable names first. Many beginner errors happen because quotation marks were entered strangely or a variable name differs by one character.

    The example code looks too short. Should I study longer code?

    At the beginner level, short code is better. The most stable way to improve is to understand short code accurately, then change values and add features one by one.

    What should I do next?

    Change and run at least one practice problem from this lesson. Then move to the next lesson, where the concepts you learned earlier will appear again naturally.

    Next Lesson Preview

    The next lesson is Python Beginner Lesson 8: Searching, Splitting, and Cleaning Strings. Based on the flow you practiced here, you will explore string processing in more detail.

    References

    Original Korean article: https://www.thinknote.co.kr/python-beginner-07-dictionary-set/

  • Python Beginner Lesson 8: Searching, Splitting, and Cleaning Strings

    In Python Beginner Lesson 8, we cover string processing in detail at a beginner-friendly level. The final goal of this lesson is to search, split, clean, and combine text. Instead of stopping at copying code, we also check why this syntax is used and where beginners often make mistakes.

    In business automation and data analysis, the data you meet most often is text. It is important to remove spaces, split words, and replace unnecessary symbols. Today’s example is small, but it becomes a basic skeleton for later automation, data analysis, and web API learning.

    What You Will Learn in This Lesson

    • Core topic: string processing
    • Today’s goal: search, split, clean, and combine text
    • Practice flow: understand the concept → run the example → review the code → try an applied task
    • Recommended study time: 30–50 minutes

    Understand the Big Picture First

    Python Beginner Lesson 8: Searching, Splitting, and Cleaning Strings - String processing means cleaning scattered text into a form that is easier for a program to handle.
    String processing means cleaning scattered text into a form that is easier for a program to handle.

    When learning string processing, the most important thing is not memorizing grammar names. You need to understand what role this concept plays inside a real program. At the beginner stage, keep asking the following three questions.

    • Where did this value come from?
    • In what order does this code run?
    • Where should I save the result if I want to use it again?

    Look Closely at the Core Concepts

    • Strings are also ordered data, so indexing and slicing are possible.
    • strip() removes whitespace from both ends.
    • split() divides a string, and join() combines it again.
    • replace() changes a specific string into another string.

    At first, explanations alone may feel abstract. That is why it is helpful to run the example below right away and check the concept with your own eyes.

    Beginner Terms You Should Know

    TermSimple explanation
    MethodA function used by adding a dot after a value
    DelimiterA character used as the standard for splitting a string
    NormalizationThe process of unifying a format so it is easier to compare or process

    Practice Setup

    Create a new Python file and run the example below. Using lowercase English letters and numbers in the file name helps reduce errors. For example, save it as lesson.py or practice_01.py. After entering the code, do not change many things at once. Change it little by little while checking the result each time.

    Example Code

    Python Beginner Lesson 8: Searching, Splitting, and Cleaning Strings - When you remove spaces, convert case, split, and join in order, you can see how text data becomes organized.
    When you remove spaces, convert case, split, and join in order, you can see how text data becomes organized.

    When you remove spaces, convert case, split, and join in order, you can see how text data becomes organized.

    raw = "  Python, Data, Automation  "
    clean = raw.strip().lower()
    items = clean.split(",")
    items = [item.strip() for item in items]
    print(items)
    print(" / ".join(items))
    
    sentence = "Python is fun. Python is practical."
    print(sentence.replace("Python", "Python programming"))

    Understand the Code Line by Line

    • strip() removes leading and trailing spaces.
    • lower() unifies uppercase and lowercase letters.
    • split(“,”) divides the string by commas.
    • A list comprehension cleans the spaces around each word again.

    At this stage, the important thing is the “reading order” of the code. Python runs from top to bottom. Even when there are exceptional flows such as functions or conditionals, beginners should first get used to the basic top-to-bottom flow.

    Change Values and Check the Result

    If the example code ran successfully, now change only a very small part. Start with small changes such as one number, one string, or one variable name so errors are easier to find. After each change, always save and run the code again.

    Part to changeWhat to check
    Input value or variable valueCheck how the result sentence changes.
    Output sentenceCheck whether it becomes a friendlier explanation for the user.
    Code orderCheck whether changing the order causes an error or changes the result.

    Common Errors and How to Fix Them

    Error or situationWhy it happensHow to fix it
    AttributeErrorThis is a common beginner-level problem.It occurs when you use a string method on a value that is not a string.
    Mistaking the original as changedThis is a common beginner-level problem.String methods return a new string, so you need to store the result back in a variable.
    Case-sensitive search failureThis is a common beginner-level problem.It is convenient to unify text with lower() before searching.

    When an error appears, first look at the last line of the error message. Then check the file name and line number. Most beginner errors come from parentheses, quotation marks, indentation, variable names, and type conversion.

    Practice Problems to Try on Your Own

    • Remove leading and trailing spaces from an email address and convert it to lowercase.
    • Split a sentence by spaces and count the words.
    • Remove hyphens from a phone number.

    When solving practice problems, do not search for the answer code right away. First write the input, processing, and output flow on paper. Once the flow is visible, the code becomes much easier to write.

    Where Does This Connect in Real Work?

    String processing does not end with a small example. It keeps appearing in business automation when organizing files, in data analysis when reading table data, and in web API work when handling response values. The beginner syntax you learn now also becomes the basic language for using tools such as pandas, requests, and FastAPI later.

    An Analogy for Beginners

    When you first see string processing, syntax symbols may catch your eye before anything else. But if you see syntax only as symbols, you get tired quickly. A better method is to understand it by role. The core of this lesson is search, split, clean, and combine text. In other words, you are practicing how to decide what task to give Python and write the processing order as code.

    Think of a cooking recipe. You prepare ingredients, process them in order, control the heat, and finally put the result on a plate. Python code is similar. You prepare the necessary values, process them in a defined order, and print or save the result. For beginners, developing this sense of order is most important.

    Follow the Execution Flow Visually

    Before running code, divide your thinking into the three columns below. This habit helps not only with simple examples but also later when you build longer projects.

    SectionCheck questionMeaning in this lesson
    InputWhat value does the program receive first?Values entered by the user or written in advance in the string processing example.
    ProcessingWhat calculation or decision is made?The part Python runs in order to achieve: search, split, clean, and combine text.
    OutputWhat result does the user check?This may be a print result, saved file, generated graph, or changed data.

    Simply filling in this table yourself improves your code-reading ability. Beginners often struggle because they do not know syntax, but more often because they cannot separate input, processing, and output flow.

    Debugging Routine: What to Check When an Error Happens

    When an error occurs, do not delete code at random. If you check in the following order, you can find most beginner errors on your own.

    • Read the last line of the error message.
    • Check the file name and line number.
    • On that line, check whether parentheses, quotation marks, colons, and commas match.
    • Check whether the variable name is exactly the same as the name defined earlier.
    • Check whether a value that should be calculated as a number is still a string.
    • Undo the part you just changed and run the code again.

    If you repeat this routine, errors begin to look less scary and more like clues. Python skill grows more from reading and fixing errors than from avoiding errors.

    Application Direction: Grow Today’s Lesson a Little Further

    Once you are comfortable with this example, keep string processing as the base and change one thing among the input value, output message, storage method, or repeat count. You do not need to build a completely new example. At the beginner stage, many small variations are best.

    • Change the variable names in the example to make them more meaningful.
    • Refine the output sentence so it reads like a guide shown to a real user.
    • Intentionally test what happens when invalid input is entered.
    • Explain the code with comments and check what you understand.
    • Try making the same result in a slightly different way.

    Lesson Checkpoints

    • ☐ I can explain in words why string processing is needed.
    • ☐ I ran the example code myself.
    • ☐ I can explain the role of at least three lines of code.
    • ☐ When an error occurred, I checked the last line and the line number.
    • ☐ I changed and ran at least one practice problem on my own.

    Related Articles

    FAQ

    Can I follow Python string processing even if I am completely new to Python?

    Yes. This lesson is written for readers who are learning programming for the first time. Focus on understanding the execution result and flow rather than memorizing the code.

    I followed the example exactly, but I get an error. What should I check first?

    Check parentheses, quotation marks, colons, indentation, and variable names first. Many beginner errors happen because quotation marks were entered strangely or a variable name differs by one character.

    The example code looks too short. Should I study longer code?

    At the beginner level, short code is better. The most stable way to improve is to understand short code accurately, then change values and add features one by one.

    What should I do next?

    Change and run at least one practice problem from this lesson. Then move to the next lesson, where the concepts you learned earlier will appear again naturally.

    Next Lesson Preview

    The next lesson is Python Beginner Lesson 9: Splitting Repeated Code into Functions. Based on the flow you practiced here, you will explore functions in more detail.

    References

    Original Korean article: https://www.thinknote.co.kr/python-beginner-08-string-processing/