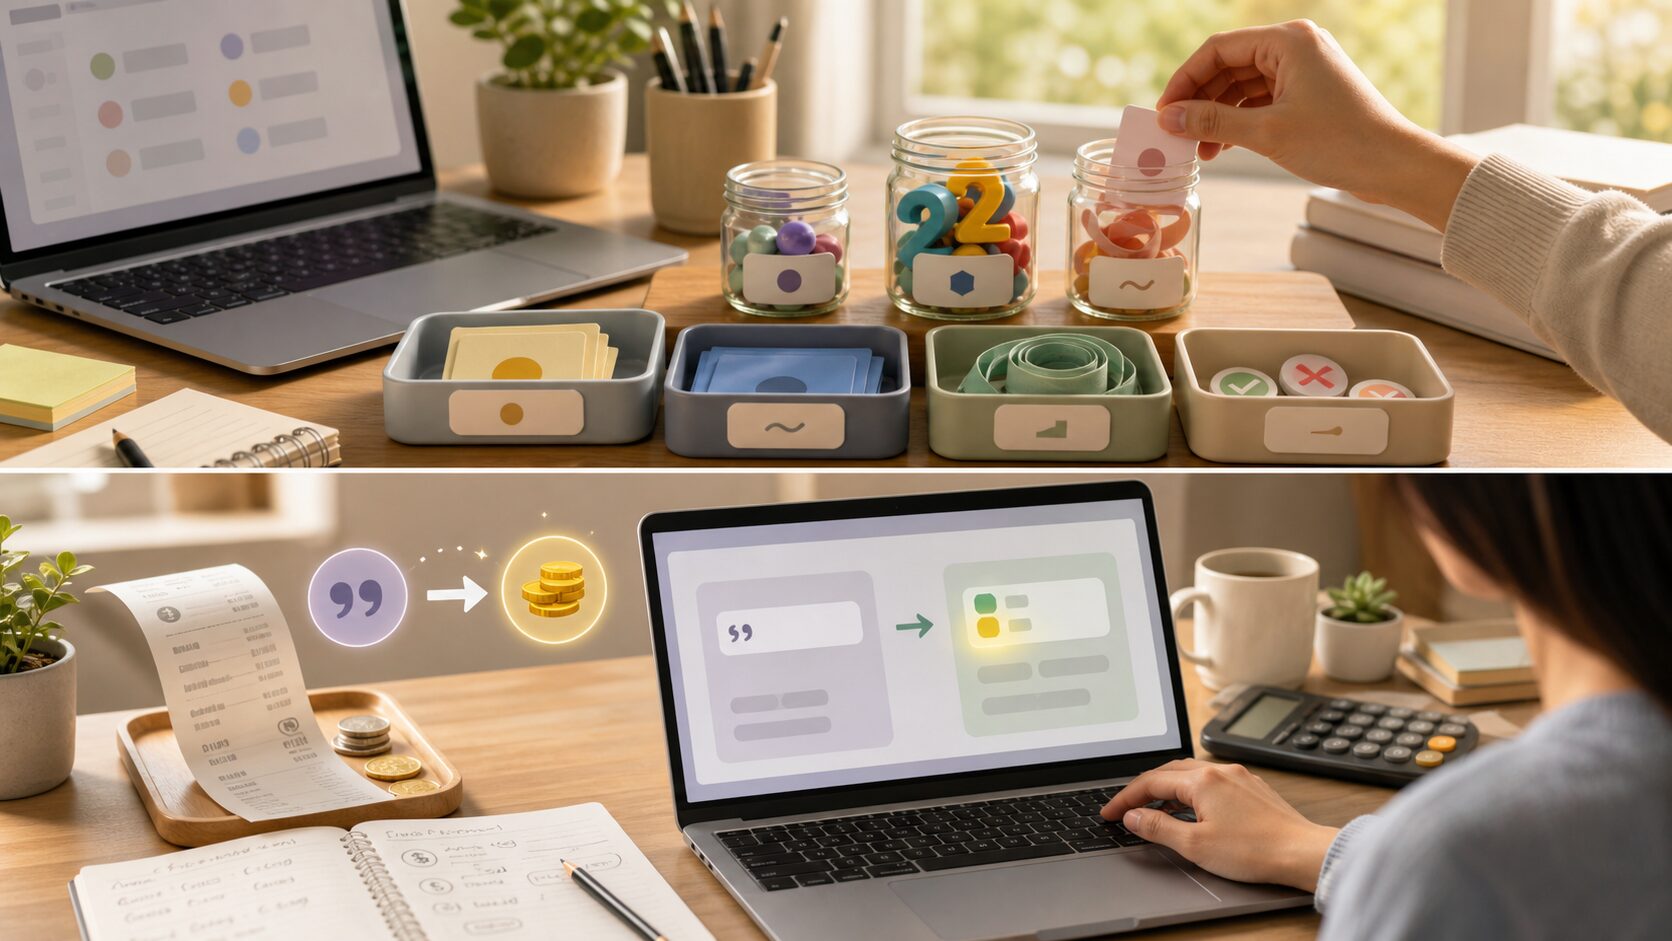
파이썬 초급 8강에서는 문자열 처리을 초보자 눈높이에서 자세히 다룹니다. 이번 강의의 최종 목표는 텍스트를 검색, 분리, 정리, 결합하는 것입니다. 단순히 코드를 복사하는 데서 끝내지 않고, 왜 이런 문법을 쓰는지와 어디에서 자주 실수하는지까지 함께 확인합니다.
업무 자동화와 데이터 분석에서 실제로 가장 자주 만나는 데이터는 텍스트입니다. 공백을 지우고, 단어를 나누고, 불필요한 기호를 바꾸는 능력이 중요합니다. 오늘 예제는 작지만, 이후 자동화·데이터 분석·웹 API 학습으로 이어지는 기본 뼈대가 됩니다.
이번 강의에서 배울 내용
핵심 주제: 문자열 처리
오늘의 목표: 텍스트를 검색, 분리, 정리, 결합하는 것
실습 방식: 개념 이해 → 예제 실행 → 코드 해설 → 응용 과제
권장 학습 시간: 30~50분
먼저 큰 그림부터 이해하기
문자열 처리는 흩어진 텍스트를 프로그램이 다루기 좋은 형태로 정리하는 작업입니다.
문자열 처리을 배울 때 가장 중요한 것은 문법 이름을 외우는 것이 아닙니다. 실제 프로그램 안에서 이 개념이 어떤 역할을 하는지 이해해야 합니다. 초급 단계에서는 아래 세 가지 질문을 계속 떠올리면 좋습니다.
이 값은 어디에서 왔는가?
이 코드는 어떤 순서로 실행되는가?
결과를 다시 사용하려면 어디에 저장해야 하는가?
핵심 개념 자세히 보기
문자열도 순서가 있는 데이터라 인덱싱과 슬라이싱이 가능합니다.
strip()은 양쪽 공백을 제거합니다.
split()은 문자열을 나누고, join()은 다시 합칩니다.
replace()는 특정 문자열을 다른 문자열로 바꿉니다.
처음에는 설명만 읽으면 추상적으로 느껴질 수 있습니다. 그래서 바로 아래 예제를 실행하면서 개념을 눈으로 확인하는 것이 좋습니다.
초보자가 알아야 할 용어 정리
용어
쉬운 설명
메서드
값 뒤에 점을 붙여 사용하는 기능
구분자
문자열을 나누는 기준 문자
정규화
비교하거나 처리하기 좋게 형태를 통일하는 과정
실습 준비
아래 예제는 새 파이썬 파일을 만들어 실행하면 됩니다. 파일명은 영어 소문자와 숫자를 사용하면 오류를 줄일 수 있습니다. 예를 들어 lesson.py, practice_01.py처럼 저장해 보세요. 코드를 입력한 뒤에는 한 번에 많이 고치지 말고, 실행 결과를 확인하면서 조금씩 바꾸는 것이 좋습니다.
예제 코드
공백 제거, 소문자 변환, 분리와 결합을 차례대로 해 보면 텍스트 데이터가 어떻게 정돈되는지 눈에 들어옵니다.
이 단계에서 중요한 것은 코드를 ‘읽는 순서’입니다. 파이썬은 위에서 아래로 실행됩니다. 함수나 조건문처럼 예외적인 흐름이 있더라도, 초급자는 먼저 위에서 아래로 실행되는 기본 흐름을 몸에 익히면 됩니다.
값을 바꿔 보며 확인하기
예제 코드가 실행됐다면 이제 아주 작은 부분만 바꿔 보세요. 숫자 하나, 문자열 하나, 변수 이름 하나처럼 작은 변경부터 시작해야 오류를 찾기 쉽습니다. 변경 후에는 반드시 저장하고 다시 실행합니다.
바꿔 볼 부분
확인할 것
입력값 또는 변수값
결과 문장이 어떻게 달라지는지 확인합니다.
출력 문장
사용자에게 더 친절한 설명이 되는지 확인합니다.
코드 순서
순서를 바꾸면 오류가 나거나 결과가 달라지는지 확인합니다.
자주 나는 오류와 해결 방법
오류 또는 상황
왜 생기는가
해결 방법
AttributeError
초급 단계에서 자주 만나는 문제입니다.
문자열이 아닌 값에 문자열 메서드를 쓰면 발생합니다.
원본 변경 착각
초급 단계에서 자주 만나는 문제입니다.
문자열 메서드는 새 문자열을 반환하므로 변수에 다시 담아야 합니다.
대소문자 검색 실패
초급 단계에서 자주 만나는 문제입니다.
검색 전 lower()로 통일하면 편합니다.
오류가 나면 먼저 오류 메시지의 마지막 줄을 보세요. 그다음 파일명과 줄 번호를 확인합니다. 대부분의 초급 오류는 괄호, 따옴표, 들여쓰기, 변수 이름, 자료형 변환에서 발생합니다.
혼자 해보는 연습 문제
이메일 주소에서 앞뒤 공백을 제거하고 소문자로 바꿔 보세요.
문장을 공백 기준으로 나눠 단어 개수를 세어 보세요.
전화번호의 하이픈을 제거해 보세요.
연습 문제를 풀 때는 정답 코드를 바로 찾기보다, 먼저 종이에 입력·처리·출력 흐름을 적어 보세요. 흐름이 보이면 코드는 훨씬 쉽게 작성됩니다.
실무에서는 어디에 연결될까?
문자열 처리은 작은 예제에서 끝나지 않습니다. 업무 자동화에서는 파일을 정리하고, 데이터 분석에서는 표 데이터를 읽고, 웹 API에서는 응답 값을 다룰 때 계속 등장합니다. 지금 배우는 초급 문법은 이후 pandas, requests, FastAPI 같은 도구를 사용할 때도 기본 언어가 됩니다.
초보자를 위한 이해 비유
문자열 처리을 처음 볼 때는 문법 기호가 먼저 눈에 들어옵니다. 하지만 문법을 기호로만 보면 금방 지칩니다. 더 좋은 방법은 역할로 이해하는 것입니다. 이번 강의의 핵심은 텍스트를 검색, 분리, 정리, 결합하는 것입니다. 즉, 파이썬에게 어떤 일을 맡길지 정하고, 그 일을 처리하는 순서를 코드로 적는 연습입니다.
예를 들어 요리 레시피를 생각해 보세요. 재료를 준비하고, 순서대로 손질하고, 불 조절을 하고, 마지막에 그릇에 담습니다. 파이썬 코드도 비슷합니다. 필요한 값을 준비하고, 정해진 순서로 처리하고, 결과를 출력하거나 저장합니다. 초급자는 이 순서 감각을 잡는 것이 가장 중요합니다.
실행 흐름을 눈으로 따라가기
코드를 실행하기 전에는 아래처럼 세 칸으로 나누어 생각해 보세요. 이 습관은 간단한 예제뿐 아니라 나중에 긴 프로젝트를 만들 때도 도움이 됩니다.
구분
확인 질문
이번 강의에서의 의미
입력
프로그램이 처음 받는 값은 무엇인가?
문자열 처리 예제에서 사용자가 넣거나 코드에 미리 적어 둔 값입니다.
처리
어떤 계산이나 판단을 하는가?
텍스트를 검색, 분리, 정리, 결합하는 것을 달성하기 위해 파이썬이 순서대로 실행하는 부분입니다.
출력
사용자가 확인하는 결과는 무엇인가?
print 결과, 저장된 파일, 만들어진 그래프, 바뀐 데이터 등이 됩니다.
이 표를 직접 채워 보는 것만으로도 코드 이해력이 좋아집니다. 초급자가 어려움을 느끼는 이유는 문법을 몰라서이기도 하지만, 더 자주 발생하는 이유는 입력·처리·출력 흐름을 구분하지 못하기 때문입니다.
디버깅 루틴: 오류가 났을 때 순서대로 보기
오류가 나면 무작정 코드를 지우지 마세요. 아래 순서대로 확인하면 대부분의 초급 오류를 스스로 찾을 수 있습니다.
오류 메시지의 마지막 줄을 읽습니다.
파일명과 줄 번호를 확인합니다.
그 줄에서 괄호, 따옴표, 콜론, 쉼표가 맞는지 봅니다.
변수 이름을 위에서 정의한 이름과 똑같이 썼는지 확인합니다.
숫자로 계산해야 하는 값이 문자열로 남아 있지 않은지 확인합니다.
방금 수정한 부분을 되돌려 보고 다시 실행합니다.
이 루틴을 반복하면 오류가 무서운 것이 아니라 단서처럼 보이기 시작합니다. 파이썬 실력은 오류를 피하는 능력보다 오류를 읽고 고치는 능력에서 더 많이 자랍니다.
응용 방향: 오늘 배운 내용을 조금 더 키우기
이번 예제가 익숙해졌다면 문자열 처리을 그대로 두고 입력값, 출력 문장, 저장 방식, 반복 횟수 중 하나를 바꿔 보세요. 예제를 완전히 새로 만들 필요는 없습니다. 초급 단계에서는 작은 변형을 많이 해보는 것이 가장 좋습니다.
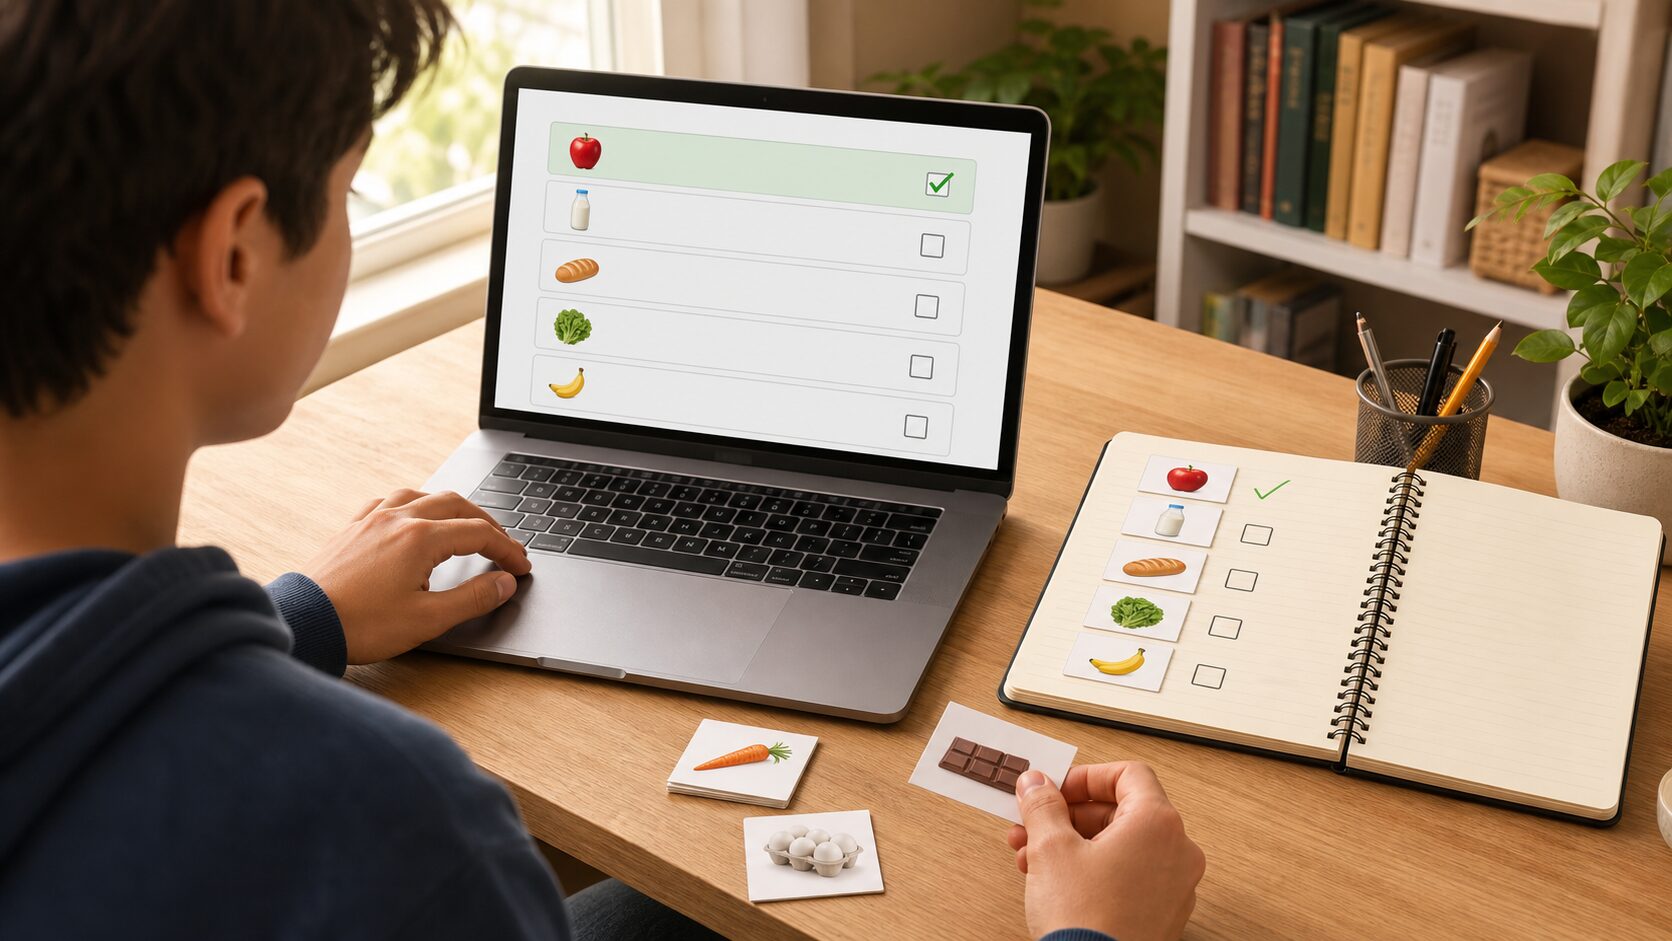
파이썬 초급 6강에서는 리스트와 튜플을 초보자 눈높이에서 자세히 다룹니다. 이번 강의의 최종 목표는 여러 값을 순서대로 저장하고 꺼내 쓰는 것입니다. 단순히 코드를 복사하는 데서 끝내지 않고, 왜 이런 문법을 쓰는지와 어디에서 자주 실수하는지까지 함께 확인합니다.
데이터가 하나만 있는 프로그램은 많지 않습니다. 장보기 목록, 학생 명단, 매출 기록처럼 여러 값을 다루려면 리스트가 필요합니다. 오늘 예제는 작지만, 이후 자동화·데이터 분석·웹 API 학습으로 이어지는 기본 뼈대가 됩니다.
이번 강의에서 배울 내용
핵심 주제: 리스트와 튜플
오늘의 목표: 여러 값을 순서대로 저장하고 꺼내 쓰는 것
실습 방식: 개념 이해 → 예제 실행 → 코드 해설 → 응용 과제
권장 학습 시간: 30~50분
먼저 큰 그림부터 이해하기
리스트와 튜플은 여러 데이터를 하나로 묶어 순서대로 관리할 때 쓰는 기본 자료구조입니다.
리스트와 튜플을 배울 때 가장 중요한 것은 문법 이름을 외우는 것이 아닙니다. 실제 프로그램 안에서 이 개념이 어떤 역할을 하는지 이해해야 합니다. 초급 단계에서는 아래 세 가지 질문을 계속 떠올리면 좋습니다.
이 값은 어디에서 왔는가?
이 코드는 어떤 순서로 실행되는가?
결과를 다시 사용하려면 어디에 저장해야 하는가?
핵심 개념 자세히 보기
리스트는 여러 값을 순서대로 담습니다.
인덱스는 0부터 시작합니다.
슬라이싱은 리스트의 일부 구간을 잘라 보는 문법입니다.
튜플은 한 번 정하면 바꾸지 않을 데이터에 적합합니다.
처음에는 설명만 읽으면 추상적으로 느껴질 수 있습니다. 그래서 바로 아래 예제를 실행하면서 개념을 눈으로 확인하는 것이 좋습니다.
초보자가 알아야 할 용어 정리
용어
쉬운 설명
인덱스
리스트에서 값의 위치를 나타내는 번호
슬라이싱
일부 구간만 잘라 가져오는 문법
가변/불변
리스트는 수정 가능, 튜플은 수정 불가
실습 준비
아래 예제는 새 파이썬 파일을 만들어 실행하면 됩니다. 파일명은 영어 소문자와 숫자를 사용하면 오류를 줄일 수 있습니다. 예를 들어 lesson.py, practice_01.py처럼 저장해 보세요. 코드를 입력한 뒤에는 한 번에 많이 고치지 말고, 실행 결과를 확인하면서 조금씩 바꾸는 것이 좋습니다.
예제 코드
쇼핑 목록을 추가하고 삭제하고 순서대로 확인하는 실습은 리스트 조작을 실제 상황처럼 이해하게 해 줍니다.
shopping = ["우유", "계란", "사과"]
shopping.append("커피")
shopping.remove("계란")

print("첫 번째 품목:", shopping[0])
print("전체 목록")
for item in shopping:
    print("-", item)

point = (37.5, 127.0)
print("좌표:", point)
코드 한 줄씩 이해하기
리스트는 대괄호로 만들고 값은 쉼표로 구분합니다.
append()는 맨 뒤에 값을 추가합니다.
remove()는 지정한 값을 제거합니다.
튜플은 소괄호로 만들며 좌표처럼 고정된 묶음에 잘 어울립니다.
이 단계에서 중요한 것은 코드를 ‘읽는 순서’입니다. 파이썬은 위에서 아래로 실행됩니다. 함수나 조건문처럼 예외적인 흐름이 있더라도, 초급자는 먼저 위에서 아래로 실행되는 기본 흐름을 몸에 익히면 됩니다.
값을 바꿔 보며 확인하기
예제 코드가 실행됐다면 이제 아주 작은 부분만 바꿔 보세요. 숫자 하나, 문자열 하나, 변수 이름 하나처럼 작은 변경부터 시작해야 오류를 찾기 쉽습니다. 변경 후에는 반드시 저장하고 다시 실행합니다.
바꿔 볼 부분
확인할 것
입력값 또는 변수값
결과 문장이 어떻게 달라지는지 확인합니다.
출력 문장
사용자에게 더 친절한 설명이 되는지 확인합니다.
코드 순서
순서를 바꾸면 오류가 나거나 결과가 달라지는지 확인합니다.
자주 나는 오류와 해결 방법
오류 또는 상황
왜 생기는가
해결 방법
IndexError
초급 단계에서 자주 만나는 문제입니다.
없는 위치를 꺼내려고 할 때 발생합니다.
remove 실패
초급 단계에서 자주 만나는 문제입니다.
리스트에 없는 값을 remove()하면 오류가 납니다.
튜플 수정 오류
초급 단계에서 자주 만나는 문제입니다.
튜플은 만든 뒤 값을 바꿀 수 없습니다.
오류가 나면 먼저 오류 메시지의 마지막 줄을 보세요. 그다음 파일명과 줄 번호를 확인합니다. 대부분의 초급 오류는 괄호, 따옴표, 들여쓰기, 변수 이름, 자료형 변환에서 발생합니다.
혼자 해보는 연습 문제
좋아하는 음식 5개를 리스트로 만들고 하나씩 출력해 보세요.
리스트에 새 값을 추가하고 하나를 삭제해 보세요.
리스트의 앞 3개 값만 슬라이싱으로 출력해 보세요.
연습 문제를 풀 때는 정답 코드를 바로 찾기보다, 먼저 종이에 입력·처리·출력 흐름을 적어 보세요. 흐름이 보이면 코드는 훨씬 쉽게 작성됩니다.
실무에서는 어디에 연결될까?
리스트와 튜플은 작은 예제에서 끝나지 않습니다. 업무 자동화에서는 파일을 정리하고, 데이터 분석에서는 표 데이터를 읽고, 웹 API에서는 응답 값을 다룰 때 계속 등장합니다. 지금 배우는 초급 문법은 이후 pandas, requests, FastAPI 같은 도구를 사용할 때도 기본 언어가 됩니다.
초보자를 위한 이해 비유
리스트와 튜플을 처음 볼 때는 문법 기호가 먼저 눈에 들어옵니다. 하지만 문법을 기호로만 보면 금방 지칩니다. 더 좋은 방법은 역할로 이해하는 것입니다. 이번 강의의 핵심은 여러 값을 순서대로 저장하고 꺼내 쓰는 것입니다. 즉, 파이썬에게 어떤 일을 맡길지 정하고, 그 일을 처리하는 순서를 코드로 적는 연습입니다.
예를 들어 요리 레시피를 생각해 보세요. 재료를 준비하고, 순서대로 손질하고, 불 조절을 하고, 마지막에 그릇에 담습니다. 파이썬 코드도 비슷합니다. 필요한 값을 준비하고, 정해진 순서로 처리하고, 결과를 출력하거나 저장합니다. 초급자는 이 순서 감각을 잡는 것이 가장 중요합니다.
실행 흐름을 눈으로 따라가기
코드를 실행하기 전에는 아래처럼 세 칸으로 나누어 생각해 보세요. 이 습관은 간단한 예제뿐 아니라 나중에 긴 프로젝트를 만들 때도 도움이 됩니다.
구분
확인 질문
이번 강의에서의 의미
입력
프로그램이 처음 받는 값은 무엇인가?
리스트와 튜플 예제에서 사용자가 넣거나 코드에 미리 적어 둔 값입니다.
처리
어떤 계산이나 판단을 하는가?
여러 값을 순서대로 저장하고 꺼내 쓰는 것을 달성하기 위해 파이썬이 순서대로 실행하는 부분입니다.
출력
사용자가 확인하는 결과는 무엇인가?
print 결과, 저장된 파일, 만들어진 그래프, 바뀐 데이터 등이 됩니다.
이 표를 직접 채워 보는 것만으로도 코드 이해력이 좋아집니다. 초급자가 어려움을 느끼는 이유는 문법을 몰라서이기도 하지만, 더 자주 발생하는 이유는 입력·처리·출력 흐름을 구분하지 못하기 때문입니다.
디버깅 루틴: 오류가 났을 때 순서대로 보기
오류가 나면 무작정 코드를 지우지 마세요. 아래 순서대로 확인하면 대부분의 초급 오류를 스스로 찾을 수 있습니다.
오류 메시지의 마지막 줄을 읽습니다.
파일명과 줄 번호를 확인합니다.
그 줄에서 괄호, 따옴표, 콜론, 쉼표가 맞는지 봅니다.
변수 이름을 위에서 정의한 이름과 똑같이 썼는지 확인합니다.
숫자로 계산해야 하는 값이 문자열로 남아 있지 않은지 확인합니다.
방금 수정한 부분을 되돌려 보고 다시 실행합니다.
이 루틴을 반복하면 오류가 무서운 것이 아니라 단서처럼 보이기 시작합니다. 파이썬 실력은 오류를 피하는 능력보다 오류를 읽고 고치는 능력에서 더 많이 자랍니다.
응용 방향: 오늘 배운 내용을 조금 더 키우기
이번 예제가 익숙해졌다면 리스트와 튜플을 그대로 두고 입력값, 출력 문장, 저장 방식, 반복 횟수 중 하나를 바꿔 보세요. 예제를 완전히 새로 만들 필요는 없습니다. 초급 단계에서는 작은 변형을 많이 해보는 것이 가장 좋습니다.
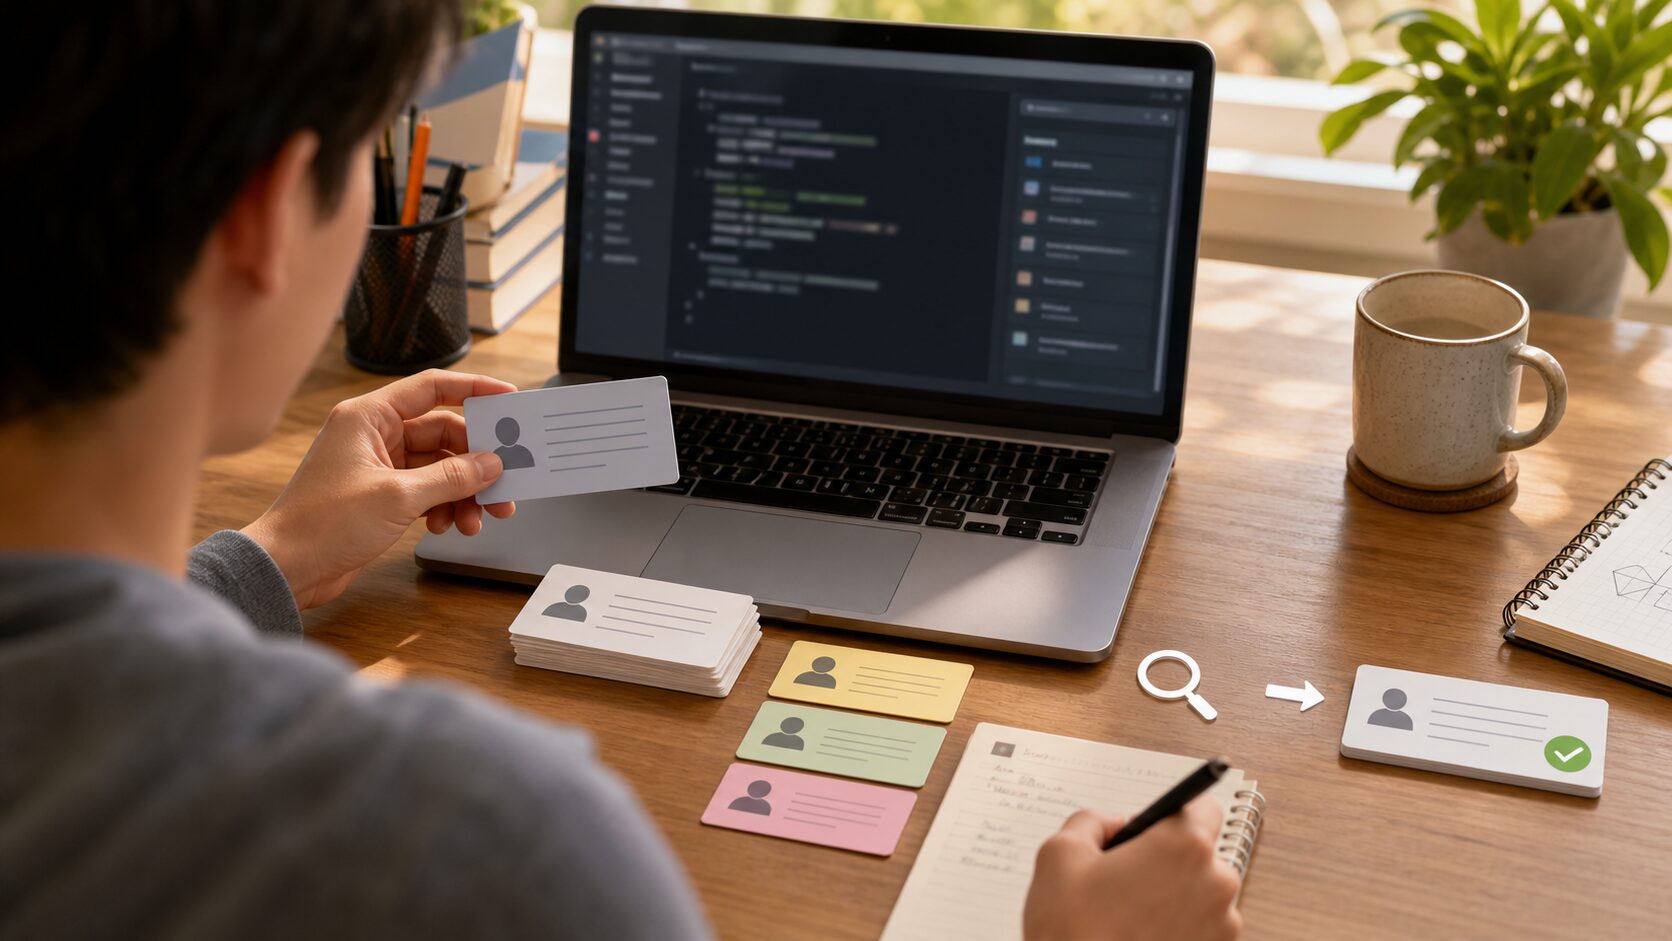
파이썬 초급 7강에서는 딕셔너리와 집합을 초보자 눈높이에서 자세히 다룹니다. 이번 강의의 최종 목표는 키-값 구조로 데이터를 저장하고 중복을 제거하는 것입니다. 단순히 코드를 복사하는 데서 끝내지 않고, 왜 이런 문법을 쓰는지와 어디에서 자주 실수하는지까지 함께 확인합니다.
리스트는 순서로 값을 찾지만, 실제 업무 데이터는 이름, 전화번호, 점수처럼 이름표가 붙은 경우가 많습니다. 이때 딕셔너리가 편합니다. 오늘 예제는 작지만, 이후 자동화·데이터 분석·웹 API 학습으로 이어지는 기본 뼈대가 됩니다.
이번 강의에서 배울 내용
핵심 주제: 딕셔너리와 집합
오늘의 목표: 키-값 구조로 데이터를 저장하고 중복을 제거하는 것
실습 방식: 개념 이해 → 예제 실행 → 코드 해설 → 응용 과제
권장 학습 시간: 30~50분
먼저 큰 그림부터 이해하기
딕셔너리는 키로 값을 찾는 구조이고, 집합은 중복을 제거하거나 포함 여부를 확인할 때 유용합니다.
딕셔너리와 집합을 배울 때 가장 중요한 것은 문법 이름을 외우는 것이 아닙니다. 실제 프로그램 안에서 이 개념이 어떤 역할을 하는지 이해해야 합니다. 초급 단계에서는 아래 세 가지 질문을 계속 떠올리면 좋습니다.
이 값은 어디에서 왔는가?
이 코드는 어떤 순서로 실행되는가?
결과를 다시 사용하려면 어디에 저장해야 하는가?
핵심 개념 자세히 보기
딕셔너리는 키와 값을 한 쌍으로 저장합니다.
키는 보통 문자열이나 숫자처럼 변하지 않는 값을 사용합니다.
get()을 사용하면 없는 키를 조회해도 안전하게 기본값을 줄 수 있습니다.
집합은 중복을 자동으로 제거합니다.
처음에는 설명만 읽으면 추상적으로 느껴질 수 있습니다. 그래서 바로 아래 예제를 실행하면서 개념을 눈으로 확인하는 것이 좋습니다.
초보자가 알아야 할 용어 정리
용어
쉬운 설명
키
값을 찾기 위한 이름표
값
키에 연결된 실제 데이터
집합
중복 없는 값들의 묶음
실습 준비
아래 예제는 새 파이썬 파일을 만들어 실행하면 됩니다. 파일명은 영어 소문자와 숫자를 사용하면 오류를 줄일 수 있습니다. 예를 들어 lesson.py, practice_01.py처럼 저장해 보세요. 코드를 입력한 뒤에는 한 번에 많이 고치지 말고, 실행 결과를 확인하면서 조금씩 바꾸는 것이 좋습니다.
예제 코드
연락처 검색 예제는 이름이라는 키로 전화번호 값을 찾는 딕셔너리의 감각을 익히기 좋습니다.
이 단계에서 중요한 것은 코드를 ‘읽는 순서’입니다. 파이썬은 위에서 아래로 실행됩니다. 함수나 조건문처럼 예외적인 흐름이 있더라도, 초급자는 먼저 위에서 아래로 실행되는 기본 흐름을 몸에 익히면 됩니다.
값을 바꿔 보며 확인하기
예제 코드가 실행됐다면 이제 아주 작은 부분만 바꿔 보세요. 숫자 하나, 문자열 하나, 변수 이름 하나처럼 작은 변경부터 시작해야 오류를 찾기 쉽습니다. 변경 후에는 반드시 저장하고 다시 실행합니다.
바꿔 볼 부분
확인할 것
입력값 또는 변수값
결과 문장이 어떻게 달라지는지 확인합니다.
출력 문장
사용자에게 더 친절한 설명이 되는지 확인합니다.
코드 순서
순서를 바꾸면 오류가 나거나 결과가 달라지는지 확인합니다.
자주 나는 오류와 해결 방법
오류 또는 상황
왜 생기는가
해결 방법
KeyError
초급 단계에서 자주 만나는 문제입니다.
없는 키를 대괄호로 바로 조회할 때 발생합니다.
키 중복
초급 단계에서 자주 만나는 문제입니다.
같은 키를 다시 넣으면 기존 값이 덮어써집니다.
순서 기대
초급 단계에서 자주 만나는 문제입니다.
집합은 중복 제거 목적이 강하므로 순서가 중요하면 리스트를 사용합니다.
오류가 나면 먼저 오류 메시지의 마지막 줄을 보세요. 그다음 파일명과 줄 번호를 확인합니다. 대부분의 초급 오류는 괄호, 따옴표, 들여쓰기, 변수 이름, 자료형 변환에서 발생합니다.
혼자 해보는 연습 문제
학생 이름과 점수를 딕셔너리로 저장해 보세요.
items()를 사용해 모든 이름과 점수를 출력해 보세요.
중복된 태그 목록에서 고유 태그만 남겨 보세요.
연습 문제를 풀 때는 정답 코드를 바로 찾기보다, 먼저 종이에 입력·처리·출력 흐름을 적어 보세요. 흐름이 보이면 코드는 훨씬 쉽게 작성됩니다.
실무에서는 어디에 연결될까?
딕셔너리와 집합은 작은 예제에서 끝나지 않습니다. 업무 자동화에서는 파일을 정리하고, 데이터 분석에서는 표 데이터를 읽고, 웹 API에서는 응답 값을 다룰 때 계속 등장합니다. 지금 배우는 초급 문법은 이후 pandas, requests, FastAPI 같은 도구를 사용할 때도 기본 언어가 됩니다.
초보자를 위한 이해 비유
딕셔너리와 집합을 처음 볼 때는 문법 기호가 먼저 눈에 들어옵니다. 하지만 문법을 기호로만 보면 금방 지칩니다. 더 좋은 방법은 역할로 이해하는 것입니다. 이번 강의의 핵심은 키-값 구조로 데이터를 저장하고 중복을 제거하는 것입니다. 즉, 파이썬에게 어떤 일을 맡길지 정하고, 그 일을 처리하는 순서를 코드로 적는 연습입니다.
예를 들어 요리 레시피를 생각해 보세요. 재료를 준비하고, 순서대로 손질하고, 불 조절을 하고, 마지막에 그릇에 담습니다. 파이썬 코드도 비슷합니다. 필요한 값을 준비하고, 정해진 순서로 처리하고, 결과를 출력하거나 저장합니다. 초급자는 이 순서 감각을 잡는 것이 가장 중요합니다.
실행 흐름을 눈으로 따라가기
코드를 실행하기 전에는 아래처럼 세 칸으로 나누어 생각해 보세요. 이 습관은 간단한 예제뿐 아니라 나중에 긴 프로젝트를 만들 때도 도움이 됩니다.
구분
확인 질문
이번 강의에서의 의미
입력
프로그램이 처음 받는 값은 무엇인가?
딕셔너리와 집합 예제에서 사용자가 넣거나 코드에 미리 적어 둔 값입니다.
처리
어떤 계산이나 판단을 하는가?
키-값 구조로 데이터를 저장하고 중복을 제거하는 것을 달성하기 위해 파이썬이 순서대로 실행하는 부분입니다.
출력
사용자가 확인하는 결과는 무엇인가?
print 결과, 저장된 파일, 만들어진 그래프, 바뀐 데이터 등이 됩니다.
이 표를 직접 채워 보는 것만으로도 코드 이해력이 좋아집니다. 초급자가 어려움을 느끼는 이유는 문법을 몰라서이기도 하지만, 더 자주 발생하는 이유는 입력·처리·출력 흐름을 구분하지 못하기 때문입니다.
디버깅 루틴: 오류가 났을 때 순서대로 보기
오류가 나면 무작정 코드를 지우지 마세요. 아래 순서대로 확인하면 대부분의 초급 오류를 스스로 찾을 수 있습니다.
오류 메시지의 마지막 줄을 읽습니다.
파일명과 줄 번호를 확인합니다.
그 줄에서 괄호, 따옴표, 콜론, 쉼표가 맞는지 봅니다.
변수 이름을 위에서 정의한 이름과 똑같이 썼는지 확인합니다.
숫자로 계산해야 하는 값이 문자열로 남아 있지 않은지 확인합니다.
방금 수정한 부분을 되돌려 보고 다시 실행합니다.
이 루틴을 반복하면 오류가 무서운 것이 아니라 단서처럼 보이기 시작합니다. 파이썬 실력은 오류를 피하는 능력보다 오류를 읽고 고치는 능력에서 더 많이 자랍니다.
응용 방향: 오늘 배운 내용을 조금 더 키우기
이번 예제가 익숙해졌다면 딕셔너리와 집합을 그대로 두고 입력값, 출력 문장, 저장 방식, 반복 횟수 중 하나를 바꿔 보세요. 예제를 완전히 새로 만들 필요는 없습니다. 초급 단계에서는 작은 변형을 많이 해보는 것이 가장 좋습니다.
파이썬 초급 5강에서는 반복문 for와 while을 초보자 눈높이에서 자세히 다룹니다. 이번 강의의 최종 목표는 같은 작업을 자동으로 반복하고 필요한 시점에 멈추는 것입니다. 단순히 코드를 복사하는 데서 끝내지 않고, 왜 이런 문법을 쓰는지와 어디에서 자주 실수하는지까지 함께 확인합니다.
반복문은 자동화의 핵심입니다. 사람이 100번 해야 하는 일을 프로그램이 대신 하게 하려면 반복 구조를 이해해야 합니다. 오늘 예제는 작지만, 이후 자동화·데이터 분석·웹 API 학습으로 이어지는 기본 뼈대가 됩니다.
이번 강의에서 배울 내용
핵심 주제: 반복문 for와 while
오늘의 목표: 같은 작업을 자동으로 반복하고 필요한 시점에 멈추는 것
실습 방식: 개념 이해 → 예제 실행 → 코드 해설 → 응용 과제
권장 학습 시간: 30~50분
먼저 큰 그림부터 이해하기
반복문은 같은 일을 사람이 여러 번 하지 않고 프로그램이 자동으로 반복하게 만드는 기본 도구입니다.
반복문 for와 while을 배울 때 가장 중요한 것은 문법 이름을 외우는 것이 아닙니다. 실제 프로그램 안에서 이 개념이 어떤 역할을 하는지 이해해야 합니다. 초급 단계에서는 아래 세 가지 질문을 계속 떠올리면 좋습니다.
이 값은 어디에서 왔는가?
이 코드는 어떤 순서로 실행되는가?
결과를 다시 사용하려면 어디에 저장해야 하는가?
핵심 개념 자세히 보기
for는 반복 대상이 정해져 있을 때 사용합니다.
while은 조건이 참인 동안 계속 반복합니다.
range()는 숫자 범위를 만들 때 자주 사용합니다.
break는 반복을 멈추고, continue는 이번 반복을 건너뜁니다.
처음에는 설명만 읽으면 추상적으로 느껴질 수 있습니다. 그래서 바로 아래 예제를 실행하면서 개념을 눈으로 확인하는 것이 좋습니다.
초보자가 알아야 할 용어 정리
용어
쉬운 설명
반복 대상
리스트, 문자열, range처럼 차례로 꺼낼 수 있는 값
무한 반복
끝나는 조건이 없어 계속 실행되는 상태
누적
반복하면서 값을 계속 더하거나 쌓는 과정
실습 준비
아래 예제는 새 파이썬 파일을 만들어 실행하면 됩니다. 파일명은 영어 소문자와 숫자를 사용하면 오류를 줄일 수 있습니다. 예를 들어 lesson.py, practice_01.py처럼 저장해 보세요. 코드를 입력한 뒤에는 한 번에 많이 고치지 말고, 실행 결과를 확인하면서 조금씩 바꾸는 것이 좋습니다.
예제 코드
반복 출력과 누적 계산을 보면 반복 대상, 반복 횟수, 종료 조건을 함께 읽는 감각이 생깁니다.
dan = int(input("몇 단을 출력할까요? "))
for i in range(1, 10):
    print(f"{dan} x {i} = {dan * i}")

total = 0
for n in range(1, 101):
    total += n
print(f"1부터 100까지의 합은 {total}입니다.")
코드 한 줄씩 이해하기
range(1, 10)은 1부터 9까지 숫자를 만듭니다.
for i in …은 숫자를 하나씩 꺼내 i에 담습니다.
total += n은 total = total + n과 같습니다.
반복이 끝난 뒤 누적된 total을 출력합니다.
이 단계에서 중요한 것은 코드를 ‘읽는 순서’입니다. 파이썬은 위에서 아래로 실행됩니다. 함수나 조건문처럼 예외적인 흐름이 있더라도, 초급자는 먼저 위에서 아래로 실행되는 기본 흐름을 몸에 익히면 됩니다.
값을 바꿔 보며 확인하기
예제 코드가 실행됐다면 이제 아주 작은 부분만 바꿔 보세요. 숫자 하나, 문자열 하나, 변수 이름 하나처럼 작은 변경부터 시작해야 오류를 찾기 쉽습니다. 변경 후에는 반드시 저장하고 다시 실행합니다.
바꿔 볼 부분
확인할 것
입력값 또는 변수값
결과 문장이 어떻게 달라지는지 확인합니다.
출력 문장
사용자에게 더 친절한 설명이 되는지 확인합니다.
코드 순서
순서를 바꾸면 오류가 나거나 결과가 달라지는지 확인합니다.
자주 나는 오류와 해결 방법
오류 또는 상황
왜 생기는가
해결 방법
무한 반복
초급 단계에서 자주 만나는 문제입니다.
while 조건이 계속 참이면 프로그램이 끝나지 않습니다.
range 끝값 착각
초급 단계에서 자주 만나는 문제입니다.
range(1, 10)은 10을 포함하지 않습니다.
누적 변수 초기화 누락
초급 단계에서 자주 만나는 문제입니다.
반복 전에 total = 0처럼 시작값을 정해야 합니다.
오류가 나면 먼저 오류 메시지의 마지막 줄을 보세요. 그다음 파일명과 줄 번호를 확인합니다. 대부분의 초급 오류는 괄호, 따옴표, 들여쓰기, 변수 이름, 자료형 변환에서 발생합니다.
혼자 해보는 연습 문제
1부터 10까지 숫자를 한 줄씩 출력해 보세요.
1부터 사용자가 입력한 숫자까지의 합을 계산해 보세요.
while문으로 비밀번호를 맞힐 때까지 반복하는 코드를 작성해 보세요.
연습 문제를 풀 때는 정답 코드를 바로 찾기보다, 먼저 종이에 입력·처리·출력 흐름을 적어 보세요. 흐름이 보이면 코드는 훨씬 쉽게 작성됩니다.
실무에서는 어디에 연결될까?
반복문 for와 while은 작은 예제에서 끝나지 않습니다. 업무 자동화에서는 파일을 정리하고, 데이터 분석에서는 표 데이터를 읽고, 웹 API에서는 응답 값을 다룰 때 계속 등장합니다. 지금 배우는 초급 문법은 이후 pandas, requests, FastAPI 같은 도구를 사용할 때도 기본 언어가 됩니다.
초보자를 위한 이해 비유
반복문 for와 while을 처음 볼 때는 문법 기호가 먼저 눈에 들어옵니다. 하지만 문법을 기호로만 보면 금방 지칩니다. 더 좋은 방법은 역할로 이해하는 것입니다. 이번 강의의 핵심은 같은 작업을 자동으로 반복하고 필요한 시점에 멈추는 것입니다. 즉, 파이썬에게 어떤 일을 맡길지 정하고, 그 일을 처리하는 순서를 코드로 적는 연습입니다.
예를 들어 요리 레시피를 생각해 보세요. 재료를 준비하고, 순서대로 손질하고, 불 조절을 하고, 마지막에 그릇에 담습니다. 파이썬 코드도 비슷합니다. 필요한 값을 준비하고, 정해진 순서로 처리하고, 결과를 출력하거나 저장합니다. 초급자는 이 순서 감각을 잡는 것이 가장 중요합니다.
실행 흐름을 눈으로 따라가기
코드를 실행하기 전에는 아래처럼 세 칸으로 나누어 생각해 보세요. 이 습관은 간단한 예제뿐 아니라 나중에 긴 프로젝트를 만들 때도 도움이 됩니다.
구분
확인 질문
이번 강의에서의 의미
입력
프로그램이 처음 받는 값은 무엇인가?
반복문 for와 while 예제에서 사용자가 넣거나 코드에 미리 적어 둔 값입니다.
처리
어떤 계산이나 판단을 하는가?
같은 작업을 자동으로 반복하고 필요한 시점에 멈추는 것을 달성하기 위해 파이썬이 순서대로 실행하는 부분입니다.
출력
사용자가 확인하는 결과는 무엇인가?
print 결과, 저장된 파일, 만들어진 그래프, 바뀐 데이터 등이 됩니다.
이 표를 직접 채워 보는 것만으로도 코드 이해력이 좋아집니다. 초급자가 어려움을 느끼는 이유는 문법을 몰라서이기도 하지만, 더 자주 발생하는 이유는 입력·처리·출력 흐름을 구분하지 못하기 때문입니다.
디버깅 루틴: 오류가 났을 때 순서대로 보기
오류가 나면 무작정 코드를 지우지 마세요. 아래 순서대로 확인하면 대부분의 초급 오류를 스스로 찾을 수 있습니다.
오류 메시지의 마지막 줄을 읽습니다.
파일명과 줄 번호를 확인합니다.
그 줄에서 괄호, 따옴표, 콜론, 쉼표가 맞는지 봅니다.
변수 이름을 위에서 정의한 이름과 똑같이 썼는지 확인합니다.
숫자로 계산해야 하는 값이 문자열로 남아 있지 않은지 확인합니다.
방금 수정한 부분을 되돌려 보고 다시 실행합니다.
이 루틴을 반복하면 오류가 무서운 것이 아니라 단서처럼 보이기 시작합니다. 파이썬 실력은 오류를 피하는 능력보다 오류를 읽고 고치는 능력에서 더 많이 자랍니다.
응용 방향: 오늘 배운 내용을 조금 더 키우기
이번 예제가 익숙해졌다면 반복문 for와 while을 그대로 두고 입력값, 출력 문장, 저장 방식, 반복 횟수 중 하나를 바꿔 보세요. 예제를 완전히 새로 만들 필요는 없습니다. 초급 단계에서는 작은 변형을 많이 해보는 것이 가장 좋습니다.
파이썬 초급 3강에서는 입력과 출력을 초보자 눈높이에서 자세히 다룹니다. 이번 강의의 최종 목표는 사용자에게 값을 받고 계산한 결과를 읽기 좋은 문장으로 출력하는 것입니다. 단순히 코드를 복사하는 데서 끝내지 않고, 왜 이런 문법을 쓰는지와 어디에서 자주 실수하는지까지 함께 확인합니다.
실제 프로그램은 고정된 값만 계산하지 않습니다. 사용자가 입력한 값에 따라 결과를 바꾸는 순간 프로그램다운 프로그램이 됩니다. 오늘 예제는 작지만, 이후 자동화·데이터 분석·웹 API 학습으로 이어지는 기본 뼈대가 됩니다.
이번 강의에서 배울 내용
핵심 주제: 입력과 출력
오늘의 목표: 사용자에게 값을 받고 계산한 결과를 읽기 좋은 문장으로 출력하는 것
실습 방식: 개념 이해 → 예제 실행 → 코드 해설 → 응용 과제
권장 학습 시간: 30~50분
먼저 큰 그림부터 이해하기
입력은 사용자의 정보를 프로그램 안으로 들여오는 통로이고, 출력은 계산 결과를 다시 사용자에게 보여주는 창입니다.
입력과 출력을 배울 때 가장 중요한 것은 문법 이름을 외우는 것이 아닙니다. 실제 프로그램 안에서 이 개념이 어떤 역할을 하는지 이해해야 합니다. 초급 단계에서는 아래 세 가지 질문을 계속 떠올리면 좋습니다.
이 값은 어디에서 왔는가?
이 코드는 어떤 순서로 실행되는가?
결과를 다시 사용하려면 어디에 저장해야 하는가?
핵심 개념 자세히 보기
input()은 사용자 입력을 문자열로 받습니다.
print()는 결과를 화면에 보여 줍니다.
f-string은 문자열 앞에 f를 붙이고 중괄호 안에 변수나 계산식을 넣는 방식입니다.
처음에는 설명만 읽으면 추상적으로 느껴질 수 있습니다. 그래서 바로 아래 예제를 실행하면서 개념을 눈으로 확인하는 것이 좋습니다.
초보자가 알아야 할 용어 정리
용어
쉬운 설명
입력
사용자가 프로그램에 넣는 값
출력
프로그램이 사용자에게 보여 주는 결과
f-string
변수 값을 문자열 안에 자연스럽게 넣는 문법
실습 준비
아래 예제는 새 파이썬 파일을 만들어 실행하면 됩니다. 파일명은 영어 소문자와 숫자를 사용하면 오류를 줄일 수 있습니다. 예를 들어 lesson.py, practice_01.py처럼 저장해 보세요. 코드를 입력한 뒤에는 한 번에 많이 고치지 말고, 실행 결과를 확인하면서 조금씩 바꾸는 것이 좋습니다.
예제 코드
f-string을 쓰면 계산한 값을 문장 안에 자연스럽게 넣어 사용자에게 읽기 좋은 결과로 보여줄 수 있습니다.
name = input("이름을 입력하세요: ")
height = float(input("키를 m 단위로 입력하세요: "))
weight = float(input("몸무게를 kg 단위로 입력하세요: "))
bmi = weight / (height ** 2)
print(f"{name}님의 BMI는 {bmi:.1f}입니다.")
코드 한 줄씩 이해하기
이름은 계산하지 않으므로 문자열 그대로 사용합니다.
키와 몸무게는 계산해야 하므로 float()로 바꿉니다.
height ** 2는 키의 제곱을 의미합니다.
{bmi:.1f}는 소수점 한 자리까지만 출력하라는 뜻입니다.
이 단계에서 중요한 것은 코드를 ‘읽는 순서’입니다. 파이썬은 위에서 아래로 실행됩니다. 함수나 조건문처럼 예외적인 흐름이 있더라도, 초급자는 먼저 위에서 아래로 실행되는 기본 흐름을 몸에 익히면 됩니다.
값을 바꿔 보며 확인하기
예제 코드가 실행됐다면 이제 아주 작은 부분만 바꿔 보세요. 숫자 하나, 문자열 하나, 변수 이름 하나처럼 작은 변경부터 시작해야 오류를 찾기 쉽습니다. 변경 후에는 반드시 저장하고 다시 실행합니다.
바꿔 볼 부분
확인할 것
입력값 또는 변수값
결과 문장이 어떻게 달라지는지 확인합니다.
출력 문장
사용자에게 더 친절한 설명이 되는지 확인합니다.
코드 순서
순서를 바꾸면 오류가 나거나 결과가 달라지는지 확인합니다.
자주 나는 오류와 해결 방법
오류 또는 상황
왜 생기는가
해결 방법
ValueError
초급 단계에서 자주 만나는 문제입니다.
숫자 입력 자리에 공백이나 문자를 넣으면 발생합니다.
계산 결과가 이상함
초급 단계에서 자주 만나는 문제입니다.
input() 값을 숫자로 바꿨는지 먼저 확인합니다.
소수점이 너무 김
초급 단계에서 자주 만나는 문제입니다.
f-string의 :.1f, :.2f 같은 형식을 사용합니다.
오류가 나면 먼저 오류 메시지의 마지막 줄을 보세요. 그다음 파일명과 줄 번호를 확인합니다. 대부분의 초급 오류는 괄호, 따옴표, 들여쓰기, 변수 이름, 자료형 변환에서 발생합니다.
혼자 해보는 연습 문제
출생연도를 입력받아 올해 나이를 계산해 보세요.
두 숫자를 입력받아 더하기, 빼기, 곱하기 결과를 출력해 보세요.
출력 문장을 더 친절하게 바꿔 보세요.
연습 문제를 풀 때는 정답 코드를 바로 찾기보다, 먼저 종이에 입력·처리·출력 흐름을 적어 보세요. 흐름이 보이면 코드는 훨씬 쉽게 작성됩니다.
실무에서는 어디에 연결될까?
입력과 출력은 작은 예제에서 끝나지 않습니다. 업무 자동화에서는 파일을 정리하고, 데이터 분석에서는 표 데이터를 읽고, 웹 API에서는 응답 값을 다룰 때 계속 등장합니다. 지금 배우는 초급 문법은 이후 pandas, requests, FastAPI 같은 도구를 사용할 때도 기본 언어가 됩니다.
초보자를 위한 이해 비유
입력과 출력을 처음 볼 때는 문법 기호가 먼저 눈에 들어옵니다. 하지만 문법을 기호로만 보면 금방 지칩니다. 더 좋은 방법은 역할로 이해하는 것입니다. 이번 강의의 핵심은 사용자에게 값을 받고 계산한 결과를 읽기 좋은 문장으로 출력하는 것입니다. 즉, 파이썬에게 어떤 일을 맡길지 정하고, 그 일을 처리하는 순서를 코드로 적는 연습입니다.
예를 들어 요리 레시피를 생각해 보세요. 재료를 준비하고, 순서대로 손질하고, 불 조절을 하고, 마지막에 그릇에 담습니다. 파이썬 코드도 비슷합니다. 필요한 값을 준비하고, 정해진 순서로 처리하고, 결과를 출력하거나 저장합니다. 초급자는 이 순서 감각을 잡는 것이 가장 중요합니다.
실행 흐름을 눈으로 따라가기
코드를 실행하기 전에는 아래처럼 세 칸으로 나누어 생각해 보세요. 이 습관은 간단한 예제뿐 아니라 나중에 긴 프로젝트를 만들 때도 도움이 됩니다.
구분
확인 질문
이번 강의에서의 의미
입력
프로그램이 처음 받는 값은 무엇인가?
입력과 출력 예제에서 사용자가 넣거나 코드에 미리 적어 둔 값입니다.
처리
어떤 계산이나 판단을 하는가?
사용자에게 값을 받고 계산한 결과를 읽기 좋은 문장으로 출력하는 것을 달성하기 위해 파이썬이 순서대로 실행하는 부분입니다.
출력
사용자가 확인하는 결과는 무엇인가?
print 결과, 저장된 파일, 만들어진 그래프, 바뀐 데이터 등이 됩니다.
이 표를 직접 채워 보는 것만으로도 코드 이해력이 좋아집니다. 초급자가 어려움을 느끼는 이유는 문법을 몰라서이기도 하지만, 더 자주 발생하는 이유는 입력·처리·출력 흐름을 구분하지 못하기 때문입니다.
디버깅 루틴: 오류가 났을 때 순서대로 보기
오류가 나면 무작정 코드를 지우지 마세요. 아래 순서대로 확인하면 대부분의 초급 오류를 스스로 찾을 수 있습니다.
오류 메시지의 마지막 줄을 읽습니다.
파일명과 줄 번호를 확인합니다.
그 줄에서 괄호, 따옴표, 콜론, 쉼표가 맞는지 봅니다.
변수 이름을 위에서 정의한 이름과 똑같이 썼는지 확인합니다.
숫자로 계산해야 하는 값이 문자열로 남아 있지 않은지 확인합니다.
방금 수정한 부분을 되돌려 보고 다시 실행합니다.
이 루틴을 반복하면 오류가 무서운 것이 아니라 단서처럼 보이기 시작합니다. 파이썬 실력은 오류를 피하는 능력보다 오류를 읽고 고치는 능력에서 더 많이 자랍니다.
응용 방향: 오늘 배운 내용을 조금 더 키우기
이번 예제가 익숙해졌다면 입력과 출력을 그대로 두고 입력값, 출력 문장, 저장 방식, 반복 횟수 중 하나를 바꿔 보세요. 예제를 완전히 새로 만들 필요는 없습니다. 초급 단계에서는 작은 변형을 많이 해보는 것이 가장 좋습니다.
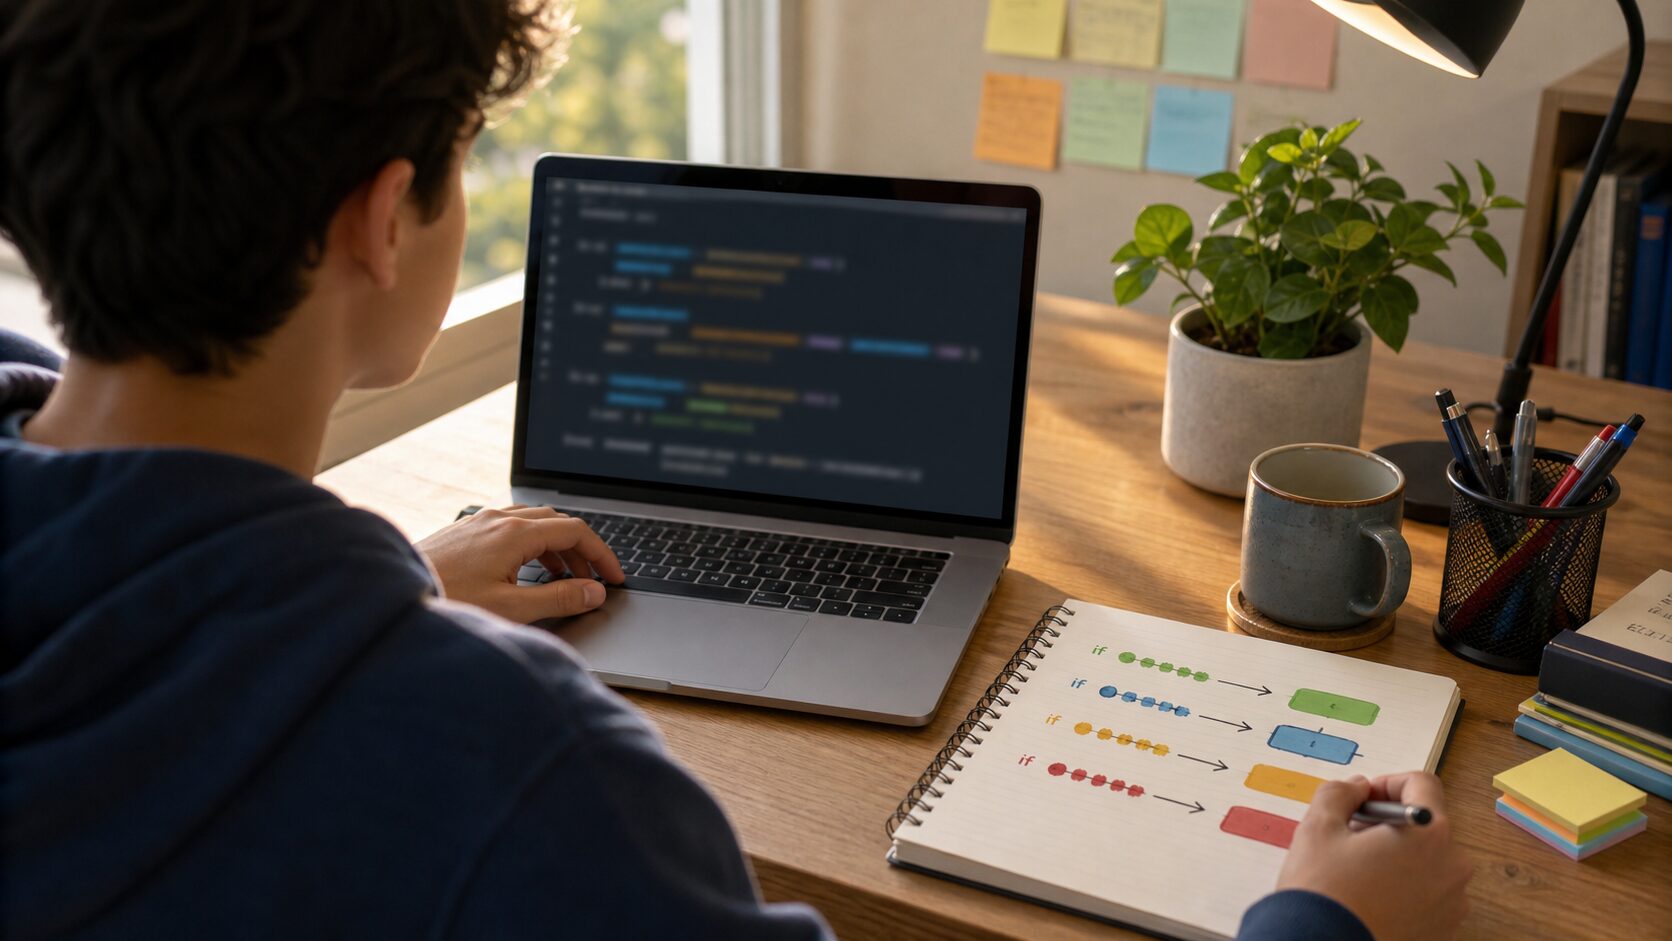
파이썬 초급 4강에서는 조건문 if을 초보자 눈높이에서 자세히 다룹니다. 이번 강의의 최종 목표는 조건에 따라 서로 다른 코드를 실행하는 흐름을 이해하는 것입니다. 단순히 코드를 복사하는 데서 끝내지 않고, 왜 이런 문법을 쓰는지와 어디에서 자주 실수하는지까지 함께 확인합니다.
프로그램은 상황 판단을 해야 합니다. 점수가 높으면 합격, 낮으면 불합격처럼 조건문은 판단이 필요한 모든 코드의 출발점입니다. 오늘 예제는 작지만, 이후 자동화·데이터 분석·웹 API 학습으로 이어지는 기본 뼈대가 됩니다.
이번 강의에서 배울 내용
핵심 주제: 조건문 if
오늘의 목표: 조건에 따라 서로 다른 코드를 실행하는 흐름을 이해하는 것
실습 방식: 개념 이해 → 예제 실행 → 코드 해설 → 응용 과제
권장 학습 시간: 30~50분
먼저 큰 그림부터 이해하기
조건문은 상황을 판단해 여러 선택지 중 하나의 실행 흐름을 고르는 구조입니다.
조건문 if을 배울 때 가장 중요한 것은 문법 이름을 외우는 것이 아닙니다. 실제 프로그램 안에서 이 개념이 어떤 역할을 하는지 이해해야 합니다. 초급 단계에서는 아래 세 가지 질문을 계속 떠올리면 좋습니다.
이 값은 어디에서 왔는가?
이 코드는 어떤 순서로 실행되는가?
결과를 다시 사용하려면 어디에 저장해야 하는가?
핵심 개념 자세히 보기
if는 조건이 참일 때 실행할 코드를 정합니다.
elif는 앞 조건이 거짓일 때 다음 조건을 검사합니다.
else는 어떤 조건도 맞지 않을 때 실행됩니다.
파이썬은 들여쓰기로 코드 블록을 구분합니다.
처음에는 설명만 읽으면 추상적으로 느껴질 수 있습니다. 그래서 바로 아래 예제를 실행하면서 개념을 눈으로 확인하는 것이 좋습니다.
초보자가 알아야 할 용어 정리
용어
쉬운 설명
비교 연산자
==, !=, >, >=처럼 값을 비교하는 기호
논리 연산자
and, or, not처럼 여러 조건을 조합하는 기호
들여쓰기
조건문 아래에 속한 코드를 표시하는 공백
실습 준비
아래 예제는 새 파이썬 파일을 만들어 실행하면 됩니다. 파일명은 영어 소문자와 숫자를 사용하면 오류를 줄일 수 있습니다. 예를 들어 lesson.py, practice_01.py처럼 저장해 보세요. 코드를 입력한 뒤에는 한 번에 많이 고치지 말고, 실행 결과를 확인하면서 조금씩 바꾸는 것이 좋습니다.
예제 코드
점수에 따라 등급을 나누는 실습은 if, elif, else가 어떤 순서로 판단되는지 이해하기 좋습니다.
이 단계에서 중요한 것은 코드를 ‘읽는 순서’입니다. 파이썬은 위에서 아래로 실행됩니다. 함수나 조건문처럼 예외적인 흐름이 있더라도, 초급자는 먼저 위에서 아래로 실행되는 기본 흐름을 몸에 익히면 됩니다.
값을 바꿔 보며 확인하기
예제 코드가 실행됐다면 이제 아주 작은 부분만 바꿔 보세요. 숫자 하나, 문자열 하나, 변수 이름 하나처럼 작은 변경부터 시작해야 오류를 찾기 쉽습니다. 변경 후에는 반드시 저장하고 다시 실행합니다.
바꿔 볼 부분
확인할 것
입력값 또는 변수값
결과 문장이 어떻게 달라지는지 확인합니다.
출력 문장
사용자에게 더 친절한 설명이 되는지 확인합니다.
코드 순서
순서를 바꾸면 오류가 나거나 결과가 달라지는지 확인합니다.
자주 나는 오류와 해결 방법
오류 또는 상황
왜 생기는가
해결 방법
IndentationError
초급 단계에서 자주 만나는 문제입니다.
if 아래 줄의 들여쓰기가 일정하지 않을 때 발생합니다.
=와 == 혼동
초급 단계에서 자주 만나는 문제입니다.
=는 저장, ==는 비교입니다.
조건 순서 오류
초급 단계에서 자주 만나는 문제입니다.
큰 범위 조건을 먼저 쓰면 뒤 조건이 실행되지 않을 수 있습니다.
오류가 나면 먼저 오류 메시지의 마지막 줄을 보세요. 그다음 파일명과 줄 번호를 확인합니다. 대부분의 초급 오류는 괄호, 따옴표, 들여쓰기, 변수 이름, 자료형 변환에서 발생합니다.
혼자 해보는 연습 문제
나이에 따라 청소년/성인 여부를 출력해 보세요.
구매 금액이 5만 원 이상이면 무료배송이라고 출력해 보세요.
아이디와 비밀번호가 모두 맞을 때 로그인 성공을 출력해 보세요.
연습 문제를 풀 때는 정답 코드를 바로 찾기보다, 먼저 종이에 입력·처리·출력 흐름을 적어 보세요. 흐름이 보이면 코드는 훨씬 쉽게 작성됩니다.
실무에서는 어디에 연결될까?
조건문 if은 작은 예제에서 끝나지 않습니다. 업무 자동화에서는 파일을 정리하고, 데이터 분석에서는 표 데이터를 읽고, 웹 API에서는 응답 값을 다룰 때 계속 등장합니다. 지금 배우는 초급 문법은 이후 pandas, requests, FastAPI 같은 도구를 사용할 때도 기본 언어가 됩니다.
초보자를 위한 이해 비유
조건문 if을 처음 볼 때는 문법 기호가 먼저 눈에 들어옵니다. 하지만 문법을 기호로만 보면 금방 지칩니다. 더 좋은 방법은 역할로 이해하는 것입니다. 이번 강의의 핵심은 조건에 따라 서로 다른 코드를 실행하는 흐름을 이해하는 것입니다. 즉, 파이썬에게 어떤 일을 맡길지 정하고, 그 일을 처리하는 순서를 코드로 적는 연습입니다.
예를 들어 요리 레시피를 생각해 보세요. 재료를 준비하고, 순서대로 손질하고, 불 조절을 하고, 마지막에 그릇에 담습니다. 파이썬 코드도 비슷합니다. 필요한 값을 준비하고, 정해진 순서로 처리하고, 결과를 출력하거나 저장합니다. 초급자는 이 순서 감각을 잡는 것이 가장 중요합니다.
실행 흐름을 눈으로 따라가기
코드를 실행하기 전에는 아래처럼 세 칸으로 나누어 생각해 보세요. 이 습관은 간단한 예제뿐 아니라 나중에 긴 프로젝트를 만들 때도 도움이 됩니다.
구분
확인 질문
이번 강의에서의 의미
입력
프로그램이 처음 받는 값은 무엇인가?
조건문 if 예제에서 사용자가 넣거나 코드에 미리 적어 둔 값입니다.
처리
어떤 계산이나 판단을 하는가?
조건에 따라 서로 다른 코드를 실행하는 흐름을 이해하는 것을 달성하기 위해 파이썬이 순서대로 실행하는 부분입니다.
출력
사용자가 확인하는 결과는 무엇인가?
print 결과, 저장된 파일, 만들어진 그래프, 바뀐 데이터 등이 됩니다.
이 표를 직접 채워 보는 것만으로도 코드 이해력이 좋아집니다. 초급자가 어려움을 느끼는 이유는 문법을 몰라서이기도 하지만, 더 자주 발생하는 이유는 입력·처리·출력 흐름을 구분하지 못하기 때문입니다.
디버깅 루틴: 오류가 났을 때 순서대로 보기
오류가 나면 무작정 코드를 지우지 마세요. 아래 순서대로 확인하면 대부분의 초급 오류를 스스로 찾을 수 있습니다.
오류 메시지의 마지막 줄을 읽습니다.
파일명과 줄 번호를 확인합니다.
그 줄에서 괄호, 따옴표, 콜론, 쉼표가 맞는지 봅니다.
변수 이름을 위에서 정의한 이름과 똑같이 썼는지 확인합니다.
숫자로 계산해야 하는 값이 문자열로 남아 있지 않은지 확인합니다.
방금 수정한 부분을 되돌려 보고 다시 실행합니다.
이 루틴을 반복하면 오류가 무서운 것이 아니라 단서처럼 보이기 시작합니다. 파이썬 실력은 오류를 피하는 능력보다 오류를 읽고 고치는 능력에서 더 많이 자랍니다.
응용 방향: 오늘 배운 내용을 조금 더 키우기
이번 예제가 익숙해졌다면 조건문 if을 그대로 두고 입력값, 출력 문장, 저장 방식, 반복 횟수 중 하나를 바꿔 보세요. 예제를 완전히 새로 만들 필요는 없습니다. 초급 단계에서는 작은 변형을 많이 해보는 것이 가장 좋습니다.
파이썬 초급 2강에서는 변수와 자료형을 초보자 눈높이에서 자세히 다룹니다. 이번 강의의 최종 목표는 숫자, 문자열, 불리언 값을 변수에 담고 계산에 맞게 형 변환하는 것입니다. 단순히 코드를 복사하는 데서 끝내지 않고, 왜 이런 문법을 쓰는지와 어디에서 자주 실수하는지까지 함께 확인합니다.
프로그램은 값을 저장하고, 바꾸고, 계산하는 일의 반복입니다. 변수와 자료형을 이해하면 코드가 왜 계산되거나 왜 오류가 나는지 보이기 시작합니다. 오늘 예제는 작지만, 이후 자동화·데이터 분석·웹 API 학습으로 이어지는 기본 뼈대가 됩니다.
이번 강의에서 배울 내용
핵심 주제: 변수와 자료형
오늘의 목표: 숫자, 문자열, 불리언 값을 변수에 담고 계산에 맞게 형 변환하는 것
실습 방식: 개념 이해 → 예제 실행 → 코드 해설 → 응용 과제
권장 학습 시간: 30~50분
먼저 큰 그림부터 이해하기
변수는 값에 붙이는 이름표이고, 자료형은 그 값을 어떻게 계산하고 다룰지 알려 주는 기준입니다.
변수와 자료형을 배울 때 가장 중요한 것은 문법 이름을 외우는 것이 아닙니다. 실제 프로그램 안에서 이 개념이 어떤 역할을 하는지 이해해야 합니다. 초급 단계에서는 아래 세 가지 질문을 계속 떠올리면 좋습니다.
이 값은 어디에서 왔는가?
이 코드는 어떤 순서로 실행되는가?
결과를 다시 사용하려면 어디에 저장해야 하는가?
핵심 개념 자세히 보기
변수는 값을 담는 이름표입니다. 값 자체가 아니라 값을 가리키는 이름이라고 생각하면 쉽습니다.
int는 정수, float는 소수, str은 문자열, bool은 참과 거짓을 표현합니다.
input()으로 받은 값은 숫자처럼 보여도 실제로는 문자열입니다. 계산하려면 int()나 float()로 바꿔야 합니다.
처음에는 설명만 읽으면 추상적으로 느껴질 수 있습니다. 그래서 바로 아래 예제를 실행하면서 개념을 눈으로 확인하는 것이 좋습니다.
초보자가 알아야 할 용어 정리
용어
쉬운 설명
변수
값을 저장해 다시 사용하기 위한 이름
자료형
값의 종류. 숫자, 문자열, 참거짓 등이 있습니다.
형 변환
값의 자료형을 다른 자료형으로 바꾸는 과정
실습 준비
아래 예제는 새 파이썬 파일을 만들어 실행하면 됩니다. 파일명은 영어 소문자와 숫자를 사용하면 오류를 줄일 수 있습니다. 예를 들어 lesson.py, practice_01.py처럼 저장해 보세요. 코드를 입력한 뒤에는 한 번에 많이 고치지 말고, 실행 결과를 확인하면서 조금씩 바꾸는 것이 좋습니다.
예제 코드
문자로 들어온 가격을 숫자로 바꾸어 계산하는 과정은 자료형 변환을 가장 쉽게 체감할 수 있는 실습입니다.
이 단계에서 중요한 것은 코드를 ‘읽는 순서’입니다. 파이썬은 위에서 아래로 실행됩니다. 함수나 조건문처럼 예외적인 흐름이 있더라도, 초급자는 먼저 위에서 아래로 실행되는 기본 흐름을 몸에 익히면 됩니다.
값을 바꿔 보며 확인하기
예제 코드가 실행됐다면 이제 아주 작은 부분만 바꿔 보세요. 숫자 하나, 문자열 하나, 변수 이름 하나처럼 작은 변경부터 시작해야 오류를 찾기 쉽습니다. 변경 후에는 반드시 저장하고 다시 실행합니다.
바꿔 볼 부분
확인할 것
입력값 또는 변수값
결과 문장이 어떻게 달라지는지 확인합니다.
출력 문장
사용자에게 더 친절한 설명이 되는지 확인합니다.
코드 순서
순서를 바꾸면 오류가 나거나 결과가 달라지는지 확인합니다.
자주 나는 오류와 해결 방법
오류 또는 상황
왜 생기는가
해결 방법
TypeError
초급 단계에서 자주 만나는 문제입니다.
문자열과 숫자를 그대로 더하려 할 때 자주 발생합니다.
ValueError
초급 단계에서 자주 만나는 문제입니다.
int(“12월”)처럼 숫자로 바꿀 수 없는 문자열을 변환할 때 발생합니다.
변수명 오류
초급 단계에서 자주 만나는 문제입니다.
변수명은 숫자로 시작할 수 없고 공백을 넣을 수 없습니다.
오류가 나면 먼저 오류 메시지의 마지막 줄을 보세요. 그다음 파일명과 줄 번호를 확인합니다. 대부분의 초급 오류는 괄호, 따옴표, 들여쓰기, 변수 이름, 자료형 변환에서 발생합니다.
혼자 해보는 연습 문제
나이를 변수에 담고 10년 뒤 나이를 출력해 보세요.
상품 가격과 할인율을 변수로 만들어 할인 후 가격을 계산해 보세요.
type()으로 각 변수의 자료형을 확인해 보세요.
연습 문제를 풀 때는 정답 코드를 바로 찾기보다, 먼저 종이에 입력·처리·출력 흐름을 적어 보세요. 흐름이 보이면 코드는 훨씬 쉽게 작성됩니다.
실무에서는 어디에 연결될까?
변수와 자료형은 작은 예제에서 끝나지 않습니다. 업무 자동화에서는 파일을 정리하고, 데이터 분석에서는 표 데이터를 읽고, 웹 API에서는 응답 값을 다룰 때 계속 등장합니다. 지금 배우는 초급 문법은 이후 pandas, requests, FastAPI 같은 도구를 사용할 때도 기본 언어가 됩니다.
초보자를 위한 이해 비유
변수와 자료형을 처음 볼 때는 문법 기호가 먼저 눈에 들어옵니다. 하지만 문법을 기호로만 보면 금방 지칩니다. 더 좋은 방법은 역할로 이해하는 것입니다. 이번 강의의 핵심은 숫자, 문자열, 불리언 값을 변수에 담고 계산에 맞게 형 변환하는 것입니다. 즉, 파이썬에게 어떤 일을 맡길지 정하고, 그 일을 처리하는 순서를 코드로 적는 연습입니다.
예를 들어 요리 레시피를 생각해 보세요. 재료를 준비하고, 순서대로 손질하고, 불 조절을 하고, 마지막에 그릇에 담습니다. 파이썬 코드도 비슷합니다. 필요한 값을 준비하고, 정해진 순서로 처리하고, 결과를 출력하거나 저장합니다. 초급자는 이 순서 감각을 잡는 것이 가장 중요합니다.
실행 흐름을 눈으로 따라가기
코드를 실행하기 전에는 아래처럼 세 칸으로 나누어 생각해 보세요. 이 습관은 간단한 예제뿐 아니라 나중에 긴 프로젝트를 만들 때도 도움이 됩니다.
구분
확인 질문
이번 강의에서의 의미
입력
프로그램이 처음 받는 값은 무엇인가?
변수와 자료형 예제에서 사용자가 넣거나 코드에 미리 적어 둔 값입니다.
처리
어떤 계산이나 판단을 하는가?
숫자, 문자열, 불리언 값을 변수에 담고 계산에 맞게 형 변환하는 것을 달성하기 위해 파이썬이 순서대로 실행하는 부분입니다.
출력
사용자가 확인하는 결과는 무엇인가?
print 결과, 저장된 파일, 만들어진 그래프, 바뀐 데이터 등이 됩니다.
이 표를 직접 채워 보는 것만으로도 코드 이해력이 좋아집니다. 초급자가 어려움을 느끼는 이유는 문법을 몰라서이기도 하지만, 더 자주 발생하는 이유는 입력·처리·출력 흐름을 구분하지 못하기 때문입니다.
디버깅 루틴: 오류가 났을 때 순서대로 보기
오류가 나면 무작정 코드를 지우지 마세요. 아래 순서대로 확인하면 대부분의 초급 오류를 스스로 찾을 수 있습니다.
오류 메시지의 마지막 줄을 읽습니다.
파일명과 줄 번호를 확인합니다.
그 줄에서 괄호, 따옴표, 콜론, 쉼표가 맞는지 봅니다.
변수 이름을 위에서 정의한 이름과 똑같이 썼는지 확인합니다.
숫자로 계산해야 하는 값이 문자열로 남아 있지 않은지 확인합니다.
방금 수정한 부분을 되돌려 보고 다시 실행합니다.
이 루틴을 반복하면 오류가 무서운 것이 아니라 단서처럼 보이기 시작합니다. 파이썬 실력은 오류를 피하는 능력보다 오류를 읽고 고치는 능력에서 더 많이 자랍니다.
응용 방향: 오늘 배운 내용을 조금 더 키우기
이번 예제가 익숙해졌다면 변수와 자료형을 그대로 두고 입력값, 출력 문장, 저장 방식, 반복 횟수 중 하나를 바꿔 보세요. 예제를 완전히 새로 만들 필요는 없습니다. 초급 단계에서는 작은 변형을 많이 해보는 것이 가장 좋습니다.
파이썬을 처음 배우려면 무엇부터 해야 할지 막막합니다. 설치를 해야 하는지, 문법을 외워야 하는지, 바로 프로젝트를 만들어야 하는지 판단하기 어렵습니다. 이 글은 그 혼란을 줄이기 위한 파이썬 초급 20강 전체 안내서입니다.
이번 시리즈는 단순 문법 목록이 아닙니다. 각 강의마다 초보자가 실제로 실행할 수 있는 작은 예제와 연습 문제를 넣었습니다. 설치, 변수, 조건문, 반복문, 자료구조, 함수, 파일 처리, 예외 처리, 클래스, 자동화, 데이터 분석, API까지 초급자가 반드시 지나가야 할 길을 순서대로 정리했습니다.
이 시리즈가 필요한 사람
파이썬을 처음 설치하는 사람
코딩 경험이 거의 없는 비전공자
업무 자동화나 데이터 분석을 배우기 전 기초가 필요한 사람
AI 도구를 더 잘 활용하기 위해 파이썬 문법을 익히려는 사람
문법 책을 봤지만 직접 무엇을 만들어야 할지 모르는 사람
초급 20강 학습 로드맵
파이썬 초급 과정은 설치, 기본 문법, 데이터 처리, 프로젝트까지 이어지는 긴 여정이므로 전체 흐름을 먼저 잡아두면 학습 부담이 줄어듭니다.
파이썬 초급 1강에서는 파이썬 설치와 첫 실행을 초보자 눈높이에서 자세히 다룹니다. 이번 강의의 최종 목표는 내 컴퓨터에서 파이썬 파일을 만들고 직접 실행할 수 있게 되는 것입니다. 단순히 코드를 복사하는 데서 끝내지 않고, 왜 이런 문법을 쓰는지와 어디에서 자주 실수하는지까지 함께 확인합니다.
설치와 실행 흐름을 모르면 이후 모든 문법 학습이 막힙니다. 초급자는 코드를 외우기 전에 “어디에 쓰고, 어디에서 실행하고, 결과를 어디에서 확인하는지”부터 잡아야 합니다. 오늘 예제는 작지만, 이후 자동화·데이터 분석·웹 API 학습으로 이어지는 기본 뼈대가 됩니다.
이번 강의에서 배울 내용
핵심 주제: 파이썬 설치와 첫 실행
오늘의 목표: 내 컴퓨터에서 파이썬 파일을 만들고 직접 실행할 수 있게 되는 것
실습 방식: 개념 이해 → 예제 실행 → 코드 해설 → 응용 과제
권장 학습 시간: 30~50분
먼저 큰 그림부터 이해하기
첫 강의에서는 설치 자체보다 코드 한 줄을 실행하고 결과가 나타나는 순간을 직접 경험하는 것이 핵심입니다.
파이썬 설치와 첫 실행을 배울 때 가장 중요한 것은 문법 이름을 외우는 것이 아닙니다. 실제 프로그램 안에서 이 개념이 어떤 역할을 하는지 이해해야 합니다. 초급 단계에서는 아래 세 가지 질문을 계속 떠올리면 좋습니다.
이 값은 어디에서 왔는가?
이 코드는 어떤 순서로 실행되는가?
결과를 다시 사용하려면 어디에 저장해야 하는가?
핵심 개념 자세히 보기
파이썬은 인터프리터 방식 언어라 코드를 한 줄씩 해석해 실행합니다.
터미널은 명령을 입력하는 창이고, 에디터는 코드를 작성하는 도구입니다.
파일 확장자는 보통 .py를 사용합니다. hello.py처럼 저장한 뒤 실행합니다.
처음에는 설명만 읽으면 추상적으로 느껴질 수 있습니다. 그래서 바로 아래 예제를 실행하면서 개념을 눈으로 확인하는 것이 좋습니다.
초보자가 알아야 할 용어 정리
용어
쉬운 설명
인터프리터
작성한 코드를 실행 시점에 해석해 동작시키는 프로그램
터미널
명령어를 입력해 프로그램을 실행하는 창
PATH
어느 폴더에서든 python 명령을 찾도록 돕는 환경 설정
실습 준비
아래 예제는 새 파이썬 파일을 만들어 실행하면 됩니다. 파일명은 영어 소문자와 숫자를 사용하면 오류를 줄일 수 있습니다. 예를 들어 lesson.py, practice_01.py처럼 저장해 보세요. 코드를 입력한 뒤에는 한 번에 많이 고치지 말고, 실행 결과를 확인하면서 조금씩 바꾸는 것이 좋습니다.
예제 코드
print("Hello, Python")
print("안녕하세요. 저는 오늘 파이썬을 처음 실행했습니다.")
name = "제우스"
print(name, "님의 파이썬 학습을 시작합니다.")
코드 한 줄씩 이해하기
첫 줄은 화면에 Hello, Python이라는 문장을 출력합니다.
두 번째 줄은 한글 문자열도 출력할 수 있음을 보여 줍니다.
세 번째 줄은 name이라는 변수에 이름을 담습니다.
마지막 줄은 변수와 문장을 함께 출력합니다.
이 단계에서 중요한 것은 코드를 ‘읽는 순서’입니다. 파이썬은 위에서 아래로 실행됩니다. 함수나 조건문처럼 예외적인 흐름이 있더라도, 초급자는 먼저 위에서 아래로 실행되는 기본 흐름을 몸에 익히면 됩니다.
값을 바꿔 보며 확인하기
예제 코드가 실행됐다면 이제 아주 작은 부분만 바꿔 보세요. 숫자 하나, 문자열 하나, 변수 이름 하나처럼 작은 변경부터 시작해야 오류를 찾기 쉽습니다. 변경 후에는 반드시 저장하고 다시 실행합니다.
바꿔 볼 부분
확인할 것
입력값 또는 변수값
결과 문장이 어떻게 달라지는지 확인합니다.
출력 문장
사용자에게 더 친절한 설명이 되는지 확인합니다.
코드 순서
순서를 바꾸면 오류가 나거나 결과가 달라지는지 확인합니다.
자주 나는 오류와 해결 방법
처음 실행에서 막힐 때는 설치 상태, 실행 위치, 파일 저장 여부를 차분히 확인하면 대부분의 문제를 좁혀 갈 수 있습니다.
오류 또는 상황
왜 생기는가
해결 방법
python 명령을 찾을 수 없음
초급 단계에서 자주 만나는 문제입니다.
설치 후 터미널을 재시작하거나 PATH 등록 여부를 확인합니다.
SyntaxError
초급 단계에서 자주 만나는 문제입니다.
따옴표, 괄호, 쉼표가 빠졌는지 확인합니다.
한글이 깨짐
초급 단계에서 자주 만나는 문제입니다.
파일 인코딩을 UTF-8로 저장했는지 확인합니다.
오류가 나면 먼저 오류 메시지의 마지막 줄을 보세요. 그다음 파일명과 줄 번호를 확인합니다. 대부분의 초급 오류는 괄호, 따옴표, 들여쓰기, 변수 이름, 자료형 변환에서 발생합니다.
혼자 해보는 연습 문제
python –version 또는 python3 –version으로 버전을 확인해 보세요.
hello.py 파일을 만들고 예제 코드를 실행해 보세요.
문장과 이름을 자신의 상황에 맞게 바꿔 보세요.
연습 문제를 풀 때는 정답 코드를 바로 찾기보다, 먼저 종이에 입력·처리·출력 흐름을 적어 보세요. 흐름이 보이면 코드는 훨씬 쉽게 작성됩니다.
실무에서는 어디에 연결될까?
파이썬 설치와 첫 실행은 작은 예제에서 끝나지 않습니다. 업무 자동화에서는 파일을 정리하고, 데이터 분석에서는 표 데이터를 읽고, 웹 API에서는 응답 값을 다룰 때 계속 등장합니다. 지금 배우는 초급 문법은 이후 pandas, requests, FastAPI 같은 도구를 사용할 때도 기본 언어가 됩니다.
초보자를 위한 이해 비유
파이썬 설치와 첫 실행을 처음 볼 때는 문법 기호가 먼저 눈에 들어옵니다. 하지만 문법을 기호로만 보면 금방 지칩니다. 더 좋은 방법은 역할로 이해하는 것입니다. 이번 강의의 핵심은 내 컴퓨터에서 파이썬 파일을 만들고 직접 실행할 수 있게 되는 것입니다. 즉, 파이썬에게 어떤 일을 맡길지 정하고, 그 일을 처리하는 순서를 코드로 적는 연습입니다.
예를 들어 요리 레시피를 생각해 보세요. 재료를 준비하고, 순서대로 손질하고, 불 조절을 하고, 마지막에 그릇에 담습니다. 파이썬 코드도 비슷합니다. 필요한 값을 준비하고, 정해진 순서로 처리하고, 결과를 출력하거나 저장합니다. 초급자는 이 순서 감각을 잡는 것이 가장 중요합니다.
실행 흐름을 눈으로 따라가기
코드를 실행하기 전에는 아래처럼 세 칸으로 나누어 생각해 보세요. 이 습관은 간단한 예제뿐 아니라 나중에 긴 프로젝트를 만들 때도 도움이 됩니다.
구분
확인 질문
이번 강의에서의 의미
입력
프로그램이 처음 받는 값은 무엇인가?
파이썬 설치와 첫 실행 예제에서 사용자가 넣거나 코드에 미리 적어 둔 값입니다.
처리
어떤 계산이나 판단을 하는가?
내 컴퓨터에서 파이썬 파일을 만들고 직접 실행할 수 있게 되는 것을 달성하기 위해 파이썬이 순서대로 실행하는 부분입니다.
출력
사용자가 확인하는 결과는 무엇인가?
print 결과, 저장된 파일, 만들어진 그래프, 바뀐 데이터 등이 됩니다.
이 표를 직접 채워 보는 것만으로도 코드 이해력이 좋아집니다. 초급자가 어려움을 느끼는 이유는 문법을 몰라서이기도 하지만, 더 자주 발생하는 이유는 입력·처리·출력 흐름을 구분하지 못하기 때문입니다.
디버깅 루틴: 오류가 났을 때 순서대로 보기
오류가 나면 무작정 코드를 지우지 마세요. 아래 순서대로 확인하면 대부분의 초급 오류를 스스로 찾을 수 있습니다.
오류 메시지의 마지막 줄을 읽습니다.
파일명과 줄 번호를 확인합니다.
그 줄에서 괄호, 따옴표, 콜론, 쉼표가 맞는지 봅니다.
변수 이름을 위에서 정의한 이름과 똑같이 썼는지 확인합니다.
숫자로 계산해야 하는 값이 문자열로 남아 있지 않은지 확인합니다.
방금 수정한 부분을 되돌려 보고 다시 실행합니다.
이 루틴을 반복하면 오류가 무서운 것이 아니라 단서처럼 보이기 시작합니다. 파이썬 실력은 오류를 피하는 능력보다 오류를 읽고 고치는 능력에서 더 많이 자랍니다.
응용 방향: 오늘 배운 내용을 조금 더 키우기
이번 예제가 익숙해졌다면 파이썬 설치와 첫 실행을 그대로 두고 입력값, 출력 문장, 저장 방식, 반복 횟수 중 하나를 바꿔 보세요. 예제를 완전히 새로 만들 필요는 없습니다. 초급 단계에서는 작은 변형을 많이 해보는 것이 가장 좋습니다.
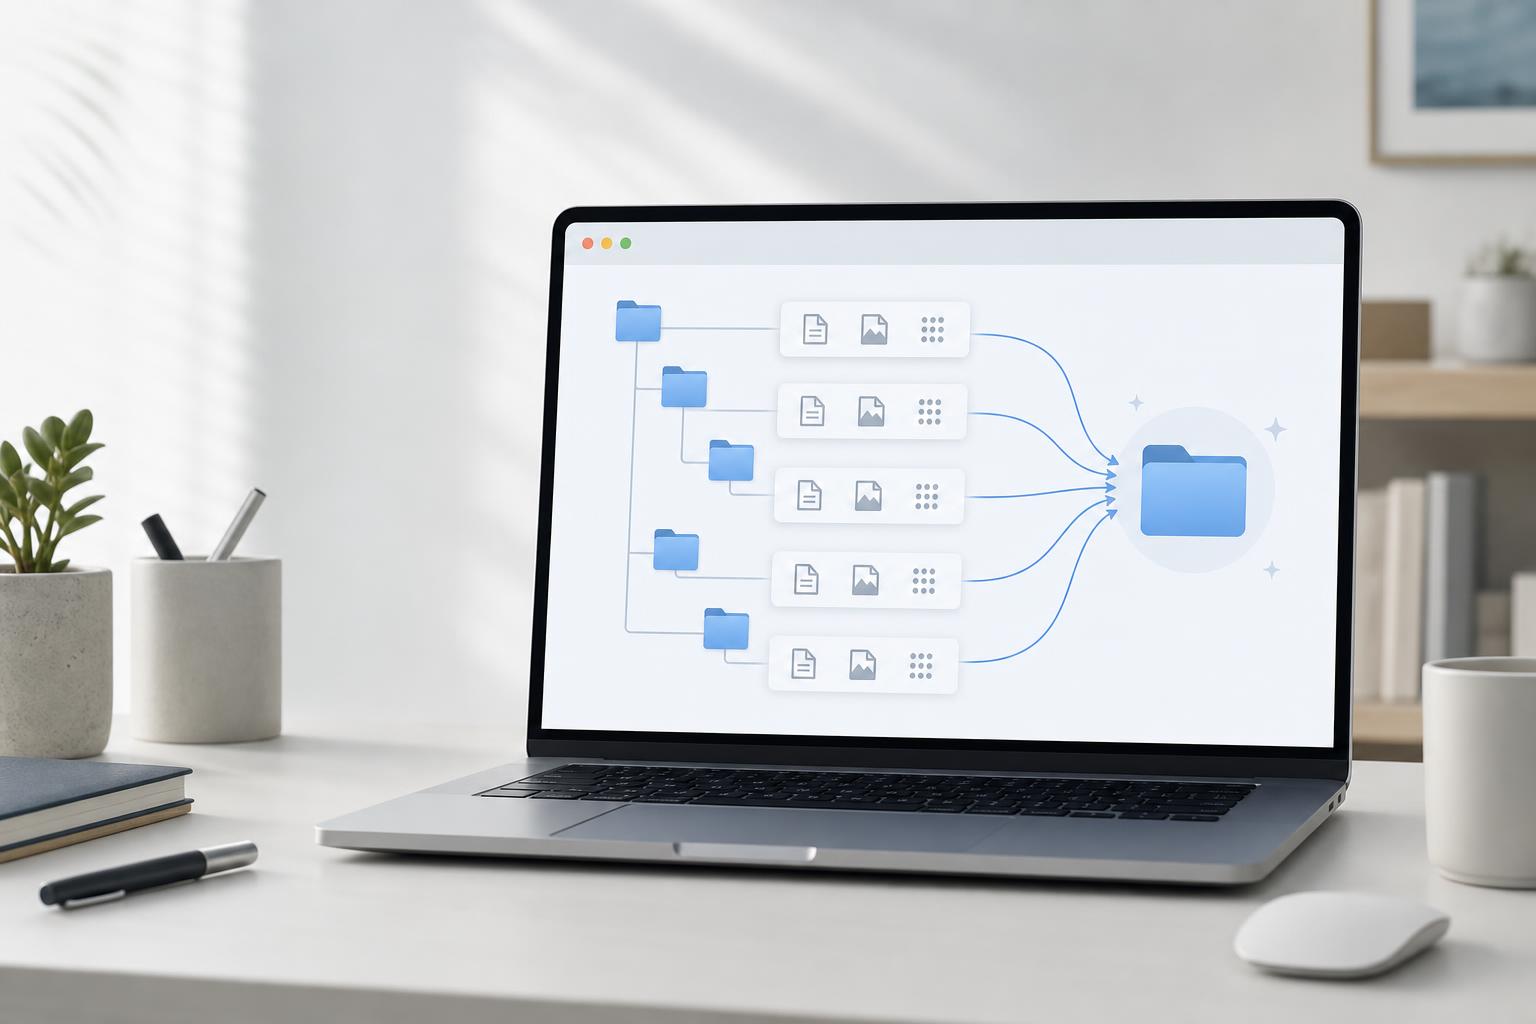
For example, you might have project materials, photos, downloads, and scanned documents divided into folders. At this time, if you do not need a folder structure and just want to collect files separately, you can use two methods.
The first way is to utilize the Finder search function. The second method is to use the find command in the terminal.
If you don’t have a lot of files, Finder is convenient. If you have a lot of files or need to do repetitive tasks, the Terminal method is faster.
First things first: copying and moving are different
Before you start, you need to distinguish the difference between copying and moving.
Copying is a method of leaving the original file as is and creating another identical file in a new location. Moving involves removing files from their original location and moving them to a new location.
If it’s important material, it’s best not to move it in the first place. Test by copying first, check the results, and move only when necessary.
Method 1. Collect only files through Finder search
The easiest way is to use Finder’s search function. You don’t need to know the commands, and you can work while visually checking the results.
Step 1. Open top level folder
Open Finder and navigate to the top-level folder containing your files.
For example, let’s say you have the following structure:
The goal is to collect only the files in one place, ignoring the subfolder structure under the project folder.
Step 2. Open Finder search bar
With the top-level folder open, press the following shortcut key:
Cmd(⌘) + F
Alternatively, you can click the search icon at the top right of Finder.
Step 3. Enter search term
Enter the search term below in the search box.
NOT kind:folder
The important thing here is to type NOT in capital letters.
This search term means “Show me only items, not folders.” This means that only files will appear in search results, and no subfolders will be included.
Step 4. Change search scope to current folder
At the bottom of the search bar, you have the option to select a search location.
If the default is This Mac, your entire Mac can be searched. This may cause unwanted files to be mixed into the results.
So you need to change the search scope to the name of the folder you are currently working in.
For example, if you’re searching within a project folder, select Project Folder, not This Mac.
Step 5. Select all files and copy or move them
If only files are displayed in the search results, select all with the following shortcut key.
Cmd(⌘) + A
To copy, follow these steps:
Cmd(⌘) + C → move-to-target-folder → Cmd(⌘) + V
To move, follow these steps:
Cmd(⌘) + C → move-to-target-folder → Cmd(⌘) + Option(⌥) + V
If you select Move, the files in their original location will disappear and be moved to the destination folder.
When the Finder method is suitable
The Finder method is suitable for the following situations:
When there are not many files
If you are not familiar with using commands
When you want to move a file while visually checking it
When you want to avoid accidentally making the wrong move
However, if you have more than a few thousand files, Finder may become slow. In this case, the terminal method is more stable.
Method 2. Copy only files using terminal command
If you have a lot of files or complex subfolders, you might want to use the Terminal.
In the terminal, you can only find files in subfolders with the find command. And you can copy or move the found files to any folder you want.
Step 1. Run terminal
Press the following shortcut key:
Cmd(⌘) + Space
When the Spotlight search box opens, type Terminal or Terminal and run it.
Step 2. Create a folder to collect files
We recommend that you first create a new folder to collect your files.
For example, you can create a folder called Collected Files on your desktop. To create it in the terminal, enter the following command:
mkdir ~/Desktop/collected-files
You can also create a new folder directly in Finder.
Command to copy files
To copy the original files to the destination folder while leaving them intact, use the following format:
find source-folder-path -type f -exec cp {} target-folder-path \;
For example, to copy all files in the Downloads/Data folder to the collected files folder on the desktop, enter the following:
find ~/Downloads/files -type f -exec cp {} ~/Desktop/collected-files \;
Here the last \; is not an unnecessary character. This is a required marker that tells you where the find -exec command ends. In zsh/bash on a Mac terminal, if you write a semicolon as is, the shell will interpret it first, so you must precede it with a backslash \; You must enter it like this:
This command will scan all subfolders under the Materials folder. Then, find only the files, excluding folders, and copy them to the collected files folder.
Command to move files
To remove a file from its original location and move it to a destination folder, use mv instead of cp.
find source-folder-path -type f -exec mv {} target-folder-path \;
An example can be seen like this.
find ~/Downloads/files -type f -exec mv {} ~/Desktop/collected-files \;
When you run this command, the files in the source folder will be moved to the destination folder. After the move, no files will remain inside the existing subfolders.
If entering the path is difficult, use drag and drop.
The most confusing part of the terminal is entering the folder path.
If you find it difficult to enter the path directly, drag and drop the folder from Finder into the terminal window. The folder path will then be automatically entered.
When moving files, the entire flow can be viewed like this:
find [drag-source-folder] -type f -exec mv {} [drag-target-folder] \;
The actual command will have a form similar to the following.
find /Users/username/Downloads/files -type f -exec mv {} /Users/username/Desktop/collected-files \;
Folder names with spaces are automatically processed when you drag and drop them, so they are safer than entering them manually.
Be careful if there are files with the same name
There may be files with the same name in different subfolders.
For example, let’s say you have the following files:
Aexample/report.pdf
Bexample/report.pdf
If you put two files together in the same folder, the file names will conflict. In this case, existing files may be overwritten depending on the command method.
If it is important material, test it by copying it first. It is safer to proceed after checking the results.
Safe copy command to avoid overwriting
If you do not want to overwrite files with the same name, you can use the cp -n option.
find source-folder-path -type f -exec cp -n {} target-folder-path \;
An example can be seen like this.
find ~/Downloads/files -type f -exec cp -n {} ~/Desktop/collected-files \;
The -n option prevents overwriting if a file with the same name already exists in the destination folder.
If you are doing this for the first time, this method is safer.
Which method should you choose: Finder or Terminal?
Situation Recommended method There are a small number of files. You are not familiar with Finder commands. You want to move Finder files while visually checking them. There are a lot of Finder files. Terminal. Subfolders are very complicated. Terminal. Repeated work is required. Terminal. You want to batch process quickly. Terminal.
If this is your first time trying it, we recommend checking it out using the Finder method. If you need to do a lot of work or the Finder is slow, you can use the terminal method.
Checklist before work
To collect files without mistakes, check the items below first.
Check that the original folder is correct.
Create a destination folder in advance to collect files.
Important material is tested by copy first.
Check to see if they can have the same file name.
Move commands are used after testing.
Just checking these five things can significantly reduce your risk of file loss.
organize
There are two main ways to ignore the subfolder structure on Mac and collect files in one place.
In Finder, you can easily pick out just the files by using the NOT kind:folder search. In the terminal, you can quickly process large files by using the find command and the -type f option.
If you are a beginner, I recommend the Finder method. If there are many files or repetitive tasks are required, the terminal method is recommended.
When dealing with important material, don’t move it right away; test it with a copy first. In particular, since files with the same name may exist in multiple folders, it is recommended to check whether they will be overwritten.
Related Reading
Continue with these related Thinknote English articles in the Productivity & Tech Tips cluster.
The Korean source explains Hermes Agent Deliverable Mode for beginners. Its central idea is simple: when an AI produces a file, report, audio, image, CSV, PDF, or other output, the user should be able to receive it directly inside the chat interface. Deliverable Mode reduces the final gap between background AI work and usable results.
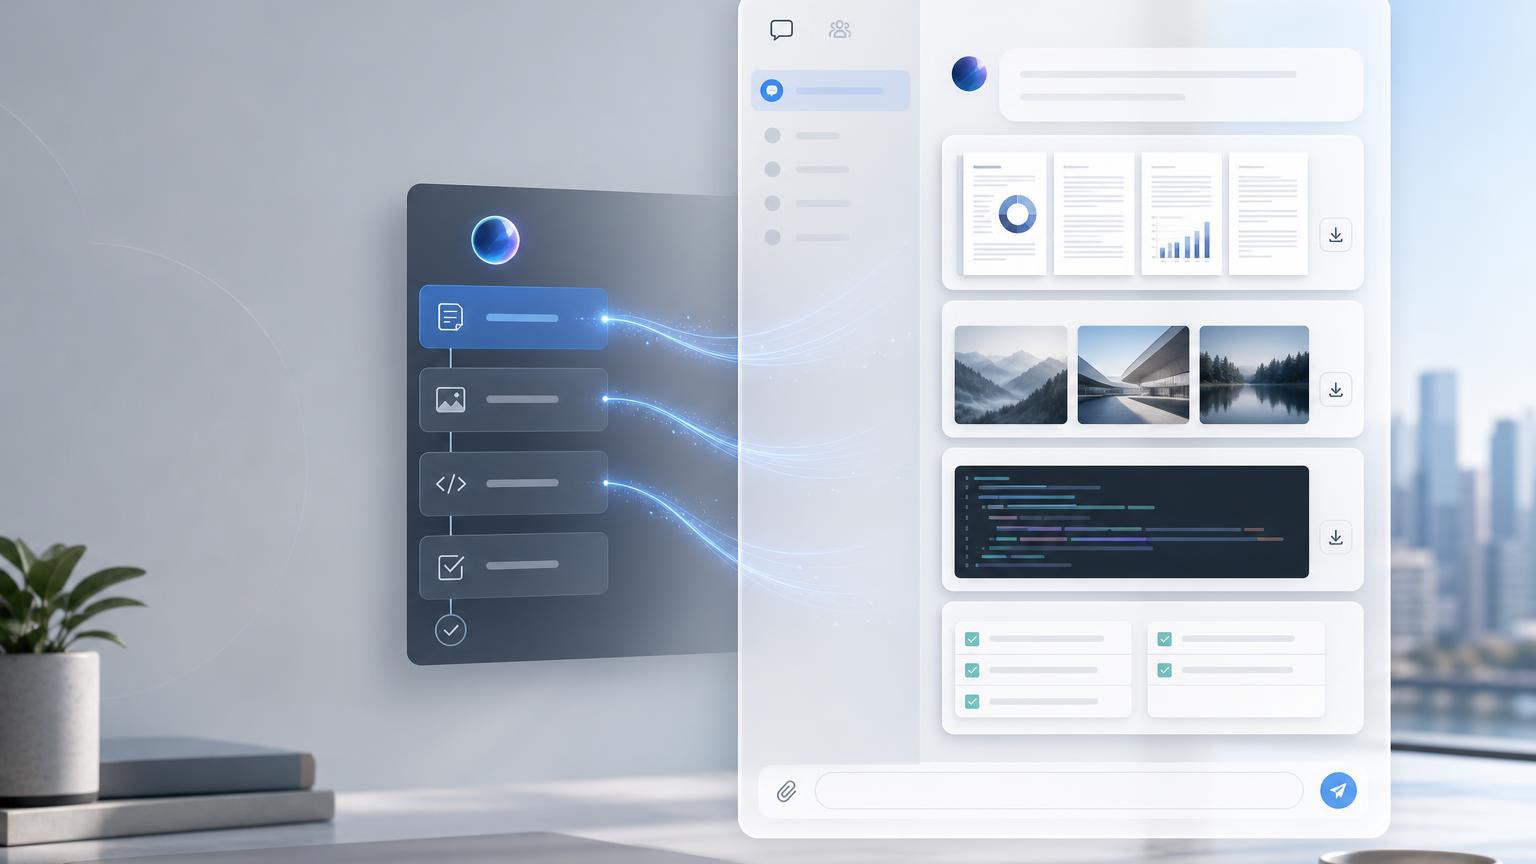
AI 에이전트가 문서, 이미지, 코드 등 산출물을 채팅으로 전달하는 과정을 시각화한 이미지
Deliverable Mode is a way for Hermes Agent to send completed outputs into the chat as visible deliverables. Instead of telling the user that a file exists somewhere, the agent can provide a rich preview or downloadable attachment depending on the platform.
This is especially useful because many AI tasks are not just answers. They produce artifacts: reports, data tables, images, audio, video, HTML pages, PDFs, and summaries.
Three Beginner Concepts
First, a deliverable is a file or output created by AI. Second, the gateway is like a delivery worker between the messenger and the AI environment. Third, each platform displays files differently.
These concepts help beginners understand why the same AI output may appear as an inline preview in one chat and as a link or attachment in another. Deliverable Mode handles the “last meter” of delivery.
What Files Can Be Sent
Deliverables may include images, PDFs, CSV files, HTML pages, audio, video, diagrams, presentations, and other user-facing results. The key is that the file should be meaningful to the user, not merely an internal log.
Developer files, private paths, code scratch files, and raw logs may require different handling. The source emphasizes that not every file should automatically be pushed to the user.
How It Works in Practice
A user asks for an output. Hermes Agent performs the task, creates the file, checks whether it is safe and useful to deliver, and then sends the file through the gateway so that the chat can display it.
This flow is important for background jobs. If an analysis takes time, Deliverable Mode can notify the user when the final report or media is ready rather than forcing the user to search the filesystem.
When It Is Especially Useful
Data analysis is one example: the user may want a CSV, chart, and written report. Automated reporting is another: the agent can compile information into a PDF or HTML page.
Presentation drafts, document templates, generated images, audio briefings, and completed background tasks also benefit because the result becomes immediately visible in the conversation.
Setup Points to Remember
Configuration should define which file types can be delivered, how previews are rendered, and how platform-specific behavior works. The user experience should be clear: the recipient should know what the file is and why it was sent.
The source also reminds readers that delivery is not the same as generation. A system can create a file but still fail at giving it to the user conveniently.
MCP and Extensibility
When used with MCP, Deliverable Mode can become more flexible because tools, resources, and external systems can be connected. MCP can expand what the agent can access and produce.
But expanded capability requires stronger control. More integrations mean more attention to permissions, file types, user consent, and traceability.
Security and Practical Cautions
Deliverables should not expose private local paths, secrets, unnecessary logs, or sensitive internal files. The agent should deliver user-facing outputs, not implementation leftovers.
Teams should define review rules for sensitive documents, restrict automatic attachment of risky file types, and ensure that platform rendering does not accidentally expose data.
Artifacts Versus Deliverable Mode
Some AI tools have Artifacts that show generated content in a side panel. Deliverable Mode is broader in spirit: it focuses on delivering completed outputs from the AI work environment into the user’s chat.
The conclusion is that Deliverable Mode reduces the last-meter friction of AI automation. It lets users receive the actual result, not just a message about the result.
Practical Implications for Readers
For readers using this article as a working reference, the practical lesson is to move from abstract interest to a concrete audit. Identify where the topic touches your own work, which assumptions are already outdated, what data or tools are missing, and which decision could be tested on a small scale before a larger commitment. Write that test down, assign an owner, and review evidence rather than impressions.
The Korean source repeatedly treats technology, strategy, and human judgment together. That is why the safest next step is not blind adoption or passive worry. It is disciplined experimentation: define the problem, compare alternatives, verify results, protect sensitive information, and keep the human purpose visible while the tool or trend evolves.
Related Reading
Continue with these related Thinknote English articles in the Digital Transformation cluster.
This article explains a digital transformation, platform, market-structure, or technology-adoption topic with Korea-specific context and global implications.
How should I use this guide?
Use it to understand market signals and strategic patterns. Combine it with current market data before making business or investment decisions.
This fuller English adaptation follows the Korean source on AI agents as personal assistants. The article asks a practical question: when AI can schedule, compare, book, pay, and communicate, how much trust should we give it?
AI personal assistants can reduce work, but trust depends on boundaries and verification.
A normal chatbot mainly answers inside a conversation. An AI agent can pursue a goal through tools: search the web, read a calendar, draft an email, compare prices, fill a form, or prepare a reservation. The difference is not intelligence alone; it is execution authority.
The Korean source frames this as the arrival of a “perfect assistant” that may feel helpful precisely because it removes small burdens. But every removed burden also shifts responsibility. If the assistant acts, the user must decide where the boundary of trust should be.
Scenes Where Work Decreases and Results Increase
The article describes everyday situations where agents become useful: organizing schedules, summarizing documents, preparing travel options, comparing products, writing replies, collecting meeting notes, or managing routine requests. These tasks do not always require deep creativity, but they consume attention.
For individuals, the immediate benefit is less context switching. For organizations, the benefit is workflow compression: a task that passed through several apps and people can become a supervised agent run with a clear output.
AI as a Personal Assistant: What Can We Delegate?
Can we delegate payments or reservations?
The source article’s answer is cautious. Low-risk preparation can be delegated earlier than final execution. An agent can compare hotels, draft a reservation request, or prepare a payment screen. But actually paying money, accepting terms, signing contracts, deleting data, or sending sensitive messages should require explicit confirmation.
Delegation should be layered. Start with information gathering, then drafting, then controlled actions, and only later allow limited autonomous execution for low-risk repeated tasks. Trust should be earned through logs and successful experience, not granted all at once.
What improves first for individuals?
The first improvement is usually not a dramatic replacement of work. It is the removal of small coordination costs: comparing options, gathering links, turning a vague plan into a checklist, and preparing a message that the user can approve.
The Biggest Risk Comes From Execution Authority
AI agents can handle repeated tasks when permissions and goals are clear.
A wrong answer is annoying. A wrong action can be costly. If an agent books the wrong flight, sends a message to the wrong person, buys the wrong product, or exposes private data, the damage is real. This is why execution authority is the central risk.
The article emphasizes permissions. Agents should not have unlimited access to email, banking, company systems, or customer records. They should operate under least privilege, with approval steps for irreversible actions.
The more connected the agent is, the narrower its permissions should be
A disconnected assistant can mostly make textual mistakes. A connected assistant can create operational mistakes. Therefore the safest design is paradoxical: the more tools an agent can use, the more specific and limited each permission should become.
Human Judgment Becomes More Important
AI agents may reduce repetitive labor, but they increase the value of human judgment. Users must define goals, choose tradeoffs, recognize suspicious outputs, and decide whether an action matches their values. The person who delegates poorly may simply automate mistakes.
In organizations, this means policy is not optional. Teams need rules about who can authorize agents, what data can be accessed, how logs are stored, and which actions require human approval. AI adoption becomes a management issue, not only a tool issue.
A Practical Checklist for Workers
The biggest risk appears when AI agents receive execution authority.
Classify tasks into read-only, draft-only, confirm-before-action, and autonomous-low-risk categories.
Keep payments, legal decisions, HR decisions, medical issues, and public communication under human approval.
Use separate accounts or limited tokens for agent access where possible.
Review logs regularly to learn where the agent fails.
Do not delegate a task you cannot explain or evaluate.
What to Watch in the Original Video
The source article points readers to moments where AI assistants move from impressive conversation to actual action. The most important viewing point is not the demo itself, but the hidden assumptions: what data the agent used, what permissions it had, where confirmation occurred, and how errors would be corrected.
Organizations need policy before scale
A company should decide in advance which departments can use agents, what records may be accessed, who approves external actions, and how incidents will be handled. If these rules are created only after a mistake, the organization has already delegated too much.
Personal users need boundaries too
Individuals should create their own rules: no automatic payment without confirmation, no sensitive documents in unknown tools, no medical or legal decisions without expert review, and no deletion or public posting without a final human check.
Trust grows through repeated supervised use
The article’s most practical implication is that trust should be built through repeated supervised use. Let the agent prepare, compare, and draft; inspect the result; then slowly expand the scope only where the agent proves reliable.
Conclusion: Trust Must Be Designed
Human judgment becomes more important when AI agents act on behalf of people.
The age of AI personal assistants will not be decided only by model capability. It will be decided by trust design. The best assistants will make work easier while keeping the user in control of meaningful decisions. The safest approach is gradual delegation, clear permissions, and visible review.
Related Reading
Continue with these related Thinknote English articles in the Digital Transformation cluster.
This article explains a digital transformation, platform, market-structure, or technology-adoption topic with Korea-specific context and global implications.
How should I use this guide?
Use it to understand market signals and strategic patterns. Combine it with current market data before making business or investment decisions.