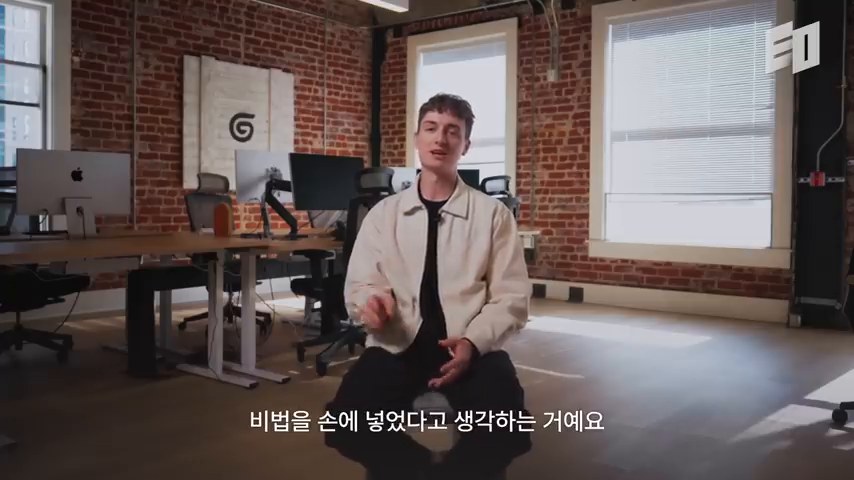
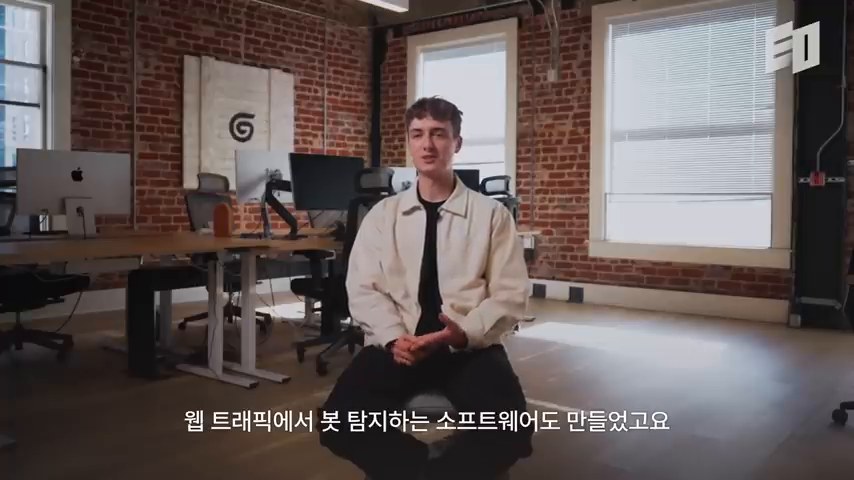
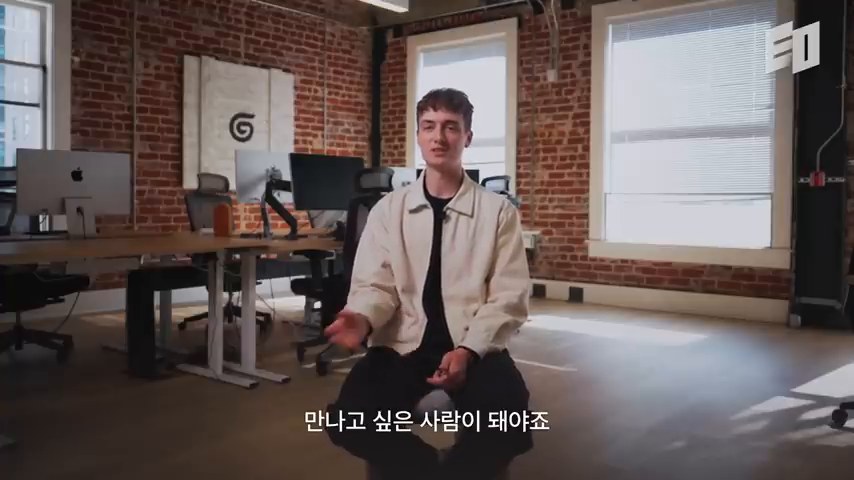
AI 자동화 이야기는 요즘 너무 쉽게 부풀려진다. “AI 에이전트 50개로 회사를 돌린다”, “하루 한 시간만 일한다”, “댓글을 남기면 돈 버는 자동화 레시피를 준다” 같은 문장이 피드에 계속 뜬다.
EO Korea가 공개한 Gumloop 창업자 Max Brodeur-Urbas 인터뷰는 그 흐름에 정면으로 브레이크를 건다. 영상의 주인공은 AI 자동화 플랫폼 회사를 만들고, 대규모 투자를 유치한 창업자다. 그런데 그가 반복해서 말하는 핵심은 의외로 차갑다. AI는 이해를 건너뛰는 지름길이 아니라, 이미 이해한 일을 더 빠르게 실행하게 만드는 도구라는 것이다.
EO Korea 영상 캡처. 이 글은 영상 내용을 그대로 요약하기보다, Gumloop 사례와 외부 자료를 함께 읽어 AI 에이전트 자동화의 현실 조건을 분석한다.
AI 에이전트 자동화의 문제는 ‘에이전트 수’가 아니다
AI 에이전트 자동화는 에이전트 수보다 업무 흐름과 판단 기준을 먼저 정리할 때 성과가 난다.
영상 초반 Max는 “AI 에이전트가 회사를 다 운영한다”는 식의 주장을 거의 마케팅으로 본다. 그가 비판하는 지점은 AI 자체가 아니다. 문제는 자동화가 마치 이해와 시행착오를 생략해 주는 것처럼 팔리는 방식이다.
Gumloop의 공식 사이트 문구도 이 관점과 맞닿아 있다. “업무를 이해하는 것이 자동화의 유일한 전제여야 한다”는 메시지를 전면에 내세운다. 즉, 핵심은 개발자가 아닌 사람도 자동화할 수 있게 만드는 것이다. 하지만 그 사람은 최소한 자신이 자동화하려는 업무를 알아야 한다.
이 차이가 중요하다. AI 에이전트 자동화는 “무엇이든 대신 해주는 비서”에 가깝지 않다. 오히려 여러 도구, 데이터, 승인 절차, 반복 작업을 하나의 흐름으로 묶는 실행 인프라에 가깝다.
Gumloop 사례가 보여주는 새로운 자동화 시장
기업 AI 자동화 시장의 핵심은 모델 하나가 아니라 여러 데이터와 도구를 운영 가능한 흐름으로 묶는 데 있다.
YC 회사 페이지는 Gumloop을 “AI로 반복적이고 복잡한 워크플로를 끝까지 자동화하는 플랫폼”으로 설명한다. 사용자는 모듈을 드래그 앤 드롭 방식으로 연결해 자동화를 만든다. 코드 작성보다 빠르게 테스트하고 운영할 수 있게 만드는 것이 목표다.
EO 기사와 TechCrunch, BetaKit 보도도 비슷한 흐름을 보여준다. Gumloop은 2026년 3월 Benchmark가 주도한 5,000만 달러 규모의 Series B 투자를 유치했고, 누적 조달액은 약 7,000만 달러 수준으로 소개된다. 이 숫자보다 더 중요한 것은 투자자들이 본 시장의 방향이다. 기업 안의 직원이 직접 AI 에이전트를 만들고, 반복 업무를 운영 가능한 형태로 묶는 시장이다.
Gumloop이 흥미로운 이유는 “모델 성능 경쟁”만을 이야기하지 않기 때문이다. 공식 사이트는 데이터 분석, 지원 티켓 분류, CRM 관리, 회의 준비, 통화 분석 같은 구체적인 업무 에이전트를 전면에 배치한다. 추상적인 AGI보다 실제 부서의 반복 업무가 앞에 나온다.
클릭 한 번 자동화가 실패하는 4가지 이유
AI 에이전트 자동화가 실패하는 이유는 대개 기술 부족 하나로 끝나지 않는다. 영상과 외부 자료를 종합하면 네 가지 조건이 보인다.
1. 업무를 모르면 자동화할 기준도 없다
AI가 결과를 내더라도 그 결과가 맞는지 판단할 사람이 필요하다. 영업 리드 분류, 고객 문의 triage, 보고서 작성, 회의 준비는 모두 조직마다 기준이 다르다. 업무 맥락을 모르면 자동화는 빠른 실행이 아니라 빠른 오류가 된다.
2. 데이터 연결 없이는 에이전트가 빈손이다
기업 자동화는 챗봇 하나로 끝나지 않는다. CRM, 문서, 이메일, 데이터베이스, 티켓 시스템, 캘린더가 연결되어야 한다. 그래서 Gumloop 같은 플랫폼은 모델보다 연결과 실행 흐름을 강조한다.
3. 반복 실행에는 통제와 관찰이 필요하다
매일 돌아가는 자동화에는 로그, 승인, 실패 알림처럼 사람이 관찰하고 멈출 수 있는 장치가 필요하다.
한 번 성공한 프롬프트와 매일 돌아가는 업무 자동화는 다르다. 반복 작업에는 실패 알림, 승인 단계, 로그, 권한 관리가 필요하다. AI 에이전트가 많아질수록 “누가 무엇을 했는지”를 볼 수 있어야 한다.
4. 자동화는 학습을 대신하지 않는다
Max는 AI를 학습 도구로 쓰는 것과 이해를 건너뛰는 것을 구분한다. AI가 설명하고 도와줄 수는 있다. 하지만 사용자가 왜 그런 결과가 나왔는지 전혀 모른다면, 자동화는 실력의 확장이 아니라 의존의 확대가 된다.
비개발자 자동화의 진짜 의미
Gumloop이 말하는 비개발자 자동화는 “아무나 아무렇게나 만든다”가 아니다. 더 정확히 말하면 업무 담당자가 엔지니어에게 모든 요구사항을 번역해 넘기지 않아도 된다는 뜻이다.
마케터는 캠페인 리드 흐름을 안다. 영업 담당자는 CRM 업데이트의 귀찮은 지점을 안다. HR 담당자는 반복되는 후보자 커뮤니케이션을 안다. 운영 담당자는 예외 처리가 어디서 터지는지 안다. 이들이 자동화의 설계자가 될 수 있다면, 기업의 AI 도입 속도는 확실히 빨라진다.
다만 여기에도 조건이 있다. 조직은 자동화 권한을 어디까지 줄지 정해야 한다. 어떤 데이터에 접근할 수 있는지, 어떤 작업은 승인 후 실행해야 하는지, 실패했을 때 누가 책임지는지도 정해야 한다. AI 에이전트 도입은 도구 구매가 아니라 운영 방식의 재설계다.
AI 업무 자동화를 시작할 때 확인할 체크리스트
작은 자동화라도 반복 업무, 성공 기준, 데이터 연결, 안전 장치, 피드백 루프를 먼저 확인해야 한다.
AI 에이전트 자동화를 도입하려는 개인이나 조직이라면, 먼저 다음 질문을 던지는 편이 낫다.
반복되는 업무가 실제로 존재하는가?
그 업무의 성공 기준을 담당자가 말로 설명할 수 있는가?
필요한 데이터와 도구가 연결 가능한가?
실패했을 때 멈추거나 검토할 장치가 있는가?
자동화 결과를 개선할 피드백 루프가 있는가?
이 다섯 가지가 없다면 에이전트를 늘리는 일은 큰 의미가 없다. 반대로 이 조건이 있다면 작은 자동화 하나도 조직의 일하는 방식을 바꿀 수 있다.
AI를 잘 쓰는 사람과 그렇지 못한 사람의 차이는 어디서 생길까. 흔히 “좋은 프롬프트를 아느냐”라고 답하지만, 실제로는 조금 다르다. 핵심은 프롬프트 문장 몇 개가 아니라, 내가 원하는 것을 맥락과 기준까지 포함해 말할 수 있는가에 있다.
일당백 영상 「언어로 섬세하게 표현되는 인간의 지능! AI 프롬프트 엔지니어링의 시작」은 이 지점을 잘 보여준다. 영상의 출발점은 책 《지적 대화를 위한 AI 언어 수업》이지만, 단순한 책 소개라기보다 AI 시대의 언어 감각을 묻는 대화에 가깝다. 특히 한국어 사용자에게는 더 중요한 질문이 있다. 한국어처럼 생략과 뉘앙스가 많은 언어로 AI와 대화할 때, 우리는 무엇을 더 분명하게 말해야 할까.
“이거 알아서 정리해 줘.” “너무 길게 쓰지 마.” “딱딱한 말투 쓰지 마.” “그림 그리지 말고 프롬프트만 보여 줘.”
사람끼리는 이 정도 말로도 어느 정도 통한다. 앞뒤 상황, 표정, 이전 대화, 조직 문화, 말투까지 함께 읽기 때문이다. 그런데 AI는 사용자가 제공하지 않은 맥락을 추측한다. 추측이 맞으면 편리하지만, 틀리면 결과는 엉뚱해진다.
OpenAI와 Anthropic의 프롬프트 가이드도 공통적으로 “명확한 지시, 충분한 맥락, 원하는 출력 형식”을 강조한다. 결국 좋은 프롬프트란 마법 문장이 아니라 AI가 추측해야 할 부분을 줄이는 문장이다.
여기서 중요한 차이가 생긴다. AI를 잘 쓰는 사람은 질문을 길게 쓰는 사람이 아니다. 맥락을 구조화하는 사람이다. 목적, 독자, 제약, 예시, 금지보다 선호, 출력 형식, 검증 기준을 함께 준다.
한국어는 왜 AI에게 더 까다로운 언어인가
한국어의 생략과 뉘앙스는 AI에게 더 분명한 맥락 설명을 요구한다.
영상에서 가장 흥미로운 대목은 한국어의 고맥락성이다. 한국어는 주어와 목적어를 자주 생략한다. 조사 하나로 초점이 바뀐다. 높임말은 표면적으로는 잘 처리되지만, 비꼼이나 반어는 전혀 다른 문제다.
예를 들어 “철수는 학교에 갔다”와 “철수가 학교에 갔다”는 비슷해 보이지만 초점이 다르다. “괜찮습니다”도 정말 괜찮다는 뜻일 수 있고, 거절일 수도 있다. “시원섭섭하다”는 시원함과 섭섭함의 비율이 상황마다 다르다.
사람은 이 차이를 상황으로 읽는다. AI는 대부분 텍스트로만 받는다. 그래서 한국어 사용자는 AI에게 더 많은 맥락을 제공해야 한다. “알아서 해 줘”는 편하지만, AI 입장에서는 정보가 부족한 명령이다.
이 문제는 번역에서도 드러난다. Anthropic의 해석가능성 연구는 대형 언어모델이 여러 언어 입력을 내부적으로 공통 개념 공간과 연결해 처리할 수 있음을 보여준다. 다만 이것이 곧 한국어의 뉘앙스까지 완벽히 보존한다는 뜻은 아니다. 언어 간 이동 과정에서 정서, 생략, 반어, 화자의 의도가 손실될 수 있다.
프롬프트 엔지니어링은 ‘질문 잘하기’가 아니라 시스템을 다루는 일이다
조직에서 프롬프트 엔지니어링은 질문법을 넘어 품질과 운영 설계의 문제가 된다.
영상에서는 프롬프트와 프롬프트 엔지니어링을 구분한다. 일상 사용자는 AI와 대화하듯 질문하면 된다. 그러나 업무 시스템, 고객 서비스, 자동화, 콘텐츠 생산 파이프라인에서는 이야기가 달라진다.
프롬프트 엔지니어링은 단순히 “예쁘게 질문하는 기술”이 아니다. 모델마다 답변 성향이 어떻게 다른지 본다. 오답이 왜 나왔는지 분석한다. 비용을 줄이는 구조를 설계한다. 여러 단계의 작업을 안정적으로 연결한다. 결과의 일관성을 조절한다.
예를 들어 글쓰기는 창의성이 필요하지만, 고객 안내 문구나 법률·정책 안내는 매번 달라지면 곤란하다. 이때는 temperature 같은 생성 설정, 예시 기반 출력, 검증 단계, 재시도 조건이 필요하다.
즉 프롬프트 엔지니어링은 말의 기술이면서 동시에 운영의 기술이다. 개인의 질문법에서 출발하지만, 조직에서는 품질관리와 비용관리의 문제로 확장된다.
“하지 마”보다 “이렇게 해”가 더 강하다
AI에게는 금지보다 원하는 방향과 기준을 구체적으로 알려주는 편이 안정적이다.
영상에서 반복되는 실전 팁 중 하나는 부정문보다 긍정문을 쓰라는 것이다. “전문 용어 쓰지 마”보다 “일상적인 단어를 사용해”가 낫다. “길게 쓰지 마”보다 “문단당 3문장 이내로 써”가 낫다. “목록식으로 쓰지 마”보다 “짧은 설명문 형태로 써”가 더 분명하다.
AI는 사용자의 부정 표현을 언제나 안정적으로 처리하지 못한다. 특히 이미지·영상 모델이나 멀티모달 모델에서는 부정어가 원하는 결과를 흐릴 수 있다. 텍스트 모델에서도 “하지 말라”는 말이 오히려 금지한 요소를 문맥 중심에 올려놓는 경우가 있다.
업무에서는 다음처럼 바꾸면 좋다.
흔한 요청
더 나은 요청
너무 어렵게 쓰지 마
중학생도 이해할 수 있는 일상어로 써
길게 쓰지 마
600자 안에서 핵심 3가지만 설명해
AI 티 나게 쓰지 마
짧은 문장과 긴 문장을 섞고, 반복 표현을 줄여
알아서 정리해 줘
배경, 핵심 쟁점, 실행 과제 순서로 정리해
주관적 의견 넣지 마
확인된 사실과 해석을 구분해서 써
이 차이는 작아 보이지만 결과는 크게 달라진다. AI가 추측할 공간을 줄이면, 사용자는 수정 시간을 줄인다.
AI 생산성 논쟁의 핵심은 ‘얼마나 썼나’가 아니라 ‘무엇을 맡겼나’다
AI 생산성은 무엇을 맡기고 무엇을 사람이 판단할지 나누는 능력에서 갈린다.
AI가 실제 생산성을 높이는지에 대해서는 의견이 갈린다. 다만 이미 일부 연구에서는 구체적 효과가 관찰됐다. NBER의 「Generative AI at Work」는 고객지원 업무에서 생성형 AI 도구가 평균 생산성을 높였고, 특히 경험이 적은 직원에게 더 큰 효과가 있었다고 분석했다.
반대로 ILO의 생성형 AI와 일자리 분석은 많은 직무가 완전히 대체되기보다 일부 과업이 자동화·보조될 가능성이 크다고 본다. 이 관점은 영상의 결론과도 맞닿아 있다. AI가 모든 일을 없애기보다, 일의 구성 요소를 다시 나눈다는 것이다.
문제는 “AI를 많이 쓰는가”가 아니다. 무엇을 맡기고, 무엇을 사람이 판단할지 정하는 능력이다. 단순 요약, 초안, 형식 변환, 반복 응답은 AI에 맡기기 쉽다. 그러나 고객의 불안한 마음을 읽는 일, 현장 맥락을 판단하는 일, 말하지 않은 요구를 조심스럽게 확인하는 일은 아직 사람의 몫이 크다.
한국어 사용자를 위한 5가지 프롬프트 원칙
1. 생략한 주어와 목적어를 되살린다
“정리해 줘”라고 쓰기 전에 무엇을, 누구에게, 어떤 목적으로 정리하는지 적는다. 한국어 대화에서는 생략이 자연스럽지만 AI에게는 빈칸이 된다.
2. 부정문을 긍정문으로 바꾼다
“딱딱하게 쓰지 마”보다 “친근하지만 과장 없는 말투로 써”라고 말한다. 금지보다 목표를 주는 편이 안정적이다.
3. 결과물의 형식을 먼저 정한다
표, 목록, 문단, 보고서, 블로그, 이메일, 발표 대본은 서로 다른 출력이다. 형식을 정하지 않으면 AI는 평균적인 답을 낸다.
4. 맥락과 기준을 분리해서 준다
배경은 배경대로, 요구사항은 요구사항대로, 검증 기준은 검증 기준대로 나눈다. 한 문장에 모두 섞으면 AI도 중요도를 놓친다.
5. 한 번에 끝내려 하지 않는다
좋은 AI 활용은 싱글 턴보다 멀티 턴에 가깝다. 초안을 받고, 기준을 보강하고, 다시 고치고, 마지막에 검증한다. 이것은 명령이 아니라 협력이다.
결국 프롬프트는 기술이 아니라 대화 습관이다
UNESCO의 AI 역량 프레임워크는 AI 시대에 필요한 능력을 단순한 도구 사용이 아니라 인간 중심적 사고, 윤리, 비판적 판단, 실제 활용 역량으로 본다. 프롬프트도 마찬가지다. 단축키처럼 외울 문제가 아니다.
AI와 대화한다는 것은 내 생각을 더 선명하게 만드는 과정이다. 내가 무엇을 원하는지 모르면 AI도 모른다. 내가 기준을 주지 않으면 AI는 평균값을 낸다. 내가 맥락을 생략하면 AI는 추측한다.
그래서 영상의 핵심은 “프롬프트를 잘 쓰자”보다 깊다. AI 시대의 경쟁력은 기술을 많이 아는 사람이 아니라, 자신의 언어를 점검하고 맥락을 설계할 수 있는 사람에게 생긴다.
조금 과장해 말하면, 앞으로의 AI 리터러시는 코딩보다 먼저 언어의 문제일 수 있다. 특히 한국어 사용자에게는 더 그렇다. 우리가 당연하게 생략했던 말, 분위기로 넘겼던 말, “알아서”라고 맡겼던 말이 AI 앞에서는 모두 다시 문장이 되어야 한다.
여름휴가를 고를 때 제일 어려운 건 “좋은 곳”을 찾는 일이 아닙니다. 문제는 내 휴가 방식에 맞는 곳을 고르는 일입니다. 누군가는 바다를 원하고, 누군가는 더위를 피할 숲을 찾습니다. 아이와 함께라면 이동 거리와 숙소가 먼저이고, 부모님과 간다면 무리 없는 동선이 더 중요합니다.
2026년 국내여행 흐름도 이 방향으로 움직이고 있습니다. 한국관광공사는 2026 관광 트렌드로 기술과 감성, 실속과 프리미엄, 유명 관광지와 로컬 일상이 함께 커지는 “이원적 관광”을 제시했습니다. 호텔스닷컴의 2026 여름 트렌드 자료도 국내 여행 관심 증가와 신중한 소비 흐름을 함께 보여줍니다.
그래서 이번 글은 단순히 “예쁜 곳 7곳”을 나열하지 않습니다. 2026년 여름휴가 국내 여행지를 트렌드, 추천 대상, 장점, 단점까지 같이 비교합니다. 성수기에는 작은 단점 하나가 여행 만족도를 크게 바꾸기 때문입니다.
2026년 여름휴가 트렌드, 여행지를 고르는 기준이 달라졌다
2026년 여름 국내여행은 크게 다섯 가지 흐름으로 볼 수 있습니다.
첫째, 해외 대신 국내를 고르는 사람이 늘고 있습니다. 항공권과 환율 부담이 남아 있고, 짧은 휴가를 효율적으로 쓰려는 수요가 큽니다. 대신 국내에서도 숙소와 식비를 더 꼼꼼하게 따지는 분위기입니다.
둘째, “더 유명한 곳”보다 “내가 편한 곳”을 찾는 흐름이 강해졌습니다. 사람이 몰리는 대표 해수욕장보다 조용한 해변, 대형 리조트보다 작은 로컬 숙소, 유명 맛집보다 동네 식당을 찾는 식입니다.
셋째, 폭염과 비 예보가 여행 선택에 더 큰 변수가 됐습니다. 바다만 보고 떠나기보다 숲, 계곡, 실내 콘텐츠, 야간 관광을 함께 고려해야 합니다.
넷째, AI와 지도 앱을 활용해 여행 일정을 짧게 짜는 사람이 늘었습니다. 하지만 실제 만족도는 여전히 주차, 숙소 위치, 대기 시간, 날씨 대응에서 갈립니다.
다섯째, 가족·세대 여행이 다시 중요해지고 있습니다. 아이, 부모님, 반려동물, 친구 모임처럼 동행자가 다양할수록 “명소의 화려함”보다 “무리 없는 동선”이 중요합니다.
한눈에 보는 2026 여름휴가 국내 여행지 7곳
여행지
잘 맞는 여행자
핵심 장점
주의할 점
강릉·속초
바다와 카페, 초보 운전 여행
접근성, 숙소 선택지, 먹거리
성수기 교통·주차 혼잡
제주 동부·서귀포
긴 휴가, 자연 풍경, 가족 여행
섬 여행 완성도, 바다·숲·오름
항공·렌터카·숙소 비용 변동
통영·거제
섬, 케이블카, 해안 드라이브
남해 풍경, 섬 투어, 여유
이동 시간이 길고 배편 변수 있음
여수·순천
야경, 정원, 부모님 여행
밤바다, 국가정원, 음식
인기 시간대 혼잡
평창·인제
폭염 회피, 숲·계곡·액티비티
시원한 고지대, 래프팅·숲길
비 예보 시 야외 일정 조정 필요
제천·단양
호수, 패러글라이딩, 커플 여행
청풍호·도담삼봉·액티비티
자차 이동이 편함
부산 영도·기장
도심형 바다, 짧은 휴가
대중교통, 카페, 야간 콘텐츠
유명지 집중 방문 시 피로감 큼
1. 강릉·속초: 실패 확률이 낮은 동해안 정석 코스
강릉과 속초는 여름 국내여행의 가장 안전한 선택지에 가깝습니다. 바다, 카페, 시장, 숙소, 맛집이 한 축으로 연결됩니다. 서울·수도권에서 이동하기도 비교적 쉽습니다.
2026년 트렌드로 보면 강릉·속초는 “실속형 국내여행”과 잘 맞습니다. 해외여행처럼 큰 준비가 필요하지 않고, 1박 2일이나 2박 3일로도 충분히 휴가 기분을 낼 수 있습니다.
장점은 선택지가 많다는 점입니다. 해변에서 쉬어도 되고, 카페와 시장 중심으로 가볍게 움직여도 됩니다. 비가 오면 실내 카페, 전시, 맛집 코스로 바꾸기도 쉽습니다.
단점은 너무 많은 사람이 같은 이유로 이곳을 고른다는 점입니다. 성수기 주말에는 숙소 가격이 오르고, 해변 근처 주차가 까다롭습니다. 강릉과 속초를 하루에 모두 보려는 일정도 피곤할 수 있습니다.
추천 방식은 단순합니다. 바다 중심이면 강릉, 설악산과 시장까지 보고 싶다면 속초에 무게를 두세요. 둘을 묶는다면 2박 이상이 좋습니다.
2. 제주 동부·서귀포: 긴 휴가를 제대로 쓰고 싶을 때
제주는 여전히 국내 여름휴가의 큰 후보입니다. 다만 2026년에는 “무조건 제주”보다 “제주를 어떻게 쓸 것인가”가 더 중요합니다. 항공권, 렌터카, 숙소 가격이 일정과 예약 시점에 따라 크게 달라지기 때문입니다.
제주 동부는 성산, 우도, 표선, 김녕처럼 바다와 오름을 함께 즐기기 좋습니다. 서귀포는 폭포, 숲길, 해안 드라이브, 가족형 숙소 선택지가 강점입니다.
장점은 여행 완성도입니다. 바다, 숲, 카페, 시장, 액티비티를 한 지역 안에서 조합할 수 있습니다. 아이와 함께 가도 코스를 만들기 쉽고, 부모님과 함께 가도 무리 없는 일정이 가능합니다.
단점은 비용과 날씨입니다. 여름 제주는 비와 바람의 변수가 있습니다. 동쪽에서 서쪽까지 욕심내면 이동 피로가 커집니다.
추천 방식은 한 권역에 머무는 것입니다. 동부 2박, 서귀포 2박처럼 숙소를 나누거나, 아예 한 지역만 깊게 보는 편이 만족도가 높습니다.
3. 통영·거제: 남해의 섬 분위기를 제대로 느끼는 여행
통영과 거제는 바다 풍경이 동해안과 다릅니다. 파도가 시원하게 밀려오는 느낌보다 섬과 항구, 다리와 해안도로가 이어지는 풍경이 매력입니다.
2026년의 “로컬 재창조” 트렌드와도 잘 맞습니다. 통영의 시장, 골목, 예술 공간, 거제의 해안 드라이브와 섬 여행은 유명 관광지 소비보다 지역의 분위기를 느끼는 여행에 가깝습니다.
장점은 풍경의 밀도입니다. 케이블카, 루지, 항구, 섬 투어, 해변을 조합하면 2박 3일도 금방 찹니다. 사진을 많이 남기고 싶은 커플 여행에도 잘 맞습니다.
단점은 접근성입니다. 수도권에서 이동 시간이 길고, 성수기에는 남해안 도로 정체도 고려해야 합니다. 섬 투어를 넣는다면 배편과 기상 상황도 확인해야 합니다.
추천 방식은 욕심을 줄이는 것입니다. 통영 중심 1박, 거제 중심 1박처럼 나누거나, 한쪽을 깊게 보는 일정이 좋습니다.
4. 여수·순천: 부모님과 함께 가기 좋은 남도형 여름휴가
여수와 순천은 바다와 정원을 함께 넣을 수 있는 조합입니다. 여수는 밤바다와 해상 케이블카, 해산물, 항구 분위기가 강합니다. 순천은 국가정원과만, 생태·정원 여행의 성격이 뚜렷합니다.
2026년 트렌드로 보면 이 지역은 세대 여행에 잘 맞습니다. 너무 과격한 액티비티보다 걷기, 식사, 야경, 정원 감상이 중심이기 때문입니다.
장점은 일정의 안정감입니다. 부모님과 함께 가도 설명하기 쉽고, 아이와 함께 가도 볼거리가 분명합니다. 음식 선택지도 넓습니다.
단점은 인기 동선의 혼잡입니다. 여수 밤바다, 케이블카, 주요 식당은 성수기 저녁에 사람이 몰립니다. 순천은 한여름 낮 시간대가 덥기 때문에 오전이나 해질 무렵이 낫습니다.
추천 방식은 낮과 밤을 나누는 것입니다. 낮에는 순천 정원이나 실내·카페 코스, 저녁에는 여수 야경으로 잡으면 피로가 덜합니다.
5. 평창·인제: 폭염을 피하고 싶은 숲·계곡 휴가
여름휴가라고 꼭 바다여야 하는 것은 아닙니다. 2026년처럼 폭염과 집중호우 변수가 커지는 시기에는 고지대 숲과 계곡, 강원 내륙 여행이 좋은 대안이 됩니다.
장점은 체감 온도입니다. 바닷가의 뜨거운 모래와 주차장을 피하고 싶다면 숲과 계곡이 훨씬 편합니다. 아이가 있는 가족에게도 물놀이와 자연 체험을 함께 넣기 좋습니다.
단점은 비 예보입니다. 계곡과 래프팅은 날씨와 수위 영향을 받습니다. 비가 오면 일정 변경이 필요하므로 실내 대체 코스를 미리 정해야 합니다.
추천 방식은 숙소를 먼저 고르는 것입니다. 숲·계곡 여행은 숙소 위치가 만족도를 크게 좌우합니다. 물놀이, 식사, 휴식이 가까운 곳을 선택하세요.
6. 제천·단양: 호수와 액티비티를 같이 즐기는 중부권 선택지
제천과 단양은 바다 대신 호수와 산, 강을 보는 여행지입니다. 청풍호, 도담삼봉, 만천하스카이워크, 패러글라이딩처럼 풍경과 액티비티를 함께 넣을 수 있습니다.
2026년 트렌드 중 “개인 가치 스펙트럼”과 잘 맞습니다. 조용한 호수 뷰를 원하면 느린 여행이 되고, 패러글라이딩이나 전망대 코스를 넣으면 활동적인 여행이 됩니다.
장점은 중부권 접근성입니다. 수도권, 충청권, 경북권에서 비교적 움직이기 쉽습니다. 바다 성수기 숙소 가격이 부담스러울 때 대안이 됩니다.
단점은 자차 의존도입니다. 명소 간 거리가 있어 대중교통만으로는 일정이 느슨해질 수 있습니다. 액티비티는 날씨와 예약 상황도 확인해야 합니다.
추천 방식은 하루에 너무 많은 전망대를 넣지 않는 것입니다. 호수, 카페, 전망대, 액티비티 중 2~3개만 고르면 충분합니다.
7. 부산 영도·기장: 짧은 휴가를 도심형 바다로 쓰는 방법
부산은 여름휴가와 도시 여행을 함께 원하는 사람에게 좋습니다. 해운대와 광안리만 떠올리기 쉽지만, 영도와 기장을 중심으로 보면 조금 다른 부산이 보입니다.
영도는 바다 전망 카페, 흰여울문화마을, 봉래산과 항구 풍경이 강점입니다. 기장은 해안 드라이브, 카페, 바다 산책, 가족형 숙소와 잘 맞습니다.
장점은 대중교통과 콘텐츠입니다. 비가 와도 맛집, 카페, 전시, 쇼핑, 실내 관광지로 바꾸기 쉽습니다. 짧은 1박 2일 휴가에도 만족도가 높습니다.
단점은 동선 피로입니다. 부산은 생각보다 넓습니다. 해운대, 광안리, 영도, 기장을 하루에 모두 넣으면 이동만 하다 끝날 수 있습니다.
추천 방식은 “부산 전체”가 아니라 “부산의 한 권역”을 고르는 것입니다. 도심 바다라면 영도, 가족형 해안 휴식이라면 기장이 좋습니다.
여행 스타일별 추천 조합
바다와 카페가 우선이면 강릉·속초나 부산 영도·기장을 고르세요. 일정이 짧을수록 접근성과 대체 코스가 중요합니다.
가족 여행이면 제주 서귀포, 여수·순천, 평창·인제가 좋습니다. 이동 거리가 짧고 숙소 주변에서 쉬기 쉬운 곳을 우선하세요.
커플 여행이면 통영·거제, 제천·단양, 제주 동부가 잘 맞습니다. 풍경이 좋고 사진을 남길 포인트가 많습니다.
부모님과 함께라면 여수·순천이나 강릉·속초가 안정적입니다. 계단이 많은 코스와 긴 대기 시간을 줄이는 것이 핵심입니다.
폭염을 피하고 싶다면 평창·인제, 제천·단양처럼 숲과 호수, 계곡이 있는 지역을 보세요. 바다보다 체감 피로가 낮을 수 있습니다.
예약 전에 꼭 확인할 체크리스트
1. 숙소 위치가 여행 목적과 맞는지 확인하세요. 해변 근처 숙소가 항상 좋은 것은 아닙니다. 주차와 소음이 불편할 수 있습니다. 2. 성수기에는 “맛집 리스트”보다 “대기 시간이 짧은 식사 후보”가 더 중요합니다. 3. 비 예보가 있으면 실내 코스를 2개 이상 준비하세요. 여름 여행은 날씨 대응이 만족도를 좌우합니다. 4. 섬 여행, 래프팅, 케이블카, 전망대는 운영 여부와 예약 조건을 공식 채널에서 확인하세요. 5. 부모님이나 아이와 함께라면 하루 이동 시간을 먼저 줄이세요. 좋은 명소를 많이 넣는 것보다 덜 피곤한 여행이 오래 기억됩니다.
이 글은 티빙 오리지널 드라마 《취사병 전설이 되다》의 등장인물을 MBTI로 읽어보는 캐릭터 해석입니다. 여기서 MBTI는 실제 배우나 실제 인물을 평가하는 도구가 아닙니다. 작품 속 인물이 낯선 군대라는 공간에서 무엇을 먼저 보고, 어떤 방식으로 버티며, 누구와 어떻게 관계를 맺는지 살펴보는 렌즈에 가깝습니다.
《취사병 전설이 되다》는 “총 대신 식칼, 탄띠 대신 앞치마”라는 소개처럼 군대와 요리, 성장 판타지를 한데 묶은 작품입니다. 이등병 강성재는 군대라는 폐쇄적인 질서 안에서 취사병이라는 새로운 역할을 만나고, 그 안에서 자기만의 능력과 자리를 만들어갑니다. 그래서 이 작품의 인물은 단순히 착하다, 세다, FM이다 같은 말로는 설명하기 어렵습니다.
이 글에서는 강성재, 조예린, 선임 취사병, 야망형 간부를 중심으로 봅니다. 다만 네 글자를 맞히는 것이 목적은 아닙니다. 더 중요한 질문은 이들이 왜 음식, 규칙, 인정, 생존이라는 압박 앞에서 서로 다른 방식으로 움직이는가입니다.
빠른 결론: 주요 등장인물 MBTI 요약
인물
이 글의 해석
대체 가능성
확신도
핵심 근거
강성재
ISFP
INFP
67%
팍팍한 현실을 견디면서도 감각과 손끝으로 자기 자리를 만드는 성장형 인물
조예린
ESTJ
ISTJ
64%
규칙, 책임, 현장 질서를 중시하는 FM 소초장형 인물
선임 취사병
ESFJ
ESTJ
58%
부대의 식사, 사람, 리듬을 관리하는 생활형 조력자
야망형 간부
ENTJ
ESTJ
57%
진급과 성과를 향해 조직 안의 판을 읽고 움직이는 인물
취사장 팀
혼합형 팀
–
55%
감각, 규칙, 생존, 인정 욕구가 부딪히며 성장하는 구조
이 표는 재미있게 보기 위한 출발점입니다. 《취사병 전설이 되다》의 인물들은 “누가 더 능력이 좋은가”보다 “누가 어떤 방식으로 자기 자리를 만들어가는가”가 중요합니다. 강성재는 조용히 버티다가 손끝의 감각으로 성장하고, 조예린은 흐트러진 현장을 규칙과 책임으로 붙잡습니다. 선임 취사병은 생활의 리듬을 알고, 야망형 간부는 조직 안에서 성과와 입지를 계산합니다.
같은 취사장 안에서도 감각, 규칙, 배려, 야망은 서로 다른 방식으로 움직입니다.
MBTI로 보기 전에: 《취사병 전설이 되다》의 인물은 ‘생활 생존형 캐릭터’다
《취사병 전설이 되다》의 인물은 거대한 전쟁 영웅형 캐릭터라기보다 생활 생존형 캐릭터에 가깝습니다. 작품의 무대는 군대이고, 핵심 공간은 취사장입니다. 군대는 규칙과 위계가 분명한 공간이고, 취사장은 그 안에서도 하루의 리듬을 책임지는 장소입니다. 사람은 배가 고프면 예민해지고, 식사는 부대의 분위기를 바꿉니다. 그래서 이 작품에서 음식은 단순한 소품이 아니라 관계와 인정의 언어가 됩니다.
강성재가 흥미로운 이유도 여기에 있습니다. 그는 처음부터 압도적인 리더나 완성형 천재로 등장하는 인물이 아닙니다. 공개 소개 기준으로 그는 부대에 갓 전입한 이등병이고, 팍팍한 현실 속에서도 악착같이 살아온 청년입니다. 그런 인물이 군대에서 예상하지 못한 퀘스트와 요리의 기회를 만나며 성장합니다. 이 설정은 MBTI로 읽기 좋은 긴장을 만듭니다.
군대라는 공간에서는 성격이 평소보다 더 선명하게 드러납니다. 누군가는 규칙을 붙잡고, 누군가는 사람의 기분을 읽고, 누군가는 성과를 계산하고, 누군가는 손으로 직접 해내며 자신을 증명합니다. 《취사병 전설이 되다》는 바로 이 차이를 요리와 판타지라는 장르적 장치로 보여줍니다.
그래서 이 글은 특정 장면 하나보다 반복되는 선택을 봅니다. 강성재가 압박 속에서 어떻게 배우는지, 조예린이 질서를 어떻게 지키는지, 선임 취사병이 사람과 밥의 리듬을 어떻게 연결하는지, 야망형 간부가 조직 안에서 무엇을 먼저 계산하는지를 중심으로 MBTI를 추정합니다.
강성재 MBTI: ISFP에 가까운 ‘손끝으로 성장하는 생존형 인물’
강성재의 반복 행동과 판단 기준
강성재는 얼핏 보면 운 좋게 기회를 얻은 성장형 주인공처럼 보입니다. 하지만 이 인물을 단순히 “요리를 잘하게 되는 병사”로만 보면 중요한 부분을 놓치게 됩니다. 강성재의 핵심은 거창한 계획보다, 지금 눈앞의 일을 몸으로 익히며 자기 자리를 만들어가는 태도입니다.
TVING 공식 소개에서 강성재는 “전설의 취사병”으로 거듭나는 이등병으로 제시됩니다. 네이버웹툰 원작 소개도 “불안하기만 한 군생활에 한줄기 빛처럼 다가온 전설의 취사병이 될 기회”를 말합니다. 이 설정은 강성재가 처음부터 세상을 바꾸려는 인물이 아니라, 불안한 현실 속에서 작은 가능성을 붙잡는 인물이라는 점을 보여줍니다.
강성재가 반복해서 보여주는 첫 번째 특징은 감각을 통해 배우는 방식입니다. 그는 추상적인 이론보다 직접 해보고, 맛보고, 실패하고, 다시 조정하는 과정에서 성장하는 인물로 읽힙니다. 요리라는 소재 자체가 이 성향을 강화합니다. 음식은 머리로만 이해할 수 없습니다. 불의 세기, 칼질의 리듬, 간의 미세한 차이, 사람들의 반응을 몸으로 익혀야 합니다.
두 번째 특징은 싫은 내색을 쉽게 하지 않고 버티는 태도입니다. 제작발표회 기사에서 강성재는 팍팍한 현실 속에서도 악착같이 살아가고, 근면 성실한 청년으로 소개됩니다. 이 지점은 강성재를 단순한 즉흥형 인물로만 보지 않게 합니다. 그는 자유롭게 움직이고 싶어도, 먼저 오늘의 몫을 감당하는 쪽에 가깝습니다.
관계 속에서 강성재는 마음을 큰 말로 과장하기보다 행동으로 보여주는 인물로 읽힙니다. 취사장이라는 공간에서 그는 사람을 설득하기보다 음식을 내놓고, 결과로 반응을 얻습니다. 누군가에게 인정받고 싶어도 그것을 직접 요구하기보다, 한 끼를 제대로 만들어내는 방식으로 자기 존재를 증명하려 할 가능성이 큽니다.
압박 상황에서 강성재는 처음부터 판을 지휘하기보다 몸을 움직이며 적응합니다. 이 방식은 ISFP적으로 읽힙니다. I는 소극성보다 감정을 안에서 정리하는 방향입니다. S는 눈앞의 재료, 시간, 사람의 반응처럼 구체적인 현실을 먼저 보는 감각입니다. F는 비논리성이 아니라 자신이 지키고 싶은 가치와 사람의 반응을 판단에 포함하는 태도입니다. P는 계획이 없다는 뜻이 아니라, 변하는 현장에 맞춰 손과 감각으로 조정하는 방식입니다.
다만 강성재를 INFP로 볼 여지도 있습니다. 흙수저 청년이 자기 가능성을 발견하고, 전설의 취사병이라는 서사를 향해 나아가는 구조만 보면 INFP적인 성장 서사도 자연스럽습니다. 하지만 이 글에서는 ISFP 쪽에 조금 더 무게를 둡니다. 강성재의 변화는 관념이나 이상을 말로 확장하기보다, 요리라는 감각적 행위와 군대라는 현실 조건 속에서 몸으로 증명되는 쪽에 가깝기 때문입니다.
결국 강성재는 “큰 꿈을 말하는 사람”보다 “작은 손끝의 변화로 자기 삶을 바꾸는 사람”에 가깝습니다. 그의 ISFP적 면모는 느슨함이 아니라 생존 감각입니다. 강성재는 거창한 구호보다 한 끼를 제대로 만들어내는 일을 통해, 자신도 누군가에게 필요한 사람이 될 수 있다는 사실을 배워가는 인물입니다.
조예린 같은 인물은 혼란스러운 현장을 규칙과 책임으로 다시 세우려 합니다.
조예린 MBTI: ESTJ에 가까운 ‘현장을 바로 세우는 FM형 인물’
조예린의 규칙 감각과 책임 방식
조예린은 공개 기사에서 FM 소초장으로 언급됩니다. 이 한 단어만으로도 인물의 기본 결이 어느 정도 보입니다. FM형 인물은 단순히 고지식한 사람이 아닙니다. 규칙이 무너지면 현장이 무너진다고 믿는 사람입니다. 특히 군대라는 공간에서는 이 성향이 더 강하게 드러날 수밖에 없습니다.
조예린의 첫 번째 특징은 질서를 먼저 보는 태도입니다. 강성재가 낯선 상황에서 감각으로 적응하는 인물이라면, 조예린은 먼저 기준을 세우고 그 기준을 지키려는 인물로 읽힙니다. 누가 무엇을 해야 하는지, 어떤 절차가 지켜져야 하는지, 어느 선을 넘으면 안 되는지를 빠르게 확인합니다.
두 번째 특징은 책임을 개인 감정보다 앞세우는 방식입니다. 조예린 같은 인물은 상대가 안쓰럽다고 해서 규칙을 쉽게 접지 않습니다. 겉으로는 차갑거나 딱딱하게 보일 수 있습니다. 하지만 더 깊게 보면 그 엄격함은 사람을 괴롭히기 위한 것이 아니라, 사고가 나지 않게 현장을 붙잡으려는 책임감에 가깝습니다.
관계 속에서 조예린은 칭찬보다 기준으로 사람을 대할 가능성이 큽니다. 누군가를 좋아해도 무조건 감싸기보다, 그 사람이 맡은 역할을 제대로 해내는지를 봅니다. 강성재가 성장할수록 조예린은 그를 단순한 신병이 아니라 현장에서 기능하는 구성원으로 인정하게 될 수 있습니다. 이 인정은 따뜻한 말보다 “해냈다”는 판단에 가까울 것입니다.
갈등 상황에서 조예린은 즉흥적인 감정 반응보다 절차와 책임을 우선합니다. 이 지점에서 ESTJ적으로 읽힙니다. E는 단순히 말이 많다는 뜻이 아니라 외부 상황에 직접 개입해 질서를 세우는 방향입니다. S는 현재의 규칙, 보고, 실제 현장을 먼저 보는 감각입니다. T는 차가움이 아니라 판단 기준을 역할과 책임에 두는 태도입니다. J는 불안한 상황을 정리하고 고정하려는 방식입니다.
다만 조예린을 ISTJ로 볼 여지도 있습니다. 만약 작품에서 그녀가 전면에서 사람을 이끄는 모습보다 조용히 규정과 임무를 지키는 모습이 더 강조된다면 ISTJ 해석도 설득력이 있습니다. 그러나 공개된 FM 소초장 이미지와 군대 현장을 관리하는 역할을 고려하면, 이 글에서는 ESTJ 쪽에 조금 더 무게를 둡니다.
조예린의 ESTJ적 면모를 단순한 엄격함으로만 보면 부족합니다. 그는 규칙을 통해 사람을 통제하려는 인물이라기보다, 규칙이 있어야 사람들이 무너지지 않는다고 믿는 인물에 가깝습니다. 그래서 강성재와의 관계에서도 핵심은 감정 대립이 아니라 성장의 기준입니다. 조예린은 강성재가 얼마나 잘하는지를 보는 동시에, 그 능력이 현장 안에서 책임으로 연결되는지를 확인하는 인물입니다.
강성재와 조예린의 관계: ISFP와 ESTJ가 만났을 때
관계 지점
강성재 쪽 경향
조예린 쪽 경향
갈등 또는 보완 가능성
성장 방식
직접 해보며 감각으로 익힘
기준과 절차를 먼저 세움
한쪽은 답답하고, 한쪽은 불안할 수 있음
책임 표현
말보다 결과와 행동
규칙, 역할, 기준
서로의 진심을 늦게 알아볼 수 있음
위기 대응
현장에 맞춰 유연하게 조정
흐트러진 질서를 바로잡음
감각과 규율이 만나면 강한 팀이 됨
인정 방식
자신이 필요한 사람임을 증명
역할 수행 여부로 평가
칭찬보다 신뢰가 먼저 쌓임
강성재와 조예린의 관계가 흥미로운 이유는 두 사람이 같은 현장을 전혀 다른 방향에서 보기 때문입니다. 강성재는 손으로 배우고, 조예린은 기준으로 판단합니다. 강성재에게 중요한 것은 지금 이 한 끼를 어떻게 살릴 것인가입니다. 조예린에게 중요한 것은 그 한 끼가 부대라는 질서 안에서 제대로 작동하는가입니다.
이 차이는 처음에는 갈등처럼 보일 수 있습니다. 강성재는 조예린의 기준을 딱딱하게 느낄 수 있고, 조예린은 강성재의 유연함을 불안하게 볼 수 있습니다. 특히 강성재가 감각적으로 해낸 결과가 절차와 충돌할 때, 두 사람의 판단 기준은 쉽게 부딪힙니다.
하지만 바로 그 차이가 보완이 됩니다. 강성재의 ISFP적 감각은 조예린의 ESTJ적 질서에 생기를 더합니다. 조예린의 기준은 강성재의 재능이 단순한 우연이나 즉흥으로 흩어지지 않게 붙잡아줍니다. 감각만 있으면 현장이 불안하고, 규칙만 있으면 음식은 생기를 잃습니다. 두 사람이 함께 있을 때 작품의 요리와 군대라는 두 축이 동시에 살아납니다.
관계적으로 보면 조예린은 강성재에게 성장의 벽이자 기준이 될 수 있습니다. 강성재는 조예린에게 규칙 안에서도 사람을 살리는 감각이 필요하다는 사실을 보여줄 수 있습니다. 이 관계는 단순한 대립이나 호감보다, 서로의 방식이 현장에서 검증되는 과정에 가깝습니다.
그래서 두 사람의 핵심은 “잘 맞는다”가 아닙니다. 서로 다르기 때문에 필요한 관계입니다. 강성재가 조예린에게 유연한 생존 감각을 보여준다면, 조예린은 강성재에게 능력이 책임으로 바뀌는 순간을 보여줍니다. 《취사병 전설이 되다》의 성장 서사는 이 차이에서 힘을 얻습니다.
선임 취사병 MBTI: ESFJ에 가까운 ‘밥과 사람의 리듬을 아는 생활형 조력자’
선임 취사병은 작품 안에서 강성재의 성장과 가장 밀접하게 연결될 수 있는 역할입니다. 공식 자료에서 세부 인물명이 충분히 공개되어 있지는 않지만, 취사장이라는 공간의 성격을 생각하면 이 역할은 단순한 선임 이상입니다. 그는 부대의 식사, 시간표, 사람들의 기분, 현장의 잔소리를 모두 알고 있는 생활형 관리자에 가깝습니다.
이 인물을 ESFJ에 가깝게 보는 이유는 사람과 생활 리듬을 함께 보기 때문입니다. 취사장은 맛만 좋으면 끝나는 곳이 아닙니다. 제시간에 나와야 하고, 많은 사람의 배를 채워야 하며, 위생과 분량과 분위기까지 맞아야 합니다. 이 모든 것을 챙기는 인물은 사람의 반응을 놓치지 않는 쪽에 가깝습니다.
선임 취사병의 첫 번째 특징은 경험으로 현장을 읽는 태도입니다. 그는 규정집만 보고 움직이기보다, 실제 부대원이 언제 예민해지고 어떤 음식에 반응하며 어떤 실수가 큰 문제로 이어지는지를 압니다. 이런 감각은 S적으로 읽힙니다. 거창한 가능성보다 오늘 당장 돌아가야 하는 식사와 사람의 몸 상태를 먼저 보는 것입니다.
두 번째 특징은 관계를 생활 속에서 관리하는 방식입니다. ESFJ적인 인물은 감정을 반드시 부드러운 말로만 표현하지 않습니다. 때로는 잔소리, 챙김, 반복되는 확인, “밥 먹었냐” 같은 생활 언어로 마음을 보여줍니다. 선임 취사병이 강성재를 대하는 방식도 엄청난 이론보다 현장에서 버티는 법을 알려주는 쪽일 가능성이 큽니다.
갈등 상황에서는 ESTJ처럼 보일 수도 있습니다. 특히 취사장의 질서와 위생, 시간 엄수를 강조하면 엄격한 관리자처럼 읽힙니다. 하지만 이 글에서는 ESFJ 쪽에 조금 더 무게를 둡니다. 취사장의 핵심은 사람을 먹이는 일이고, 그 일은 규칙만으로 완성되지 않기 때문입니다. 사람의 입맛, 분위기, 체력, 사기까지 함께 보는 태도가 중요합니다.
선임 취사병은 강성재에게 기술만 가르치는 인물이 아닙니다. 그는 밥이 부대 안에서 어떤 의미를 갖는지 알려주는 사람입니다. 그래서 이 인물의 ESFJ적 면모는 친절한 성격이라는 뜻이 아니라, 생활의 반복 속에서 사람을 돌보고 조직의 온도를 유지하는 능력으로 읽는 편이 자연스럽습니다.
야망형 간부 MBTI: ENTJ에 가까운 ‘성과와 진급을 계산하는 조직형 인물’
제작발표회 공개 기사에서는 성공을 위해 질주하는 간부 역할이 언급됩니다. 이 유형의 인물은 《취사병 전설이 되다》 안에서 강성재의 성장과 대비되는 축을 만들 가능성이 큽니다. 강성재가 살아남기 위해 자기 능력을 키운다면, 야망형 간부는 조직 안에서 더 높은 자리와 성과를 향해 움직입니다.
이 인물을 ENTJ에 가깝게 보는 이유는 목표 지향성이 강하기 때문입니다. ENTJ적으로 읽히는 인물은 단순히 야심이 많아서가 아닙니다. 그는 조직의 판을 읽고, 어느 지점에서 성과를 만들어야 하는지 계산하며, 사람과 상황을 목표에 맞춰 움직이려 합니다. 군대라는 위계적 공간에서는 이런 성향이 더 선명하게 드러납니다.
첫 번째 특징은 결과를 먼저 보는 태도입니다. 좋은 의도보다 중요한 것은 성과로 보일 수 있습니다. 취사장, 부대 분위기, 강성재의 능력도 그 자체로만 보지 않고 “이것이 내 위치와 조직 평가에 어떤 영향을 주는가”로 해석할 가능성이 큽니다.
두 번째 특징은 관계를 자원처럼 읽는 방식입니다. ENTJ형 인물은 사람을 반드시 차갑게 대한다는 뜻이 아닙니다. 다만 사람의 감정보다 역할, 능력, 활용 가능성을 먼저 볼 때가 많습니다. 강성재의 재능이 드러날수록 이 간부는 그 가능성을 순수하게 응원하기보다, 조직 안의 카드로 보려 할 수 있습니다.
갈등 상황에서 이 인물은 감정을 달래기보다 판을 정리하려 합니다. 누가 책임질지, 어떤 보고가 올라갈지, 어떤 결과가 남을지를 먼저 계산합니다. 이 점에서 ENTJ적으로 읽힙니다. E는 외부 상황에 직접 개입하는 에너지이고, N은 현재 사건 너머의 기회와 판을 보는 감각입니다. T는 냉혈함이 아니라 성과와 구조를 우선하는 판단 기준입니다. J는 목표를 향해 상황을 정리하려는 방식입니다.
ESTJ 가능성도 있습니다. 특히 진급, 규정, 위계, 조직 내 평가를 현실적으로 따지는 면을 강조하면 ESTJ로도 읽힙니다. 그러나 이 글에서는 ENTJ에 조금 더 무게를 둡니다. 이 인물이 단순히 기존 규칙을 지키는 데서 멈추지 않고, 자신의 상승과 성과를 위해 판을 움직이는 쪽으로 보이기 때문입니다.
야망형 간부는 작품 안에서 불편한 긴장을 만들 수 있습니다. 하지만 이런 인물이 있어야 강성재의 성장이 단순한 요리 실력 향상에 머물지 않습니다. 강성재의 능력이 누군가에게는 희망이고, 누군가에게는 성과의 도구가 될 수 있다는 점이 드러나기 때문입니다.
취사장 팀 분석: 감각, 규칙, 생활, 야망이 만나는 공간
취사장 팀을 MBTI로 보면 한 유형의 사람들이 모인 조직이 아닙니다. 오히려 서로 다른 생존 방식이 한 공간에서 부딪히는 팀입니다. 강성재는 손끝의 감각과 적응력으로 성장하고, 조예린은 규칙과 책임으로 현장을 붙잡습니다. 선임 취사병은 밥과 사람의 리듬을 알고, 야망형 간부는 조직 안의 성과와 입지를 계산합니다.
이 조합이 흥미로운 이유는 모두가 “밥”을 다르게 보기 때문입니다. 강성재에게 밥은 자기 가능성을 증명하는 기회입니다. 조예린에게 밥은 부대가 제대로 돌아가는 기준 중 하나입니다. 선임 취사병에게 밥은 사람을 살피는 생활의 언어입니다. 야망형 간부에게 밥은 때로 성과와 평가의 재료가 될 수 있습니다.
서로의 강점은 동시에 갈등의 씨앗이 됩니다. 강성재의 유연함은 규칙을 중시하는 사람에게 불안하게 보일 수 있습니다. 조예린의 엄격함은 성장 중인 강성재에게 벽처럼 느껴질 수 있습니다. 선임 취사병의 생활 감각은 윗선의 성과 논리와 충돌할 수 있습니다. 야망형 간부의 추진력은 현장의 사람들을 도구처럼 느끼게 만들 수 있습니다.
하지만 이 작품의 재미는 바로 그 차이에서 나옵니다. 취사장은 단순한 배경이 아니라, 사람이 먹고 버티고 인정받는 장소입니다. 음식은 가장 현실적인 것이면서도 가장 감정적인 것입니다. 그래서 《취사병 전설이 되다》의 팀워크는 전투보다 생활에 가깝고, 영웅담보다 성장담에 가깝습니다.
MBTI로 이 팀을 읽는 가장 좋은 방식은 궁합표를 보는 것이 아닙니다. 각 인물이 취사장이라는 공간에서 어떤 기능을 맡는지 보는 것입니다. ISFP적 감각, ESTJ적 질서, ESFJ적 돌봄, ENTJ적 성과 욕구가 같은 공간에서 부딪힐 때, 작품은 군대 이야기이면서 동시에 사람의 자리 찾기 이야기가 됩니다.
이 분석에서 조심해야 할 것
첫째, 이 글의 MBTI는 공식 설정이 아닙니다. TVING, CJ ENM, 네이버웹툰, 제작발표회 기사에서 확인할 수 있는 것은 작품의 기본 설정과 인물의 역할, 출연 정보입니다. MBTI 유형은 공식 자료가 아니라 작품 속 행동과 관계 방식을 바탕으로 한 블로그식 해석입니다.
둘째, I와 E를 말수로만 판단하면 안 됩니다. 강성재가 ISFP적으로 읽힌다고 해서 소극적인 인물이라는 뜻은 아닙니다. 그는 말보다 행동과 감각으로 자기를 증명하는 쪽에 가깝습니다. 반대로 조예린이나 야망형 간부가 E적으로 읽힌다고 해서 단순히 활발하다는 뜻도 아닙니다. 외부 상황에 직접 개입해 기준이나 성과를 만들려는 방향을 말합니다.
셋째, T와 F를 차갑고 따뜻한 사람으로 나누면 안 됩니다. 조예린의 T적 판단은 감정이 없다는 뜻이 아닙니다. 현장을 지키기 위해 역할과 책임을 먼저 본다는 뜻에 가깝습니다. 강성재의 F적 면모도 비논리성이 아니라, 자신이 지키고 싶은 가치와 사람의 반응을 판단에 포함하는 방식입니다.
넷째, 장르적 판타지를 현실 군대의 정답처럼 받아들이면 곤란합니다. 《취사병 전설이 되다》는 군대와 요리를 다루지만, 동시에 상태창과 성장 판타지를 활용하는 드라마입니다. 이 글의 목적은 현실 군 생활을 평가하는 것이 아니라, 장르적 인물들을 성격유형이라는 언어로 읽어보는 것입니다.
마지막으로 팬덤 해석과 다를 수 있습니다. 어떤 독자는 강성재를 INFP로, 조예린을 ISTJ로, 야망형 간부를 ESTJ로 볼 수 있습니다. 그런 차이는 틀림이 아니라 강조점의 차이에 가깝습니다. 어떤 행동을 더 중심에 놓느냐에 따라 캐릭터 MBTI는 달라질 수 있습니다.
이 작품에서 밥은 단순한 음식이 아니라 부대의 분위기와 관계를 바꾸는 언어입니다.
마무리: 《취사병 전설이 되다》는 MBTI보다 ‘자기 자리를 만드는 법’이 먼저 보이는 작품
《취사병 전설이 되다》의 매력은 강성재가 ISFP인지, 조예린이 ESTJ인지 맞히는 데만 있지 않습니다. 더 중요한 질문은 낯선 질서 안에 던져진 사람이 어떻게 자기 자리를 만들어가는가입니다. 누군가는 감각으로 배우고, 누군가는 규칙으로 지키며, 누군가는 생활의 리듬을 알고, 누군가는 성과를 향해 판을 읽습니다.
MBTI는 이 차이를 조금 더 쉽게 바라보게 해줍니다. 같은 취사장 안에 있어도 사람들은 같은 방식으로 책임지지 않습니다. 강성재는 한 끼를 통해 자신을 증명하고, 조예린은 기준을 통해 현장을 지키며, 선임 취사병은 반복되는 식사의 리듬으로 사람을 돌봅니다.
그래서 이 작품은 음식 드라마이면서 성장 드라마입니다. 밥을 짓는다는 것은 단순히 요리를 한다는 뜻이 아닙니다. 누군가의 하루를 버티게 만들고, 자신도 그 안에서 필요한 사람이 되어가는 일입니다. 《취사병 전설이 되다》의 MBTI 해석은 결국 네 글자보다, 사람이 자기 자리에서 어떻게 전설이 되어가는지를 묻는 질문으로 돌아갑니다.
Metacognition starts when you step back from the thought itself and look at the state of your thinking.
Near the end of a workday, you ask ChatGPT to draft a report. The answer arrives quickly. The sentences are smooth. The structure looks useful. But something still feels slightly unfinished.
“Is this actually right?”
In the past, the important skill was often finding the answer. Now the situation is different. Answers are easy to get. The harder question is whether you really understand that answer, whether you should trust it, and whether you can adapt it to your own situation.
That is where metacognition matters. In simple terms, metacognition is the ability to know what you know and what you do not know. It may sound like a study-skill concept for students, but today it has become a basic capability for workers, creators, educators, and anyone who uses AI.
Metacognition means looking at your own thinking one step back
Metacognition sounds like a technical psychology term. In everyday life, however, it is a familiar feeling.
You may be solving a problem and suddenly realize, “I thought I understood this concept, but I cannot explain it.” In a meeting, you may pause and ask, “Am I stating a fact, or am I making an assumption?” While writing, you may notice, “The sentences are polished, but the logic is thin.”
All of these moments are related to metacognition. The key is stepping back. Instead of being fully trapped inside your thoughts, you look at the condition of your thoughts.
That is why metacognition is not just self-reflection. More precisely, it is a skill for adjusting judgment. It helps you distinguish what you know from what you do not know, check the gap between confidence and evidence, and change your strategy when needed.
Why metacognition matters again now
Metacognition is not a new idea. But it is becoming important again because generative AI is changing the way we think.
In a 2025 CHI paper, researchers from Microsoft Research and Carnegie Mellon University analyzed 936 examples of generative AI use reported by 319 knowledge workers. One result was especially interesting. Higher confidence in AI was associated with less critical-thinking enactment, while higher task-specific self-confidence was associated with more critical-thinking enactment.
This should not be read too simply as “AI makes people think less.” The more useful message is different. People who use AI well do not automatically reject AI answers. They also do not accept them blindly. Instead, they verify the answer, integrate it into their own context, and keep final responsibility for the decision.
UNESCO also released AI competency frameworks for students and teachers in 2024. These frameworks do not treat AI literacy as simple tool operation. They connect AI use with human-centered judgment, responsibility, and educational competence. In other words, the direction of learning is shifting from “Can you use AI?” to “Can you think with AI while checking your own judgment?”
A polished answer can support understanding, but it can also create the feeling that you understood more than you actually did.
The illusion that grows as AI becomes smarter
The biggest risk in the AI era is not only a wrong answer. A more subtle risk is the feeling that you have understood something when you have not.
When you read an AI-generated summary, your mind can feel clearer. The structure looks neat. The examples are there. But when you try to explain the idea to someone else, your words may suddenly stop.
At that moment, you may have information. But you may not yet have understanding.
Recent arXiv preprints discuss a similar concern. One line of research argues that AI may improve individual creative output while reducing the diversity of ideas at the group level. Another study suggests that long reasoning traces from large language models can increase trust and enjoyment, but do not always improve actual task performance.
These are still emerging research discussions, so they should be read carefully. Even so, the direction is clear. AI explanations can help understanding. They can also create the feeling that understanding is already complete.
That is why metacognition is necessary. Do not ask only, “Is this answer good?” Ask also, “How well do I actually understand this answer?”
Good questions help you test the evidence, limits, and blind spots behind your own judgment.
Five questions that build metacognition
Metacognition is not simply an inborn trait. It is closer to a habit. If you use the following five questions often, the quality of your thinking changes.
1. What am I assuming I understand right now?
The first thing to check is illusion. When a word feels familiar, we often feel that we understand it. But familiarity and understanding are not the same.
A good method is the one-sentence explanation test. After reading a concept, try to explain it in one sentence as if you were speaking to a beginner. If you cannot explain it, it is not yet your own knowledge.
The same applies to AI answers. Do not just copy the output. Ask, “How would I say this in my own words?”
2. Does my confidence come from evidence or from style?
People tend to trust content more when the writing is smooth. AI answers make this especially easy. Confident wording, organized lists, and technical terms can quickly create a feeling of reliability.
Metacognition asks where that confidence comes from. Are you confident because of data, experience, a credible source, or just because the sentences sound convincing?
If you are writing a work report, check the sources. If the topic involves investment, policy, health, or any high-risk decision, this matters even more.
3. Could counterevidence change my judgment?
When metacognition is weak, people protect their ideas. When metacognition is strong, people test their ideas.
The same attitude is needed when using AI. Ask questions such as, “What is the strongest counterargument to this claim?”, “Under what conditions would this conclusion be wrong?”, and “How would another perspective interpret this?” These prompts often improve the quality of the answer.
But the point is not to add counterarguments as decoration. Your judgment must actually be open to revision.
4. Am I looking for an answer, or am I trying to stop thinking?
When we are busy, we want answers. More precisely, we often want to end the thinking process. AI satisfies that desire very well.
The problem is that important judgments are rarely finished with one quick answer. Hiring, strategy, education design, writing, and business planning all involve context, purpose, and stakeholders.
At that point, the metacognitive question is simple. “Do I need a conclusion now, or do I need more exploration?” It is important to distinguish moments that require a decision from moments that require more thinking.
5. Can I verify this with a next action?
Good thinking eventually becomes a testable action. Metacognition becomes weak if it remains only an internal reflection.
If you wrote an article, ask one person to read it. If you created a lecture outline, test it as a five-minute explanation. If AI suggested a strategy, run a small experiment before turning it into a full plan.
When you move from “This seems right” to “Let me test it in a small way,” thinking becomes a real capability.
A strong AI thinking routine includes not only fast answers, but also verification, reconstruction, and final responsibility.
A practical metacognition routine for work and learning
You do not need to train metacognition in a grand way. You can put it into your day as a short routine.
Before starting a task, write down three things: what you know, what you do not know, and what you need to verify. Before a meeting, write down your assumptions. After the meeting, leave one sentence about how your thinking changed.
When using AI, the routine needs to be even clearer.
Write a short first draft yourself.
Ask AI to improve or challenge it.
Separate facts, interpretations, and suggestions in the AI answer.
Mark the parts that need sources.
Rewrite the final sentence in your own judgment.
The order matters. If you begin by outsourcing everything to AI, you lose your own reference point. If you write your first draft first, AI becomes a reviewer rather than a replacement.
Metacognition is the human speed we need in the AI era
AI is fast. Because of that, we often feel that we must become faster too. But not every kind of thinking should speed up.
Important work still needs slower intervals. We need time to pause, doubt, explain again, and test ideas through small experiments.
Metacognition is the ability to protect that slower interval. It is not lazy hesitation. It is an intentional pause for better judgment.
In the future, people who use AI well will not simply be those who know many prompts. More important will be the person who can observe the state of their own thinking. That person knows what they know, what they do not know, when to trust AI, and when to check again.
That is metacognition. And today, it is no longer just a study technique. It is becoming a core skill for how we work and learn.
Metacognition is the ability to notice what you know and what you do not know, then adjust your learning or judgment strategy accordingly. In simple terms, it means looking at your own thinking one step back.
Does stronger metacognition improve learning?
In many cases, yes. People with stronger metacognition can identify what they do not understand and change their learning strategy. Knowing what to check can matter more than simply studying for a long time.
Why is metacognition important in the AI era?
AI can produce fast and convincing answers. Because of that, users may feel that they understand something even when they have not tested their understanding. Metacognition helps you verify AI answers and adapt them to your own context.
How can I train metacognition?
The easiest method is to build a questioning habit. Ask: “What do I know?”, “What do I not know?”, “What is the evidence?”, “What is the counterargument?”, and “How can I test this in a small way?”
Does using AI weaken metacognition?
Not always. If you use AI only as an answer machine, it may reduce your own thinking. But if you use AI to review drafts, generate counterarguments, check sources, and design small experiments, it can strengthen metacognition.
퇴근 전, ChatGPT에 보고서 초안을 맡깁니다. 답은 빠르게 나옵니다. 문장도 그럴듯합니다. 그런데 이상하게 마음 한쪽이 걸립니다.
“이게 맞나?”
예전에는 답을 찾는 능력이 중요했습니다. 이제는 조금 달라졌습니다. 답은 너무 쉽게 나옵니다. 문제는 그 답을 내가 제대로 이해했는지, 그대로 믿어도 되는지, 내 상황에 맞게 바꿨는지를 알아차리는 일입니다.
여기서 필요한 능력이 메타인지입니다. 쉽게 말하면, 메타인지는 “내가 지금 무엇을 알고 있고, 무엇을 모르는지 아는 능력”입니다. 공부 잘하는 사람의 비밀처럼 들리지만, 요즘은 직장인과 창작자, 교육자, AI 사용자 모두에게 필요한 기본 역량이 되고 있습니다.
메타인지는 ‘생각을 한 번 더 보는 능력’이다
메타인지는 어려운 심리학 용어처럼 보입니다. 하지만 일상에서는 꽤 익숙한 감각입니다.
문제를 풀다가 “아, 나는 이 개념을 안다고 생각했는데 설명은 못 하네”라고 느끼는 순간이 있습니다. 회의 중에 “내가 지금 사실을 말하는 건가, 추측을 말하는 건가” 하고 멈추는 순간도 있습니다. 글을 쓰다 “문장은 매끄러운데 논리는 비어 있네”라고 알아차리는 때도 있습니다.
이런 순간이 모두 메타인지와 연결됩니다. 핵심은 한 발 뒤로 물러서는 것입니다. 생각 속에만 빠져 있지 않고, 내 생각의 상태를 다시 보는 것입니다.
그래서 메타인지는 단순한 자기반성이 아닙니다. 더 정확히는 판단을 조정하는 기술입니다. 내가 아는 것과 모르는 것을 구분하고, 자신감과 근거 사이의 간격을 확인하고, 필요하면 전략을 바꾸는 능력입니다.
왜 지금 다시 메타인지인가
메타인지가 오래된 개념인데도 최근 다시 중요해진 이유가 있습니다. 생성형 AI가 우리의 생각 과정을 바꾸고 있기 때문입니다.
Microsoft Research와 카네기멜런대 연구진은 2025년 CHI 논문에서 지식근로자 319명의 생성형 AI 사용 사례 936건을 분석했습니다. 흥미로운 결과가 나왔습니다. 사용자가 AI를 더 신뢰할수록 비판적 사고를 덜 수행하는 경향이 있었고, 자기 과제에 대한 자신감이 높을수록 비판적 사고를 더 많이 수행하는 경향이 있었습니다.
이 결과를 단순히 “AI를 쓰면 생각을 덜 한다”로 읽으면 부족합니다. 더 중요한 메시지는 따로 있습니다. AI를 잘 쓰는 사람은 AI 답변을 무조건 거부하지도, 무조건 받아들이지도 않습니다. 대신 답변을 검증하고, 자기 맥락에 통합하고, 최종 책임을 스스로 가져갑니다.
UNESCO도 2024년 학생과 교사를 위한 AI 역량 프레임워크를 내놓았습니다. AI를 단순한 도구 사용 능력으로만 보지 않고, 인간 중심의 판단과 책임 있는 활용을 함께 다룹니다. 결국 교육의 방향도 “AI를 쓸 줄 아는가”에서 “AI와 함께 생각을 점검할 수 있는가”로 옮겨가고 있습니다.
그럴듯한 답은 이해를 돕기도 하지만 이해한 듯한 착각도 만들 수 있습니다.
AI가 똑똑해질수록 생기는 착각
AI 시대의 가장 큰 위험은 틀린 답만이 아닙니다. 더 교묘한 위험은 ‘내가 이해했다’는 착각입니다.
AI가 정리해 준 글을 읽으면 머릿속이 맑아진 것처럼 느껴집니다. 요약도 깔끔합니다. 예시도 있습니다. 그런데 막상 누군가에게 설명하려 하면 말문이 막히는 경우가 있습니다.
이때 우리는 정보를 가진 것이지, 이해한 것은 아닐 수 있습니다.
최근 arXiv에 공개된 여러 연구도 비슷한 문제의식을 다룹니다. AI가 창의적 작업을 도와 개인 결과물의 수준을 끌어올릴 수 있지만, 동시에 집단 전체의 아이디어 다양성은 줄어들 수 있다는 논의가 있습니다. 또 LLM의 긴 추론 과정이나 설명이 사용자에게 더 큰 신뢰감을 주지만, 실제 과제 수행 성과를 항상 높이는 것은 아니라는 연구도 나왔습니다.
아직 일부는 사전 공개 논문이므로 조심해서 읽어야 합니다. 그래도 방향은 분명합니다. AI의 설명은 이해를 돕는 도구가 될 수 있습니다. 동시에 이해한 듯한 느낌을 만들어낼 수도 있습니다.
그래서 메타인지가 필요합니다. “답이 좋은가?”만 묻지 말고, “나는 이 답을 어느 수준까지 이해했나?”를 물어야 합니다.
좋은 질문은 AI 답변을 그대로 믿기보다 내 판단의 근거와 빈틈을 확인하게 합니다.
메타인지를 키우는 5가지 질문
메타인지는 타고난 머리의 문제가 아닙니다. 습관에 가깝습니다. 다음 다섯 가지 질문만 자주 써도 생각의 질이 달라집니다.
1. 나는 지금 무엇을 알고 있다고 착각하고 있나?
가장 먼저 확인할 것은 착각입니다. 익숙한 단어를 보면 안다고 느낍니다. 하지만 익숙함과 이해는 다릅니다.
좋은 방법은 한 문장 설명입니다. 어떤 개념을 읽은 뒤, 초등학생에게 설명하듯 한 문장으로 바꿔 보세요. 설명이 막히면 아직 내 지식이 아닙니다.
AI 답변도 마찬가지입니다. 그대로 복사하지 말고 “내 말로 다시 쓰면 무엇인가?”를 물어야 합니다.
2. 내 자신감은 근거에서 온 것인가, 분위기에서 온 것인가?
사람은 문장이 매끄러우면 내용을 더 믿기 쉽습니다. AI 답변은 특히 그렇습니다. 자신감 있는 문체, 정돈된 목록, 전문 용어가 결합되면 신뢰감이 빠르게 올라갑니다.
하지만 메타인지는 자신감의 출처를 묻습니다. 내가 확신하는 이유가 데이터인지, 경험인지, 권위 있는 출처인지, 아니면 그럴듯한 문장 때문인지 구분해야 합니다.
업무 보고서라면 출처를 확인해야 합니다. 투자나 정책, 건강처럼 리스크가 큰 주제라면 더더욱 그렇습니다.
3. 반대 근거를 찾으면 내 판단이 바뀔 수 있나?
메타인지가 약할 때 사람은 자기 생각을 보호합니다. 메타인지가 강할 때 사람은 자기 생각을 시험합니다.
AI에게도 같은 태도가 필요합니다. “이 주장에 대한 반론은 무엇인가?”, “이 결론이 틀릴 수 있는 조건은 무엇인가?”, “다른 관점에서 보면 어떤 해석이 가능한가?”를 물어보면 답변의 품질이 달라집니다.
중요한 것은 반론을 형식적으로 붙이는 것이 아닙니다. 내 판단이 실제로 수정될 수 있어야 합니다.
4. 나는 답을 찾고 있나, 생각을 끝내고 싶어 하나?
바쁠수록 우리는 답을 원합니다. 더 정확히 말하면, 생각을 끝내고 싶어 합니다. AI는 이 욕구를 매우 잘 채워 줍니다.
문제는 중요한 판단일수록 빠른 종료가 위험하다는 점입니다. 채용, 전략, 교육 설계, 글쓰기, 사업 기획은 정답 하나로 끝나지 않습니다. 맥락과 목적, 이해관계가 얽혀 있습니다.
이때 메타인지 질문은 간단합니다. “나는 지금 결론이 필요한가, 탐색이 필요한가?” 결론이 필요한 순간과 더 생각해야 하는 순간을 구분하는 것이 중요합니다.
5. 다음 행동으로 검증할 수 있는가?
좋은 생각은 검증 가능한 행동으로 내려옵니다. 메타인지도 머릿속 성찰에만 머물면 약합니다.
예를 들어 글을 썼다면 한 사람에게 읽혀 봅니다. 강의안을 만들었다면 5분짜리 설명으로 테스트합니다. AI가 추천한 전략이라면 작은 실험을 먼저 해 봅니다.
“맞는 것 같다”에서 끝내지 않고 “작게 확인해 보자”로 이동할 때, 생각은 실제 능력이 됩니다.
AI를 잘 쓰는 루틴은 빠른 답보다 검증, 재구성, 최종 판단을 함께 포함합니다.
일과 학습에서 바로 써먹는 메타인지 루틴
메타인지를 거창하게 훈련할 필요는 없습니다. 하루 일과에 짧은 루틴으로 넣으면 됩니다.
업무를 시작하기 전에는 세 가지를 적습니다. 내가 아는 것, 모르는 것, 확인해야 할 것. 회의 전에는 내가 가진 가정이 무엇인지 적습니다. 회의 후에는 바뀐 생각을 한 줄로 남깁니다.
AI를 사용할 때는 더 분명한 루틴이 필요합니다.
먼저 내 초안을 짧게 쓴다.
AI에게 보완을 요청한다.
AI 답변에서 사실, 해석, 제안을 구분한다.
출처가 필요한 부분을 따로 표시한다.
마지막 문장은 내 판단으로 다시 쓴다.
이 순서가 중요합니다. 처음부터 AI에게 맡기면 내 생각의 기준점이 사라집니다. 반대로 내 초안을 먼저 만들면 AI는 대체자가 아니라 점검자가 됩니다.
메타인지는 AI 시대의 인간다운 속도다
AI는 빠릅니다. 그래서 우리는 더 빨라져야 한다고 느낍니다. 하지만 모든 생각이 빨라져야 하는 것은 아닙니다.
오히려 중요한 일에는 느린 구간이 필요합니다. 멈춰서 묻는 시간, 의심하는 시간, 다시 설명해 보는 시간, 작은 실험으로 확인하는 시간이 필요합니다.
메타인지는 그 느린 구간을 지키는 힘입니다. 게으른 망설임이 아니라, 더 나은 판단을 위한 의도적인 멈춤입니다.
앞으로 AI를 잘 쓰는 사람은 프롬프트를 많이 아는 사람만은 아닐 것입니다. 더 중요한 사람은 자기 생각의 상태를 볼 줄 아는 사람입니다. 내가 무엇을 아는지, 무엇을 모르는지, 언제 AI를 믿고 언제 다시 확인해야 하는지 아는 사람입니다.
그것이 메타인지입니다. 그리고 지금 이 능력은 공부법을 넘어, 일하는 방식과 배우는 방식의 핵심이 되고 있습니다.
When order has broken down, each person’s role becomes visible first.
How this article reads the characters
This article is a character interpretation of Netflix’s drama Teach You a Lesson through the lens of MBTI. Here, MBTI is not a tool for judging the actors or real people. It is closer to a lens for asking what each character notices first under pressure, how they collide with others, and how they carry responsibility.
Teach You a Lesson is built around schools where students, teachers, and parents have crossed the line. It also centers on the Teacher’s Rights Protection Bureau, which steps in to set things right. Because of that setup, the characters do not reveal themselves in calm everyday routines. They reveal themselves in conflict and crisis. One person moves immediately. Another designs the field. Another organizes information. Another pushes into the situation with their body first.
This article focuses on Na Hwa-jin, Im Han-lim, Choi Kang-seok, and Bong Geun-dae. The goal is not to “guess four letters” as if there were one official answer. The more interesting question is why these people speak about justice in such different ways. It is also why they move at different speeds even when they are aiming at the same goal.
Quick answer: MBTI summary for the main characters
Character
This article’s interpretation
Possible alternative
Confidence
Core reason
Na Hwa-jin
ENTJ
ESTJ
72%
Takes control of the field and moves people and situations toward results
Im Han-lim
ESTP
ENTP
68%
Fast reaction, bold execution, and unpredictable breakthroughs
Choi Kang-seok
INTJ
ENTJ
63%
Institutional design, long-term strategy, and a structural view of problems
Bong Geun-dae
INTP
ENTP
61%
Information analysis, systems thinking, and loose but quick problem solving
Teacher’s Rights Protection Bureau team
Mixed-type team
–
60%
Command, execution, strategy, and analysis are divided across the team
MBTI works better here as a lens for repeated behavior than as a fixed label.
This table is only a starting point. In Teach You a Lesson, the more important question is not “who is stronger,” but “who tries to restore order in what way.” Na Hwa-jin pushes directly into the field. Im Han-lim shakes the situation with an irregular speed. Choi Kang-seok looks at the larger institutional frame. Bong Geun-dae supports the team through information and systems.
Before reading it through MBTI: these are crisis-intervention characters
The characters in Teach You a Lesson are closer to crisis-intervention characters than ordinary coming-of-age drama characters. Official materials introduce the series through the Teacher’s Rights Protection Bureau, created to deal with collapsed teacher authority and broken school environments. In other words, these characters exist by being sent into places where balance has already fallen apart.
In this kind of setup, personality does not appear gently. Who gathers information first, who accepts risk, who persuades people, and who overturns the board becomes the evidence of personality. That is why an MBTI reading of Teach You a Lesson should focus less on speech style or surface impression and more on repeated judgment patterns.
Another important point is that the drama carries both real social issues and genre fantasy. The Teacher’s Rights Protection Bureau is a dramatic device that pushes through the frustration viewers may feel in real life. So the characters move between realistic public officials and genre-style problem solvers. That double quality makes the MBTI reading more interesting.
It is not enough to see Na Hwa-jin only as a tough male character. It is also not enough to see Im Han-lim only as someone reckless. Choi Kang-seok and Bong Geun-dae cannot be explained by their job titles alone, either. All of them try to restore order, but their methods of restoration are different.
The person who takes control of the field first clarifies direction.
Na Hwa-jin MBTI: an ENTJ-like field commander and problem solver
Na Hwa-jin’s repeated behavior and judgment standard
At first glance, Na Hwa-jin may look forceful and uncompromising. But if we reduce him to “a strong person,” we miss the important part. His core is not the display of power. It is the drive to regain control quickly in a field that has already broken down.
Netflix’s official page and trailer materials present Na Hwa-jin as an inspector at the Teacher’s Rights Protection Bureau. He is a person who solves school problems in his own way. That setup is the starting point for understanding his personality. He is not someone who observes a case from far away. He steps into the middle of the field and shakes the center of the problem directly.
The first repeated feature Na Hwa-jin shows is speed of judgment. Instead of holding on to a situation for a long explanation, he quickly sees what is wrong. He also sees where pressure has to be applied for the situation to change. This speed fits an ENTJ-like drive to organize the outside world and produce results.
The second feature is the way he moves people. Na Hwa-jin is not a gentle coordinator who keeps everyone comfortable. He applies the pressure he thinks is necessary, even if the other person dislikes it. On the surface, this can look aggressive. At a deeper level, though, what he wants is not emotional victory. It is the restoration of order.
Why Na Hwa-jin reads as ENTJ
In relationships, Na Hwa-jin does not explain trust at length. He looks at whether the other person can play their role. He also looks at whether they can endure the field they are standing in and avoid stepping back in the face of risk. His relationship style is therefore closer to recognition in real situations than warm verbal empathy. He quickly gives room to people who can move with him, but reacts sharply to people who avoid responsibility.
Under pressure, Na Hwa-jin changes the structure before soothing emotions. He calculates who is creating harm, what kind of power is twisting the field, and how the board has to be overturned. This is where he reads as ENTJ. E does not mean loudness; it means energy directed toward direct intervention in the outside situation. N points to a sense for structural problems beyond the event in front of him. T is not coldness; it means placing judgment on results and principles. J is not a closed personality; it is a way of organizing the board toward a goal.
There is also room to read Na Hwa-jin as ESTJ. If we emphasize rules, order, responsibility, and immediate execution in the field, the ESTJ interpretation makes sense. Still, this article leans a little more toward ENTJ. Na Hwa-jin seems less like someone simply enforcing existing rules and more like someone strategically taking control of a broken field to create the result he wants.
In the end, Na Hwa-jin is closer to “someone who reorganizes the field around results” than “someone who presses people down with force.” That is also why he can feel uncomfortable. Rather than carefully adjusting the temperature of each relationship, he drives people and situations in the direction he believes is necessary. His ENTJ-like side is therefore better read as leadership that proves responsibility through results, not as a desire to dominate.
An unpredictable move can be the force that shakes a closed situation open.
Im Han-lim MBTI: an ESTP-like executor who breaks through unpredictably
Im Han-lim’s field sense and execution style
Im Han-lim is an inspector like Na Hwa-jin, but her rhythm of movement is different. Official newsroom materials describe her as a former special forces soldier who now works as an inspector at the Teacher’s Rights Protection Bureau. Netflix episode descriptions also describe her as a “wild card” who is hard to predict. Even from that phrase alone, Im Han-lim feels like a character whose field reaction comes before the written plan.
Her first impression is free, bold, and unrestrained. But that freedom is not simple impulsiveness. She reads situations through her body, senses the direction of danger quickly, and instantly digs into the other side’s weak point. This agility fits an ESTP-like sensitivity to the reality and stimuli right in front of her.
In terms of repeated behavior, Im Han-lim reads the temperature of the field before the fixed procedure. Instead of persuading at length, she collides directly and tries to create a crack quickly. When someone subtly controls the mood, Im Han-lim does not solve that situation with logic alone. She changes the flow through posture, tone, timing, and the intensity of pressure.
Why Im Han-lim reads as ESTP
In relationships, Im Han-lim has a short distance. She reacts directly rather than observing people from far away. This is both a strength and a weakness. To some people, she may feel like a refreshing teammate. To others, she may feel hard to predict. Im Han-lim is a character whose feelings are already visible in her reactions before she has neatly organized them into words.
In conflict, Im Han-lim chooses approach over avoidance. She does not wait because she is afraid; she judges while moving. In crisis situations, this style can be powerful. But not every problem can be solved only through a fast breakthrough. That is why her style may sometimes clash with Na Hwa-jin’s bigger picture or Choi Kang-seok’s institutional judgment.
In MBTI terms, Im Han-lim’s E points to energy that comes alive through direct contact with people and situations. S points to a focus on what is happening right now rather than abstract slogans. T does not mean a lack of emotion. It is closer to a tendency to look first for a workable solution instead of sinking into emotion during urgent moments. P is not looseness for its own sake; it is a way of keeping options open in a changing field.
An ENTP reading is also possible. If we emphasize Im Han-lim’s irregularity, verbal speed, and enjoyment of shaking the board, she can be read as ENTP. This article, however, gives more weight to ESTP. Her core does not seem to be the expansion of ideas as a logic game. It is the way she cuts in immediately through field pressure and physical instinct.
Im Han-lim may look like an unstable variable inside the team, but that variability is exactly what makes her feel alive. When not every problem can be solved by rules and procedure, she changes the atmosphere of the field. Her ESTP-like side is therefore not light improvisation. It is survival-oriented execution that works instantly in crisis.
When Na Hwa-jin and Im Han-lim meet: ENTJ and ESTP in the same field
Relationship point
Na Hwa-jin’s tendency
Im Han-lim’s tendency
Possible conflict or complement
Field approach
Tries to control the whole board
Jumps into the crack in front of her
Their speed aligns, but their methods can differ
Leadership
Results and responsibility first
Action and reaction first
Command and improvisation may collide
Risk response
Calculated pressure
Breakthrough through direct contact
They become a strong team if they recognize each other’s strengths
Relationship expression
Recognition and role assignment
Reaction and companionship
Trust grows in the field more than through words
The relationship between Na Hwa-jin and Im Han-lim is interesting because both of them are moving characters. Neither of them is the type to sit still and wait. But if Na Hwa-jin designs the board and then pushes into it, Im Han-lim works differently. She senses the tremor inside the board and jumps in right away.
That difference can become a strong complement inside the team. Na Hwa-jin sets the direction, and Im Han-lim creates speed inside that direction. To Na Hwa-jin, Im Han-lim is unpredictable but necessary execution power. To Im Han-lim, Na Hwa-jin is the command line that turns improvisation into results.
Of course, conflict is also possible. Na Hwa-jin, read as ENTJ-like, tries to control the flow for the sake of results. Im Han-lim, read as ESTP-like, trusts the immediate sense of the field. From Na Hwa-jin’s view, Im Han-lim may jump too far. From Im Han-lim’s view, Na Hwa-jin may try to hold the board too tightly.
But in a drama like Teach You a Lesson, that tension becomes part of the team’s driving force. The problems faced by the Teacher’s Rights Protection Bureau are not solved only in a neat meeting room. Someone has to see the larger structure, and someone has to push the situation in front of them. The difference between the two is not simple compatibility. It is how a crisis-response team works.
So the core of this relationship is not “they match well.” It is that when two different speeds of execution face the same direction, the team becomes much stronger. Na Hwa-jin binds Im Han-lim’s speed to a direction, and Im Han-lim gives Na Hwa-jin’s direction the vitality of the actual field.
Choi Kang-seok MBTI: an INTJ-like strategist who designs institutions
Choi Kang-seok is introduced as the Minister of Education who created the Teacher’s Rights Protection Bureau. He is less a field-level problem solver who runs into the situation himself. He is more the person who creates the board on which such problem solvers can move. His personality should therefore be read through the size of his view rather than the intensity of his actions.
Choi Kang-seok’s first feature is that he sees structure first. He does not look only at a single school incident, one offender, or one conflict. He looks at why these problems repeat at an institutional level. This attitude fits an INTJ-like sense for long-term patterns and direction inside scattered events.
The second feature is that he places people into roles rather than emotionally comforting them. Through the Teacher’s Rights Protection Bureau, Choi Kang-seok institutionalizes the method of problem solving. This is an attempt to keep anger from being consumed as a simple emotion and to make it work inside a system.
In relationships, Choi Kang-seok is closer to a designer than a warm comforter. He understands why someone like Na Hwa-jin is needed. He also sees the kinds of situations where an executor like Im Han-lim can exert power. Rather than gathering people because he likes them personally, he builds a team by placing necessary people in necessary positions.
In conflict, Choi Kang-seok looks at long-term consequences before immediate emotional reaction. Because of that, he can sometimes appear cold or calculating. But T does not only mean coldness. For Choi Kang-seok, T is a standard that prioritizes public judgment over personal preference. J is the way he fixes that judgment into organizations and systems.
An ENTJ reading is also possible. His position as minister, his drive to create an organization, and his use of authority can all be read as ENTJ. This article, however, leans more toward INTJ. Choi Kang-seok seems less like a leader who personally dominates the field. He looks more like a strategist who designs the larger board on which the field can operate.
Choi Kang-seok is a quiet axis inside Teach You a Lesson. If Na Hwa-jin and Im Han-lim are remembered through movement, Choi Kang-seok remains through structure. His INTJ-like side is therefore not a cold distance from people. It is the attitude of a designer who wants to change the problem in a way that can last.
Bong Geun-dae MBTI: an INTP-like information supporter who reads systems
Bong Geun-dae is introduced as a genius officer at the Teacher’s Rights Protection Bureau. From that setup alone, he may look like a typical analytical supporter. But a good supporter is not simply someone who organizes documents. A good supporter discovers variables the team has missed and turns complicated information into something the team can act on.
Bong Geun-dae’s first feature is that he reads problems as systems before reading them as people. Instead of focusing first on who got angry, he looks for missing information, weak procedures, and hidden connections. This attitude fits an INTP-like form of internal logic-centered thinking, often described in MBTI cognitive-function language as a Ti tendency.
The second feature is that he creates a slightly different rhythm inside tense situations. When Na Hwa-jin and Im Han-lim create pressure at the front, Bong Geun-dae interprets the board from behind. His presence keeps the team from moving only through force. Pressure needs information to gain direction, and execution needs analysis to avoid waste.
In relationships, Bong Geun-dae is unlikely to be the type who displays emotion loudly. Instead, he gives the information the team needs and provides the basis for the next action. His way of expressing care is closer to useful clues and hints toward a solution than emotional language.
Under pressure, Bong Geun-dae tries to grasp the structure before jumping in. This style can look slow in a fast-moving field. But the more complex the problem is, the more the team needs someone like Bong Geun-dae. Immediate action alone cannot reveal connections that are hidden under the surface.
An ENTP reading is also possible. If the “genius officer” setup and his ability to shift the team’s mood are emphasized, he can be read as ENTP. This article, however, gives more weight to INTP. His center seems closer to analyzing information and understanding structure through internal logic than to persuading people and expanding the board outward.
Bong Geun-dae is not a person who slows the team down. He is the person who keeps its speed from spinning in the wrong direction. The teamwork in Teach You a Lesson is not completed by Na Hwa-jin’s pressure and Im Han-lim’s breakthrough alone. When someone like Bong Geun-dae quietly reads the system, the team’s actions become designed intervention rather than simple anger.
A team grows stronger when different functions interlock, not when everyone has the same style.
Team analysis: command, execution, strategy, and analysis are divided
Viewed through MBTI, the Teacher’s Rights Protection Bureau team is not a group of people with the same type. It is closer to a team where different functions are divided. Na Hwa-jin controls the field. Im Han-lim breaks through irregularly. Choi Kang-seok designs the institutional direction, and Bong Geun-dae interprets information and systems.
This combination is interesting because all of them talk about justice, but they approach justice differently. For Na Hwa-jin, justice is a result that must be corrected now. For Im Han-lim, justice is the bodily reaction to unfairness right in front of her. For Choi Kang-seok, justice is institutional balance. For Bong Geun-dae, justice begins with reading the structure of the problem accurately.
Each person’s strength can also become the seed of conflict. Na Hwa-jin’s drive can feel like pressure to someone else. Im Han-lim’s quick reaction can shake a plan. Choi Kang-seok’s strategy can feel distant in the field. Bong Geun-dae’s analysis can feel frustrating in an urgent situation.
But teams become stronger when they are different, not when everyone is the same. Especially in a drama like Teach You a Lesson, which deals with cracks in the school environment, emotion, institution, field action, and information are all necessary. If only one side is emphasized, the problem becomes oversimplified. The strength of the Teacher’s Rights Protection Bureau team comes from that balance.
The best way to read this team through MBTI is not to look at a compatibility chart. It is to look at what function each character performs. When ENTJ-like command, ESTP-like execution, INTJ-like design, and INTP-like analysis face the same direction, the team becomes more than a dramatic device. It becomes a living group.
What to be careful about in this analysis
First, the MBTI types in this article are not official settings. Netflix’s official materials introduce the plot, cast, and character setup, but they do not officially confirm the characters’ MBTI types. The types in this article are interpretations based on behavior and relationship patterns inside the drama.
Second, T and F should not be used to divide people into cold and warm personalities. If Na Hwa-jin or Choi Kang-seok reads as T-like, that does not mean they have no emotion. It means they seem more likely to put results, structure, and responsibility before emotion as a decision standard.
Third, E and I should not be judged only by how much someone talks. Im Han-lim’s E does not simply mean that she is lively. It means she reacts immediately to external situations and gains energy through contact with the field. Bong Geun-dae’s I is not passivity, either. It is closer to a way of approaching problems through internal logic and analysis.
Fourth, the genre exaggeration should not be taken as a real-world answer for schools. Teach You a Lesson deals with real problems, but it also uses genre catharsis. The purpose of this article is to read those genre characters through the language of personality types.
Finally, this reading may differ from fandom interpretations. Some readers may see Na Hwa-jin as ESTJ, Im Han-lim as ENTP, or Choi Kang-seok as ENTJ. Those differences are not necessarily mistakes. They are usually differences in emphasis. Depending on which behavior is placed at the center, a character’s MBTI can change.
Conclusion: Teach You a Lesson is more about “how to set things right” than about MBTI
The appeal of Teach You a Lesson is not limited to guessing whether Na Hwa-jin is ENTJ or Im Han-lim is ESTP. The more important question is how people move when they face a broken field. One person commands the board, one breaks through with the body, one designs institutions, and one reads the gaps in the information.
MBTI makes those differences easier to see. People who share the same goal do not always fight in the same way. That is why the characters in Teach You a Lesson are remembered first through the rhythm of their actions, not through four letters.
This article reads Na Hwa-jin as close to ENTJ and Im Han-lim as close to ESTP. It also reads Choi Kang-seok as close to INTJ and Bong Geun-dae as close to INTP. But the most important interpretation is elsewhere. Teach You a Lesson shows not only a single powerful problem solver, but the process by which different forms of responsibility gather and become a team.
This article reads Na Hwa-jin as close to ENTJ. He quickly takes control of the field, pushes problems toward results, and moves people and situations in the direction of a goal. However, an ESTJ reading is also possible if we emphasize his focus on order and responsibility.
Is Im Han-lim from Teach You a Lesson an ESTP?
This article interprets Im Han-lim as close to ESTP. Official materials introduce her as a former special forces soldier and an inspector. Inside the drama, she reads as a character with immediate execution power and unpredictable reactions. If her irregularity and verbal speed are emphasized, an ENTP reading is also possible.
What types could Choi Kang-seok and Bong Geun-dae be?
Choi Kang-seok is read as close to INTJ because he created the Teacher’s Rights Protection Bureau. He also seems to look first at institutions and long-term strategy. Bong Geun-dae is given more weight as INTP because he works as a supporter who understands information and systems.
Are these official MBTI types?
No. This article is a blog-style interpretation for reading fictional characters, not an official MBTI source. Official materials were used to confirm the series introduction and character setup, while the MBTI types were inferred from scenes, behavior, and relationship patterns.
Is it okay to analyze drama characters through MBTI?
Yes, as long as MBTI is not treated as an answer sheet. Character MBTI works best as a language for discussing why a character repeats certain choices. It should not be used as a tool for fixing that character into one final label.
Image source: Captured images used in this article are stills from the original YouTube video. They are used for review, commentary, and educational explanation, and copyright remains with the original rights holders and the channel.
이 글은 넷플릭스 드라마 《참교육》의 등장인물을 MBTI로 읽어보는 캐릭터 해석입니다. 여기서 MBTI는 실제 배우나 실제 인물을 평가하는 도구가 아닙니다. 작품 속 인물이 어떤 압박 앞에서 무엇을 먼저 보고, 누구와 어떻게 부딪히며, 어떤 방식으로 책임을 감당하는지 살펴보는 렌즈에 가깝습니다.
《참교육》은 선을 넘는 학생, 교사, 학부모로 인해 흔들린 교육 현장과, 이를 바로잡기 위해 등장한 교권보호국을 중심에 둔 작품입니다. 그래서 인물들은 평온한 일상에서 성격을 드러내기보다, 충돌과 위기 속에서 성향을 드러냅니다. 누군가는 즉시 움직이고, 누군가는 판을 설계하며, 누군가는 정보를 정리하고, 누군가는 몸으로 먼저 부딪힙니다.
이 글에서는 나화진, 임한림, 최강석, 봉근대를 중심으로 봅니다. 다만 네 글자를 맞히는 것이 목적은 아닙니다. 더 중요한 질문은 이들이 왜 그런 방식으로 정의를 말하고, 왜 같은 목표를 향하면서도 서로 다른 속도로 움직이는가입니다.
빠른 결론: 주요 등장인물 MBTI 요약
인물
이 글의 해석
대체 가능성
확신도
핵심 근거
나화진
ENTJ
ESTJ
72%
현장을 장악하고 결과를 향해 사람과 판을 움직임
임한림
ESTP
ENTP
68%
즉각 반응, 과감한 실행, 예측 밖의 돌파력
최강석
INTJ
ENTJ
63%
제도 설계, 장기 전략, 큰 구조를 먼저 봄
봉근대
INTP
ENTP
61%
정보 분석, 시스템 이해, 느슨하지만 빠른 문제 해결
교권보호국 팀
혼합형 팀
–
60%
지휘·실행·전략·분석이 분업되는 구조
MBTI는 인물을 고정하는 라벨보다 반복 행동을 읽는 렌즈에 가깝습니다.
이 표는 재미있게 보기 위한 출발점입니다. 《참교육》의 인물들은 “누가 더 세다”보다 “누가 어떤 방식으로 질서를 회복하려 하는가”가 중요합니다. 나화진은 현장을 밀고 들어가고, 임한림은 변칙적인 속도로 판을 흔듭니다. 최강석은 제도라는 큰 틀을 보고, 봉근대는 정보와 시스템으로 팀을 받칩니다.
MBTI로 보기 전에: 《참교육》의 인물은 ‘위기 개입형 캐릭터’다
《참교육》의 인물은 평범한 성장 드라마의 캐릭터라기보다 위기 개입형 캐릭터에 가깝습니다. 공식 소개에서 작품은 무너진 교권과 교육 현장을 바로잡기 위해 창설된 교권보호국을 전면에 세웁니다. 즉 인물들은 누군가의 일상에 조용히 스며드는 방식이 아니라, 이미 균형이 무너진 현장에 투입되는 방식으로 존재합니다.
이 설정에서는 성격이 부드럽게 드러나지 않습니다. 누가 먼저 정보를 모으는지, 누가 위험을 감수하는지, 누가 사람을 설득하는지, 누가 판을 뒤집는지가 곧 성격의 증거가 됩니다. 그래서 《참교육》의 MBTI 분석은 말투나 겉인상보다 반복되는 판단 기준을 봐야 합니다.
또 하나 중요한 점은 이 작품이 현실 문제와 장르적 판타지를 함께 품고 있다는 점입니다. 교권보호국은 현실의 답답함을 드라마적 방식으로 밀어붙이는 장치입니다. 그래서 인물들의 행동도 현실적인 행정가와 장르적 해결사 사이를 오갑니다. 이 이중성이 MBTI 해석을 더 흥미롭게 만듭니다.
나화진을 단순한 강한 남자 캐릭터로만 보면 부족합니다. 임한림을 단순히 거침없는 인물로만 봐도 부족합니다. 최강석과 봉근대 역시 각각 권력자와 사무관이라는 역할명만으로 설명되지 않습니다. 이들은 모두 무너진 질서를 회복하려 하지만, 회복의 방법이 다릅니다.
현장을 장악하는 사람은 먼저 방향을 정리합니다.
나화진 MBTI: ENTJ에 가까운 ‘현장 지휘형 해결사’
나화진의 반복 행동과 판단 기준
나화진은 얼핏 보면 강압적이고 거침없는 인물처럼 보입니다. 하지만 이 인물을 단순히 “센 사람”으로 정리하면 중요한 부분을 놓치게 됩니다. 나화진의 핵심은 힘의 과시가 아니라, 무너진 현장에서 빠르게 통제권을 되찾으려는 실행력입니다.
Netflix 공식 소개와 예고편 설명에서 나화진은 교권보호국 감독관으로 제시됩니다. 학교에서 벌어지는 문제를 자신만의 방식으로 해결하는 인물입니다. 이 설정은 그의 성격을 이해하는 출발점입니다. 그는 사건을 멀리서 관찰하는 사람이 아니라, 현장 안으로 들어가 문제의 중심을 직접 흔드는 사람입니다.
나화진이 반복해서 보여주는 첫 번째 특징은 판단의 속도입니다. 그는 상황을 오래 붙잡고 설명하기보다, 지금 무엇이 잘못됐고 어디를 눌러야 판이 바뀌는지를 빠르게 봅니다. 이 속도는 ENTJ의 Te, 즉 외부 세계를 구조화하고 결과를 만들어내려는 기능과 잘 맞습니다.
두 번째 특징은 사람을 움직이는 방식입니다. 나화진은 모두에게 친절한 조정자는 아닙니다. 오히려 상대가 불편해하더라도 필요한 압박을 가합니다. 겉으로는 공격적으로 보일 수 있지만, 더 깊게 보면 그가 원하는 것은 감정의 승리가 아니라 질서의 회복입니다.
나화진을 ENTJ로 읽는 이유
관계 안에서 나화진은 신뢰를 말로 길게 설명하지 않습니다. 그는 상대가 제 역할을 할 수 있는지, 지금 이 판에서 버틸 수 있는지, 위험 앞에서 물러서지 않을 수 있는지를 봅니다. 그래서 나화진의 관계 방식은 따뜻한 공감보다 실전에서의 인정에 가깝습니다. 함께 움직일 수 있는 사람에게는 빠르게 공간을 내주지만, 책임을 회피하는 사람에게는 날카롭게 반응합니다.
압박 상황에서 나화진은 감정을 먼저 달래기보다 구조를 먼저 바꿉니다. 누가 피해를 만들고 있는지, 어떤 권력이 현장을 비틀고 있는지, 어떤 방식으로 판을 뒤집어야 하는지를 계산합니다. 이 지점에서 그는 ENTJ적으로 읽힙니다. E는 시끄럽다는 뜻이 아니라 외부 상황에 직접 개입해 에너지를 쓰는 방향입니다. N은 눈앞의 사건을 넘어 구조의 문제를 보는 감각입니다. T는 차가움이 아니라 판단 기준을 결과와 원칙에 두는 태도입니다. J는 닫힌 성격이 아니라 목표를 향해 판을 정리하려는 방식입니다.
다만 나화진을 ESTJ로 볼 여지도 있습니다. 현장의 규칙, 질서, 책임, 즉각적인 실행을 강조하면 ESTJ 해석도 설득력이 있습니다. 그래도 이 글에서는 ENTJ 쪽에 조금 더 무게를 둡니다. 나화진은 기존 규칙을 그대로 집행하는 사람이라기보다, 무너진 판을 새롭게 장악하고 원하는 결과를 만들기 위해 전략적으로 움직이는 인물에 가깝기 때문입니다.
결국 나화진은 “힘으로 누르는 사람”보다 “현장을 결과 중심으로 재편하는 사람”에 가깝습니다. 그가 불편하게 보일 수 있는 이유도 여기에 있습니다. 그는 관계의 온도를 세심하게 맞추기보다, 지금 필요한 방향으로 사람과 상황을 몰아갑니다. 그래서 그의 ENTJ적 면모는 지배욕이 아니라 책임을 결과로 증명하려는 리더십으로 읽는 편이 자연스럽습니다.
예측 밖의 움직임은 때로 닫힌 판을 흔드는 힘이 됩니다.
임한림 MBTI: ESTP에 가까운 ‘예측 밖의 돌파형 실행자’
임한림의 현장 감각과 실행 방식
임한림은 나화진과 같은 감독관이지만, 움직이는 리듬이 다릅니다. 공식 뉴스룸 자료에서 임한림은 특전사 출신 교권보호국 감독관으로 소개됩니다. Netflix 에피소드 소개에서도 “어디로 튈지 모르는 럭비공 같은” 인물로 설명됩니다. 이 표현만 놓고 봐도 임한림은 계획서보다 현장 반응이 먼저 나오는 캐릭터에 가깝습니다.
임한림의 첫인상은 자유롭고 거침없습니다. 하지만 이 자유로움은 단순한 충동성과 다릅니다. 그는 상황을 몸으로 읽고, 위험의 방향을 빠르게 감지하며, 상대의 허점을 순간적으로 파고듭니다. 이 민첩함은 ESTP의 Se, 즉 눈앞의 현실과 자극에 즉각 반응하는 감각과 잘 맞습니다.
반복 행동으로 보면 임한림은 정해진 절차보다 현장의 온도를 먼저 봅니다. 말로 오래 설득하기보다 직접 부딪히고, 가능하면 빠르게 균열을 만들어냅니다. 누군가가 교묘하게 분위기를 장악하면, 임한림은 그 판을 논리로만 풀지 않습니다. 몸짓, 말투, 타이밍, 압박의 강도를 이용해 흐름을 바꿉니다.
임한림을 ESTP로 읽는 이유
관계 속에서 임한림은 거리감이 짧습니다. 사람을 멀리서 관찰하기보다 바로 반응합니다. 이 점은 장점이자 약점입니다. 상대에게는 속이 시원한 동료처럼 보일 수 있지만, 동시에 예측하기 어려운 사람으로 느껴질 수도 있습니다. 임한림은 마음을 정리해서 보여주기보다, 반응 속에 이미 마음이 드러나는 인물입니다.
갈등 앞에서 임한림은 회피보다 접근을 택합니다. 무서워서 움직이지 않는 것이 아니라, 움직이면서 판단합니다. 이 방식은 위기 현장에서는 강력합니다. 하지만 모든 문제가 빠른 돌파로만 풀리는 것은 아니기 때문에, 때로는 나화진의 큰 그림이나 최강석의 제도적 판단과 부딪힐 가능성도 있습니다.
MBTI 지표로 보면 임한림의 E는 사람들과의 직접 접촉에서 에너지가 살아나는 방향입니다. S는 추상적인 구호보다 지금 눈앞의 움직임을 보는 태도입니다. T는 감정이 없다는 뜻이 아닙니다. 오히려 긴박한 상황에서 감정에 잠기기보다 작동 가능한 해법을 먼저 찾는 기준에 가깝습니다. P는 느슨함이 아니라 변화하는 현장에서 선택지를 열어두는 방식입니다.
ENTP 가능성도 있습니다. 임한림의 변칙성, 말의 속도, 판을 흔드는 재미를 강조하면 ENTP로도 읽힙니다. 다만 이 글에서는 ESTP에 더 무게를 둡니다. 임한림의 핵심은 아이디어를 논리 게임처럼 확장하는 데보다, 현장의 압력과 몸의 감각으로 바로 치고 들어가는 데 있기 때문입니다.
임한림은 팀 안에서 불안정한 변수처럼 보이지만, 바로 그 변수성 때문에 살아 있는 인물입니다. 모든 문제가 규정과 절차로만 해결되지 않을 때, 임한림은 현장의 공기를 바꿉니다. 그래서 그의 ESTP적 면모는 가벼운 즉흥성이 아니라 위기 속에서 즉각적으로 작동하는 생존형 실행력으로 읽힙니다.
나화진과 임한림의 관계: ENTJ와 ESTP가 만났을 때
관계 지점
나화진 쪽 경향
임한림 쪽 경향
갈등 또는 보완 가능성
현장 접근
판 전체를 장악하려 함
눈앞의 균열에 바로 뛰어듦
속도는 맞지만 방식이 다를 수 있음
리더십
결과와 책임 중심
행동과 반응 중심
지휘와 즉흥이 충돌할 수 있음
위험 대응
계산된 압박
몸으로 부딪히는 돌파
서로의 강점을 알아보면 강한 팀이 됨
관계 표현
인정과 역할 부여
반응과 동행
말보다 현장에서 신뢰가 쌓임
나화진과 임한림의 관계가 흥미로운 이유는 두 사람이 모두 움직이는 인물이라는 점입니다. 둘 다 가만히 앉아 기다리는 쪽은 아닙니다. 하지만 나화진이 판을 설계한 뒤 밀고 들어간다면, 임한림은 판 안의 흔들림을 감지하고 곧장 뛰어듭니다.
이 차이는 팀 안에서 강력한 보완이 됩니다. 나화진은 방향을 잡고, 임한림은 그 방향 안에서 속도를 냅니다. 나화진에게 임한림은 예측 불가능하지만 필요한 실행력입니다. 임한림에게 나화진은 즉흥을 성과로 연결해주는 지휘선입니다.
물론 갈등도 생길 수 있습니다. ENTJ적으로 읽히는 나화진은 결과를 위해 흐름을 통제하려 합니다. ESTP적으로 읽히는 임한림은 현장의 순간 감각을 믿습니다. 나화진이 보기에는 임한림이 너무 튈 수 있고, 임한림이 보기에는 나화진이 지나치게 판을 잡으려 할 수 있습니다.
하지만 《참교육》 같은 작품에서는 이 긴장이 오히려 팀의 추진력이 됩니다. 교권보호국이 상대하는 문제는 정리된 회의실 안에서만 풀리지 않습니다. 누군가는 큰 구조를 보고, 누군가는 지금 눈앞의 상황을 밀어붙여야 합니다. 두 사람의 차이는 단순 궁합이 아니라, 위기 대응 팀이 작동하는 방식입니다.
그래서 이 관계의 핵심은 “잘 맞는다”가 아닙니다. 서로 다른 속도의 실행력이 같은 방향을 향할 때, 팀은 훨씬 강해집니다. 나화진은 임한림의 속도를 방향으로 묶고, 임한림은 나화진의 방향에 현장의 생기를 불어넣습니다.
최강석 MBTI: INTJ에 가까운 ‘제도를 설계하는 전략가’
최강석은 교권보호국을 창설한 교육부 장관으로 소개됩니다. 그는 현장에 직접 뛰어드는 해결사라기보다, 그런 해결사가 움직일 수 있는 판을 만든 인물입니다. 그래서 최강석의 성격은 행동의 강도보다 시야의 크기로 읽어야 합니다.
최강석의 첫 번째 특징은 구조를 먼저 본다는 점입니다. 한 학교의 사건, 한 명의 가해자, 한 번의 갈등만 보는 것이 아니라, 왜 이런 문제가 반복되는지를 제도 차원에서 바라봅니다. 이 태도는 INTJ의 Ni, 즉 흩어진 사건 속에서 장기적인 패턴과 방향을 읽는 감각과 잘 맞습니다.
두 번째 특징은 사람을 감정적으로 달래기보다 역할로 배치한다는 점입니다. 최강석은 교권보호국이라는 조직을 통해 문제 해결의 방식을 제도화합니다. 이것은 현장의 분노를 단순한 감정으로 소비하지 않고, 시스템 안에서 작동하게 만들려는 태도입니다.
관계 속에서 최강석은 따뜻한 위로자라기보다 설계자에 가깝습니다. 그는 나화진 같은 인물이 왜 필요한지 압니다. 임한림 같은 실행자가 어떤 상황에서 힘을 발휘하는지도 봅니다. 사람을 좋아해서 모으기보다, 필요한 자리에 필요한 사람을 놓는 방식으로 팀을 구성합니다.
갈등 앞에서 최강석은 즉각적인 감정 반응보다 장기적 결과를 봅니다. 이 때문에 때로는 차갑거나 계산적으로 보일 수 있습니다. 하지만 T는 냉정함만을 뜻하지 않습니다. 최강석에게 T는 개인적 호감보다 공적 판단을 우선하는 기준입니다. J는 그 판단을 조직과 제도로 고정하려는 방식입니다.
ENTJ 가능성도 있습니다. 장관이라는 위치, 조직을 창설하는 추진력, 권한을 행사하는 방식은 ENTJ로도 읽힙니다. 다만 이 글에서는 INTJ 쪽에 더 무게를 둡니다. 최강석은 직접 현장을 장악하는 리더라기보다, 현장이 작동할 수 있는 큰 판을 설계하는 전략가로 보이기 때문입니다.
최강석은 《참교육》 안에서 조용한 축입니다. 나화진과 임한림이 움직임으로 기억된다면, 최강석은 구조로 남습니다. 그래서 그의 INTJ적 면모는 차가운 거리감이 아니라, 문제를 오래 가는 방식으로 바꾸려는 설계자의 태도에 가깝습니다.
봉근대 MBTI: INTP에 가까운 ‘시스템을 읽는 정보형 조력자’
봉근대는 교권보호국의 천재 사무관으로 소개됩니다. 이 설정만 놓고 보면 그는 전형적인 분석형 조력자처럼 보입니다. 하지만 좋은 조력자는 단순히 자료를 정리하는 사람이 아닙니다. 팀이 놓친 변수를 발견하고, 복잡한 정보를 작동 가능한 형태로 바꾸는 사람입니다.
봉근대의 첫 번째 특징은 문제를 사람보다 시스템으로 읽는다는 점입니다. 누가 화를 냈는지보다 어떤 정보가 빠졌는지, 어떤 절차가 허술한지, 어떤 연결이 숨어 있는지를 봅니다. 이 태도는 INTP의 Ti, 즉 내부 논리와 구조를 파고드는 기능과 잘 맞습니다.
두 번째 특징은 긴장된 현장 안에서 한 박자 다른 리듬을 만든다는 점입니다. 나화진과 임한림이 전면에서 압박을 만들 때, 봉근대는 뒤에서 판을 해석합니다. 그의 존재는 팀이 단순히 힘으로만 움직이지 않게 해줍니다. 정보가 있어야 압박도 방향을 얻고, 분석이 있어야 실행도 낭비되지 않습니다.
관계 속에서 봉근대는 감정을 크게 드러내는 유형은 아닐 가능성이 큽니다. 대신 필요한 정보를 주고, 팀이 다음 행동을 할 수 있도록 근거를 제공합니다. 마음을 표현하는 방식이 정서적 언어보다 유용한 단서와 해결의 힌트에 가까운 셈입니다.
압박 상황에서 봉근대는 바로 뛰어들기보다 구조를 파악하려 합니다. 이 방식은 빠른 현장에서는 느려 보일 수 있습니다. 하지만 복잡한 문제일수록 봉근대 같은 인물이 필요합니다. 즉각적인 행동만으로는 보이지 않는 연결을 찾아내기 때문입니다.
ENTP 가능성도 있습니다. 천재 사무관이라는 설정과 팀 안에서 분위기를 바꾸는 재치가 강조된다면 ENTP로도 읽을 수 있습니다. 다만 이 글에서는 INTP 쪽에 무게를 둡니다. 봉근대의 중심은 사람을 설득해 판을 흔드는 외부 확장보다, 정보를 분석하고 구조를 이해하는 내부 논리에 더 가까워 보이기 때문입니다.
봉근대는 팀의 속도를 늦추는 사람이 아니라, 속도가 헛돌지 않게 만드는 사람입니다. 《참교육》의 팀워크는 나화진의 압박과 임한림의 돌파만으로 완성되지 않습니다. 봉근대처럼 조용히 시스템을 읽는 인물이 있어야, 팀의 행동은 단순한 분노가 아니라 설계된 개입이 됩니다.
팀은 같은 성향이 아니라 다른 기능이 맞물릴 때 강해집니다.
교권보호국 팀 분석: 지휘, 실행, 전략, 분석이 나뉘는 팀
교권보호국 팀은 MBTI로 보면 한 유형의 사람들이 모인 조직이 아닙니다. 오히려 서로 다른 기능이 분업되는 팀입니다. 나화진은 현장을 장악하고, 임한림은 변칙적으로 돌파합니다. 최강석은 제도의 방향을 설계하고, 봉근대는 정보와 시스템을 해석합니다.
이 조합이 흥미로운 이유는 모두가 정의를 말하지만, 정의에 접근하는 방식이 다르기 때문입니다. 나화진에게 정의는 지금 당장 바로잡아야 할 결과입니다. 임한림에게 정의는 눈앞의 부당함에 몸이 먼저 반응하는 감각입니다. 최강석에게 정의는 제도적 균형입니다. 봉근대에게 정의는 문제의 구조를 정확히 읽는 일입니다.
서로의 강점은 동시에 갈등의 씨앗이 됩니다. 나화진의 추진력은 누군가에게 압박으로 느껴질 수 있습니다. 임한림의 순발력은 계획을 흔들 수 있습니다. 최강석의 전략은 현장에서는 멀게 보일 수 있습니다. 봉근대의 분석은 급한 상황에서는 답답해 보일 수 있습니다.
하지만 팀은 같은 사람만 모였을 때보다 다를 때 강해집니다. 특히 《참교육》처럼 교육 현장의 균열을 다루는 작품에서는 감정, 제도, 현장, 정보가 모두 필요합니다. 한쪽만 강조하면 문제는 단순화됩니다. 교권보호국 팀의 힘은 바로 이 균형에서 나옵니다.
이 팀을 MBTI로 읽는 가장 좋은 방식은 궁합표를 보는 것이 아닙니다. 각 인물이 어떤 기능을 맡고 있는지 보는 것입니다. ENTJ적 지휘, ESTP적 실행, INTJ적 설계, INTP적 분석이 같은 방향을 바라볼 때, 팀은 드라마 안에서 하나의 장치가 아니라 살아 있는 집단이 됩니다.
이 분석에서 조심해야 할 것
첫째, 이 글의 MBTI는 공식 설정이 아닙니다. Netflix 공식 자료는 작품의 줄거리, 출연진, 캐릭터 설정을 알려주지만, 인물의 MBTI를 공식적으로 확정하지 않습니다. 따라서 이 글의 유형은 작품 속 행동과 관계 방식을 바탕으로 한 해석입니다.
둘째, T와 F를 차갑고 따뜻한 사람으로 나누면 안 됩니다. 나화진이나 최강석이 T적으로 읽힌다고 해서 감정이 없다는 뜻은 아닙니다. 그들은 감정을 기준으로 삼기보다 결과, 구조, 책임을 먼저 보는 쪽에 가깝습니다.
셋째, E와 I도 말수로만 판단하면 위험합니다. 임한림의 E는 단순히 활발하다는 뜻이 아닙니다. 외부 상황에 즉각 반응하고, 현장 접촉 속에서 에너지가 살아나는 방향입니다. 봉근대의 I 역시 소극성이 아니라 내부 논리와 분석으로 문제에 접근하는 방식에 가깝습니다.
넷째, 장르적 과장을 실제 교육 현장의 정답처럼 받아들이면 안 됩니다. 《참교육》은 현실 문제를 다루지만, 동시에 장르적 카타르시스를 사용하는 드라마입니다. 이 글의 목적은 그 장르적 인물들을 성격유형이라는 언어로 읽어보는 것입니다.
마지막으로 팬덤의 해석과 다를 수 있습니다. 어떤 독자는 나화진을 ESTJ로, 임한림을 ENTP로, 최강석을 ENTJ로 볼 수 있습니다. 그런 차이는 틀림이 아니라 강조점의 차이에 가깝습니다. 어떤 행동을 더 중심에 놓느냐에 따라 캐릭터 MBTI는 달라질 수 있습니다.
마무리: 《참교육》은 MBTI보다 ‘어떻게 바로잡을 것인가’가 먼저 보이는 작품
《참교육》의 매력은 나화진이 ENTJ인지, 임한림이 ESTP인지 맞히는 데만 있지 않습니다. 더 중요한 질문은 무너진 현장을 마주했을 때 사람은 어떤 방식으로 움직이는가입니다. 누군가는 판을 지휘하고, 누군가는 몸으로 돌파하며, 누군가는 제도를 설계하고, 누군가는 정보의 틈을 읽습니다.
MBTI는 이 차이를 조금 더 쉽게 바라보게 해줍니다. 같은 목표를 가진 사람도 같은 방식으로 싸우지는 않습니다. 그래서 《참교육》의 인물들은 네 글자보다 행동의 리듬으로 먼저 기억됩니다.
이 글에서는 나화진을 ENTJ, 임한림을 ESTP, 최강석을 INTJ, 봉근대를 INTP에 가깝게 보았습니다. 하지만 가장 중요한 해석은 따로 있습니다. 《참교육》은 한 명의 강한 해결사보다, 서로 다른 방식의 책임이 모여 팀이 되는 과정을 보여주는 작품입니다.
Before reading The Trauma Code: Heroes on Call through MBTI, there is one point to keep in mind. This article does not diagnose fictional characters as if they were real people. MBTI is used here as one interpretive lens for understanding behavior, conflict, and relationship patterns.
The characters in this story become clearer in crisis than in ordinary daily life. One person rushes in first. Another organizes the field. Someone else watches the institution, status, and reputation. Another has to carry what must be learned even while feeling fear.
So this article does not stop at the question, “What type is Baek Kang-hyuk?” It also looks at why Baek pushes so hard, why Yang Jae-won follows even while shaken, why Cheon Jang-mi holds the team’s rhythm together, and why Han Yu-rim keeps colliding with the trauma center.
In a crisis, each person’s role becomes visible before anything else.
Quick Summary: Main Character MBTI Interpretations
The table is only a starting point for quick understanding. In character MBTI analysis, the important task is not simply matching four letters. What matters more is that the characters respond in very different ways to the same hospital, the same patient, and the same crisis.
Character
This Article’s Interpretation
Possible Alternatives
Confidence
Core Reason
Baek Kang-hyuk
ENTJ
ESTP, INTJ
75%
A crisis-command leader who sets direction and moves people when the situation is urgent.
Yang Jae-won
ISFJ
INFP, ISFP
68%
A growth-oriented character who stays responsible for people even when afraid and turns learning into duty.
Cheon Jang-mi
ESTJ
ESFJ
64%
A practical coordinator who holds onto procedures and field operations before emotions.
Han Yu-rim
ESTJ
ENTJ
60%
A managerial figure who moves by hospital authority, results, hierarchy, and organizational order.
Park Gyeong-won
ISTP
INTP
52%
An observant practitioner who helps the team through technical accuracy and judgment rather than emotional expression.
Before MBTI: These Are Crisis-Response Characters
The Trauma Code: Heroes on Call is, above all, a workplace medical drama. That means personality often appears more through action than through speech. Type interpretation changes depending on who decides first, who accepts risk, who watches the system, and who restores trust between people.
Netflix Tudum introduces The Trauma Code: Heroes on Call as a medical drama about a doctor with combat-medical experience who tries to change Korea’s trauma-response system. The core is not just the brilliance of one genius doctor. The real question is what changes when one person’s skill collides with a team, a hospital, and an institution.
The characters in this drama are easier to read through decisions made under pressure than through casual conversation. In a conference room, status may matter. In an emergency field, what matters more is who moves first, who carries responsibility, and who makes the decision that can save a life.
For that reason, this MBTI reading includes occupational pressure. In a medical drama, a character’s professional role can look stronger than their everyday personality. Baek Kang-hyuk’s ENTJ-like traits are not only personal traits. They also appear through his role as a leader standing in front of life-or-death decisions.
Teamwork is another important point. A trauma center is not completed by one brilliant person. Fast judgment, accurate execution, emotional endurance, and administrative coordination must all work together. That difference becomes the main clue for reading each character’s MBTI pattern.
Baek Kang-hyuk MBTI: An ENTJ-Like Crisis-Command Leader
Baek Kang-hyuk is not simply a charismatic person. If he is read only as someone “strong,” the center of the character is missed. His essence is the power to set direction in a crisis and make people and systems move toward that direction.
The person who reduces chaos is the one who creates direction first.
He tends to present the action needed now rather than explaining emotions at length. In an emergency, he does not wait through long persuasion. He quickly clarifies who must do what. This ability to take command of the field fits well with ENTJ-style directive energy.
Baek’s first repeated behavior is setting a high standard. He does not easily adjust himself to the hospital’s existing inertia. Instead of accepting “good enough,” he holds to a result standard: if a patient can be saved, the team should try to save them. This attitude is not mere stubbornness. It reads as the responsibility of someone dealing with human life.
His second feature is the way he pushes people. He is less a gentle teacher who waits comfortably and more someone who pressures others until they reach the edge of their ability. He does not offer Yang Jae-won only easy encouragement. He throws Yang into uncomfortable situations and makes him judge, act, and grow inside them.
This is where Baek reads as ENTJ. E does not simply mean being talkative. His energy moves outward: changing the situation, moving the team, and shaking up the hospital’s flow. N appears in the way he sees not only the immediate treatment but also what kind of system the trauma center should become.
T does not mean coldness. Baek’s T is closer to keeping the criteria of judgment from becoming blurred in a crisis. J is not about liking schedules. It appears as the habit of structuring chaos and pushing decisions through.
There is also an ESTP possibility. Scenes where he responds quickly, takes physical risks, and seems to enjoy immediate judgment can look ESTP-like. Still, this article gives more weight to ENTJ. Baek is not only moving through field instinct. He keeps holding onto a direction that changes the team and the institution.
In the end, Baek is not a character who stops at “I will get this done.” He is closer to “I will make this team move that way.” His command orientation and will to change are what make him read closer to ENTJ.
Yang Jae-won MBTI: An ISFJ-Like Person Who Turns Fear into Responsibility
Yang Jae-won has a rhythm almost opposite to Baek Kang-hyuk’s. He does not appear at first as someone filled with overwhelming certainty. He is closer to a person who shakes, feels tension, and senses the burden. But that anxiety does not mean weakness.
Fear does not disappear. It changes into a form of responsibility.
Yang’s core lies in the fact that even when he wants to run away, he does not easily let go of the people entrusted to him. He does not see himself as a grand hero. That is why he feels human. He is not fearless. He is someone who feels fear and still remains in the field.
His first repeated behavior is observing and learning. He cannot immediately take over the field the way Baek does. Instead, he looks at the situation, looks at people, and tries to accept what he missed. This pattern connects to the careful, reality-based sense often associated with ISFJ.
His second feature is responsibility inside relationships. Yang does not see patients and the team as abstract tasks. He tends to take another person’s suffering as his own burden. So the more pressure he receives, the heavier his heart becomes. But that weight is also what makes him grow.
I should not be read as passivity. Yang’s I is closer to the way he organizes energy internally. Rather than proving himself loudly, he holds a shaken heart inside and returns to the field. S appears in his focus on the concrete patient in front of him, the procedure, and the technique he must learn.
F is not illogicality. Yang’s F is sensitivity toward people. He does not simply look at an outcome and move on. He senses what that outcome means to someone. J reads less as perfect control and more as an attitude of carrying his assigned role to the end even in confusion.
INFP is also possible as an alternative. If only his weak self-confidence and the way inner values and fear shake him are emphasized, he can look INFP-like. But Yang remains tied for longer to concrete responsibility, learning, and procedure in the field than to imagination or abstract meaning. That is why this article gives more weight to ISFJ.
Yang Jae-won is the character in The Trauma Code with whom readers may most easily empathize. If Baek is the one who opens a direction, Yang is the one who follows that direction and changes himself. His growth is quiet, but it is essential for the team to actually function.
Baek Kang-hyuk and Yang Jae-won: When ENTJ Meets ISFJ
The center of this relationship is rough growth rather than warm mentoring. Baek does not raise Yang by comfortably protecting him. Instead, he gives him the work that must be done now and makes him judge for himself.
From Yang’s point of view, this is a heavy method. He cannot move like Baek from the start. Yet that very difference makes him grow. He begins to see what he fears, and he starts turning that fear into responsibility rather than an excuse.
To Baek, Yang is not simply a junior doctor. He is someone the team needs in order to continue. A genius leader alone cannot build a trauma center. Someone must learn the standard, carry it forward, and connect people with the field.
In MBTI terms, ENTJ and ISFJ move at different speeds. ENTJ looks first at the goal and structure. ISFJ holds first onto people and concrete responsibility. That difference creates frustration, but it can also make the team stronger.
Ultimately, this relationship is not a simple structure where a strong person drags a weak person along. It is a relationship in which someone who opens direction and someone who learns responsibility change each other. That is why Baek and Yang’s relationship is one of the most important axes for understanding the team’s drama.
Relationship Point
Baek Kang-hyuk’s Tendency
Yang Jae-won’s Tendency
Conflict or Complement
Crisis response
Judges and directs immediately.
Feels tense but holds onto responsibility.
The speed gap creates pressure.
Growth style
Pushes people to their limits.
Tries to embody what he learns.
Uncomfortable, but it becomes a trigger for growth.
Emotional expression
Speaks through results and action.
Feels burden and guilt strongly.
They can misunderstand each other’s language.
Role in the team
Leader who creates direction.
Executor who learns the field.
Leadership and trust are built together.
Cheon Jang-mi MBTI: An ESTJ-Like Practical Coordinator Who Holds the Field Together
Cheon Jang-mi is closer to the operational center of the team than to its emotional center. When the field shakes, she quickly sees what is missing, who must move, and what order is needed. This practical sense reads as ESTJ-like.
Her first feature is realistic response. A hospital field does not run on emotion alone. Records, procedures, movement paths, staff, equipment, and communication all have to line up. Cheon is the character who holds onto those concrete elements.
Her second feature is how she manages the team’s temperature. She is not the kind of person who unpacks every emotion at length. But she does not ignore people either. When necessary, she speaks firmly. When necessary, she organizes the atmosphere so the team can move again.
E appears in the way her role comes alive through interaction with people. Cheon is closer to someone who speaks, coordinates, and moves in the field than to a quiet observer lost in thought. S appears in her sense for the treatment and operation needed now rather than an abstract ideal.
T is not coldness. It is the strength to set priorities. She judges what must be handled first for the patient and the team. J appears in the way she reorganizes a scattered field and clarifies each person’s role.
ESFJ is also possible as an alternative. If the focus is on how she looks after team members and senses relational balance, ESFJ can feel natural. Still, this article gives more weight to ESTJ because field operation and procedural coordination appear stronger than emotional caregiving.
Cheon matters because she makes Baek’s leadership work in reality. However powerful a leader may be, a team cannot endure for long if no one holds the field. Cheon is close to a “moving system” inside this story.
Even one person’s decision becomes reality only through the hands of a team.
Han Yu-rim MBTI: An ESTJ-Like Manager Who Tries to Protect Organizational Order
Han Yu-rim is often contrasted with Baek Kang-hyuk. He does not look only at lives in the field. He also watches hospital order, authority, evaluation, and face. That can make him feel frustrating, but inside a professional organization, he is also a very realistic figure.
His first repeated behavior is finding standards inside the organization. If Baek first asks, “What is needed now?” Han first asks, “What is possible inside this organization?” That difference creates the conflict between them.
His second feature is sensitivity to authority and performance. He is conscious of who holds what position in the hospital and what impact each decision will have on the organization. This attitude connects to the structure-oriented side of ESTJ.
Han’s E appears in the way he reveals his position and exercises influence inside the organization. S is his attention to real rank, procedure, and hospital operating conditions. T appears in his preference for organizational judgment and performance standards over emotion. J reads as a preference for predictable order and control.
ENTJ is also possible. If his competitiveness, awareness of power, and struggle for control are emphasized, he can look ENTJ-like. But if Baek is a change-oriented leader trying to create a new structure, Han is closer to a managerial figure trying to preserve order inside an existing structure.
If Han is read only as an obstacle, the interpretation becomes shallow. In workplace dramas, organizational characters create conflict but also give the story realism. Systems do not change through good intentions alone. Budgets, authority, reputation, and profit are all intertwined.
That is why Han’s ESTJ-like traits keep the drama’s tension alive. He checks Baek’s ideals and speed. That check may feel uncomfortable, but precisely because of that friction, the trauma center becomes more than a personal hero story. It becomes a story about organizational change.
Park Gyeong-won MBTI: An ISTP-Like Observer Who Helps Through Skill Rather Than Words
Park Gyeong-won may not take up as much explanation as the central characters, but he can be read as someone who adds texture to the team. Rather than displaying emotions strongly, he contributes through his skill and judgment when needed.
The ISTP possibility comes from places where function comes before emotion, accuracy before speech, and situational judgment before relationship talk. A character like this can look quiet inside a team. In a crisis, however, that stable practical sense becomes a strength.
INTP is possible as an alternative. If analytic thought and an observer-like attitude are emphasized, he may read as INTP. Yet in the hospital-field context, he shows presence more through technical execution than through long explanation of ideas. That is why this article leans toward ISTP.
Team Relationship Analysis: When Leadership and Trust Collide
The team in The Trauma Code is not complete from the beginning. Baek pushes a standard forward. Yang learns that standard. Cheon makes the field actually work. Han reveals the hospital organization’s order and points of collision.
The interesting part of this team is that not everyone looks in the same direction. Baek sees results and the speed of change. Yang feels the weight of people and responsibility. Cheon sees whether the field can execute. Han sees institutional systems and costs.
Through MBTI, these differences also reveal each person’s weakness. ENTJ-style leadership can be fast but rough. An ISFJ-style executor can be faithful but may take on too much burden. An ESTJ-style operator can be stable but uncomfortable with change. An ISTP-style practitioner can be accurate but awkward at explaining the heart.
Still, a team does not become strong only when similar people gather. In a crisis field, someone must set direction. Someone must move their hands. Someone must hold records and procedures. Someone must ask uncomfortable questions. The teamwork in The Trauma Code is built on exactly these differences.
In the end, the core relationship in this drama is not compatibility. It is trust. They do not trust each other because everything feels comfortable. Trust is created through the repeated experience that, even when they clash, each person carries out a role in front of crisis. That is why this team is remembered more for how it endures together than for four MBTI letters.
What remains longer than type is the role each person takes in front of crisis.
What This Analysis Should Be Careful About
First, reading Baek Kang-hyuk as ENTJ does not mean every ENTJ is like Baek. A character is created for a dramatic situation. A real person’s MBTI and a fictional character interpretation should be treated differently.
Second, T and F should not be divided into coldness and warmth. Baek’s T is not indifference toward patients. Yang’s F does not mean weak judgment. Both express the desire to save people in different ways.
Third, E and I are also risky to judge only by the amount of speech. Baek has strong energy for changing the external situation. Yang organizes pressure internally and moves again. Both can be active, but the direction of their energy differs.
Fourth, in a workplace drama, role can look like personality. Being a doctor, nurse, or hospital administrator strongly limits a character’s words and actions. So the types in this article are not official settings. They are interpretations based on behavior inside the story.
Conclusion: The Trauma Code Shows Roles in Crisis Before MBTI Types
The appeal of The Trauma Code: Heroes on Call is not only in guessing whether Baek is ENTJ or Yang is ISFJ. The more important question is what role a person takes when standing in front of crisis.
Baek creates direction. Yang learns responsibility even while afraid. Cheon keeps the field from collapsing. Han shows the wall of the organization. These differences come together to create the drama’s tension.
MBTI is a language that can make those differences easier to explain. But it is not the final answer. This article’s interpretation is also only one possibility. If it helps you watch the characters more closely and understand the difference in their relationships and choices, that is enough.
This article reads Baek Kang-hyuk as closer to ENTJ. He sets direction in crisis, moves the team, and shows a strong will to change the system. However, if his immediate field response and risk-taking are emphasized, ESTP is also a possible interpretation.
Why is Yang Jae-won interpreted as ISFJ?
Yang Jae-won appears as someone who does not easily let go of people and roles even while anxious. He learns and carries concrete responsibility in the field rather than living mainly through abstract ideals. That is why this article gives more weight to ISFJ.
Is Cheon Jang-mi closer to ESTJ or ESFJ?
Cheon Jang-mi can also be read as ESFJ because she cares for the team. In this article, however, her field operation, procedural coordination, and quick practical judgment stand out more strongly. That is why she is interpreted as closer to ESTJ.
Is this an official MBTI analysis?
No. This is not an official MBTI result. It is a character interpretation based on behavior and relationships in the drama. It should not be used as a fixed diagnosis or applied directly to real people.
Is it okay to analyze drama characters through MBTI?
Yes, if MBTI is not used as a label or stereotype. It works best as a supporting language for looking at repeated behavior, relationship style, and conflict response. Used that way, it can make character interpretation safer and more enjoyable.
One person walks toward possibility, while another quietly stays beside them.
The Perspective of This Article
When Life Gives You Tangerines is not a work where a person’s character can be reduced easily to four letters. Ae-sun and Gwan-sik pass through Jeju, family, poverty, love, and time together. That is why the MBTI analysis in this article should not be treated as a search for the “right answer.” It is better understood as one lens for reading a character’s choices and relationship patterns.
The characters in this drama are especially hard to read from first impressions alone. Ae-sun is not ENFP simply because she seems bright. Gwan-sik is not ISFJ simply because he is quiet. Each of them endures life, expresses love, and carries wounds in a different way. This article estimates their types by looking at repeated behavior and the rhythm of their relationships.
MBTI is not a diagnosis of real people. It is not a tool for judging actors or fictional characters either. Still, when we look at what a character notices first under pressure, how they express what they feel, and what kind of responsibility they try to carry inside a relationship, the work becomes a little deeper.
Quick Conclusion: MBTI Summary of the Main Characters
Character
Interpretation in this article
Possible alternatives
Confidence
Core reason
Oh Ae-sun
ENFP
INFP, ENFJ
70%
She does not simply accept the life given to her. Through words and emotions, she keeps opening the possibility of another life.
Yang Gwan-sik
ISFJ
ISTJ, ISFP
75%
Rather than declaring his heart loudly, he stays for a long time and repeats responsibility.
Jeon Gwang-rye
ESTJ
ISTJ, ISFJ
65%
For the survival of her family, she looks at reality first and puts what must be done ahead of emotion.
Yang Geum-myeong
ENFJ
INFJ, ENFP
55%
She tries to understand the wounds and choices of the parents’ generation within the wider context of relationships.
Bu Sang-gil
ESTP
ESFP, ENTP
50%
He reacts immediately and creates competition and tension inside relationships.
MBTI is closer to a lens for reading characters than a final answer.
The table is only a starting point for reading the drama with some fun. In practice, what matters more than each character’s MBTI is why they love, endure, and clash in different ways. Ae-sun and Gwan-sik do not remain together because they are similar. Rather, because they are so different, each person illuminates the empty spaces in the other.
There is one more thing to remember. When Life Gives You Tangerines does not show only one period of a person’s life. Young Ae-sun, Ae-sun choosing love, and Ae-sun as a parent are the same person, but they are not under the same pressure. The same is true of Gwan-sik. That is why the type interpretation in this article is not a label that never changes across a lifetime. It is closer to a judgment about the tendency that appears most repeatedly inside the work.
Before Looking Through MBTI: The Characters Are Shaped by Time
Netflix introduces the drama as the story of a bold girl and a steadfast boy who grow up in Jeju. Their lives do not end with one confession of love or one scene of conflict. The drama shows how love endures through frustration, family, labor, poverty, and the pressure of an era.
That is why the characters in this work are close to “characters shaped by time.” A character shaped by time is seen more clearly through choices repeated over many years than through a single tone of voice. More important than who laughed loudly or who stayed quiet is what each person does when a crisis comes: who runs out into the world, and who remains in place and endures.
Whenever life tries to make Ae-sun smaller, she pushes outward. She speaks, dreams, collides with the world, and holds on to possibility even when it looks reckless. Gwan-sik is the person who stays beside her so that those possibilities do not collapse completely in reality. He does not say much, but he shows love by repeating the same heart in the same place.
In a drama like this, it is risky to hold on to the impression from one scene when using MBTI. If you look only at the moments when Ae-sun appears outgoing, ENFP comes out too easily. If you look only at Gwan-sik’s sense of reality, it is easy to conclude ISTJ. But across the whole drama, both characters are more complex. Inside Ae-sun’s freedom is the strength to endure wounds. Inside Gwan-sik’s quietness is a stubbornness that does not break easily.
So this article reads the characters through four questions.
When this character is under pressure, do they move outward or endure inwardly?
Do they notice real conditions first, or possibility and meaning first?
When deciding, do they prioritize principles and logic, or relationships and emotional texture?
Do they try to organize and control life, or leave possibility open inside the flow?
Oh Ae-sun MBTI: An ENFP-Like Person Who Tries to Stay Alive
Ae-sun is not simply a bright character. Nor does brightness alone make her ENFP. Ae-sun’s core is the force that refuses to fold her life into something small. She is not someone who does not understand reality. Rather, when reality tries to fold her too easily, she tries to open herself back up.
Netflix Tudum introduces Ae-sun as a character with dreams bigger than her village. Official descriptions also portray her as a bold and spirited girl. That description contains something larger than simple cheerfulness. Ae-sun does not simply accept the conditions given to her. She tries to speak, dream, and move in her own way.
Ae-sun’s first repeated behavior is that she holds on to possibility first. She is not unaware of how difficult the conditions in front of her are. In fact, she knows them very well. Still, when life says, “This is enough,” Ae-sun does not easily submit to that sentence. This attitude feels N-like. She sees the still-open direction of life before the reality currently visible in front of her.
The second feature is the way she brings her heart outward. Ae-sun does not quietly fold her emotions away. She pushes them out through words and actions. If something feels unfair, she feels it as unfair. If she loves, that love becomes visible in the way she acts. So Ae-sun’s E does not simply mean that she talks a lot. It is closer to an energy that confirms her existence by colliding with the world.
Inside relationships, Ae-sun does not leave the other person untouched. To Gwan-sik, to her family, and to the world, she tries to show the direction of her heart. To some people, this may look unstable or reckless. But more deeply, Ae-sun is a person who refuses to let the conditions of life explain all of who she is. She wants to speak love, dreams, and even her own name for herself.
At this point, Ae-sun can be read in an ENFP-like way.
E: Her energy comes alive as she meets and collides with people. Rather than only thinking alone, she speaks, moves, and creates relationships.
N: She is drawn to the possibility that “life can be different,” more than to the conditions immediately in front of her.
F: Her judgments are centered on heart, relationship, unfairness, and the feeling of love.
P: Rather than quietly entering a fixed frame, she tries to change the flow.
Still, it is not enough to see Ae-sun only as a typical “active ENFP.” As the drama moves forward, she becomes a much more layered person. After experiencing wounds, there are moments when she sinks inward like an INFP. There are also moments when she carries an entire relationship like an ENFJ in order to protect someone. So her type should be read through the direction that repeats across her life, not fixed from one scene.
Even so, this article gives more weight to ENFP. Ae-sun is not someone who denies reality. She is someone who believes reality cannot explain all of her. She adapts in order to survive, but inside her heart she never lets go of the possibility of another life. That is why Ae-sun’s MBTI becomes more accurate when it is read not as “brightness,” but as “the strength to stay alive.”
Yang Gwan-sik MBTI: An ISFJ-Like Person Who Stays Longer Than Words
Gwan-sik is much heavier than the kind of “kind man” often described in romance dramas. Tudum introduces him as a character who has loved Ae-sun since childhood. Official descriptions also present him as a boy who is steady and solid like iron. This steadfastness is not just niceness. It is closer to the ability to remain for a long time for one person.
Gwan-sik’s first impression is quietness. But being quiet does not make him weak or passive. His quietness is not the absence of feeling. It is closer to a way of not scattering his feelings easily. Rather than explaining his heart loudly, he shows what kind of person he is by remaining in the same place and repeating the same responsibilities.
Gwan-sik’s first repeated behavior is that he stays beside someone. He cannot live Ae-sun’s life for her. But when Ae-sun shakes, he does not disappear. This “not disappearing” is Gwan-sik’s greatest language. Instead of persuading someone of love with words, he proves it with time.
The second feature is his attitude of carrying reality with his body. Gwan-sik looks first at what must be done today, the place that must be protected now, and the share of reality that must actually be carried, rather than at grand possibilities. In this sense, S appears strongly. He is closer to holding the weight of reality in his hands than to explaining life with abstract words.
Inside relationships, Gwan-sik expresses his heart in the opposite way from Ae-sun. If Ae-sun is the person who pushes her heart outward and collides with the world, Gwan-sik is the person who holds his heart inside and endures for a long time. Ae-sun speaks possibility, and Gwan-sik endures each day so that possibility does not collapse. That is why Gwan-sik’s love is not flashy, but it remains.
At this point, Gwan-sik can be read in an ISFJ-like way.
I: Rather than exploding his feelings outward, he holds them inside for a long time.
S: He looks at today’s work, the place where he must stay, and the reality he must carry with his body before grand ideals.
F: At the center of his judgment are Ae-sun, family, and relational responsibility.
J: Even in unstable situations, he tries to protect the role he has taken on.
ISTJ is also possible. If we focus only on his sense of reality, responsibility, and endurance, he can also be read as ISTJ. But Gwan-sik’s decisions often move from emotional loyalty toward Ae-sun rather than from cold principles. He is not a person who remains in order to protect rules. He is closer to a person who remains in order to protect his heart.
ISFP cannot be completely ruled out either, because Gwan-sik’s love often appears through sensation and action rather than words. But across the whole drama, Gwan-sik shows continuing roles and responsibilities more strongly than a momentary flow of emotion. For that reason, this article gives the greatest weight to ISFJ. Gwan-sik is ultimately a person who turns the sentence “I will be here” into a lifelong attitude.
Ae-sun and Gwan-sik’s Relationship: When ENFP Meets ISFJ
Some hearts are delivered through words; others are delivered through actions that remain.
Seen through MBTI, Ae-sun and Gwan-sik’s relationship is the meeting of “a person who runs toward possibility” and “a person who supports that possibility so it does not fall apart.” Ae-sun imagines life more widely. Gwan-sik stands beside that imagination so it can endure in reality.
Relationship point
Ae-sun’s tendency
Gwan-sik’s tendency
Possible conflict or complement
Expression of love
Words, dreams, and direct emotion
Actions, responsibility, and quiet devotion
They may fail to recognize each other’s language of love.
Response to reality
Sees possibility first
Sees the share that must be carried now
One may feel frustrated while the other feels anxious.
Handling wounds
Emotion leaks outward
Swallows it inside and endures
Unspoken feelings can pile up.
Way of growing
Grows by breaking frames
Deepens by protecting a place
The speed of change can differ.
The reason this relationship remains in memory is not that the two people fit perfectly. Rather, because they are different, they see the empty spaces in each other. Ae-sun shows Gwan-sik that life is not only something to endure. Gwan-sik shows Ae-sun that love can take a form that lasts longer than words.
To Ae-sun, Gwan-sik sometimes feels like a wall of reality. He is careful, slow, and sometimes endures for too long. To someone like Ae-sun, who pushes life outward, Gwan-sik’s way can feel frustrating. But because of that very slowness, Ae-sun gains a place to return to when she collapses.
To Gwan-sik, Ae-sun is anxious but dazzling. She shows him the width of life that he may not easily imagine. If Gwan-sik first sees the portion that must be carried today, Ae-sun sees another possibility beyond it. That difference shakes Gwan-sik, but it also makes his life deeper.
Their conflicts do not arise only because their personalities do not match. They arise because the language in which they express love is different. Ae-sun speaks and collides because she wants her heart to be understood. Gwan-sik shows his heart through responsibility rather than speech. One side may feel, “Why won’t you say it?” while the other may feel, “Why don’t you know, after all I have done?”
That is why Ae-sun and Gwan-sik’s relationship cannot be explained by a simple ENFP-ISFJ compatibility chart. The core of this relationship is not compatibility. It is time. They clash because they are different, and because they are different, they keep learning for a long time. The feeling left by When Life Gives You Tangerines is here. Love may not be the comfortable fit of people with the same personality. It may be the long recognition of a heart expressed in another way.
Jeon Gwang-rye MBTI: An ESTJ-Like Rough Protector
Gwang-rye is Ae-sun’s mother. Tudum introduces her as a character who carries the burden of livelihood while trying to give Ae-sun a better life. On the surface, she looks strong and rough, but beneath that is deep devotion to her daughter. In one phrase, Gwang-rye is close to “a protector who did not have the luxury of expressing emotion beautifully.”
Gwang-rye’s first repeated behavior is that she sees reality first. She does not ignore the fact that the family must survive right now. Rice, livelihood, safety, and her daughter’s future come before dreams or emotions. This is where S and J appear strongly. She is someone who holds on to what must be done now rather than offering abstract comfort.
The second feature is protection that can look like control. Gwang-rye cannot express love softly. Instead, she blocks firmly, pushes forward, and sometimes disciplines roughly. From the outside, she may look cold or strict. But more deeply, that strictness is a survival method used by someone who is trying not to lose her family.
At this point, Gwang-rye can be read in an ESTJ-like way. E appears in the way she directly intervenes in relationships and daily life. S appears in her tendency to see real conditions first. T does not mean that she has no feeling. It is closer to a tendency to put what must be done and the result first when judging. J appears in her effort to organize and control a situation that might otherwise collapse.
But if we read ESTJ as “a cold person,” we misunderstand Gwang-rye. Her strictness does not come from a lack of emotion. It is closer to a defense mechanism produced by a life that did not give her room to express emotion. A person who never had time to explain love may bring love out as orders or scolding. Under Gwang-rye’s rough words lies the heart that says, “You, at least, must not fall apart.”
ISTJ is also possible. If we focus only on Gwang-rye’s sense of reality and responsibility-centered attitude, she can be read as ISTJ. But she is less the type to endure quietly alone and more the type to directly move and control family and daily life. For that reason, this article gives a little more weight to ESTJ. Gwang-rye is not a cold person. She is someone who learned survival too early.
Yang Geum-myeong MBTI: A Next-Generation Perspective with ENFJ Possibility
Geum-myeong is introduced as the daughter of Ae-sun and Gwan-sik. She is not simply the next generation. She is closer to a window that makes us look again at the parents’ lives from another time. Through Geum-myeong, the drama asks again, from the next generation’s viewpoint, “Why did they live that way back then?”
Geum-myeong’s core is an attitude that tries to understand the whole relationship. She does not judge the pain and choices of the parents’ generation only as right or wrong. She tries to see the love, the conditions of the era, and the unspoken hearts within it. At this point, Geum-myeong has ENFJ possibility.
The ENFJ interpretation comes from the fact that Geum-myeong tries to connect meaning between people. She does not look only at individual feelings. She tries to read how wounds continue and change inside one family. E appears in her interest in people and relationships. N appears in her gaze toward the meaning behind events. F appears in her attempt to understand relational emotion. J appears in the direction of organizing that understanding into one story.
Of course, INFJ can also be a natural reading. If Geum-myeong’s observation and meaning-making appear strongly inward, INFJ may fit better. In some scenes, she also looks like an observer who quietly accepts and interprets the lives of the parents’ generation. That is why the confidence level cannot be set too high.
Even so, this article leaves open the possibility of ENFJ. Geum-myeong does not close her parents’ lives inside private sentiment alone. She reconnects those lives through the language of relationship and makes the viewer see Ae-sun and Gwan-sik with different eyes. Geum-myeong is a next-generation character, and at the same time, she is the gaze that organizes the emotion of the whole work.
Bu Sang-gil MBTI: A Tension-Creating Character Read as ESTP
Bu Sang-gil is introduced as someone who grew up with Gwan-sik. This article reads him as a character with ESTP possibility. Because he creates tension in surrounding relationships rather than carrying the central axis of the whole work, the confidence level is not high. Still, a few repeated impressions are clear.
Bu Sang-gil is closer to the type who reacts immediately to a situation. Rather than reflecting deeply and building meaning over time, he moves quickly inside the relationship and competition in front of him. This sense of the field and immediacy reads as ESTP-like. Before emotion, what appears first is the moment’s power struggle, his position within a relationship, and direct reaction.
The difference becomes clearer when he is compared with Gwan-sik. Gwan-sik is a person who proves his heart by remaining for a long time. Bu Sang-gil is closer to someone who creates tension inside a relationship and reveals his presence through that tension. Even if they grew up in the same environment, the direction of their energy looks different.
Still, ESFP is also possible. If we focus only on scenes where emotional reaction and spontaneity inside relationships are emphasized, ESFP can be a valid reading. If his quick verbal response and argumentative attitude are emphasized more strongly, ENTP is also weakly possible. So it is safer to see Bu Sang-gil through his role as a tension-creating character rather than to fix him as ESTP with certainty.
What to Be Careful About in This Analysis
MBTI character analysis is fun, but there are many things to be careful about. Characters in movies and dramas are not real people. A character is created through scenes written by a writer, an actor’s performance, historical background, and editing. So MBTI is better used as a tool that opens conversation, not as a conclusion.
First, T does not mean a cold person. Prioritizing logic or principles does not mean having no empathy. A character like Gwang-rye, who looks first at what must be done, may still have a deep heart trying to protect her family underneath.
Second, F does not mean an illogical person. It means that relationships and values matter in judgment, not that judgment is weak. Gwan-sik’s F does not appear as emotional excess. It appears as emotional responsibility toward one person.
Third, I does not mean a passive person. A quiet character like Gwan-sik can show enormous continuity and resolve. Introversion does not mean avoiding people. It can be a way of handling heart and energy inwardly for a long time.
Fourth, E does not mean a noisy person. Ae-sun’s extraversion is less about talking a lot and more about opening her life by colliding with the world. She confirms her existence through relationship and language.
Finally, a character’s MBTI is not an official diagnosis. It may differ from fandom interpretations, and depending on the scene, the same character may look like another type. The character becomes more dimensional through the process of comparing those differences. What matters is not “right or wrong,” but “why the character can be read that way.”
The way love is expressed passes through time and becomes understanding in the next generation.
Conclusion: When Life Gives You Tangerines Shows the Way Love Works Before MBTI
The charm of When Life Gives You Tangerines is not in guessing whether Ae-sun is ENFP or Gwan-sik is ISFJ. The more important question is this: why does one person push love forward through words, while another protects love like a lifelong habit?
Ae-sun is a person who tries to widen herself whenever life tries to make her smaller. Gwan-sik is the person who stands beside that widening heart for a long time so it does not collapse completely. They do not love because they are alike. They love while slowly learning each other’s different rhythms.
Gwang-rye shows that love can sometimes be expressed as rough responsibility. Geum-myeong shows how the next generation can understand those rough years again. A character like Bu Sang-gil creates tension inside relationships and makes Ae-sun and Gwan-sik’s choices clearer.
That is why this drama’s MBTI becomes clearer when it is seen as the rhythm of relationships rather than four letters. Type names such as ENFP, ISFJ, and ESTJ are only the starting point. What remains in the end is not a type chart. It is the way different people pass through the same years and come to recognize one another’s hearts.
In the next article in this series, we will move to the characters of The Trauma Code: Heroes on Call and analyze the MBTI patterns of leadership and teamwork that appear in crisis situations.
Is Ae-sun from When Life Gives You Tangerines an ENFP?
This article reads Ae-sun as close to ENFP. However, because her whole life is shown, some parts of her may look like INFP or ENFJ depending on the period and scene. The core is not a bright personality, but the attitude of holding on to life’s possibilities until the end.
Is Gwan-sik from When Life Gives You Tangerines an ISFJ?
ISFJ is the most natural interpretation for Gwan-sik. He shows his heart through action more than words, and his way of taking responsibility for a long time is strong. If his sense of reality and responsibility are emphasized more, ISTJ is also possible. But this article gives more weight to ISFJ because of his emotional loyalty toward Ae-sun.
Why does this article read Gwang-rye as ESTJ?
Gwang-rye is a character who looks first at family survival and real conditions rather than emotion. Her way of organizing what must be done and intervening strongly to protect her family reads as ESTJ-like. Still, she is not a cold person. It is more natural to see her as a protector who did not have enough room to express emotion softly.
Is this analysis an official MBTI diagnosis?
No. This article is not a diagnosis based on an official assessment. It is a blog-style character analysis based on public work information and scene interpretation. It does not determine the personality of any actor or real person.
Is it okay to analyze fictional characters with MBTI?
It can be useful, but it should not be used dogmatically. MBTI is one lens for discussing a character’s actions and relationships. It should not be used to label people or characters as fixed types.
중증외상센터를 MBTI로 읽을 때 가장 먼저 조심해야 할 점이 있습니다. 이 글은 인물을 실제 사람처럼 진단하는 글이 아닙니다. MBTI는 캐릭터의 행동, 갈등, 관계 방식을 이해하기 위한 하나의 해석 도구입니다.
이 작품의 인물들은 평온한 일상보다 위기 상황에서 더 선명해집니다. 누군가는 먼저 뛰어들고, 누군가는 현장을 정리합니다. 또 누군가는 제도와 체면을 의식하고, 누군가는 두려움 속에서도 배워야 할 몫을 감당합니다.
그래서 이 글은 “백강혁은 무슨 유형인가?”에서 멈추지 않습니다. 백강혁이 왜 그렇게 밀어붙이는지, 양재원이 왜 흔들리면서도 따라가는지, 천장미가 왜 팀의 리듬을 붙잡는지, 한유림이 왜 자꾸 부딪히는지를 함께 봅니다.
빠른 결론: 주요 등장인물 MBTI 요약
인물
이 글의 해석
대체 가능성
확신도
핵심 근거
백강혁
ENTJ
ESTP, INTJ
75%
위기 상황에서 방향을 정하고 사람을 움직이는 현장 지휘형 리더
양재원
ISFJ
INFP, ISFP
68%
불안해도 맡은 사람을 놓지 않고 배움을 책임으로 바꾸는 성장형 인물
천장미
ESTJ
ESFJ
64%
감정보다 절차와 현장 운영을 먼저 붙잡는 실무 조정자
한유림
ESTJ
ENTJ
60%
병원 조직의 권위, 성과, 체계를 기준으로 움직이는 관리형 인물
박경원
ISTP
INTP
52%
감정 표현보다 기술과 판단의 정확성으로 팀을 돕는 관찰형 실무자
표는 빠른 이해를 위한 출발점입니다. 캐릭터 MBTI에서 중요한 것은 네 글자를 맞히는 일이 아닙니다. 더 중요한 것은 같은 병원, 같은 환자, 같은 위기 앞에서도 인물들이 전혀 다른 방식으로 반응한다는 점입니다.
중증외상센터는 특히 직업 드라마입니다. 그래서 성격은 말투보다 행동에서 더 많이 드러납니다. 누가 먼저 결정을 내리는지, 누가 위험을 감수하는지, 누가 시스템을 의식하는지, 누가 사람 사이의 신뢰를 회복하는지에 따라 유형 해석이 달라집니다.
MBTI로 보기 전에: 중증외상센터의 인물은 ‘위기 대응형 캐릭터’다
Netflix Tudum은 The Trauma Code: Heroes on Call을 전투 의료 경험을 지닌 의사가 한국의 외상 대응 체계를 바꾸기 위해 움직이는 의학 드라마로 소개합니다. 핵심은 단순한 천재 의사의 활약이 아닙니다. 한 사람의 실력이 팀, 병원, 제도와 부딪힐 때 어떤 변화가 생기는가입니다.
이 작품의 인물들은 일상 대화보다 압박 속 선택으로 더 잘 보입니다. 회의실에서는 체면이 중요할 수 있습니다. 하지만 응급 현장에서는 누가 먼저 움직이고, 누가 책임을 감당하며, 누가 사람을 살리는 결정을 내리는지가 훨씬 중요해집니다.
그래서 이 글의 MBTI 해석은 직업적 압박을 함께 봅니다. 의학 드라마 속 캐릭터는 실제 성격보다 직업 역할이 강하게 드러날 수 있습니다. 백강혁의 ENTJ적 면모도 개인 성격만이 아니라, 생명을 앞에 둔 리더 역할과 결합되어 나타납니다.
또 하나 중요한 점은 팀워크입니다. 중증외상센터는 혼자 잘해서 완성되는 공간이 아닙니다. 빠른 판단, 정확한 실행, 감정적 버팀, 행정적 조율이 함께 돌아가야 합니다. 이 차이가 캐릭터별 MBTI를 읽는 핵심 단서가 됩니다.
백강혁 MBTI: ENTJ에 가까운 ‘위기 지휘형 리더’
혼란을 줄이는 사람은 먼저 방향을 만든다.
백강혁은 단순히 카리스마가 강한 인물이 아닙니다. 그를 “센 사람”으로만 보면 핵심을 놓치게 됩니다. 백강혁의 본질은 위기 앞에서 방향을 정하고, 그 방향으로 사람과 시스템을 움직이게 만드는 힘입니다.
그는 감정을 길게 설명하기보다 지금 필요한 행동을 먼저 제시합니다. 응급 상황에서 오래 설득하고 기다리는 방식보다, 누가 무엇을 해야 하는지 빠르게 정리합니다. 이 현장 장악력은 ENTJ의 지휘형 에너지와 잘 맞습니다.
백강혁의 첫 번째 반복 행동은 기준을 높게 잡는 것입니다. 그는 기존 병원의 관성에 쉽게 맞추지 않습니다. “이 정도면 된다”는 말보다 “살릴 수 있으면 살려야 한다”는 결과 기준이 앞섭니다. 이 태도는 단순한 고집이 아니라 생명을 다루는 사람의 책임감으로 읽힙니다.
두 번째 특징은 사람을 밀어붙이는 방식입니다. 그는 다정하게 기다리는 스승이라기보다, 상대가 자기 능력의 한계까지 올라오도록 압박하는 쪽에 가깝습니다. 양재원에게도 편안한 격려만 주지 않습니다. 오히려 불편한 상황을 던져 놓고, 그 안에서 판단하고 성장하게 만듭니다.
이 지점에서 백강혁은 ENTJ적으로 읽힙니다. E는 단순히 말이 많다는 뜻이 아닙니다. 그의 에너지는 외부 상황을 바꾸고, 팀을 움직이고, 병원의 흐름을 흔드는 방향으로 뻗어 갑니다. N은 눈앞의 처치만이 아니라 중증외상센터가 어떤 시스템이 되어야 하는지 보는 시야에서 드러납니다.
T는 차가움이 아닙니다. 백강혁의 T는 감정을 무시한다는 뜻보다, 위기 상황에서 판단 기준을 흐리지 않는 방식에 가깝습니다. J는 계획표를 좋아한다는 뜻이 아니라, 혼란을 구조화하고 결정을 밀어붙이는 태도로 나타납니다.
다만 ESTP 가능성도 있습니다. 현장 대응이 빠르고, 몸으로 위험을 감수하며, 즉각적인 판단을 즐기는 듯한 장면은 ESTP처럼 보입니다. 그러나 이 글에서는 ENTJ 쪽에 더 무게를 둡니다. 백강혁은 현장 감각만으로 움직이는 인물이 아니라, 팀과 제도를 바꾸려는 방향성을 계속 붙잡기 때문입니다.
결국 백강혁은 “내가 해내겠다”에서 끝나는 인물이 아닙니다. 그는 “이 팀이 그렇게 움직이게 만들겠다”에 가까운 사람입니다. 그 지휘성과 변화 의지가 그를 ENTJ에 가깝게 읽게 만듭니다.
양재원 MBTI: ISFJ에 가까운 ‘두려움을 책임으로 바꾸는 사람’
두려움은 사라지기보다 책임의 형태로 바뀐다.
양재원은 백강혁과 정반대의 리듬을 가진 인물입니다. 그는 처음부터 압도적인 확신을 가진 사람처럼 보이지 않습니다. 오히려 흔들리고, 긴장하고, 부담을 느끼는 쪽에 가깝습니다. 하지만 이 불안이 곧 약함을 뜻하지는 않습니다.
양재원의 핵심은 도망치고 싶은 마음이 있어도, 맡은 사람을 쉽게 놓지 않는다는 데 있습니다. 그는 스스로를 대단한 영웅으로 여기지 않습니다. 그래서 더 인간적입니다. 겁이 없는 사람이 아니라, 겁을 느끼면서도 현장에 남는 사람입니다.
그의 첫 번째 반복 행동은 관찰하고 배우는 태도입니다. 백강혁처럼 곧바로 판을 장악하지는 못합니다. 대신 상황을 보고, 사람을 보고, 자신이 무엇을 놓쳤는지 받아들이려 합니다. 이 성향은 ISFJ의 세심한 현실 감각과 연결됩니다.
두 번째 특징은 관계 속 책임입니다. 양재원은 환자와 팀을 추상적인 과제로 보지 않습니다. 그는 누군가의 고통을 자신의 부담으로 받아들이는 편입니다. 그래서 압박을 받을수록 마음이 더 무거워집니다. 하지만 그 무게가 그를 성장하게 만듭니다.
I는 소극성으로 볼 수 없습니다. 양재원의 I는 에너지를 안에서 정리하는 방식에 가깝습니다. 그는 큰소리로 자신을 증명하기보다, 흔들린 마음을 안쪽에서 붙잡고 다시 현장으로 돌아옵니다. S는 눈앞의 구체적 환자, 절차, 배워야 할 기술에 집중하는 태도에서 보입니다.
F는 비논리가 아닙니다. 양재원의 F는 사람을 향한 민감성입니다. 그는 결과만 보고 지나가기보다, 그 결과가 누군가에게 어떤 의미인지 느낍니다. J는 완벽한 통제라기보다, 혼란 속에서도 맡은 역할을 끝까지 감당하려는 태도로 읽힙니다.
대체 유형으로는 INFP도 가능합니다. 특히 자기 확신이 약하고, 내면의 가치와 두려움이 크게 흔들리는 면만 보면 INFP처럼 보일 수 있습니다. 하지만 양재원은 상상과 의미보다 현장의 구체적 책임, 배움, 절차에 더 오래 묶여 있습니다. 그래서 이 글에서는 ISFJ 가능성을 더 높게 봅니다.
양재원은 중증외상센터에서 독자가 가장 쉽게 감정이입할 수 있는 인물입니다. 백강혁이 방향을 여는 사람이라면, 양재원은 그 방향을 따라가며 자신을 바꾸는 사람입니다. 그의 성장은 조용하지만, 팀이 실제로 굴러가기 위해 꼭 필요한 변화입니다.
백강혁과 양재원의 관계: ENTJ와 ISFJ가 만났을 때
관계 지점
백강혁 쪽 경향
양재원 쪽 경향
갈등 또는 보완 가능성
위기 대응
즉시 판단하고 지시한다
긴장하지만 책임을 붙잡는다
속도 차이 때문에 압박이 생긴다
성장 방식
한계까지 밀어붙인다
배운 것을 몸에 익히려 한다
불편하지만 성장의 계기가 된다
감정 표현
결과와 행동으로 말한다
부담과 죄책감을 크게 느낀다
서로의 언어를 오해할 수 있다
팀 안의 역할
방향을 만드는 리더
현장을 배우는 실행자
리더십과 신뢰가 함께 만들어진다
이 관계의 핵심은 따뜻한 멘토링보다 거친 성장입니다. 백강혁은 양재원을 편안하게 보호하는 방식으로 키우지 않습니다. 오히려 지금 해야 할 일을 던지고, 스스로 판단하게 만듭니다.
양재원 입장에서는 이 방식이 부담스럽습니다. 그는 처음부터 백강혁처럼 움직일 수 없습니다. 그러나 바로 그 차이 때문에 양재원은 성장합니다. 자신이 두려워하는 지점이 무엇인지 보게 되고, 그 두려움을 핑계가 아니라 책임으로 바꾸기 시작합니다.
백강혁에게 양재원은 단순한 후배가 아닙니다. 그는 팀이 지속되기 위해 필요한 사람입니다. 천재적인 리더 혼자서는 중증외상센터를 만들 수 없습니다. 누군가가 그 기준을 배우고, 이어받고, 사람과 현장을 연결해야 합니다.
MBTI로 보면 ENTJ와 ISFJ는 속도가 다릅니다. ENTJ는 목표와 구조를 먼저 봅니다. ISFJ는 사람과 구체적 책임을 먼저 붙잡습니다. 이 차이는 답답함을 만들지만, 동시에 팀을 더 단단하게 만듭니다.
결국 이 관계는 “강한 사람이 약한 사람을 끌고 간다”는 구도가 아닙니다. 방향을 여는 사람과 책임을 배워 가는 사람이 서로를 바꾸는 관계입니다. 그래서 백강혁과 양재원의 관계는 이 작품의 팀워크를 설명하는 가장 중요한 축입니다.
천장미 MBTI: ESTJ에 가까운 ‘현장을 붙잡는 실무 조정자’
천장미는 팀 안에서 감정의 중심이라기보다 운영의 중심에 가까운 인물입니다. 그는 현장이 흔들릴 때 무엇이 빠졌는지, 누가 움직여야 하는지, 어떤 순서가 필요한지를 빠르게 봅니다. 이 실무 감각이 ESTJ적으로 읽힙니다.
천장미의 첫 번째 특징은 현실 대응력입니다. 병원 현장은 감동만으로 돌아가지 않습니다. 기록, 절차, 동선, 인력, 장비, 의사소통이 모두 맞아야 합니다. 천장미는 바로 그 구체적 요소를 붙잡는 인물입니다.
두 번째 특징은 팀의 온도를 관리하는 방식입니다. 그는 모든 감정을 길게 풀어내는 스타일은 아닙니다. 하지만 사람을 모른 척하지도 않습니다. 필요한 순간에는 단호하게 말하고, 필요한 순간에는 팀이 다시 움직일 수 있도록 분위기를 정리합니다.
E는 사람들과의 상호작용 속에서 역할이 살아나는 방식으로 보입니다. 천장미는 혼자 생각에 잠긴 관찰자보다, 현장에서 말하고 조율하고 움직이는 인물에 가깝습니다. S는 추상적 이상보다 지금 필요한 처치와 운영을 보는 감각에서 드러납니다.
T는 냉정함이 아니라 우선순위를 정하는 힘입니다. 환자와 팀을 위해 무엇을 먼저 처리해야 하는지 판단합니다. J는 흐트러진 현장을 다시 정리하고, 각자의 역할을 분명히 하는 태도로 나타납니다.
대체 유형으로는 ESFJ도 가능합니다. 팀원들을 챙기고, 관계의 균형을 보는 면을 강조하면 ESFJ 해석도 자연스럽습니다. 다만 이 글에서는 감정적 돌봄보다 현장 운영과 절차 조율이 더 강하게 보인다고 판단해 ESTJ 쪽에 무게를 둡니다.
천장미가 중요한 이유는 백강혁의 리더십을 현실에서 작동하게 만들기 때문입니다. 아무리 강한 리더가 있어도, 현장을 붙잡는 사람이 없으면 팀은 오래 버티지 못합니다. 천장미는 이 작품에서 “움직이는 시스템”에 가까운 인물입니다.
한유림 MBTI: ESTJ에 가까운 ‘조직 질서를 지키려는 관리자’
한유림은 백강혁과 자주 대비되는 인물입니다. 그는 현장의 생명만 보는 사람이 아니라 병원 조직의 질서, 권위, 평가, 체면을 함께 봅니다. 그래서 때로는 답답해 보이지만, 직업 조직 안에서는 충분히 현실적인 인물입니다.
그의 첫 번째 반복 행동은 기준을 조직 안에서 찾는 것입니다. 백강혁이 “지금 무엇이 필요한가”를 먼저 본다면, 한유림은 “이 조직 안에서 무엇이 가능한가”를 먼저 봅니다. 이 차이가 두 사람의 충돌을 만듭니다.
두 번째 특징은 권위와 성과에 민감하다는 점입니다. 그는 병원 안에서 누가 어떤 위치에 있는지, 어떤 결정이 조직에 어떤 영향을 주는지 의식합니다. 이 태도는 ESTJ의 구조 지향성과 연결됩니다.
한유림의 E는 조직 안에서 자신의 입장을 드러내고 영향력을 행사하는 방식으로 보입니다. S는 현실의 직위, 절차, 병원 운영 조건을 중시하는 태도입니다. T는 감정보다 조직적 판단과 성과 기준을 앞세우는 모습에서 드러납니다. J는 예측 가능한 질서와 통제를 선호하는 방식으로 읽힙니다.
다만 ENTJ 가능성도 있습니다. 특히 경쟁심, 권력 의식, 주도권 다툼을 강조하면 ENTJ처럼 보일 수 있습니다. 그러나 백강혁이 새로운 구조를 만들려는 변화형 리더라면, 한유림은 이미 있는 구조 안에서 질서를 지키려는 관리형 인물에 더 가깝습니다.
한유림을 단순한 방해자로만 보면 글이 얕아집니다. 직업 드라마에서 조직형 인물은 갈등을 만드는 동시에 현실성을 부여합니다. 시스템은 늘 선한 의지만으로 바뀌지 않습니다. 예산, 권한, 체면, 손익이 얽혀 있기 때문입니다.
그래서 한유림의 ESTJ적 면모는 작품의 긴장을 유지합니다. 그는 백강혁의 이상과 속도를 견제합니다. 그 견제가 불편하게 보일 수 있지만, 바로 그 마찰 때문에 중증외상센터가 개인의 영웅담을 넘어 조직 변화의 이야기로 읽힙니다.
박경원 MBTI: ISTP에 가까운 ‘말보다 기술로 돕는 관찰자’
박경원은 중심 인물들만큼 많은 설명을 차지하지 않아도 팀의 질감을 보완하는 인물로 읽을 수 있습니다. 그는 감정을 크게 드러내기보다, 필요한 순간에 자신의 기술과 판단으로 기여하는 쪽에 가깝습니다.
ISTP 가능성은 감정보다 기능, 말보다 정확성, 관계보다 상황 판단이 먼저 보이는 지점에서 나옵니다. 이런 인물은 팀 안에서 조용해 보일 수 있습니다. 하지만 위기 상황에서는 오히려 흔들림 없는 실무 감각이 강점이 됩니다.
대체 유형으로는 INTP도 가능합니다. 분석적 사고와 관찰자적 태도를 강조하면 INTP처럼 읽힐 수 있습니다. 다만 병원 현장이라는 맥락에서 그는 생각을 길게 설명하기보다 기술적 실행으로 존재감을 드러내는 인물에 가까워 ISTP 쪽에 무게를 둡니다.
팀 관계 분석: 리더십과 신뢰가 충돌할 때
한 사람의 결단도 결국 팀의 손을 거쳐 현실이 된다.
중증외상센터의 팀은 처음부터 완성된 팀이 아닙니다. 백강혁은 기준을 밀어붙이고, 양재원은 그 기준을 배워 갑니다. 천장미는 현장이 실제로 돌아가게 만들고, 한유림은 병원 조직의 질서와 충돌 지점을 드러냅니다.
이 팀의 재미는 모두가 같은 방향을 보지 않는다는 데 있습니다. 백강혁은 결과와 변화의 속도를 봅니다. 양재원은 사람과 책임의 무게를 느낍니다. 천장미는 현장의 실행 가능성을 봅니다. 한유림은 조직의 체계와 손익을 봅니다.
MBTI로 보면 이 차이는 각자의 약점도 함께 보여줍니다. ENTJ형 리더십은 빠르지만 거칠 수 있습니다. ISFJ형 실행자는 성실하지만 부담을 과하게 떠안을 수 있습니다. ESTJ형 운영자는 안정적이지만 변화를 불편하게 느낄 수 있습니다. ISTP형 실무자는 정확하지만 마음을 설명하는 데 서툴 수 있습니다.
하지만 팀은 같은 사람들만 모였을 때 강해지는 것이 아닙니다. 위기 현장에서는 방향을 정하는 사람, 손을 움직이는 사람, 기록과 절차를 붙잡는 사람, 불편한 질문을 던지는 사람이 모두 필요합니다. 중증외상센터의 팀워크는 바로 이 차이 위에서 만들어집니다.
결국 이 작품의 핵심 관계는 궁합보다 신뢰입니다. 서로 편해서 믿는 것이 아닙니다. 불편하고 부딪혀도, 위기 앞에서 각자의 역할을 해낸다는 경험이 신뢰를 만듭니다. 그래서 이 팀은 MBTI 네 글자보다 “함께 버티는 방식”으로 기억됩니다.
이 분석에서 조심해야 할 것
첫째, 백강혁을 ENTJ로 본다고 해서 모든 ENTJ가 백강혁 같다는 뜻은 아닙니다. 캐릭터는 극적 상황을 위해 만들어진 인물입니다. 실제 사람의 MBTI와 드라마 속 인물 해석은 다르게 봐야 합니다.
둘째, T와 F를 차가움과 따뜻함으로 나누면 안 됩니다. 백강혁의 T는 환자를 향한 무관심이 아닙니다. 양재원의 F도 판단력이 약하다는 뜻이 아닙니다. 둘은 사람을 살리려는 마음을 서로 다른 방식으로 표현합니다.
셋째, E와 I도 말수로만 판단하면 위험합니다. 백강혁은 외부 상황을 바꾸는 에너지가 강합니다. 양재원은 안에서 부담을 정리하며 다시 움직입니다. 둘 다 능동적일 수 있지만, 에너지의 방향이 다릅니다.
넷째, 직업 드라마에서는 역할이 성격처럼 보일 수 있습니다. 의사, 간호사, 병원 관리자라는 직무는 인물의 말투와 행동을 강하게 제한합니다. 그래서 이 글의 유형은 공식 설정이 아니라 작품 속 행동을 바탕으로 한 해석입니다.
유형보다 오래 남는 것은 위기 앞에서 맡은 역할이다.
결론: 중증외상센터는 MBTI보다 ‘위기 앞의 역할’이 먼저 보이는 작품
중증외상센터의 매력은 백강혁이 ENTJ인지, 양재원이 ISFJ인지 맞히는 데만 있지 않습니다. 더 중요한 질문은 위기 앞에서 사람은 어떤 역할을 맡게 되는가입니다.
백강혁은 방향을 만듭니다. 양재원은 두려움 속에서도 책임을 배웁니다. 천장미는 현장이 무너지지 않게 붙잡습니다. 한유림은 조직의 벽을 보여줍니다. 이 차이가 모여 작품의 긴장을 만듭니다.
MBTI는 이 차이를 조금 더 쉽게 설명해 주는 언어입니다. 하지만 정답은 아닙니다. 이 글의 해석도 하나의 가능성입니다. 캐릭터를 더 재미있게 보고, 관계와 선택의 차이를 이해하는 데 도움이 되면 충분합니다.