Red Hat supports cockpit as a server management tool to improve administrator’s management efficiency. cockpit provides a user-friendly interface and is also supported on CentOS.
Cockpit is modular and can be expanded by installing additional modules.
You can additionally set up multiple servers in one cockpit dashboard.
cockpit uses a socket method and does not use memory during use.
Cockpit can be accessed by a user with sudoer privileges, but cannot be accessed by root privileges.
Activate cockpit
The installation and connection methods are very simple. When you reboot after installing CentOS 8, the cockpit activation command is displayed at the top of the login page.
After logging in, enter the following code in the terminal.
centos cockpit
sudo systemctl enable --now cockpit.socket
After activation, reboot.
sudo reboot
cockpit access
When you reboot, the connection link is initially displayed at the top.
centos cockpit
Access https://localhost:9090/ or https://[ip]:9090/ in a web browser. It is displayed as private, but you can click Advanced, move to ‘Not Secure’, and access it.
centos cockpitcentos cockpit
Good article to read together
Linux user management useradd usermod userdel
Activate Centos 8 RHEL & REMI Repository
Install OpenSSL
Installing and managing MariaDB (MySQL)
Install Ubuntu 22.04.1 (VirtualBox)
Practical phpMyAdmin Notes
phpMyAdmin is useful for quick database inspection, but it should not be exposed casually on a public server. Use strong authentication, restrict access by IP or VPN when possible, keep PHP and phpMyAdmin updated, and back up databases before structural changes. For team environments, define who can access the tool and avoid using a shared administrator account for routine work.
Security Checklist
For a public-facing phpMyAdmin installation, add layered protection rather than relying only on the application login screen. Recommended safeguards include HTTPS, strong database-user passwords, limited privileges, IP restrictions or VPN access, regular updates, and tested backups. If the tool is needed only temporarily, disable or remove it after the maintenance task is finished.
Related Reading
Continue with these related Thinknote English articles in the Server & Infrastructure cluster.
This article is part of Thinknote’s English server and infrastructure archive. It focuses on practical Linux, Ubuntu, web-server, database, SSH, firewall, or hosting operations that readers can adapt to their own environment.
How should I use this guide?
Use it as a practical checklist and concept guide. Before applying commands on a live server, verify package names, OS versions, ports, and backup requirements for your own setup.
-m or –create-home: Add the new user’s home directory. -s or –shell: The shell can be set differently for each user. -u or –uid: Specifies a specific user ID (UID). -c or –comment : GECOS field
sudo adduser [example]
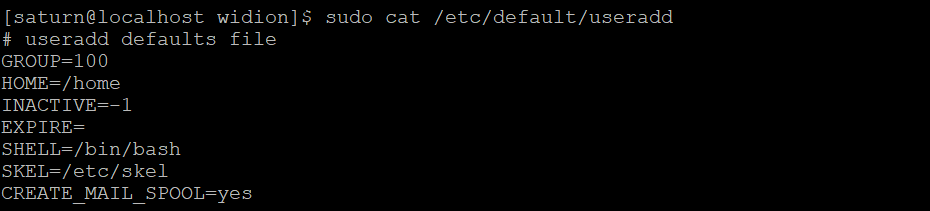
User default settings can be checked in /etc/defaults/useradd.
sudo cat /etc/default/useradd
useradd default
Register the user’s password with the passwd [user name] command. Existing users can change their password.
sudo passwd [example]
Article image 2
Edit user information
For existing user accounts, you can change the user name, change the shell, or lock or unlock the account.
-c or –comment: Modify GECOS field -d or –home: Modify home directory information -e or –expiredate: Set account expiration -l (lowercase L) or –login: Modify username
-L or –lock: Lock user account
-U or –unlock : Unlock user
sudo usermod [option] [example]
Delete user
Unnecessary user accounts can be deleted with the userdel command.
-f or –force: Delete account even when user is logged in -r or –remove: Delete account including mail and home directory
sudo userdel [example]
Good article to read together
Linux administrator tool – enable cockpit
Activate Centos 8 RHEL & REMI Repository
Install OpenSSL
Installing and managing MariaDB (MySQL)
Install Ubuntu 22.04.1 (VirtualBox)
Practical DNS and Name-Server Notes
DNS changes can take time to propagate, so plan edits carefully and keep a record of the previous values. Before changing name servers, confirm the authoritative provider, required A or CNAME records, MX records for email, and any TXT records used for verification. After the change, test from multiple networks and keep the previous configuration available until the migration is stable.
Related Reading
Continue with these related Thinknote English articles in the Server & Infrastructure cluster.
This article is part of Thinknote’s English server and infrastructure archive. It focuses on practical Linux, Ubuntu, web-server, database, SSH, firewall, or hosting operations that readers can adapt to their own environment.
How should I use this guide?
Use it as a practical checklist and concept guide. Before applying commands on a live server, verify package names, OS versions, ports, and backup requirements for your own setup.
RHEL stands for an additional package for Enterprise Linux and provides a repository that can be used on Centos 8 servers. To use the RHEL repository, you must be connected to the Internet and have root or sudo administrator privileges.
RHEL 8 includes new features that accelerate application development, including installation, coding, tool selection, and configuration. Configuring to use the RHEL Repository on CentOS 8 is very simple, and during installation, REMI, which includes the PHP package to be used on the web server, is also installed. REMI is a free and stable dnf(yum) repository centered on the PHP stack and includes packages for the latest version of PHP.
Activate RHEL
sudo dnf search epel
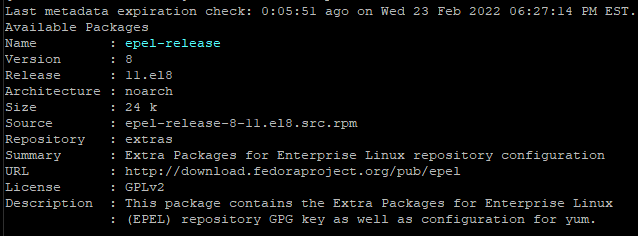
sudo dnf info epel-release
Centos 8 RHEL & REMI Repository
sudo dnf -y install epel-release
Centos 8 RHEL & REMI Repository
sudo dnf update
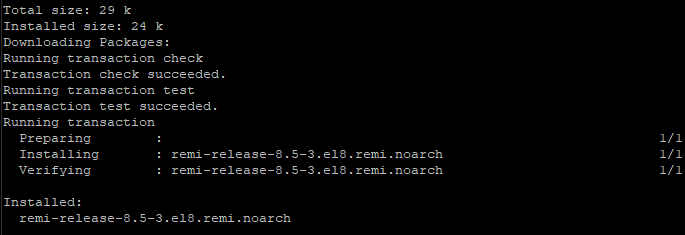
Activate REMI
You can install the REMI repository by running the following command.
For current production servers, treat this article as a conceptual reference rather than a copy-and-paste deployment recipe. Confirm the Linux distribution, Apache version, virtual-host layout, firewall rules, TLS certificate path, and backup policy before changing a live server. If the server hosts multiple sites, test configuration changes with a syntax check and reload the service only after verifying that the new configuration does not break existing domains.
Verification Checklist
After editing Apache configuration, run a syntax check, confirm that the expected virtual host answers on the correct domain, and review the error log before assuming the change is complete. If HTTPS is involved, also verify the certificate chain, renewal schedule, and redirect behavior from HTTP to HTTPS. These checks reduce downtime and make the older setup notes safer to apply in a modern hosting environment.
Related Reading
Continue with these related Thinknote English articles in the Server & Infrastructure cluster.
This article is part of Thinknote’s English server and infrastructure archive. It focuses on practical Linux, Ubuntu, web-server, database, SSH, firewall, or hosting operations that readers can adapt to their own environment.
How should I use this guide?
Use it as a practical checklist and concept guide. Before applying commands on a live server, verify package names, OS versions, ports, and backup requirements for your own setup.
firewalld is a firewall management tool provided by default in the CentOS operating system. firewalld supports both IPv4 and IPv6 networks, operates as defined in the profile area, and is highly reliable.
block: Connect only networks started within the system and reject all other connections
dmz: Allows connections only from allowed ports and provides connections to incoming ports.
drop: Block all incoming connections and only allow outgoing network connections
public: Do not trust other servers or computers on the network and allow only necessary ports and services
trusted: Allow connections to all zones
home: Connects to a trusted PC on the local network and allows only selected TCP/IP ports
You can use friewall to allow or block traffic. Centos 8 provides a custom-based firewall with a dynamic interface.
A firewall forms a barrier between the system and external sources, preventing external damage from spreading and damaging valuable internal data. Therefore, you must use a firewall and you should not stop it just because the service is not working well.
You can specify the port directly, but you can also use the service name to operate it.
sudo firewall-cmd --get-services
sudo firewall-cmd --get-services | grep [example example : http or mysql]
Service port information can be checked through the xml file in the link below.
sudo ls -l /usr/lib/firewalld/services/
sudo cat /usr/lib/firewalld/services/ssh.xml
The following is the command to permanently add an http port to the public zone. If you delete –permanent and enter it, it will be added temporarily and will disappear after rebooting. If you register a service and port, it must be reloaded.
The following is the command to permanently delete the http port in the public zone. If you delete –permanent and then enter it, it will be temporarily deleted and will remain after rebooting. If you delete a service or port, it must be reloaded.
This article is part of Thinknote’s English server and infrastructure archive. It focuses on practical Linux, Ubuntu, web-server, database, SSH, firewall, or hosting operations that readers can adapt to their own environment.
How should I use this guide?
Use it as a practical checklist and concept guide. Before applying commands on a live server, verify package names, OS versions, ports, and backup requirements for your own setup.
Apache is an open source HTTP server, while Nginx is an open source, high-performance asynchronous web server and reverse proxy server.
While the development and evolution of Apache HTTP Server is managed and maintained by a global user community (Apache Software Foundation), Nginx is maintained and maintained by the company of the same name, founded in 2011.
While Apache provides various multiprocessing modules to handle client requests and web traffic, Nginx is designed to handle multiple client requests simultaneously with minimal hardware resources.
In Apache, a single thread is associated with one connection, but in Nginx, a single thread can handle multiple connections. This process consumes less memory and improves performance.
While Apache HTTP Server has a non-scalable, multi-threaded architecture, Nginx follows an asynchronous event-based approach to handling multiple client requests.
The Apache server serves static content using traditional methods and handles dynamic content natively within the web server itself. Nginx, on the other hand, cannot handle dynamic content internally and relies on external processes to do so.
In other words, Apache has a relative advantage in terms of security and stability, and nginx has a relative advantage in terms of efficiency and speed. Activate and install Centos 8 RHEL & REMI Repository.
2. Install nginx web server
1) Update
sudo dnf update
2) Search nginx and check version
sudo dnf list install nginx
nginx web server
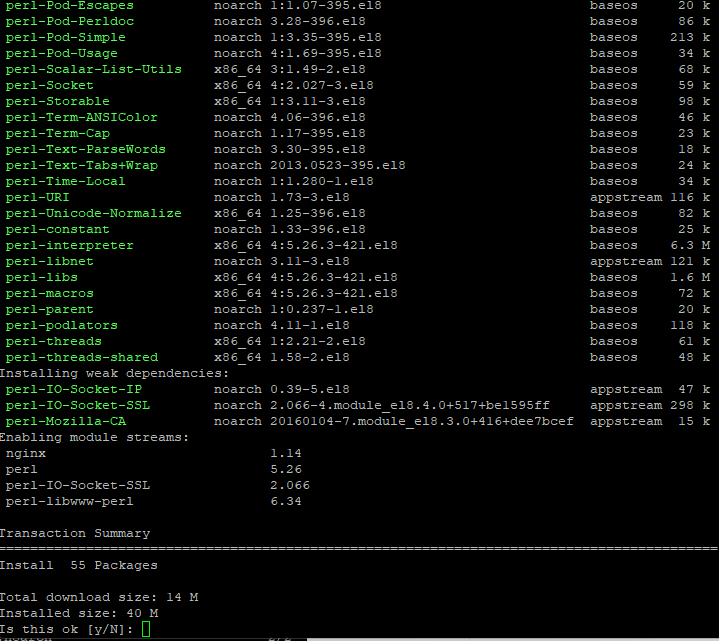
3) Install nginx
sudo dnf install -y nginx.x86_64
nginx web server
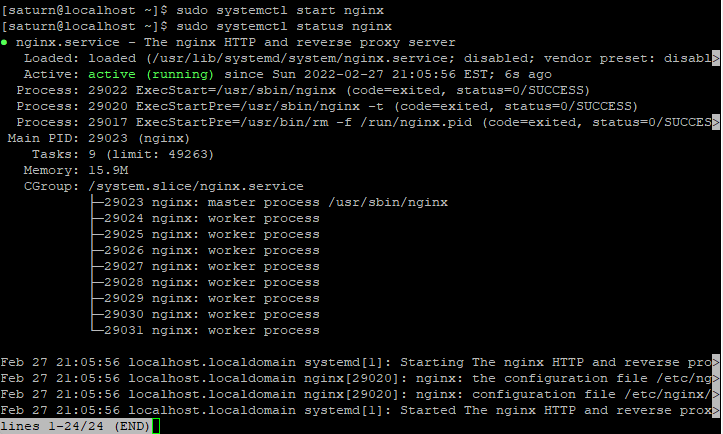
4) Check nginx status
sudo systemctl status nginx
nginx web server
5) Start nginx
Press Ctrl+c to exit and start nginx.
sudo systemctl start nginx
nginx web server
Enable it to run automatically when booting. If you do not execute the following command, it will run in a dead state rather than a running state when booting.
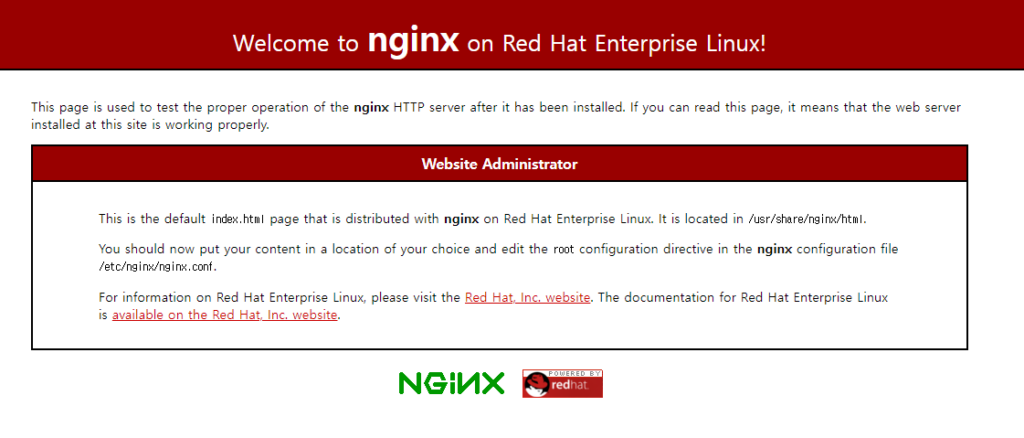
Enter the IP address in a web browser and the following screen will appear.
nginx web server
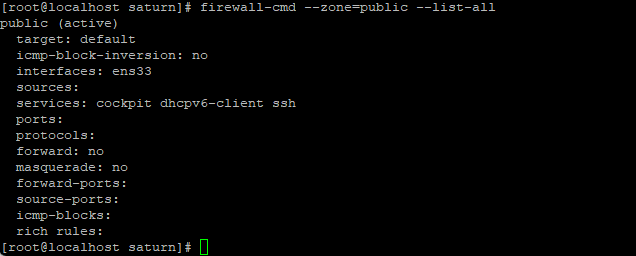
If an error occurs in the web browser, check the status of nginx to see if it is operating normally. Next, check whether the firewall is working and port 80 is open.
Good article to read together
Install Nginx web server (ubuntu)
firewall settings
Install PHP 8 (ubuntu)
Free HTTPS setup (Let’s Encrypt, Cloudflare)
Install Centos 8
Related Reading
Continue with these related Thinknote English articles in the Server & Infrastructure cluster.
This article is part of Thinknote’s English server and infrastructure archive. It focuses on practical Linux, Ubuntu, web-server, database, SSH, firewall, or hosting operations that readers can adapt to their own environment.
How should I use this guide?
Use it as a practical checklist and concept guide. Before applying commands on a live server, verify package names, OS versions, ports, and backup requirements for your own setup.
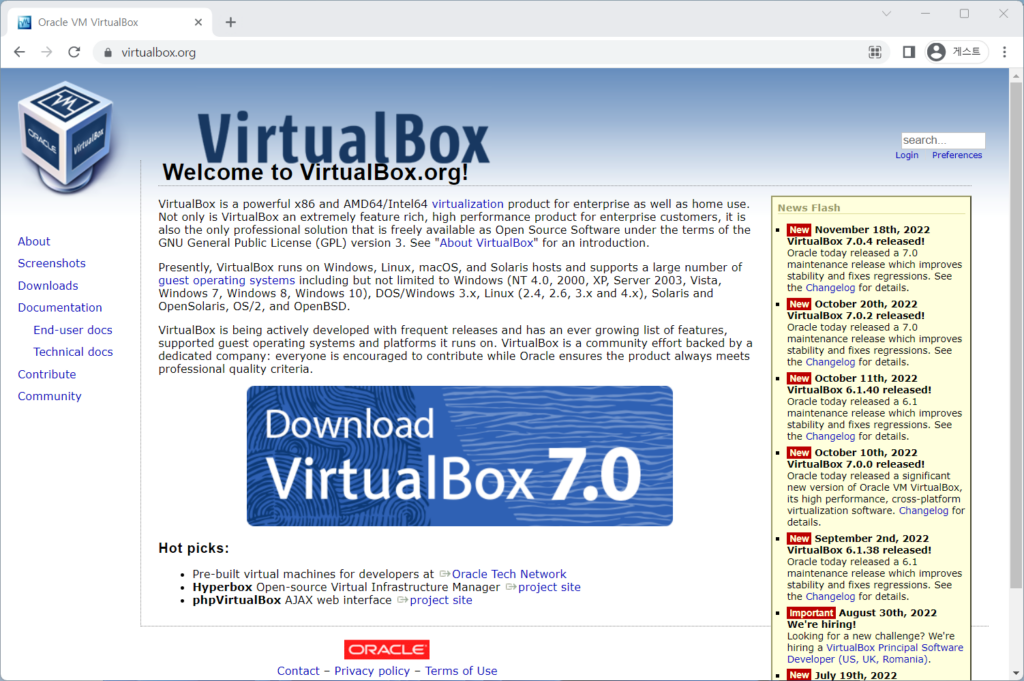
VirtualBox is a virtual machine that anyone can use as free software. A virtual machine () is a virtual environment with its own CPU, memory, network interfaces, and storage created on a physical hardware system. A physical machine equipped with a hypervisor, such as a Kernel-Based Virtual Machine (KVM), is called a host machine, host computer, host operating system, or simply host.
The hypervisor can easily relocate computing resources such as CPU, memory, and storage between existing guests or to new virtual machines. Virtual machines are not suitable for use in resource-intensive 3D, graphics, or physics engines.
Virtual machines can install various operating systems such as MacOS, Linux, and Windows, and each operating system is configured similarly to the physical environment.
1) Virtual machine type
A virtual machine has various software depending on the operating system of the host PC. The following virtual machine software is available for free. Here, we will build a virtual environment using VirtualBox software.
Virtualization Manager
VM Monitor
VMware Fusion (Mac)
Parallels
VMware Workstation Player
Hyper-V
VirtualBox
QEMU
Gnome Boxes
Red Hat Virtualization
2. Understanding VirtualBox
1) VirtualBox Features
VirtualBox is free software and anyone can use it. VirtualBox was originally created by Innotek GmbH, which was acquired by Sun Microsystems in 2008 and by Oracle in 2010.
VirtualBox is the best software for developers who need to develop in a variety of virtual environments for enterprise visualization and home use. VirtualBox is an open source hypervisor for x86 computers and is one of the best VM software that supports creation and management of virtual machines.
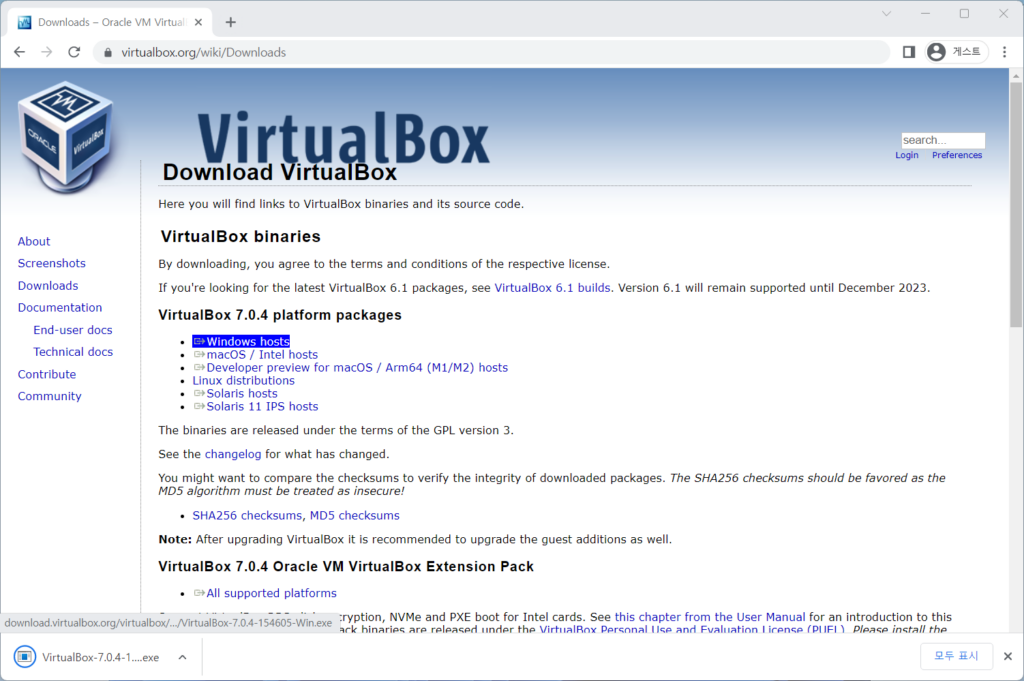
VirtualBox can install and run Windows, Linux, BSD and other OS. A notable aspect of VirtualBox is its ability to transfer virtual machines from one host to another.
2) VirtualBox virtualization
Users of VirtualBox can load multiple guest OSs on a single host operating system (host OS). Each guest can be started, paused, and stopped independently within its own virtual machine.
Users can configure each virtual machine independently and run it in either software-based virtualization or hardware-assisted virtualization, if supported by the underlying host hardware.
The host OS and guest OS and applications can communicate with each other through several mechanisms, including a common clipboard and virtualized network functions. Guest virtual machines can also communicate if they are configured to communicate directly with each other.
3) VirtualBox features
You can resize the window.
Supports multiple screen resolutions.
Windows 10 supports drag and drop functionality.
It gives you the flexibility to run any application on your PC.
You can run multiple guest windows simultaneously on the same computer.
Seamless mode allows you to run macOS and Windows applications side by side.
Supports Linux, Mac, Windows, Solaris, and OpenSolaris platforms.
4) Virtualization supported OS
Windows 7 or higher
Windows Server 2012 or later
linux distribution
macOS versions 10.13 High Sierra through 10.15 Catalina (Intel-based Macs only)
This article is part of Thinknote’s English server and infrastructure archive. It focuses on practical Linux, Ubuntu, web-server, database, SSH, firewall, or hosting operations that readers can adapt to their own environment.
How should I use this guide?
Use it as a practical checklist and concept guide. Before applying commands on a live server, verify package names, OS versions, ports, and backup requirements for your own setup.
1. Run virtual PC (hereinafter referred to as Ubuntu Server)
Ubuntu installation is carried out by running the configured virtual environment. Since Korean version cannot be installed during installation of Ubuntu 22.04 version, you must complete the installation and additionally install a Korean input method to use Korean language.
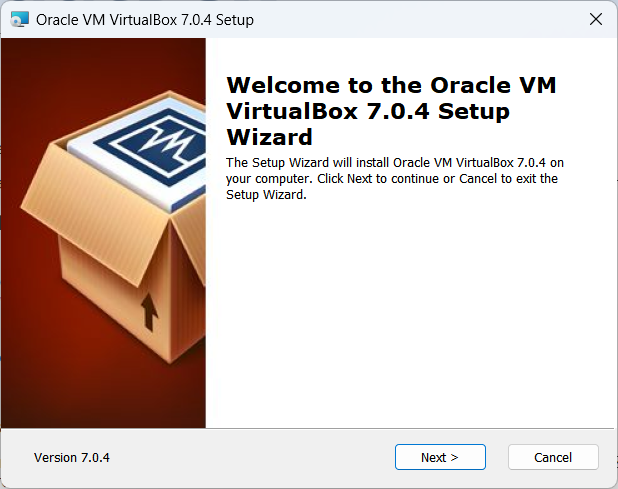
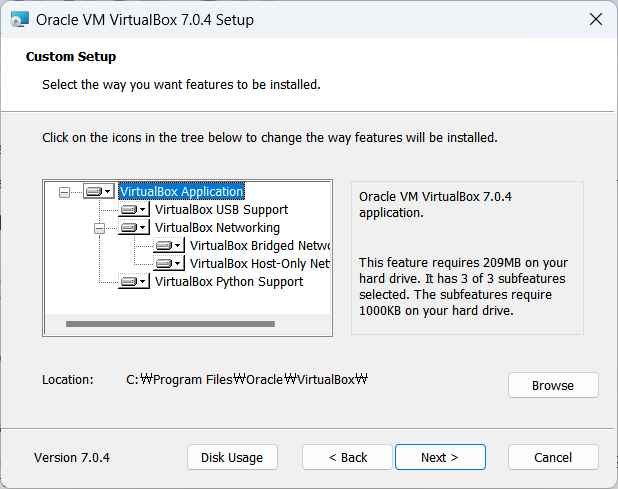
If you have not set up VirtualBox first, click the link below to set up VirtualBox before proceeding.
Download Ubuntu and set up Ubuntu (Virtualbox)
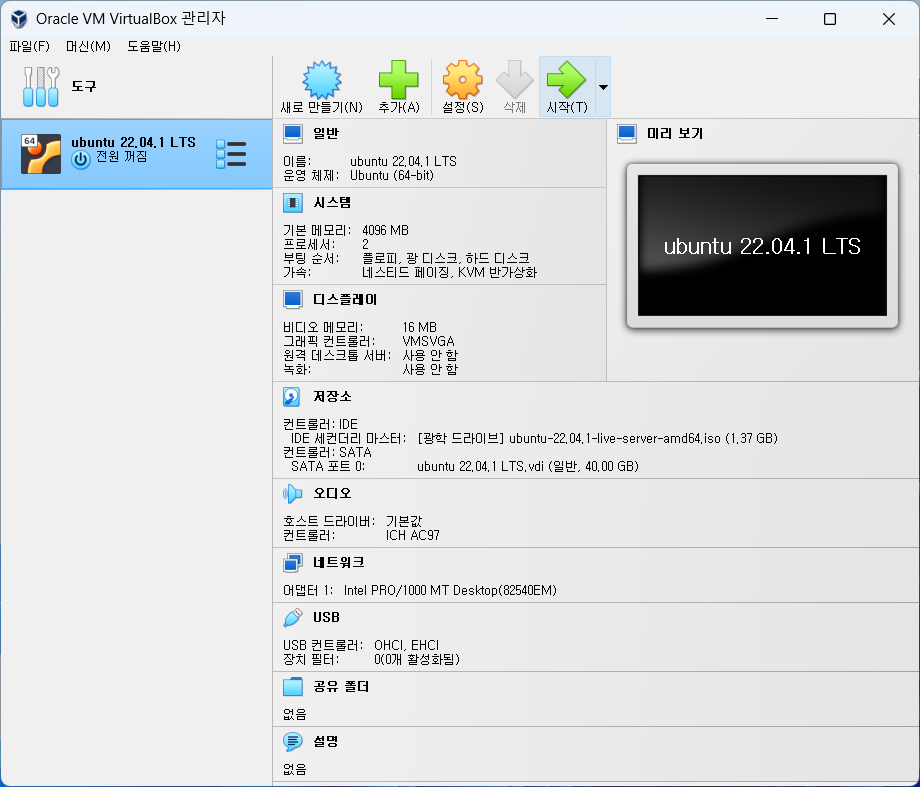
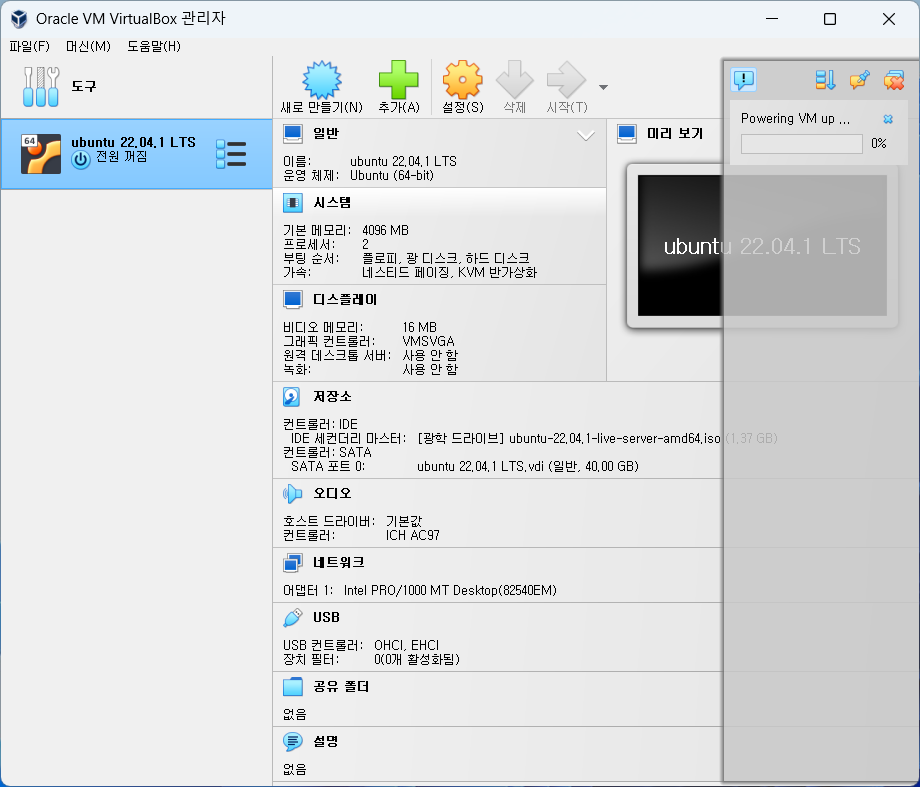
Run VirtualBox Manager and click Start in the top menu.
install ubuntuinstall ubuntu
2. Install Ubuntu
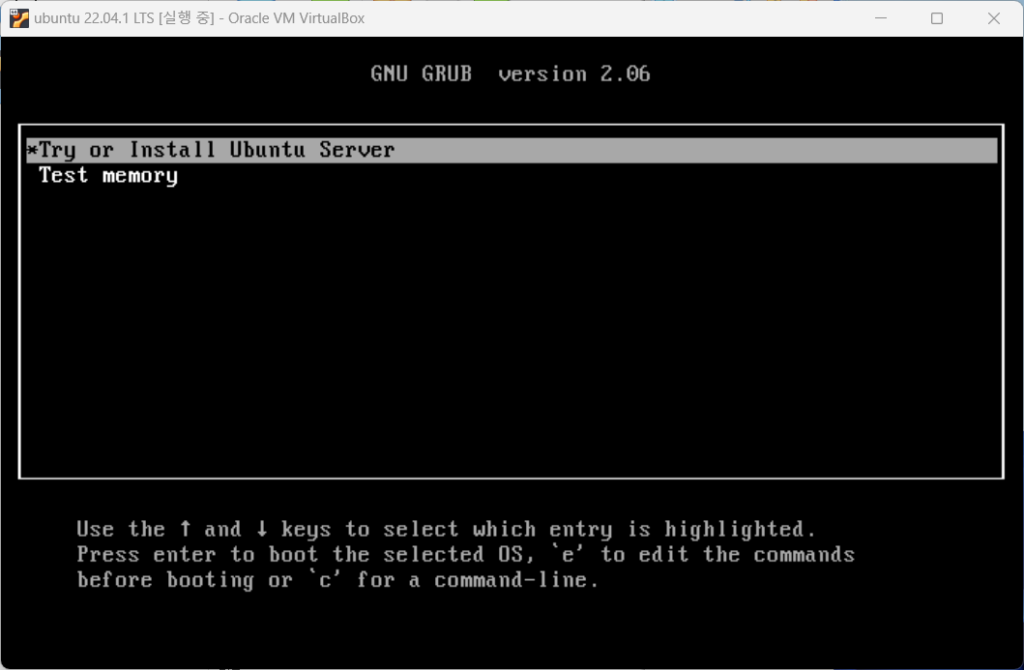
The ubuntu iso image mounted on the IDE controller is loaded and takes you to the installation screen.
install ubuntu
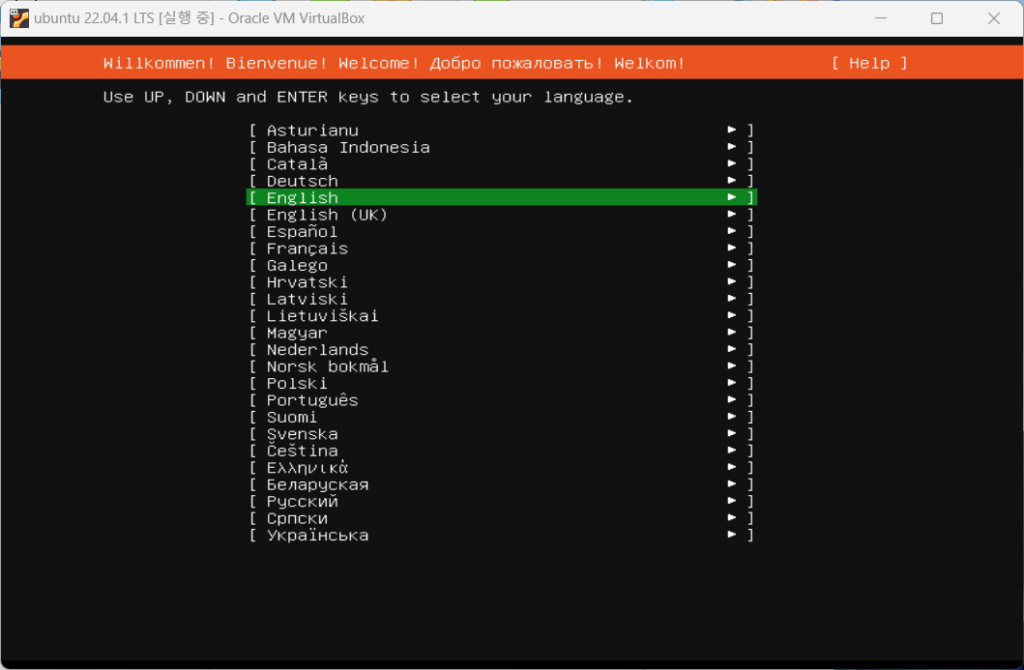
There is no Korean in the language settings, so I installed it in English.
install ubuntu
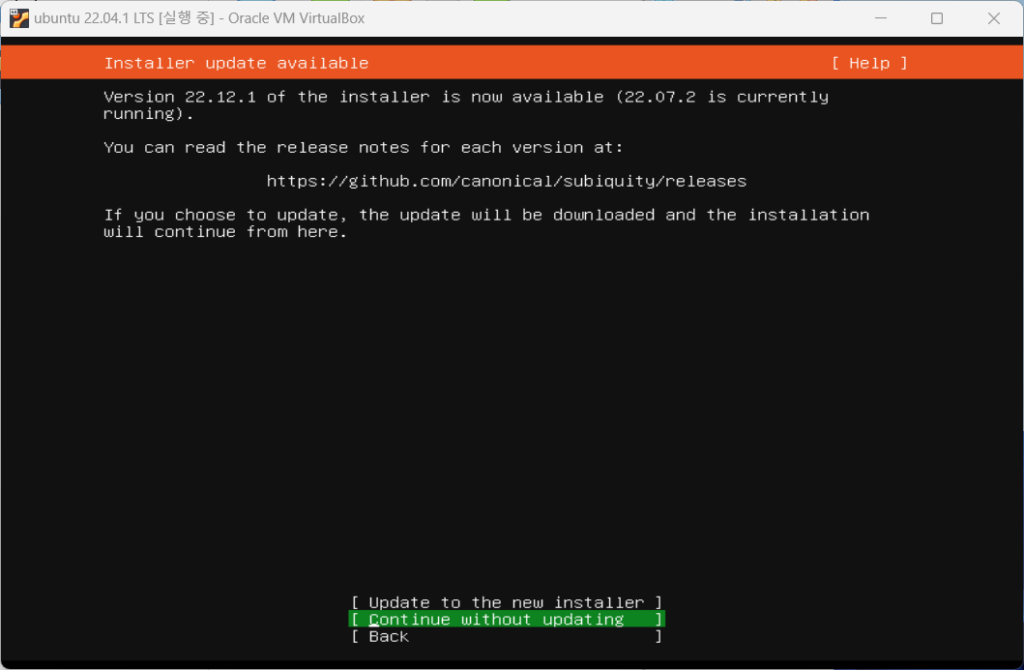
The Installer continues without updates.
install ubuntu
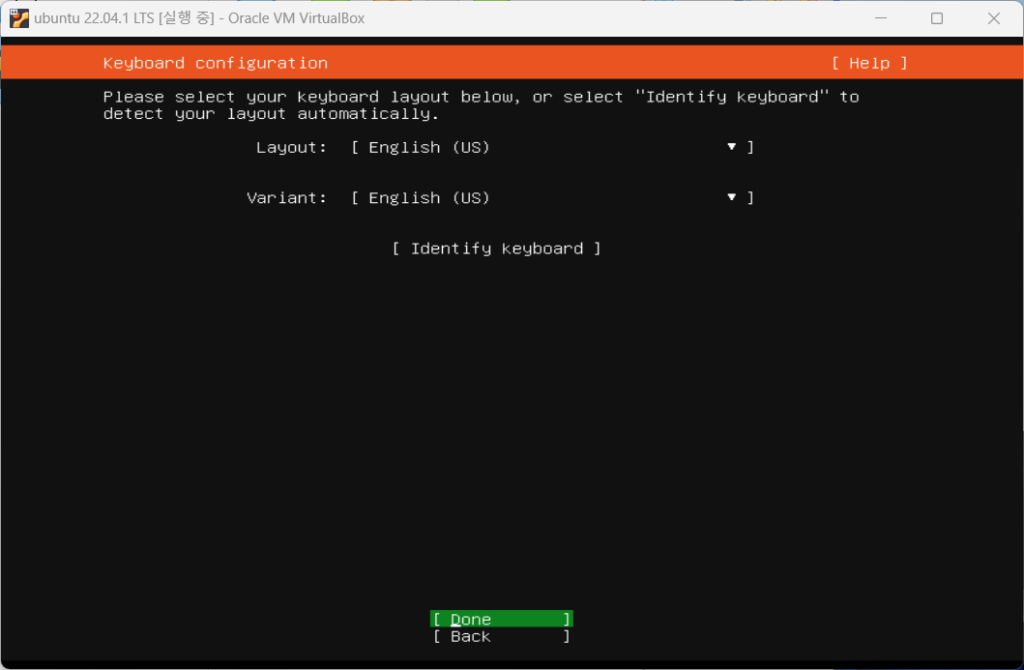
Select English as the keyboard language and click Done.
install ubuntu
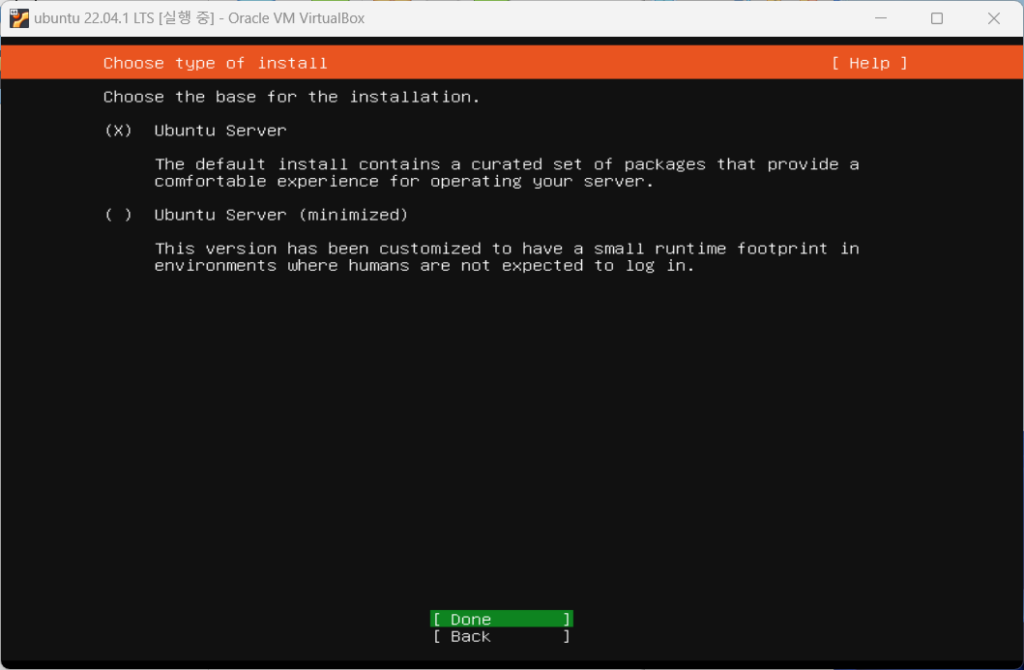
Select Ubuntu Server as the Ubuntu installation type and click Finish.
install ubuntu
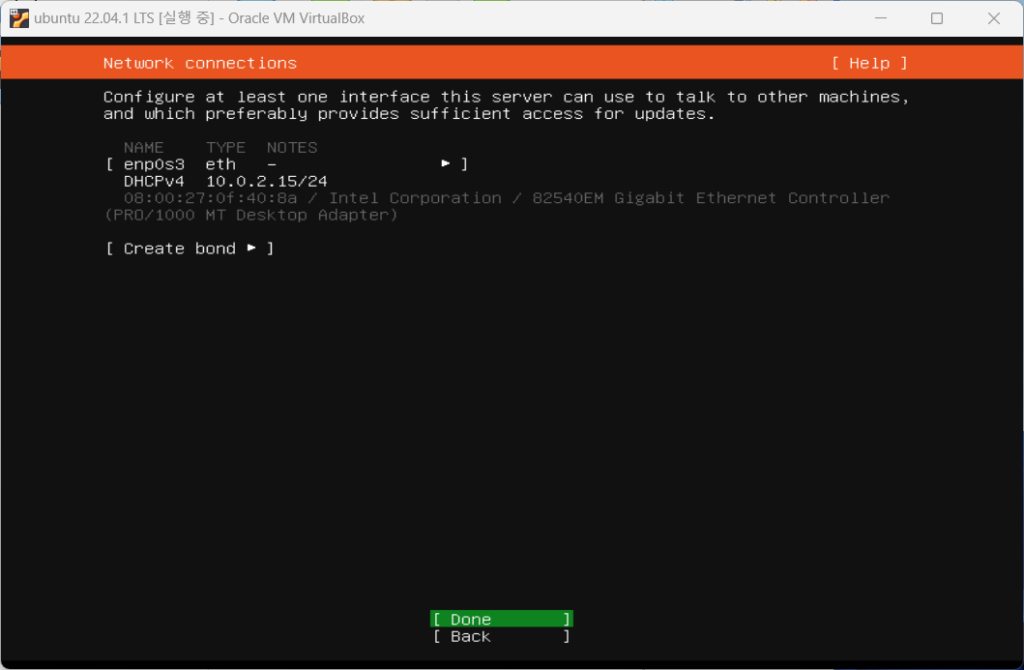
Network settings are set to default settings. The IP address set automatically is the address assigned by Virtualbox.
install ubuntu
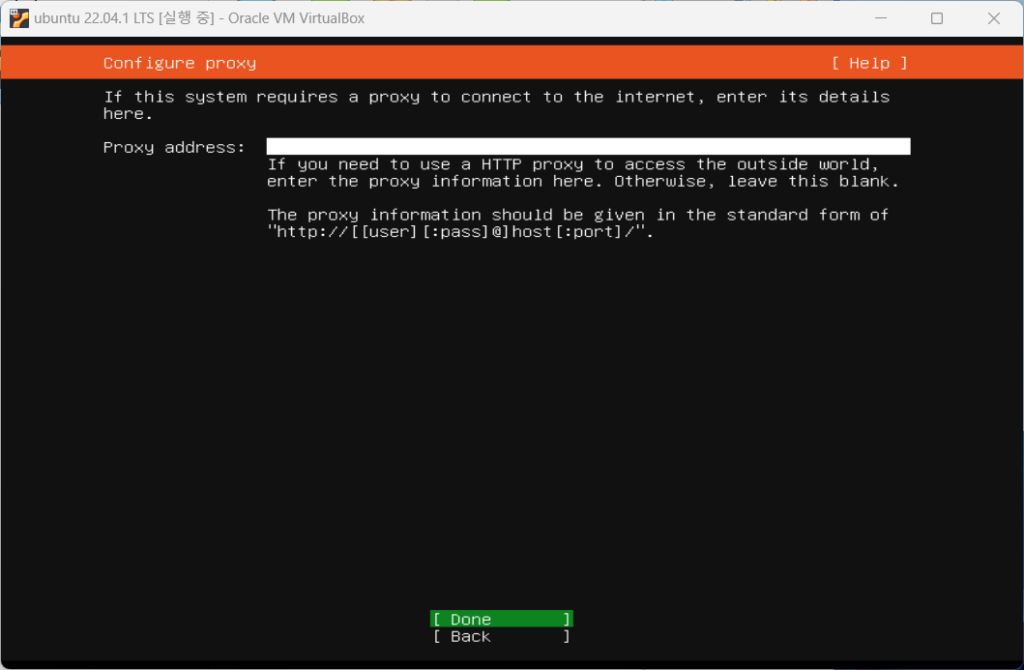
Click Done without entering the proxy address for proxy settings.
install ubuntu
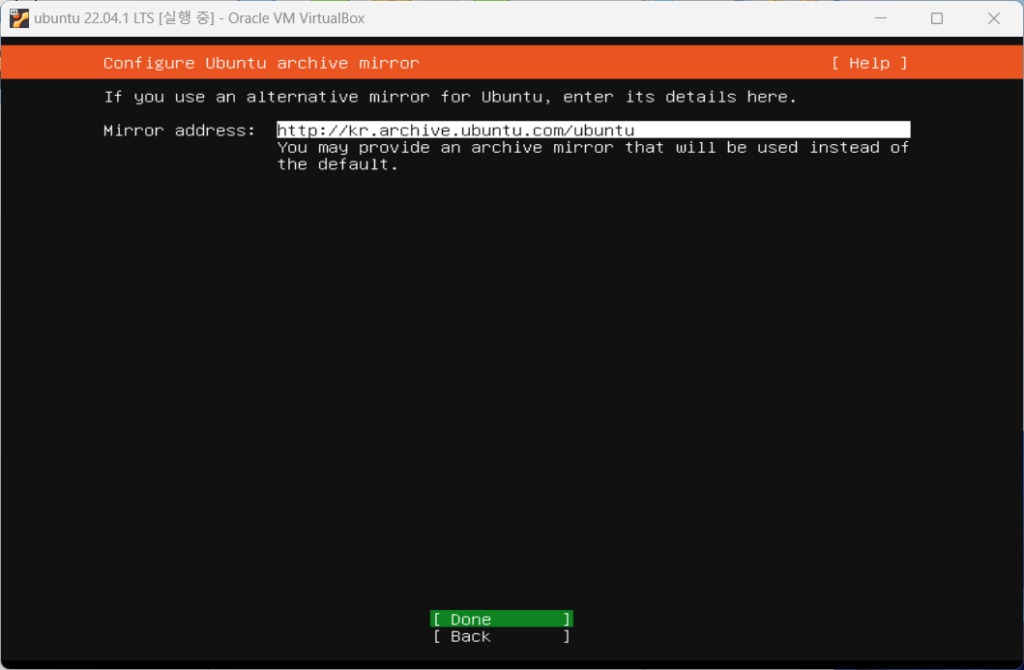
For Ubuntu archive mirror, select the default settings and click Done.
install ubuntu
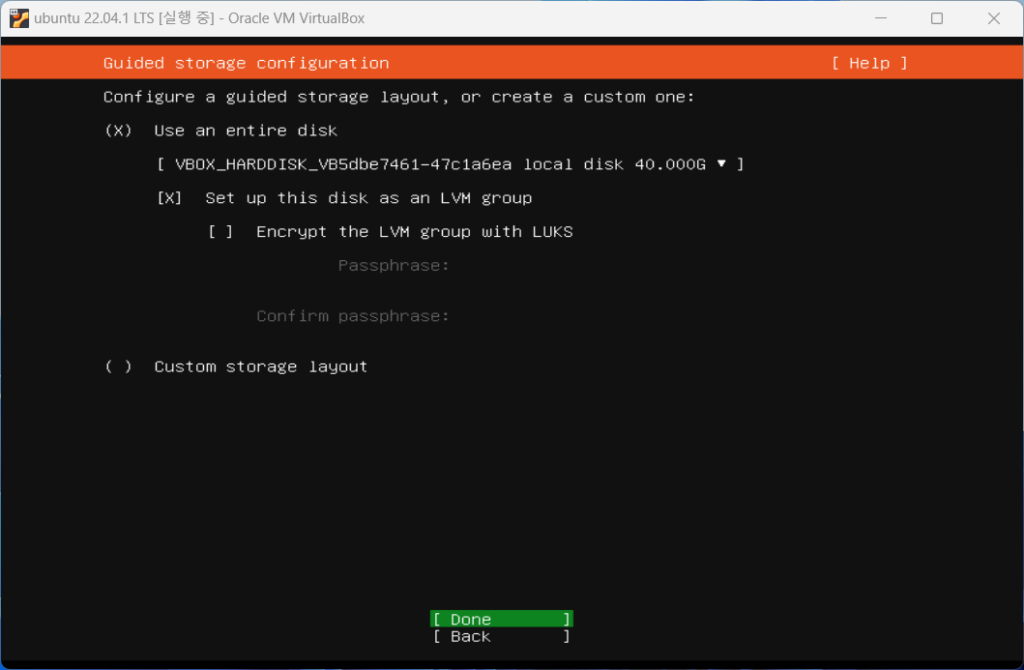
Depending on your configuration, you can set the storage settings to a custom storage layout, but since we are using a new disk, select the default settings and click Finish.
install ubuntu
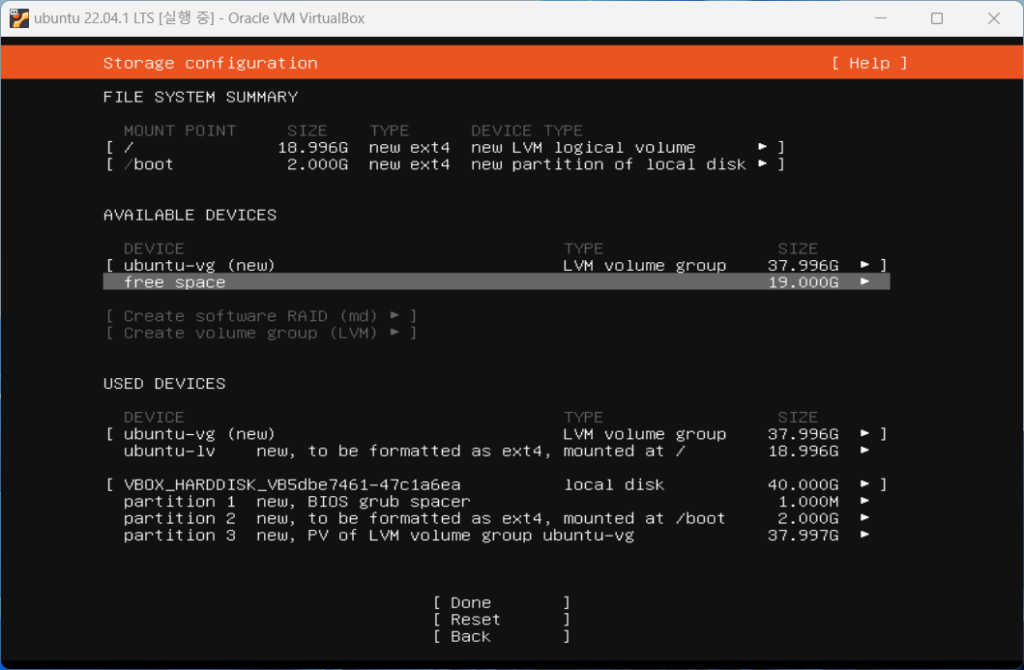
The default partitions are shown, and you can see that the root partition and boot partition consist of 20G, and there is 20G of free space.
install ubuntu
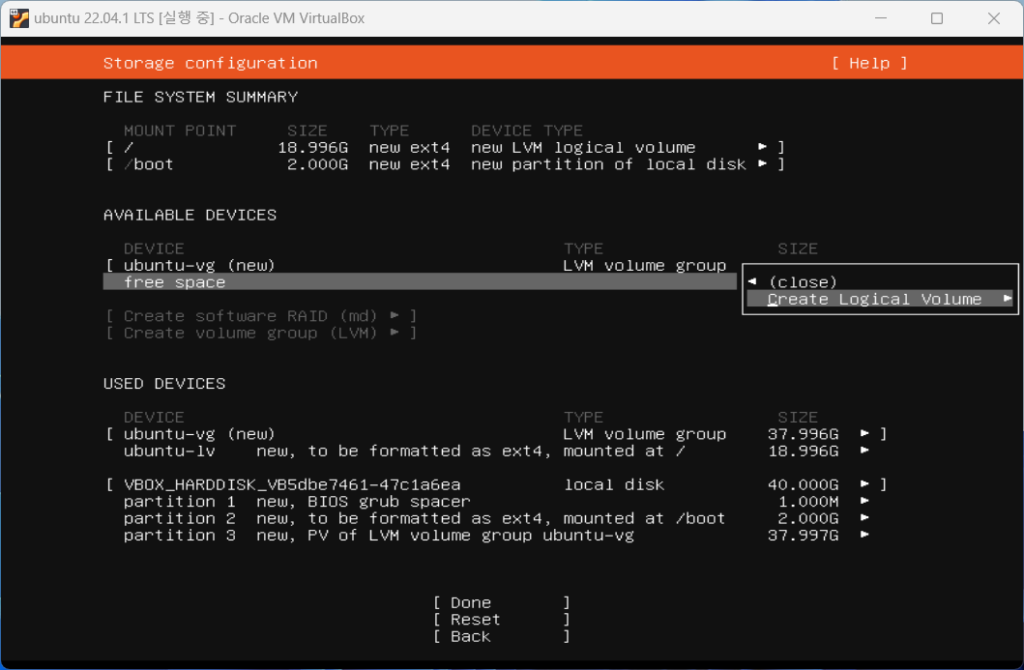
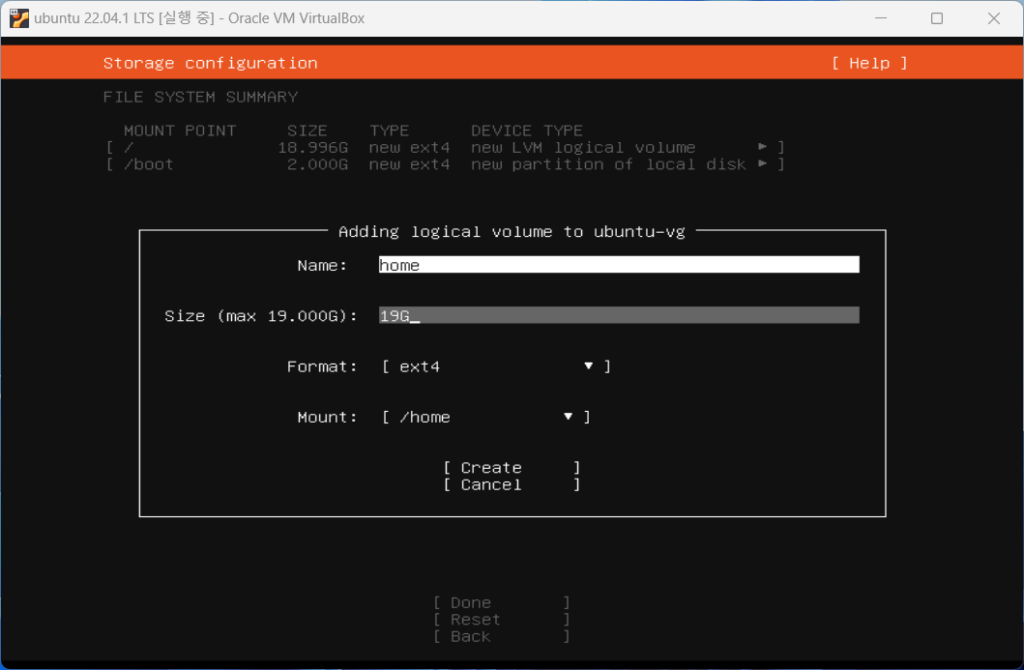
Select Create Logical Volume to configure the unallocated space into the /home directory.
install ubuntu
Write name as home and allocate maximum space as shown below. If left blank, maximum space will be automatically allocated. Select ext4 as the Format and /home as the Mount and click Create.
install ubuntu
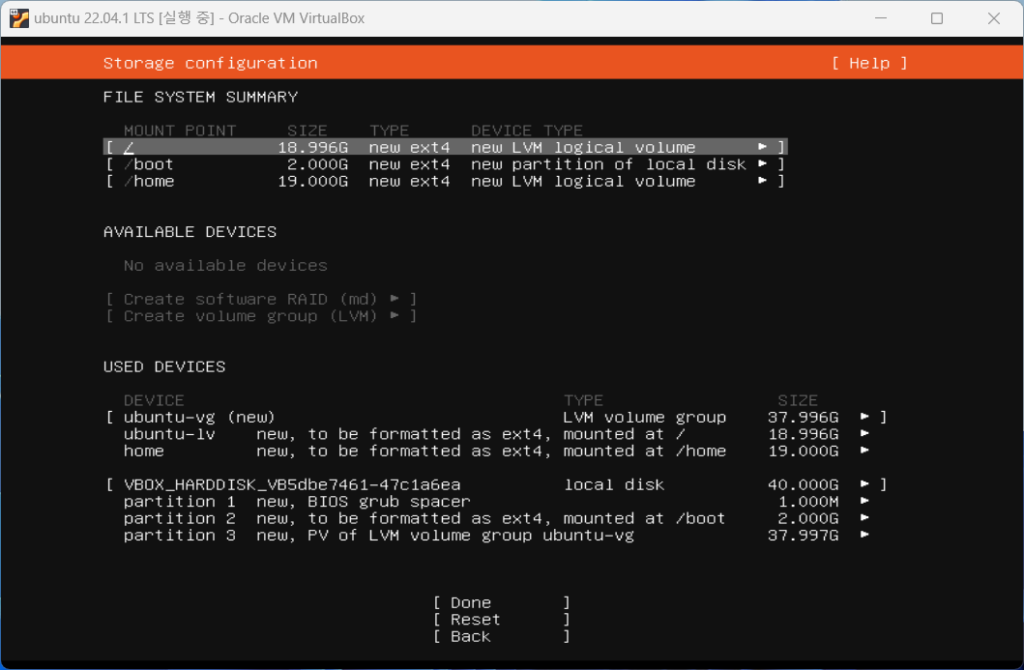
You can see that the /home directory has been added in the partition configuration information. Click Done.
install ubuntu
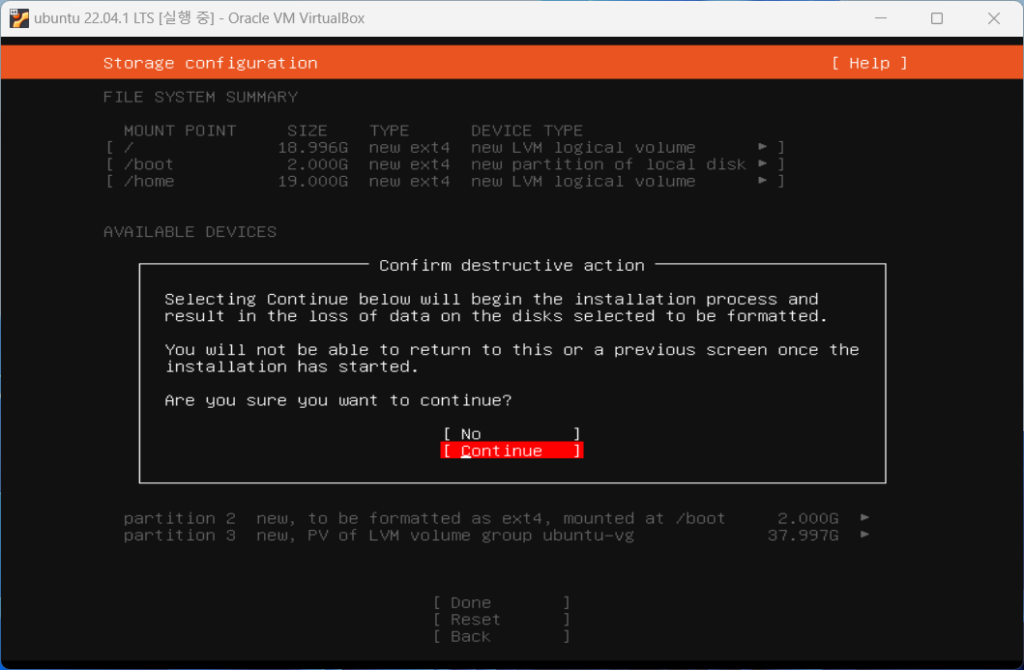
In the confirmation window, select and click Continue.
install ubuntu
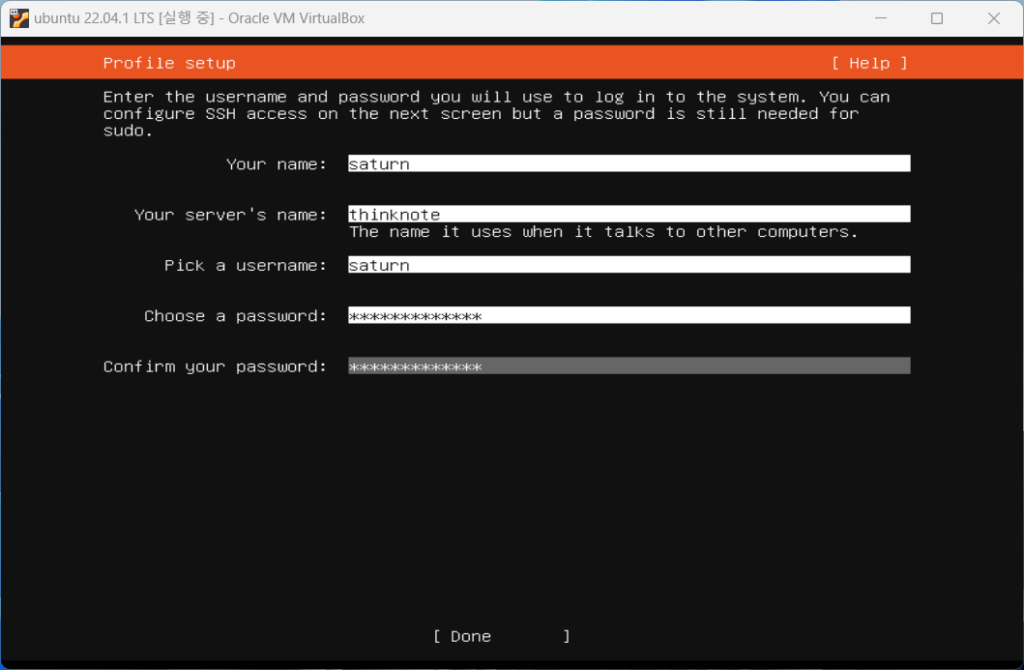
Enter the name of Ubuntu and the server name. Additionally, enter your username and password. The user name and password entered here will be used as the login ID and password.
install ubuntu
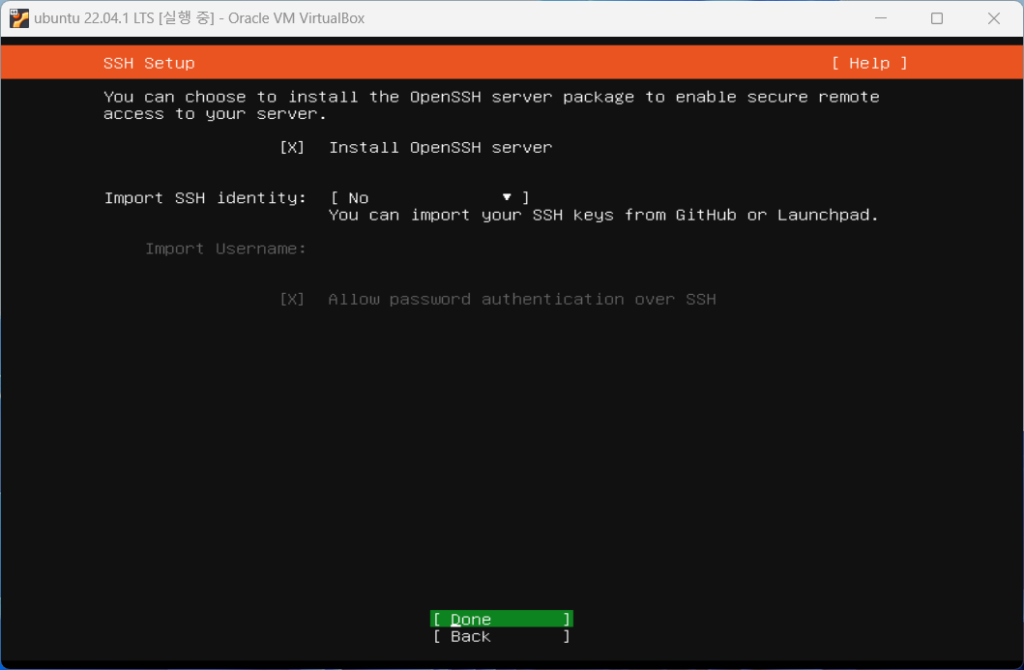
OpenSSH Server is a package for external connection using the SSH program. To connect to the terminal, select OpenSSH server and click Done.
install ubuntu
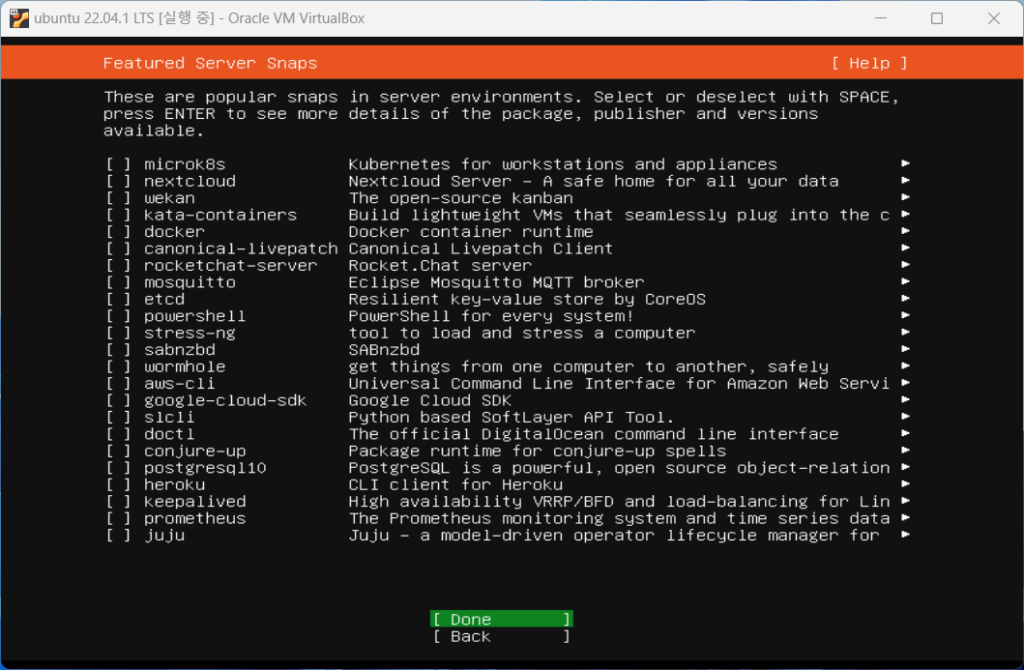
Select the Server Snaps you want to further configure. Click Done without installing here.
install ubuntu
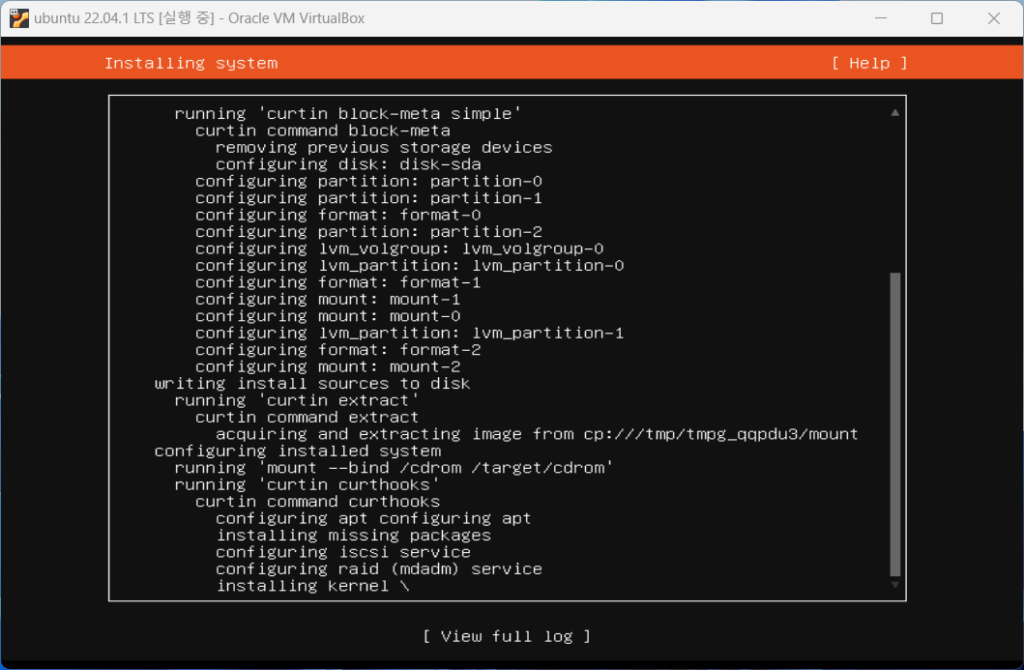
Installation will begin, and if you want to see the installation details, click view full log.
install ubuntu
Once the installation is complete, you will see the Cancel update and reboot menu, click on it to restart the server.
install ubuntu
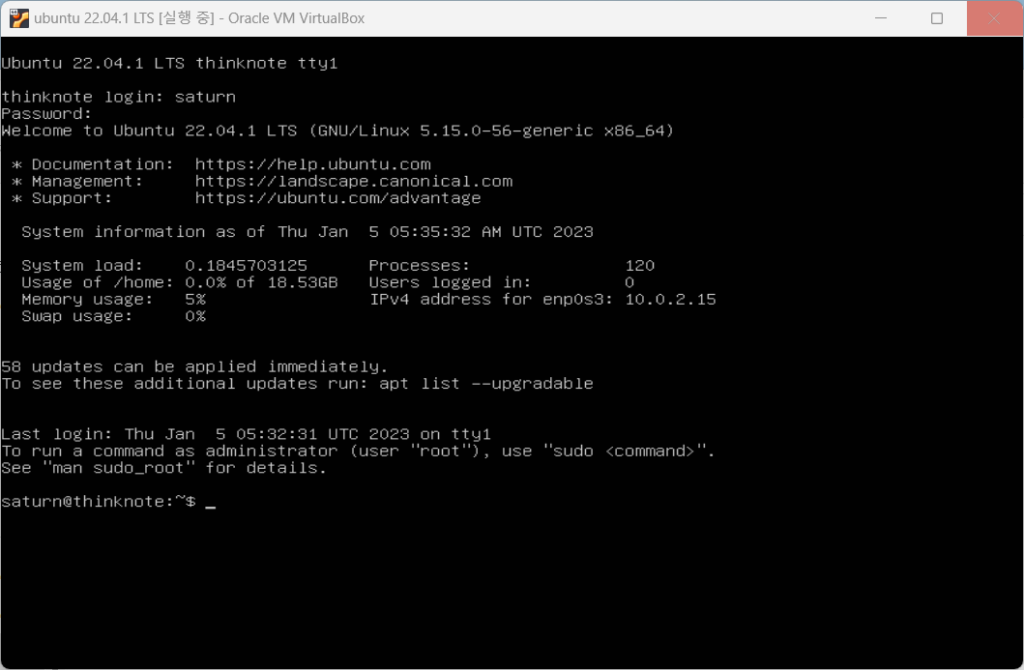
When the restart is complete and the login terminal appears, log in with the username and password you entered in [Step 15].
install ubuntu
Once login is complete, enter ‘username@hostname:~’ terminal and a command line will appear and installation is complete.
Good article to read together
VirtualBox Virtual Box virtual machine download and installation
Install OpenSSL
Installing and managing MariaDB (MySQL)
Activate Centos 8 RHEL & REMI Repository
Linux administrator tool – enable cockpit
Related Reading
Continue with these related Thinknote English articles in the Server & Infrastructure cluster.
This article is part of Thinknote’s English server and infrastructure archive. It focuses on practical Linux, Ubuntu, web-server, database, SSH, firewall, or hosting operations that readers can adapt to their own environment.
How should I use this guide?
Use it as a practical checklist and concept guide. Before applying commands on a live server, verify package names, OS versions, ports, and backup requirements for your own setup.
Ubuntu setup is done with Ubuntu 22.04.1 LTS version. Ubuntu is an open source operating system for Linux distributions designed and engineered to be the backbone of the Internet. Ubuntu Server provides economic and technical scalability for public or private data centers. Especially if you want to deploy an OpenStack cloud, Kubernetes cluster, or 50,000-node render farm, Ubuntu Server offers the best value scaling performance available. Ubuntu installation is done with version 22.04.1 LTS.
Ubuntu has several editions that can run on different types of systems, including core, server, and desktop. Each edition is available for personal computers, servers, supercomputers, cloud computing, and more.
Ubuntu is an operating system that appeals to users as it is a free, open source solution that is secure and easy to use. It is also user-friendly, customizable, and offers improved security within the OS.
2) Differences between Ubuntu Server and Desktop
Ubuntu Server Edition and Ubuntu Desktop Edition use the same apt repositories, so you can easily install server applications on the Desktop Edition just as you would on the Server Edition.
One major difference is that the graphical environment used in Desktop Edition is not installed for the server. This includes the graphics server itself, graphics utilities and applications, and various user support services required by desktop users.
3) Ubuntu installation system requirements
Ubuntu Server Edition provides a common, minimalist foundation for a variety of server applications such as file/print services, web hosting, email hosting, and more. Ubuntu Server Edition versions support four 64-bit architectures.
amd64 (Intel/AMD 64-bit)
arm64 (64-bit ARM)
ppc64el (POWER8 and POWER9)
s390x (IBM Z and LinuxONE)
CPU: 1 GHz or higher
RAM: 1GB or more
Disk: 2.5 GB minimum
4) Preparing to install Ubuntu
Before installing Ubuntu Server Edition, make sure all data on your system is backed up. If this is not your first time installing an operating system on your computer, you may need to repartition your disk to make room for Ubuntu.
Whenever you partition a disk, you should be prepared to lose all the contents of the disk if you make a mistake or encounter problems while partitioning. The programs used for installation are very reliable and most have been around for many years, but they also perform destructive actions.
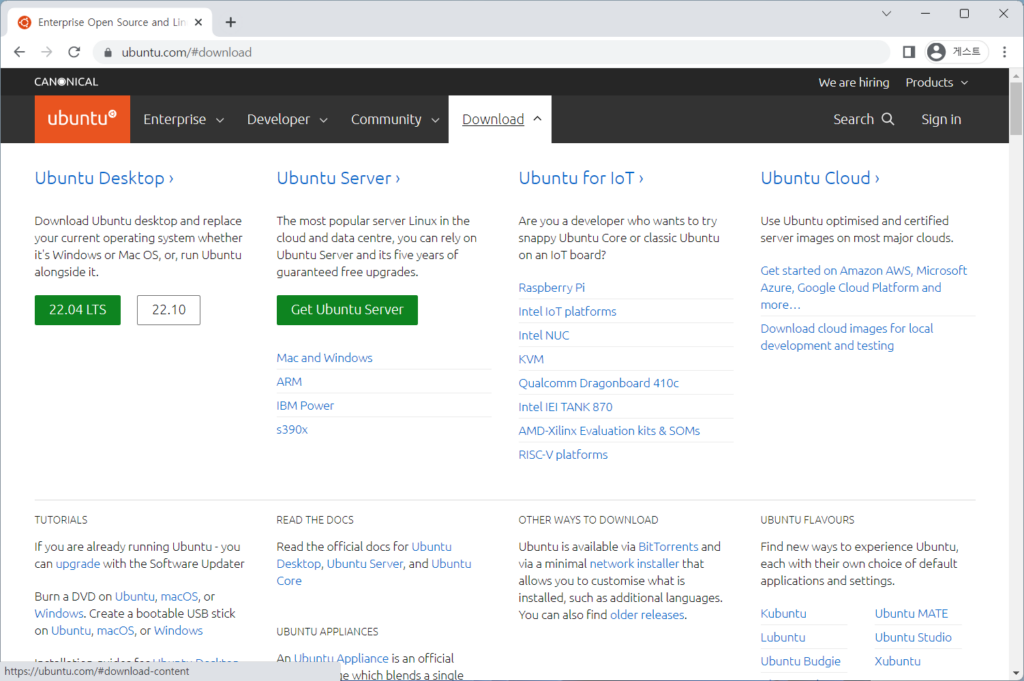
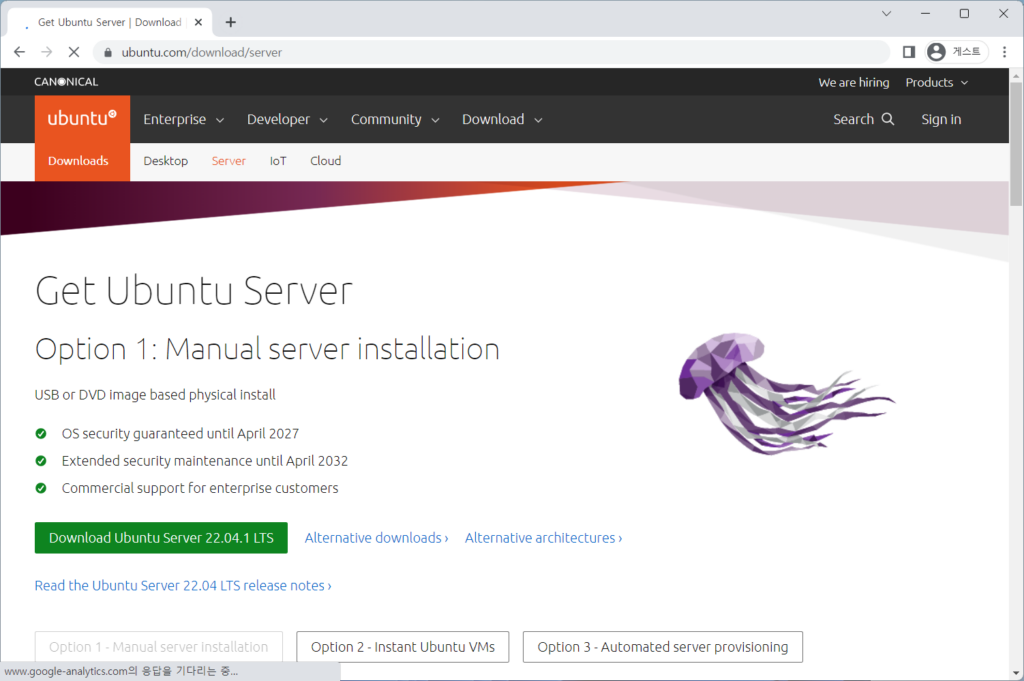
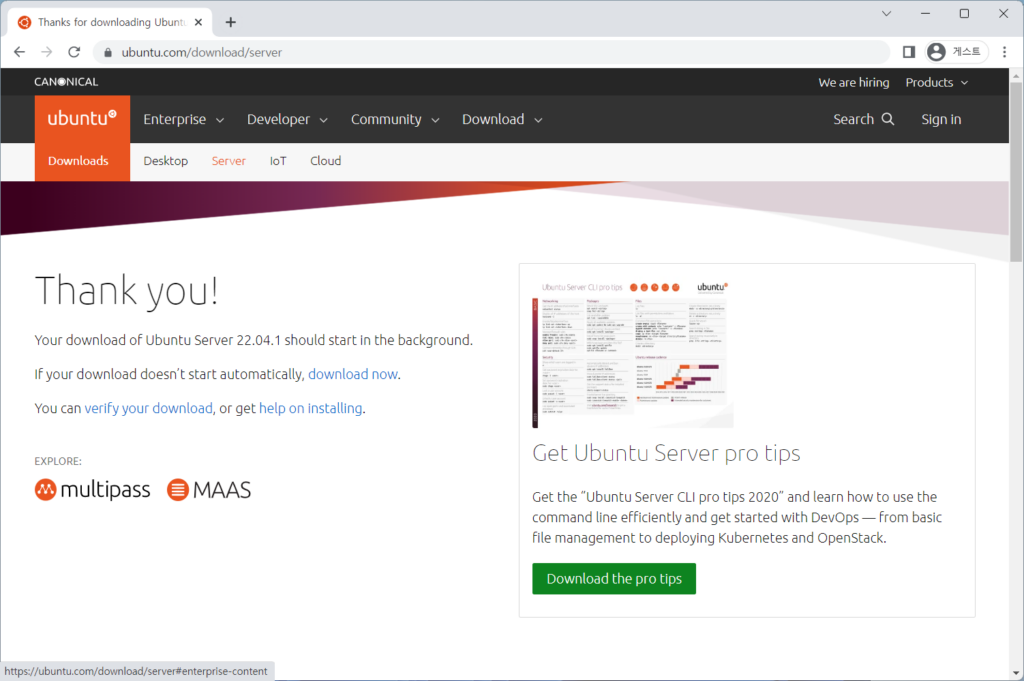
5) Download Ubuntu
Download link: https://ubuntu.com/
Download and install Ubuntu, set up virtual machine UbuntuDownload and install Ubuntu, set up virtual machine UbuntuDownload and install Ubuntu, set up virtual machine UbuntuDownload and install Ubuntu, set up virtual machine Ubuntu
2. Set up virtual machine ubuntu in Virtualbox
1) Ubuntu settings
You can configure the virtual machine Ubuntu at an appropriate level according to the specifications of your host computer.
virtual machine ubuntu settings
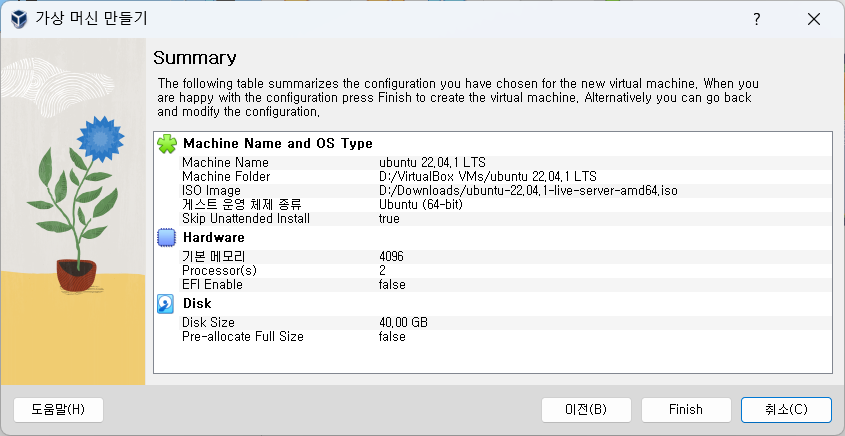
Select the name of the virtual machine, the storage folder, and the downloaded ubuntu iso image.
virtual machine ubuntu settings
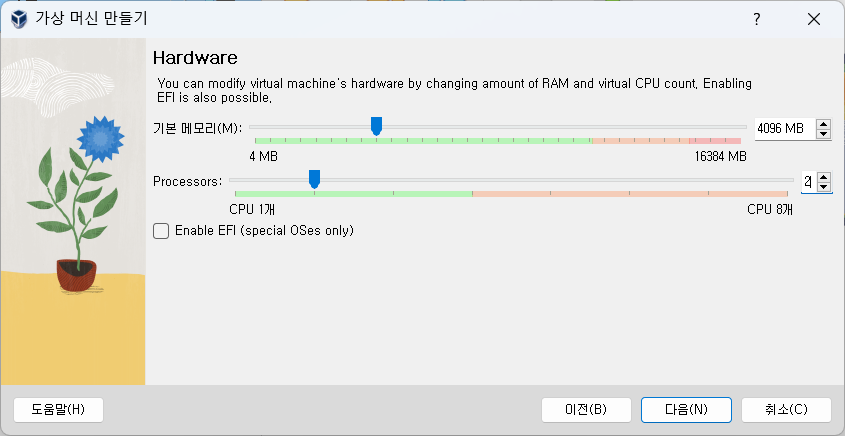
Set the default memory and number of Processors to be used by the virtual machine, taking into account the host computer specifications.
virtual machine ubuntu settings
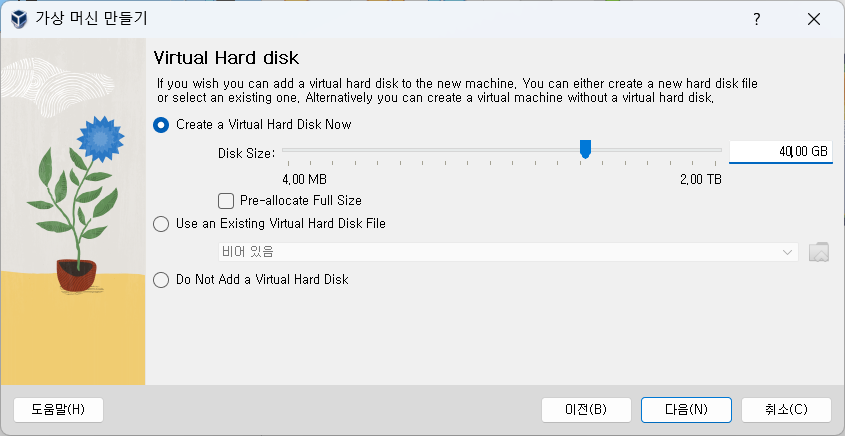
Although you can use an existing virtual disk, we are creating a virtual disk here.
This article is part of Thinknote’s English server and infrastructure archive. It focuses on practical Linux, Ubuntu, web-server, database, SSH, firewall, or hosting operations that readers can adapt to their own environment.
How should I use this guide?
Use it as a practical checklist and concept guide. Before applying commands on a live server, verify package names, OS versions, ports, and backup requirements for your own setup.
To keep Ubuntu up to date, use the update or upgrade command. Update and upgrade may be the same, but there is a difference. The update command does not change the package to the latest version, but instead retrieves information about the latest version available on the system.
That is, it does not download or install any packages. You must use the upgrade command to download and install the package. The system operates on a database of available packages.
The database does not contain packages, only the package’s metadata (version, repositories, dependencies, etc.). So without updating the database the system won’t know whether there is a newer package available or not.
Update and upgrade are administrative commands and must be executed with root privileges. sudo allows you to run commands as Ubuntu root. So I log in as root or use sudo for both commands.
1) apt update
Get updated metadata from a package with the apt update command. Your local package cache will be updated and you will see which packages are available for upgrade.
apt update: Updates the package cache (knows which package versions can be installed or upgraded)
package update
sudo apt update
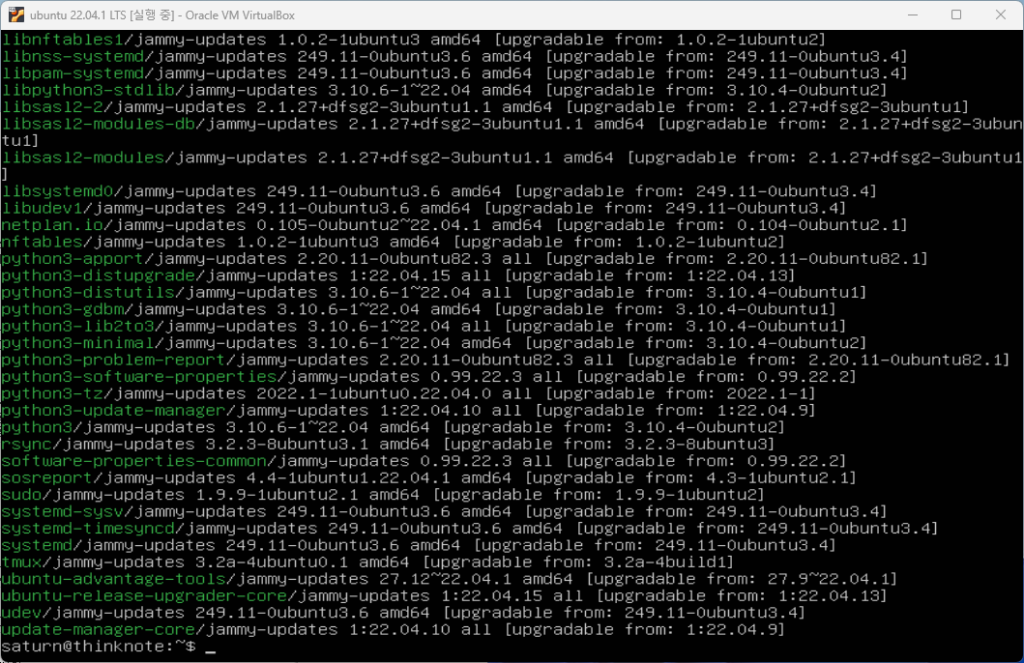
You can use the apt and apt-get commands to update the package cache. The two commands are the same, but the difference is that the apt command displays the number of upgradeable packages. Here it shows that there are 59 upgradeable packages.
sudo apt update
2) apt upgrade
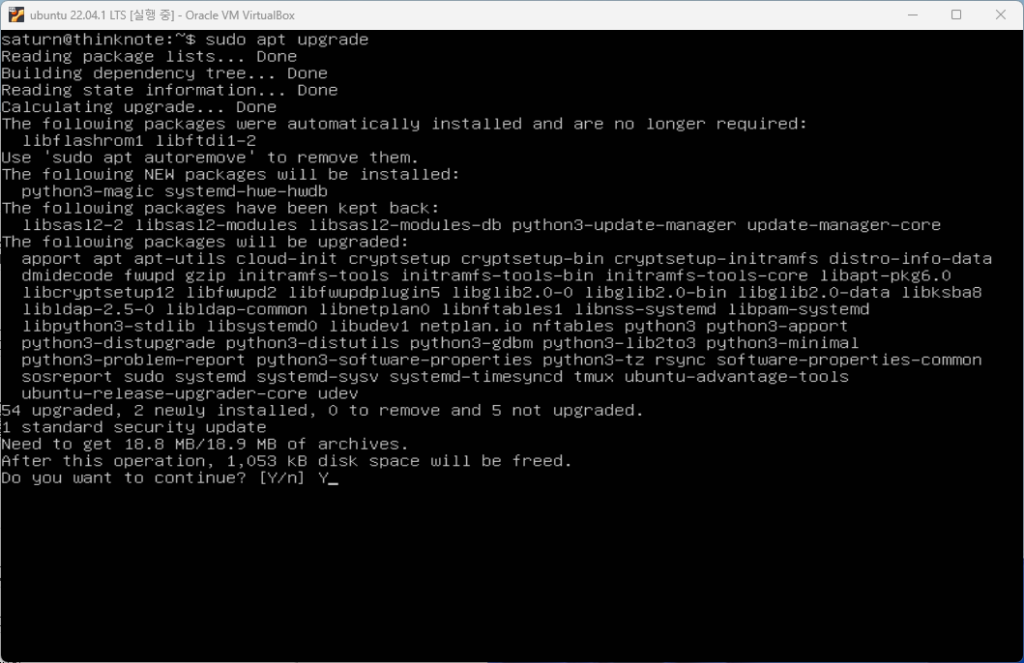
You can upgrade all (upgradable) packages with sudo apt upgrade. You can press Enter or Y to proceed with the upgrade, or press N to cancel.
apt upgrade: Upgrade a package to a new version
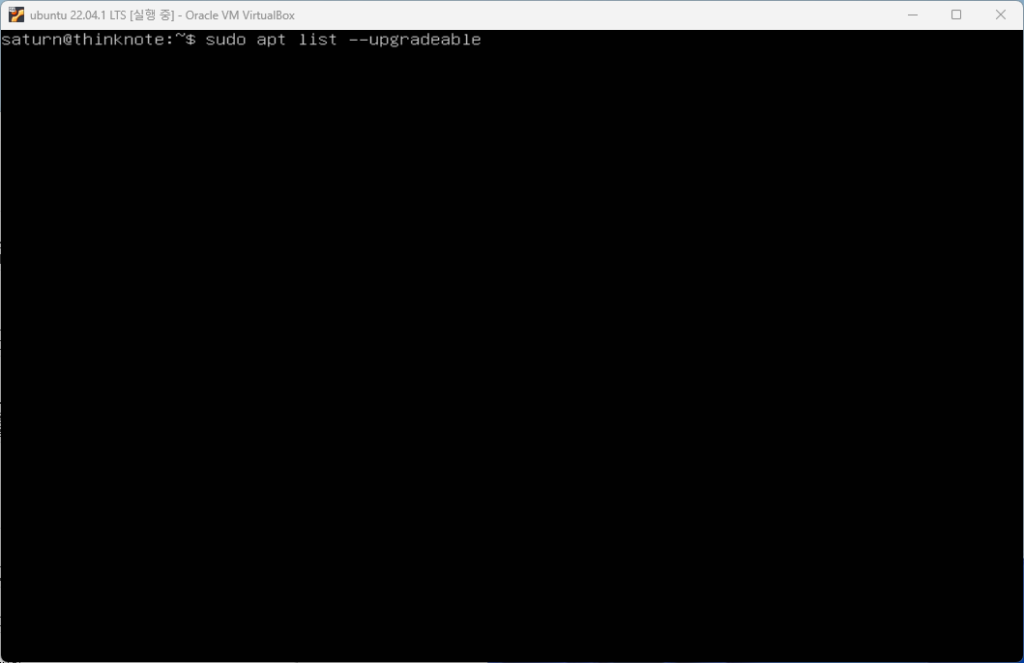
View package upgrade list
sudo apt list --upgradeable
You can upgrade the entire package with the sudo get upgrade command, but before that, you can check the list of packages that can be upgraded.
sudo apt list –upgradeablesudo apt upgrade
package upgrade
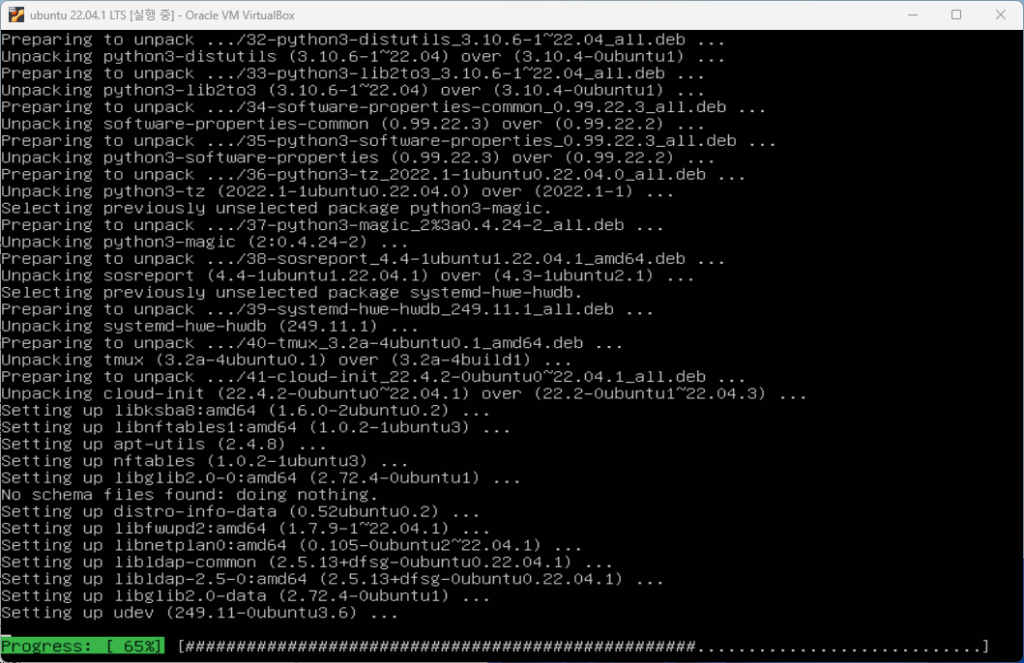
sudo apt upgrade
Before the upgrade begins, you will be asked whether you want to continue. Type Y to proceed with the upgrade, n to cancel, and then press enter. Here, type Y to proceed with the upgrade and proceed.
sudo apt upgradesudo apt upgrade
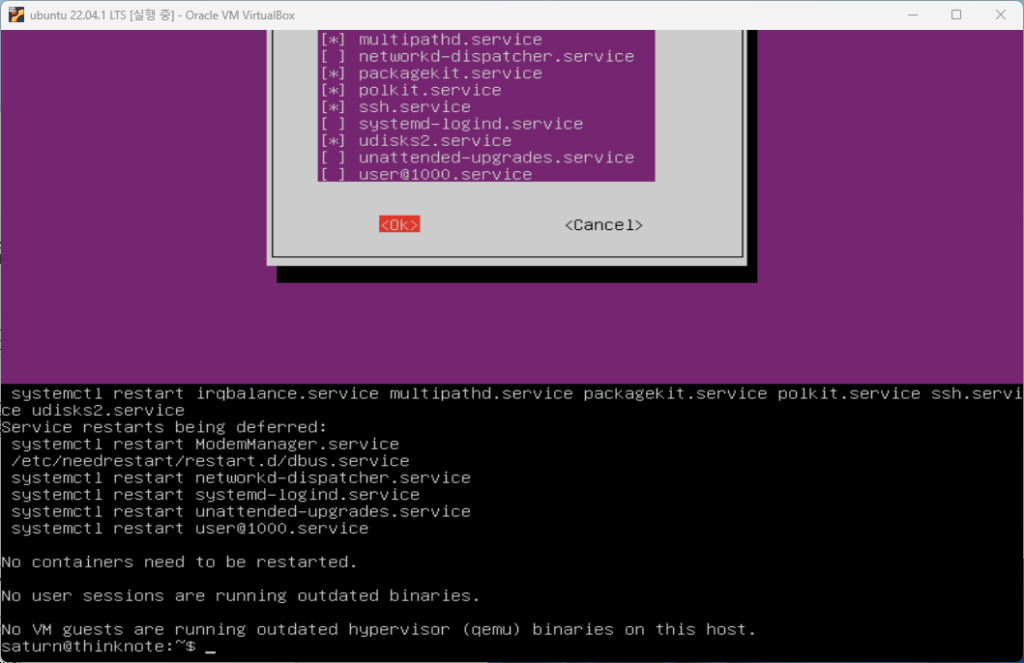
When the upgrade is complete, a window will appear asking you to restart the service. Here we select OK and continue. When the upgrade is complete, you can check the restarted services.
sudo apt upgrade
If you re-enter the sudo apt update command, you can see that there are no upgradeable packages.
sudo apt upgrade
Good article to read together
VirtualBox Virtual Box virtual machine download and installation
Download Ubuntu and set up Ubuntu (virtualbox)
Install Ubuntu 22.04.1 (VirtualBox)
Install and enable Ubuntu firewall iptables
Ubuntu firewall iptables setup and management
Related Reading
Continue with these related Thinknote English articles in the Server & Infrastructure cluster.
This article is part of Thinknote’s English server and infrastructure archive. It focuses on practical Linux, Ubuntu, web-server, database, SSH, firewall, or hosting operations that readers can adapt to their own environment.
How should I use this guide?
Use it as a practical checklist and concept guide. Before applying commands on a live server, verify package names, OS versions, ports, and backup requirements for your own setup.
This guide is a fuller English adaptation of the original Korean Ubuntu iptables article. The source post is a practical server-administration note, not just a short firewall overview. It explains how to understand iptables, check rules, flush chains, add local and inbound rules, save changes, and read common iptables command options.
1. Understanding iptables Firewall Management on Ubuntu
checking current iptables rules.
Firewall management is the process of deciding which network traffic should be allowed, rejected, or dropped. Ubuntu often provides UFW as a user-friendly firewall interface, but iptables gives administrators a more detailed view of the rule structure behind packet filtering.
iptables is useful because it helps you understand chains, rules, policies, interfaces, ports, and connection states. Even if you later use UFW or nftables, learning iptables improves your understanding of Linux server security.
The original tutorial proceeds by disabling UFW and configuring the firewall directly through iptables. The goal is to build a reasonable, extensible framework rather than blindly copying a single command.
2. Initial iptables Setup Strategy
adding inbound firewall rules.
A firewall can be configured in two broad ways. The first approach is to allow most traffic and block only known unwanted traffic. The second approach is to define allowed traffic and block everything else. For cloud servers and production-like systems, the second approach is usually safer because it reduces accidental exposure.
However, restrictive firewall rules can also lock you out of your own server. Before applying strict rules, always make sure SSH access is allowed and that you have a recovery method from the hosting console or virtual machine interface.
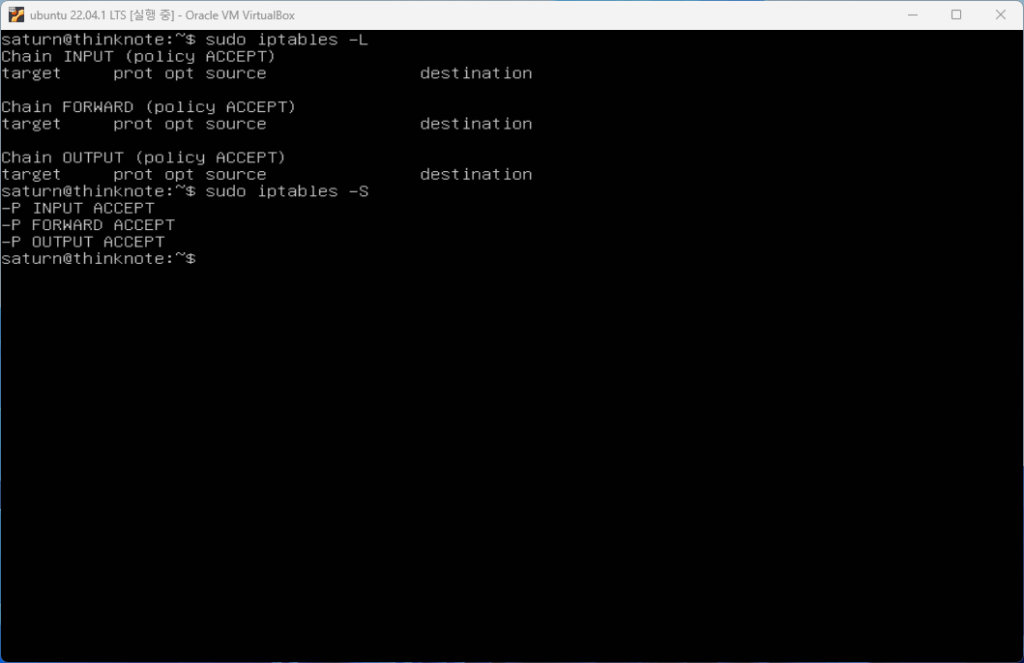
1) Check current iptables rules
Before changing anything, check the current rules. The original article explains that the -L option lists rules in chains, while the -S option prints rules in a format closer to commands. Both are useful.
The basic chains include INPUT, OUTPUT, and FORWARD. INPUT applies to packets coming into the local server. OUTPUT applies to packets leaving the server. FORWARD applies to packets routed through the server rather than delivered locally.
Other chains such as PREROUTING and POSTROUTING appear in routing and NAT contexts. PREROUTING processes packets before routing decisions. POSTROUTING processes packets after routing decisions and before packets leave through network hardware.
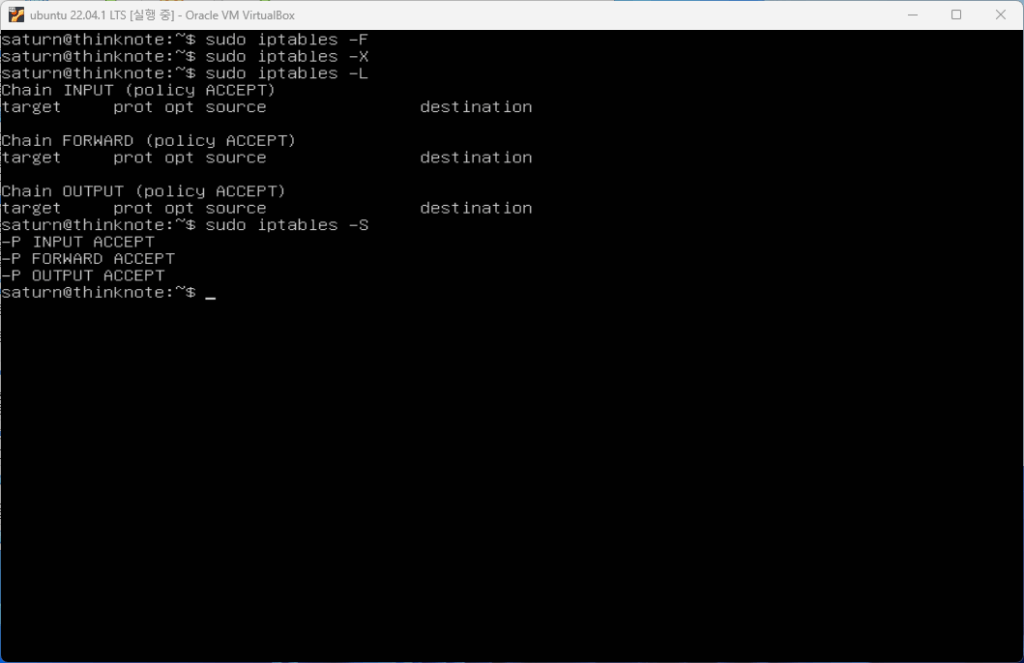
2) Flush existing rules carefully
The original tutorial shows how to remove existing rules with options such as -F and -X. The -F option flushes rules from chains, while -X deletes user-defined chains.
This is useful in a learning environment or clean setup, but it must be used carefully on a remote server. If you remove rules and then apply a default drop policy without allowing SSH, you may lose access.
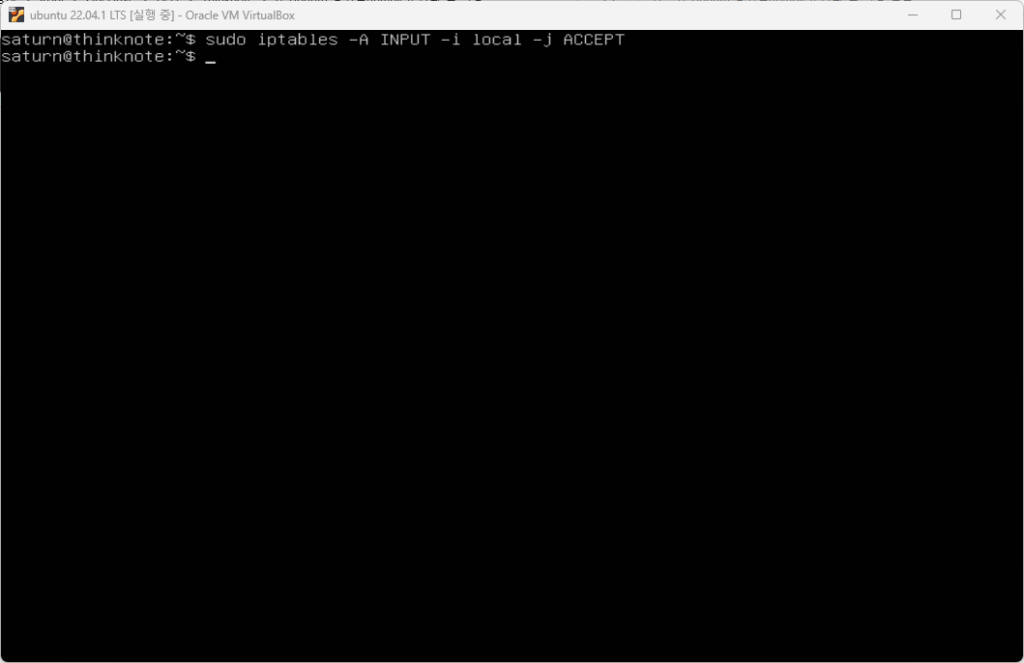
3) Add loopback and local traffic rules
Local loopback traffic should normally be allowed. The loopback interface is used by services on the same machine to communicate internally. Blocking it can break software that expects local connections to work.
iptables rules can be appended with -A, and interfaces can be specified with -i. This allows administrators to distinguish local loopback traffic from external network traffic.
4) Add inbound traffic rules
To begin using iptables safely, add allowed inbound rules for required services. For example, a server may need SSH, HTTP, HTTPS, or application-specific ports. The original article also highlights connection states such as RELATED and ESTABLISHED.
Allowing established connections means that replies to already-approved connections can continue. This is important because server communication is not only about new inbound requests; it also includes packets that belong to existing sessions.
5) Save and restart rules
Adding rules in a session does not automatically make them persistent after reboot. The original article explains the need to save changes and reload or restart related services. On Ubuntu systems, tools such as netfilter-persistent can be used to save, reload, restart, start, stop, or flush persistent rules.
A good practice is to save rules only after confirming that SSH and required services still work. After saving, reboot or reload in a controlled way and verify the active rules again.
3. Basic iptables Command Forms
saving iptables rules.
The source article lists common command forms. Administrators use -A to append rules, -I to insert rules at a specific position, -R to replace rules, -D to delete rules, -L to list rules, -S to print rules, -F to flush chains, -N to create a chain, -X to delete a chain, -E to rename a chain, and -P to set a default policy.
These options matter because rule order matters. A packet is checked against rules in sequence. If an early rule matches, later rules may not be evaluated in the way a beginner expects. This is why inserting, replacing, and listing rules are daily administration tasks.
4. Common iptables Options and Rule Management
iptables port management.
The original article includes command options such as append, check, delete, insert, replace, list, list-rules, flush, zero counters, new chain, delete chain, policy, protocol, source, destination, input interface, output interface, jump target, and match extensions.
For practical server work, you should understand at least five ideas: what chain the rule belongs to, what protocol it matches, what source or destination it applies to, what port it affects, and what target action it takes. A target may accept, drop, reject, or jump to another chain.
5. Ports, SSH, and Web Server Access
The tutorial connects iptables to port usage. SSH commonly uses port 22 unless changed. Web servers commonly use port 80 for HTTP and 443 for HTTPS. Database and internal service ports should usually not be exposed publicly unless there is a specific reason and additional protection.
A safe firewall mindset is minimal exposure. Open only what the server needs. Document why each port is open. Recheck rules after installing services such as Nginx, PHP, Redis, or database tools.
Practical Safety Checklist
Before applying iptables rules on a remote Ubuntu server, check the current rules, confirm SSH access, allow loopback traffic, allow established connections, open required service ports, apply rules gradually, save only after verification, and keep a recovery path available.
iptables can look complex at first, but it becomes manageable when treated as a structured decision table for network traffic. The value of the original article is that it walks through the mindset and command categories needed for real server operation.
Related Reading
Continue with these related Thinknote English articles in the Server & Infrastructure cluster.
This article is part of Thinknote’s English server and infrastructure archive. It focuses on practical Linux, Ubuntu, web-server, database, SSH, firewall, or hosting operations that readers can adapt to their own environment.
How should I use this guide?
Use it as a practical checklist and concept guide. Before applying commands on a live server, verify package names, OS versions, ports, and backup requirements for your own setup.
Firewall covers installing and activating iptables as an important step in server security. A large part of firewall management involves determining the individual rules and policies that will apply traffic restrictions to your network.
1. Understanding iptables firewall and preparing in advance
Ubuntu provides ufw as a default firewall, but iptables allows detailed management of the structural framework to which rules are applied.
First, stop using the ufw firewall and configure the firewall using the iptables package. iptables focuses on establishing a framework that provides reasonable defaults and encourages extensibility.
1) Advance preparation
Check the ufw firewall status and stop the firewall. If you followed along with the Ubuntu installation, the ufw firewall is active. At this time, if you enter the sudo ufw status command, it will display inactive. If you install iptables and do not disable the ufw firewall, a conflict will occur. Commands for managing services can be managed in the form of systemctl or [service name.service].
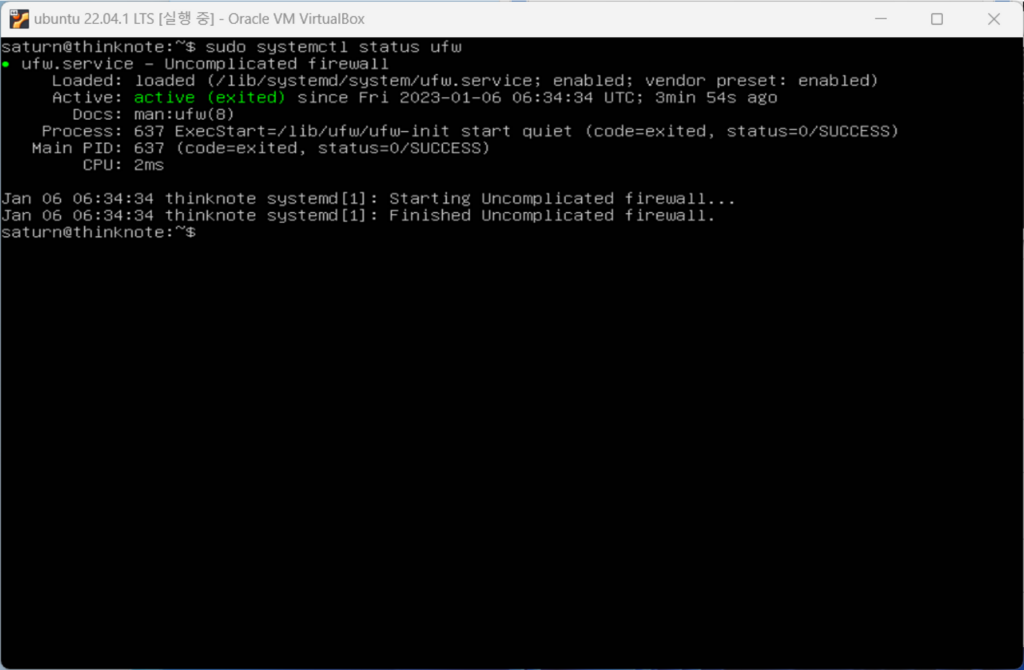
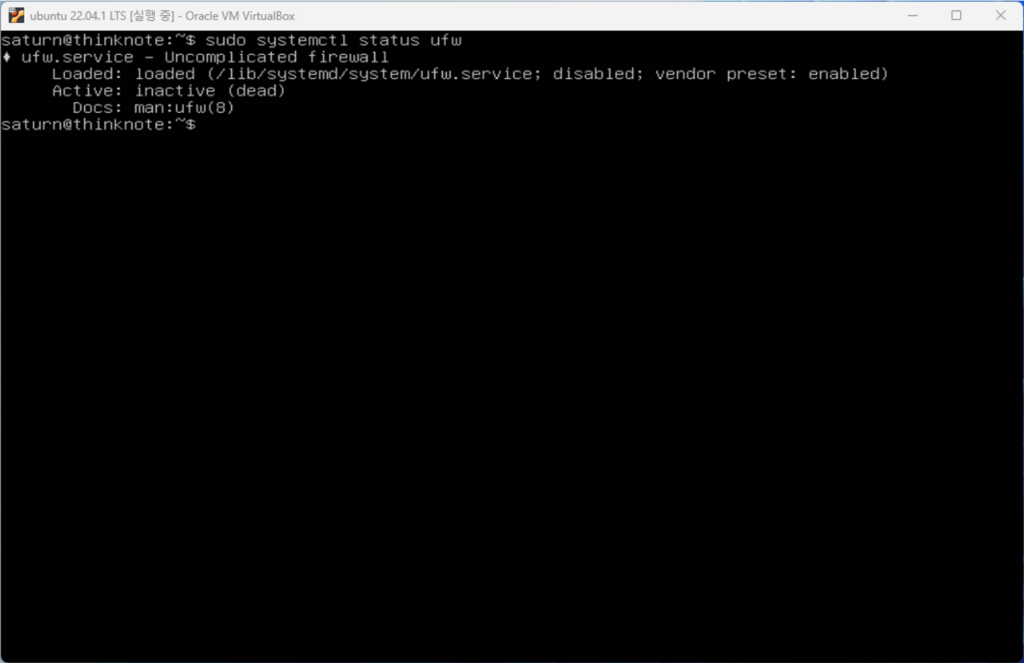
2) Check ufw status
sudo systemctl status ufw
Article image 1
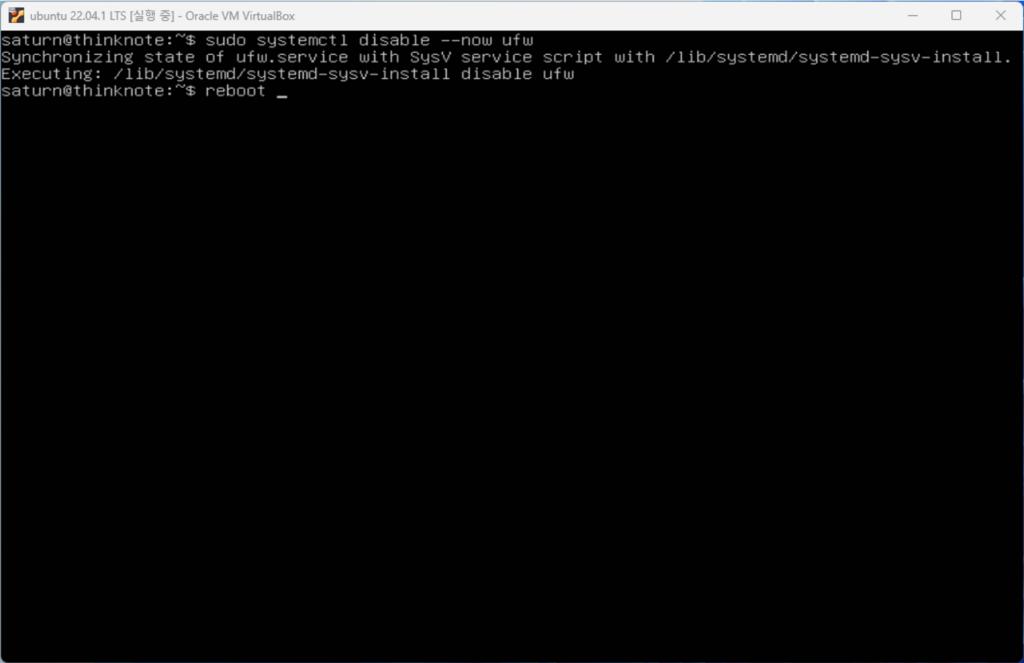
3) stop and disable ufw
You can utilize the stop command to stop a service, but stop does not affect startup activation. On the other hand, the disable command disables the service at startup, and adding the –now command takes effect immediately. Disable the ufw service with the command below and restart it with the reboot command.
sudo systemctl disable --now ufw
reboot
Article image 2
sudo systemctl status ufw
Article image 3
2. Check for iptables installation and activation issues
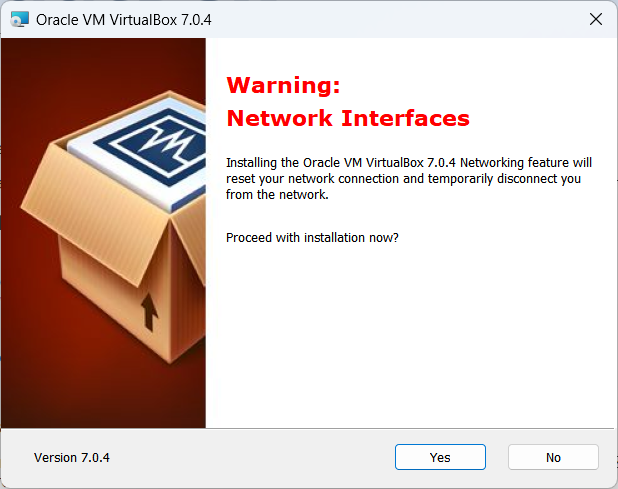
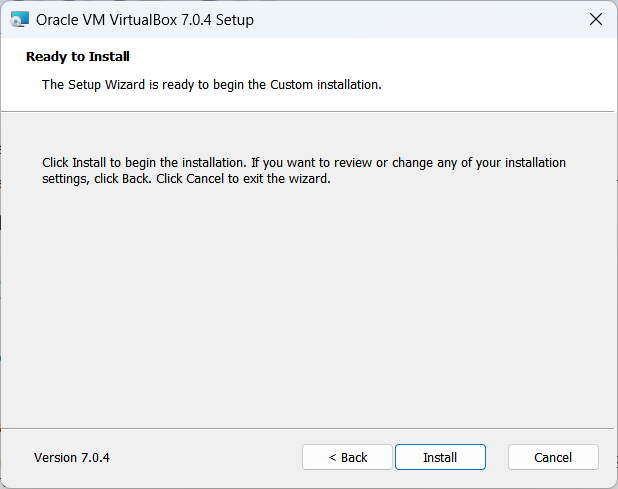
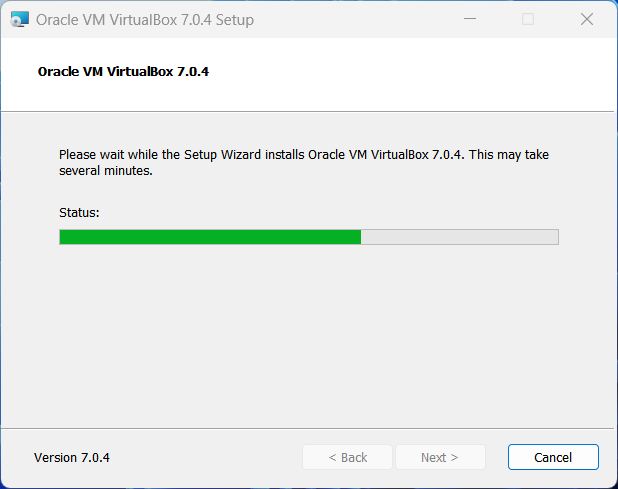
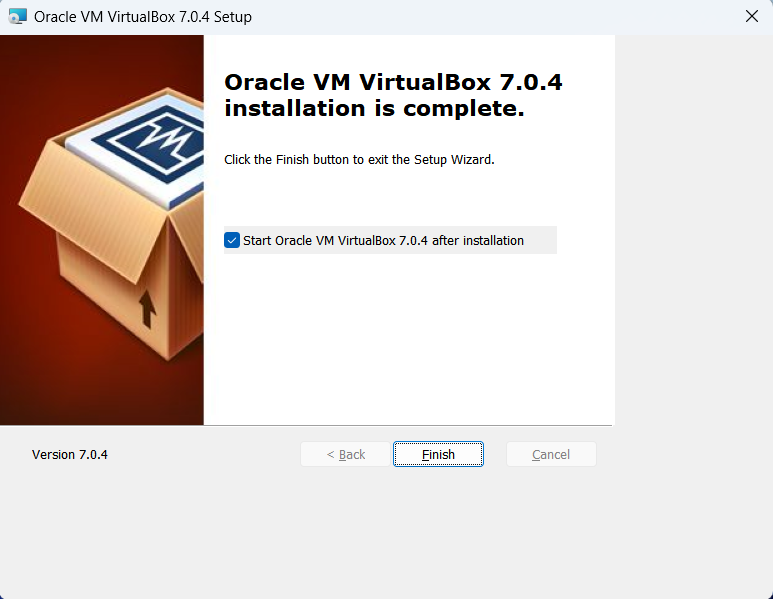
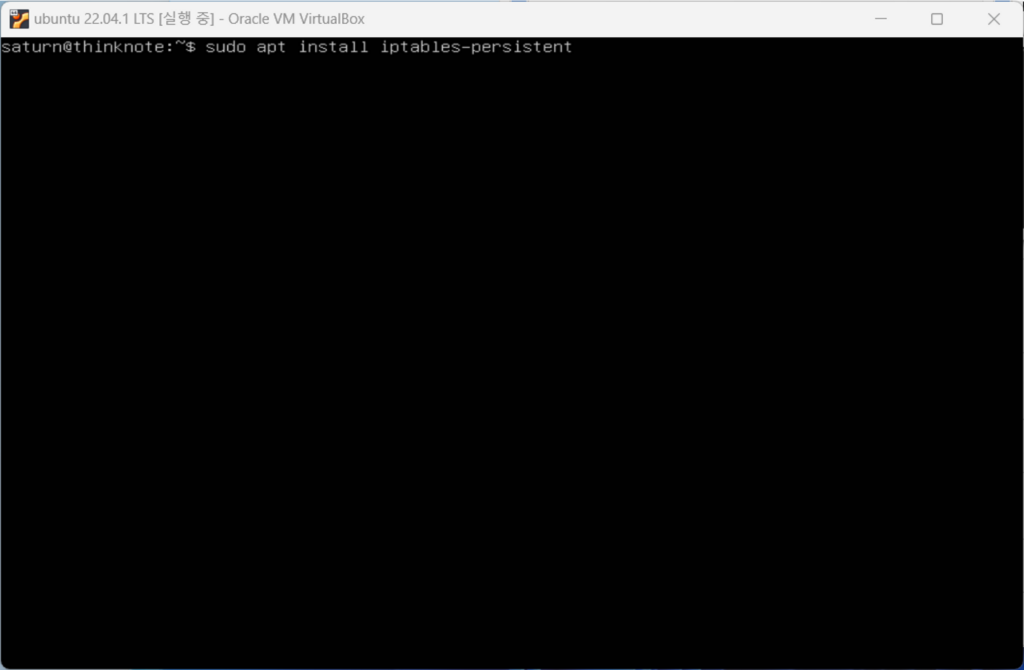
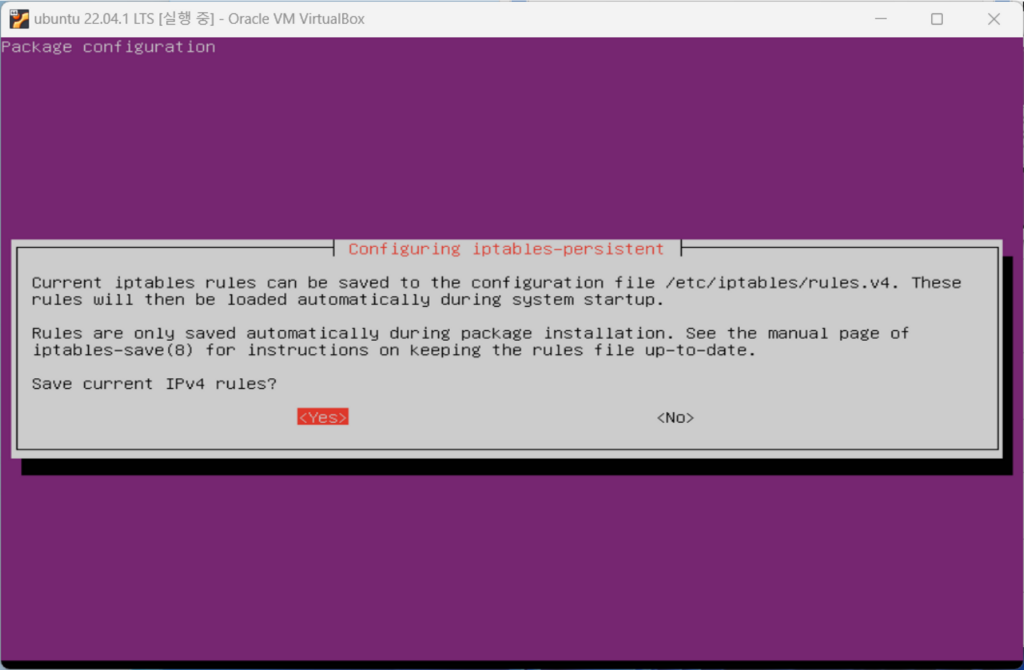
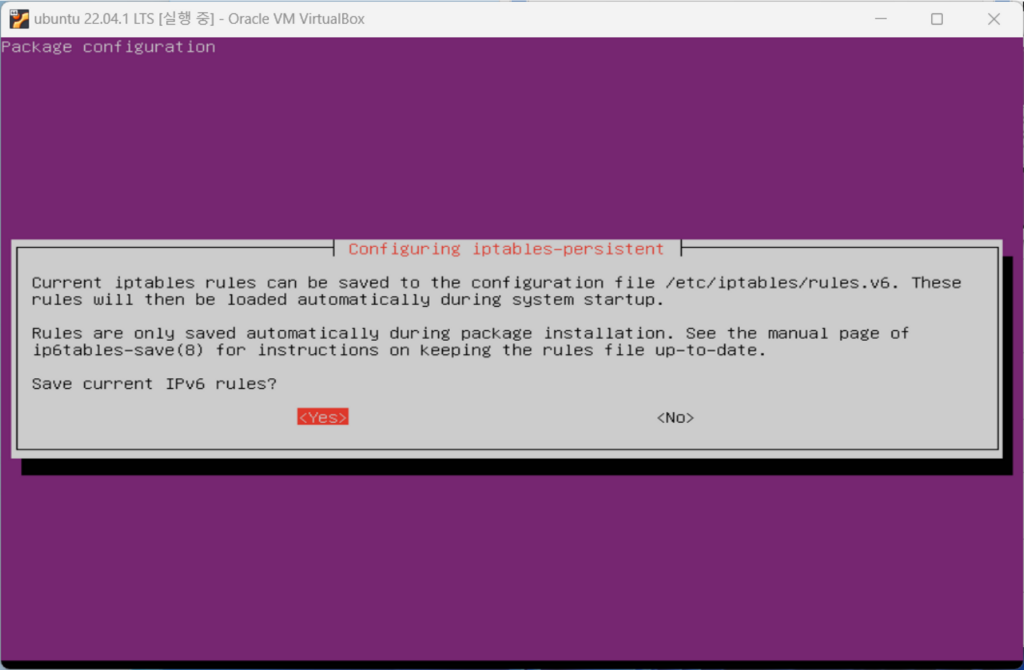
1) Install iptables (iptables-persistent)
If you have stopped ufw, install the iptables package. After installing Iptables, you can save your rule sets and have them automatically applied at boot.
sudo apt install iptables-persistent
Article image 4Article image 5Article image 6
2) Enable iptables when starting
Check IPtables status
sudo systemctl status iptables
Article image 7
Iptables status active on startup
sudo systemctl enable iptables
reboot
Article image 8
3) Check iptables activation issue (not automatically activated on startup)
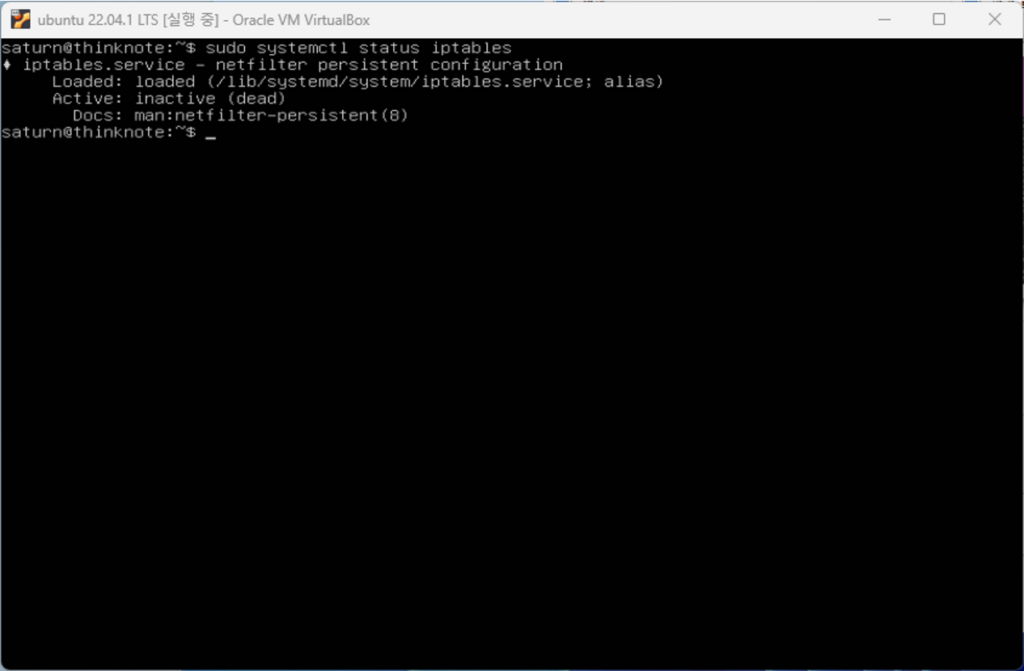
Check IPtables status
It is activated normally in Ubuntu 20, but is not activated in Ubuntu 22. If you check the status of iptables, the alias is not registered, so you need to register the alias.
sudo systemctl status iptables
Article image 9
3. Register an iptables alias and activate it at startup
1) Register an alias to activate Iptables startup
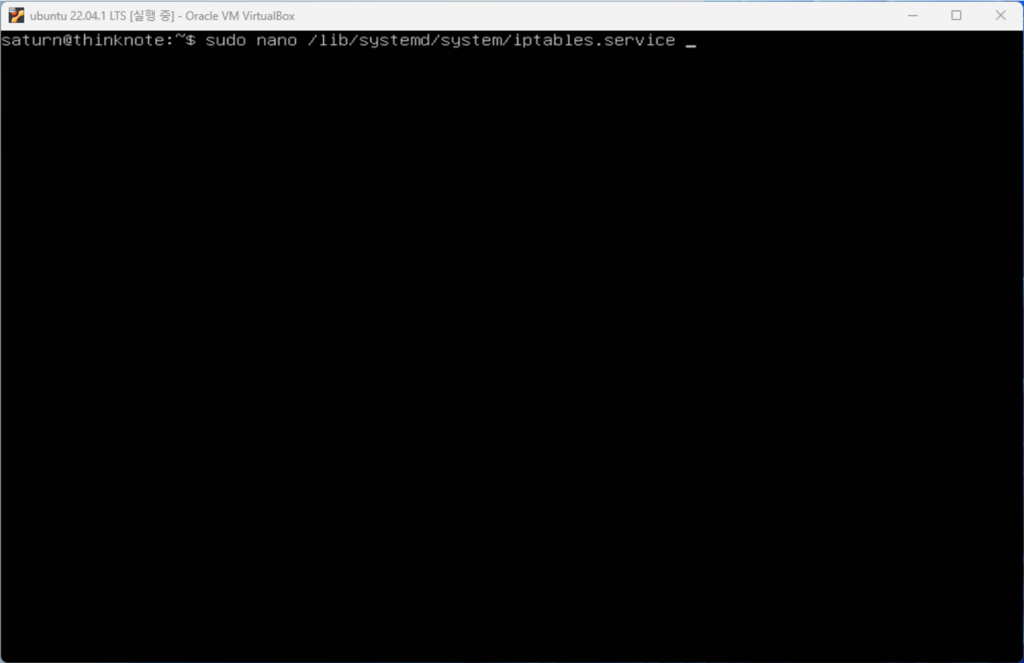
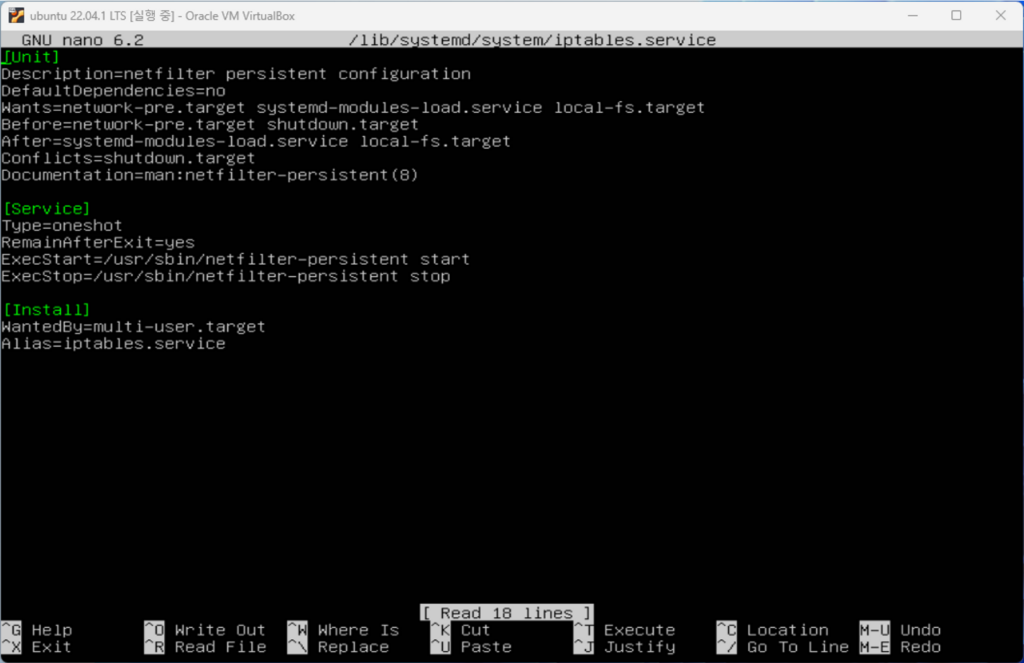
You can check the location of iptables.service in the status and load the file with the nano editor. You can also use the vi editor. Register the alias under [install] at the bottom of the file. Here, register as Alias=iptables.service.
sudo nano /lib/systemd/system/iptables.service
Article image 10Article image 11
Disable Iptables and then re-enable it. At this time, if you add the –now command, the service will run together with activation.
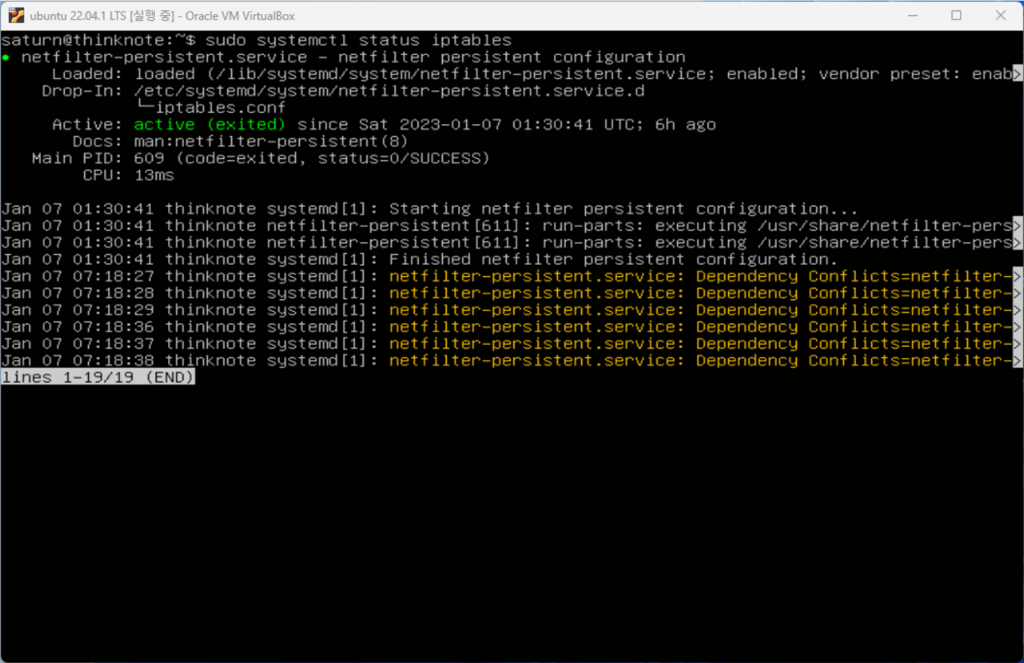
Restart the server to see if the service is enabled at startup. As shown in the image below, if a dependency conflict occurs with netfilter-persistent.service, restart netfilter-persistent.service. You can check that the iptables service is properly activated using the systemctl command.
reboot
sudo systemctl status iptables
sudo systemctl restart netfilter-persistent.service
Article image 12
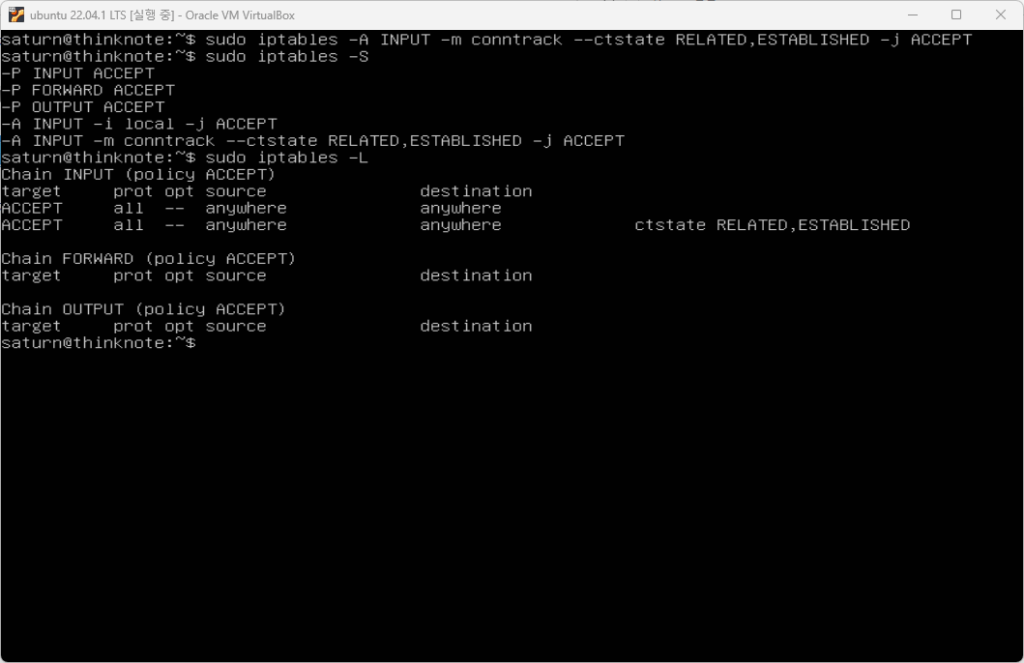
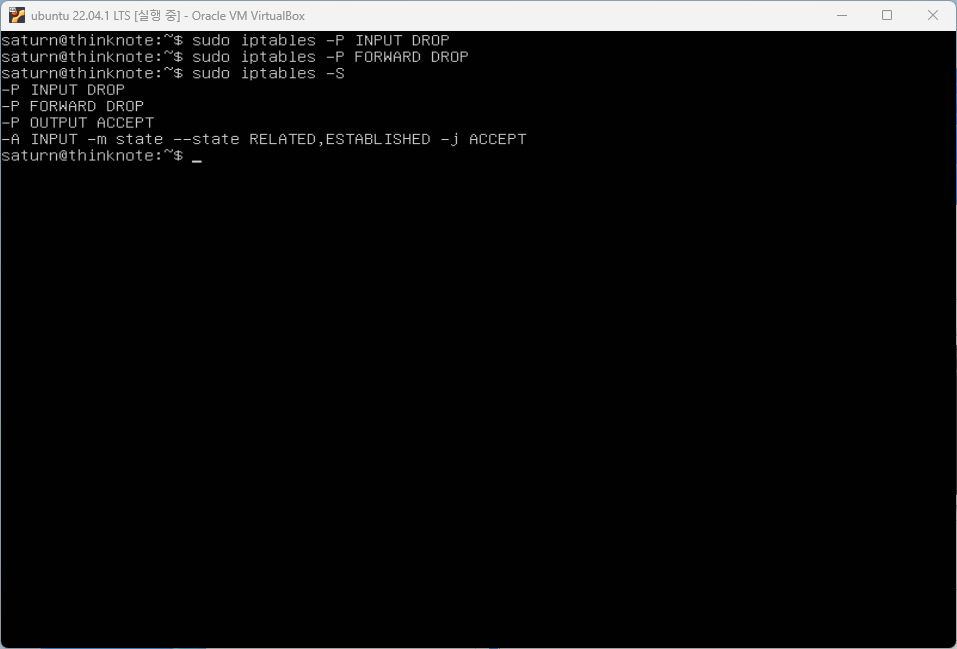
3. iptables block all connections
The previous setting is a setting where INPUT, FORWARD, and OUTPUT are all allowed. I will close all INPUT and FORWARD. When I output the configuration, INPUT and FORWARD are marked as closed. If services are added in the future, only the ports for the relevant services will be opened and run.
sudo iptables -P INPUT DROP
sudo iptables -P FORWARD DROP
sudo iptables -S
Article image 13
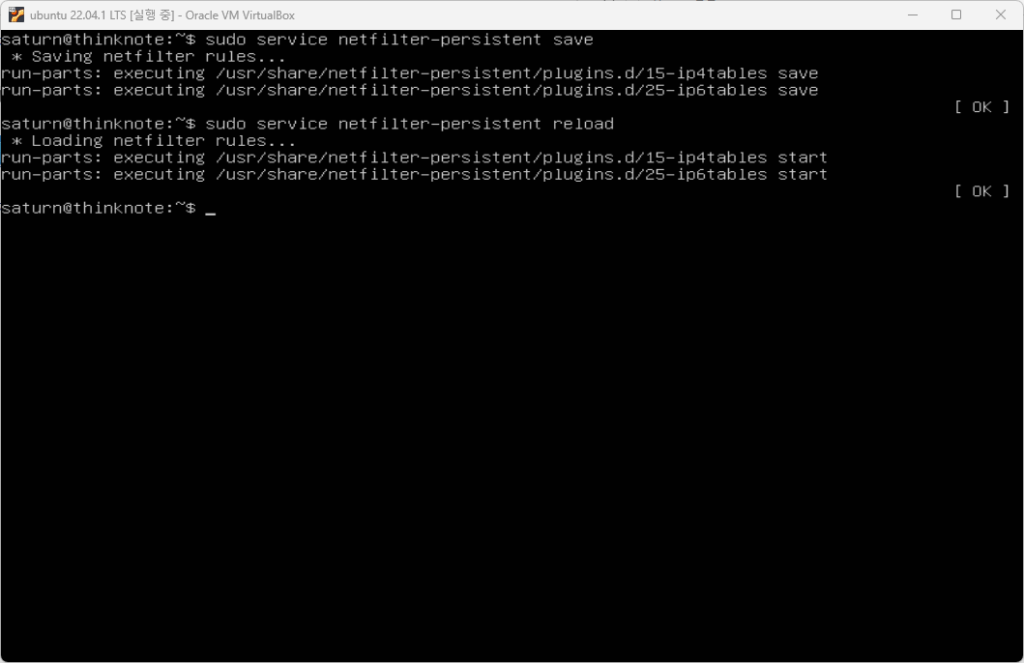
Save the changed settings and reload. reload is a command to apply rules without restarting. Any changes you make will not take effect when Ubuntu restarts unless you run the following code.
sudo netfilter-persistent save
sudo netfilter-persistent reload
Good article to read together
Ubuntu firewall iptables setup and management
Install Nginx web server (ubuntu)
Linux administrator tool – enable cockpit
Activate Centos 8 RHEL & REMI Repository
Install Nginx web server (Centos 8)
Related Reading
Continue with these related Thinknote English articles in the Server & Infrastructure cluster.
This article is part of Thinknote’s English server and infrastructure archive. It focuses on practical Linux, Ubuntu, web-server, database, SSH, firewall, or hosting operations that readers can adapt to their own environment.
How should I use this guide?
Use it as a practical checklist and concept guide. Before applying commands on a live server, verify package names, OS versions, ports, and backup requirements for your own setup.
This guide is a fuller English adaptation of the original Korean article about installing OpenSSH on Ubuntu and using MobaXterm for remote access. The source post explains the SSH protocol, OpenSSH features, installation checks, server packages, and MobaXterm installation for Windows users.
SSH is a secure protocol for remote login and remote command execution. Compared with older tools such as telnet and rlogin, SSH provides encrypted communication and stronger authentication. This is why SSH is a basic requirement for Linux server administration.
The original article notes that SSH1 is no longer supported in modern OpenSSH releases, while SSH2 was developed to improve security, avoid earlier patent issues, and address data integrity problems. SSH2 supports a variety of symmetric and asymmetric cryptographic choices.
OpenSSH is one of the most widely used tools for SSH-based remote access. It encrypts traffic to reduce the risk of eavesdropping, connection hijacking, and other network attacks. It also supports tunneling, multiple authentication methods, and detailed configuration options.
Tools included in the OpenSSH family
The OpenSSH suite includes client and server tools. Remote work can be performed with ssh, scp, and sftp. Key management involves tools such as ssh-add, ssh-keysign, ssh-keyscan, and ssh-keygen. The service side includes sshd, sftp-server, and ssh-agent.
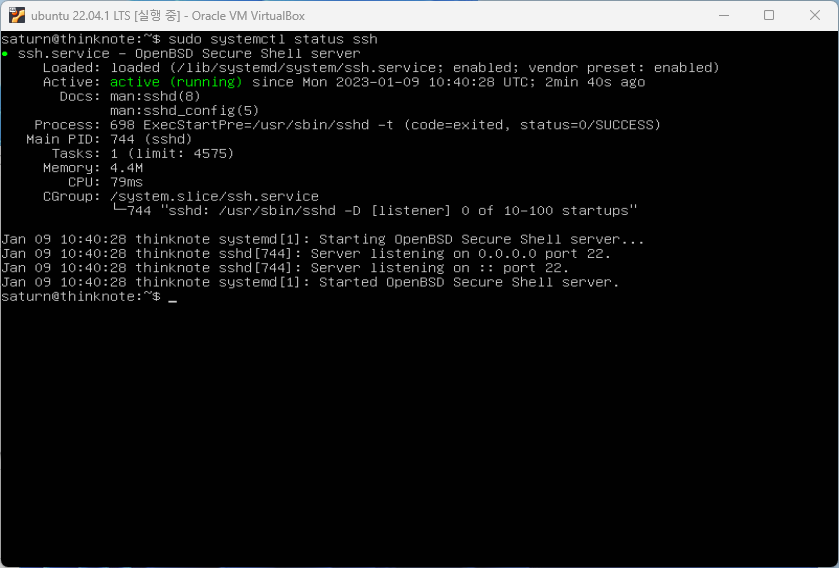
2. Key Features of OpenSSH
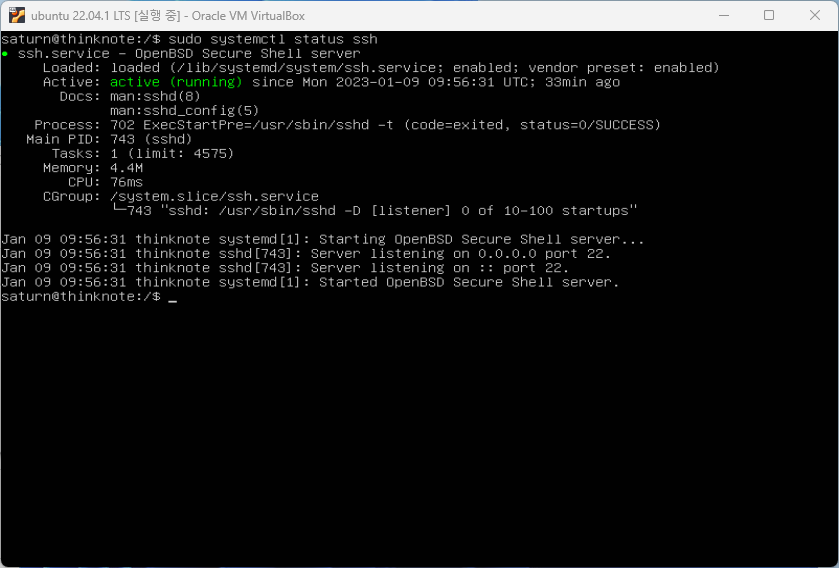
checking SSH service status.
Open source and widely usable
OpenSSH is an open source project that can be used freely, including in commercial contexts. Because the code is public, it benefits from review, reuse, bug discovery, and long-term maintenance by a broad community.
Strong encryption before authentication
OpenSSH starts encryption before authentication, which helps prevent passwords and other sensitive information from being sent in plain text. It supports modern algorithms and key types such as AES, ChaCha20, RSA, ECDSA, and Ed25519, while older options are gradually removed or discouraged.
X11 forwarding
X11 forwarding allows remote graphical traffic to be sent through an encrypted SSH channel. This can be useful when running graphical applications from a remote Unix-like environment while reducing the risk of someone snooping on the session or injecting commands into an unprotected connection.
Port forwarding for secure tunnels
Port forwarding creates encrypted channels for TCP/IP connections. This can protect legacy services or internal tools by routing them through SSH. For example, insecure protocols can be wrapped in an encrypted tunnel when a direct secure alternative is not available.
Strong authentication methods
OpenSSH supports authentication methods such as public keys, one-time passwords, and in some environments Kerberos. Public key authentication is especially common for server administration because it reduces reliance on reusable passwords and can be combined with passphrases and agents.
Agent forwarding and compression
Agent forwarding lets a local authentication agent hold keys and forward authentication through an SSH connection without storing private keys on every remote system. OpenSSH also supports optional compression, which can improve performance over slower network links.
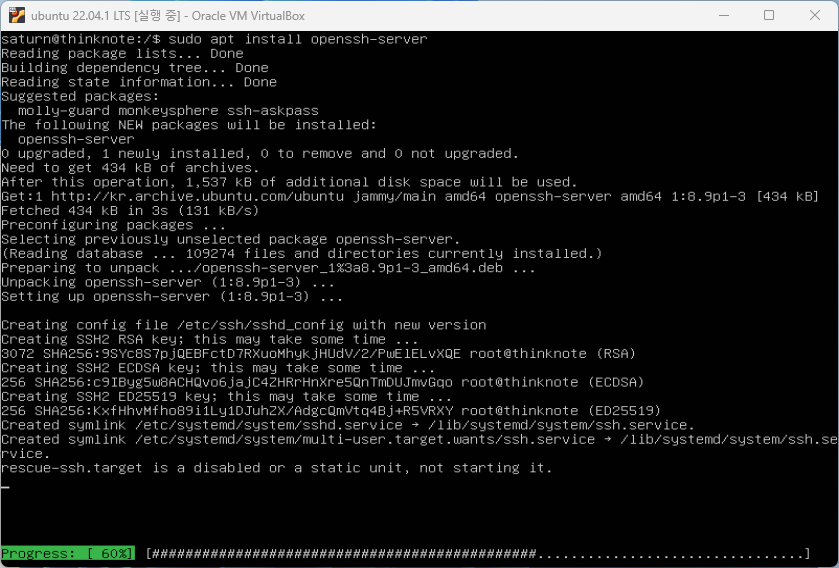
3. Installing and Checking OpenSSH on Ubuntu
MobaXterm download and install.
If Ubuntu was installed with server features, SSH may already be installed. The original tutorial checks service status with systemctl. Even if the package is installed, you should confirm that the service is running and enabled.
OpenSSH usually runs as ssh.service on Ubuntu. The installed package list may include openssh-client, openssh-server, and an SFTP server package. For remote login into the Ubuntu machine, openssh-server is essential.
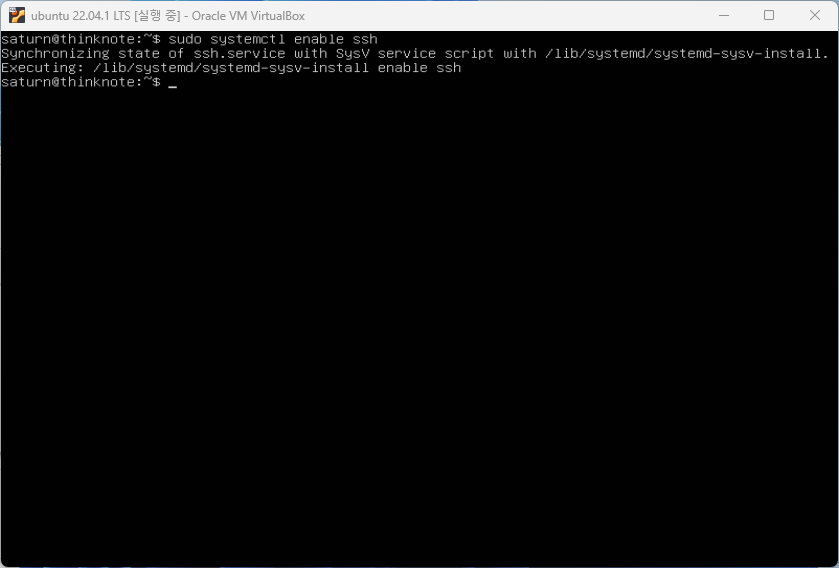
After installation, enable the service so that it starts automatically on boot. Then reboot or restart the service in a controlled way and verify that SSH is still available.
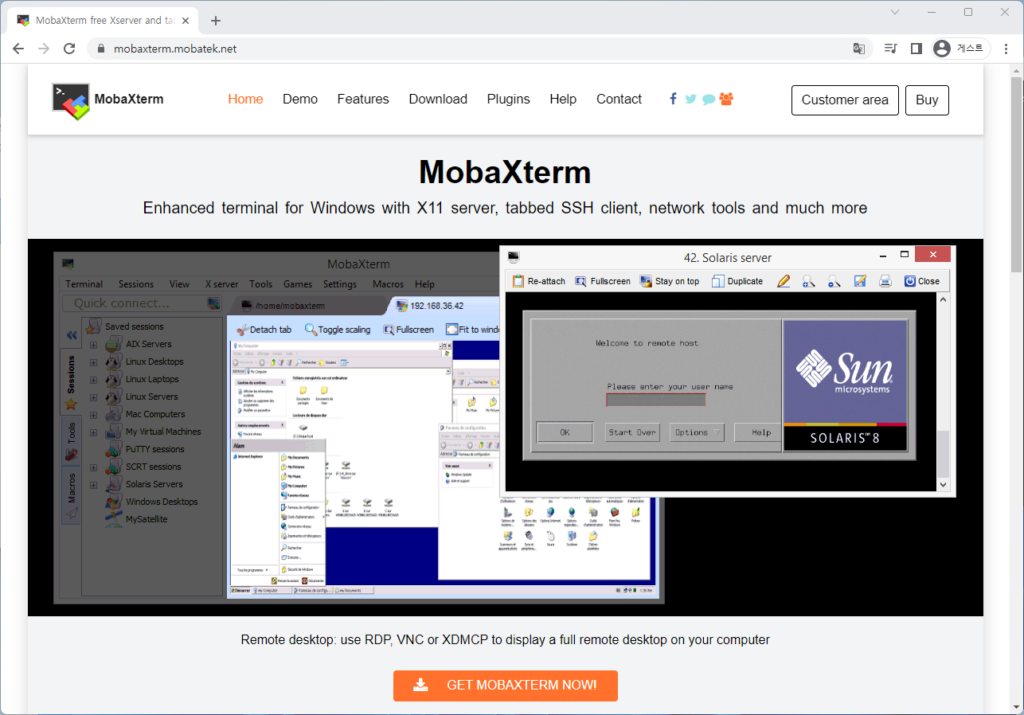
4. Preparing MobaXterm for SSH Access from Windows
connecting to Ubuntu server with SSH.
Why MobaXterm is useful
MobaXterm is a remote access program for Windows. It is convenient for programmers, webmasters, and IT administrators because it combines SSH sessions with additional remote network tools. It can provide SSH, X11, RDP, VNC, FTP, MOSH, and Unix-like commands from a Windows desktop environment.
When connecting to a remote server through SSH, MobaXterm can automatically show a graphical SFTP browser. This makes it easier for beginners to inspect and edit remote files while also using a terminal session.
Download and install MobaXterm
The original article downloads MobaXterm from the official Home Edition page and proceeds with the installer edition rather than the portable edition. After downloading, unzip or run the installer package and complete the installation wizard.
After launching MobaXterm, you can create an SSH session by entering the server address, username, and port. If SSH uses a non-default port, the client setting must match the server configuration and firewall rules.
5. Connection Checks Before Remote Work
Remote access depends on several conditions working together: the server IP address is correct, OpenSSH server is installed, ssh.service is running, the firewall allows the SSH port, the username exists, and the authentication method is valid.
If connection fails, do not assume the client is the problem. Check service status, port configuration, firewall rules, network reachability, and credentials. In server administration, connection troubleshooting is often a chain of small checks.
6. Security After the First Successful Login
Once SSH works, improve security. Use strong passwords or public key authentication, limit unnecessary users, keep packages updated, document the port, and avoid exposing other services without need. Remote access should be convenient enough to operate but strict enough to protect the server.
The original article connects this topic to related Ubuntu setup tasks such as SSH port configuration, VirtualBox installation, Ubuntu installation, update and upgrade, and firewall settings. OpenSSH is often the gateway to all later Linux server work.
Related Reading
Continue with these related Thinknote English articles in the Server & Infrastructure cluster.
This article is part of Thinknote’s English server and infrastructure archive. It focuses on practical Linux, Ubuntu, web-server, database, SSH, firewall, or hosting operations that readers can adapt to their own environment.
How should I use this guide?
Use it as a practical checklist and concept guide. Before applying commands on a live server, verify package names, OS versions, ports, and backup requirements for your own setup.