[카테고리:] Productivity & Tech Tips

  • Python Beginner Lesson 12: Reading and Writing Files and CSV Basics

    In Python Beginner Lesson 12, we cover file handling and CSV in detail at a beginner-friendly level. The final goal of this lesson is to read and write text and CSV files while saving program results. Instead of stopping at copying code, we also check why this syntax is used and where beginners often make mistakes.

    When a program ends, values in memory disappear. By learning file handling, you can save results and read them again in the next run. Today’s example is small, but it becomes a basic skeleton for later automation, data analysis, and web API learning.

    What You Will Learn in This Lesson

    • Core topic: file handling and CSV
    • Today’s goal: read and write text and CSV files while saving program results
    • Practice flow: understand the concept → run the example → review the code → try an applied task
    • Recommended study time: 30–50 minutes

    Understand the Big Picture First

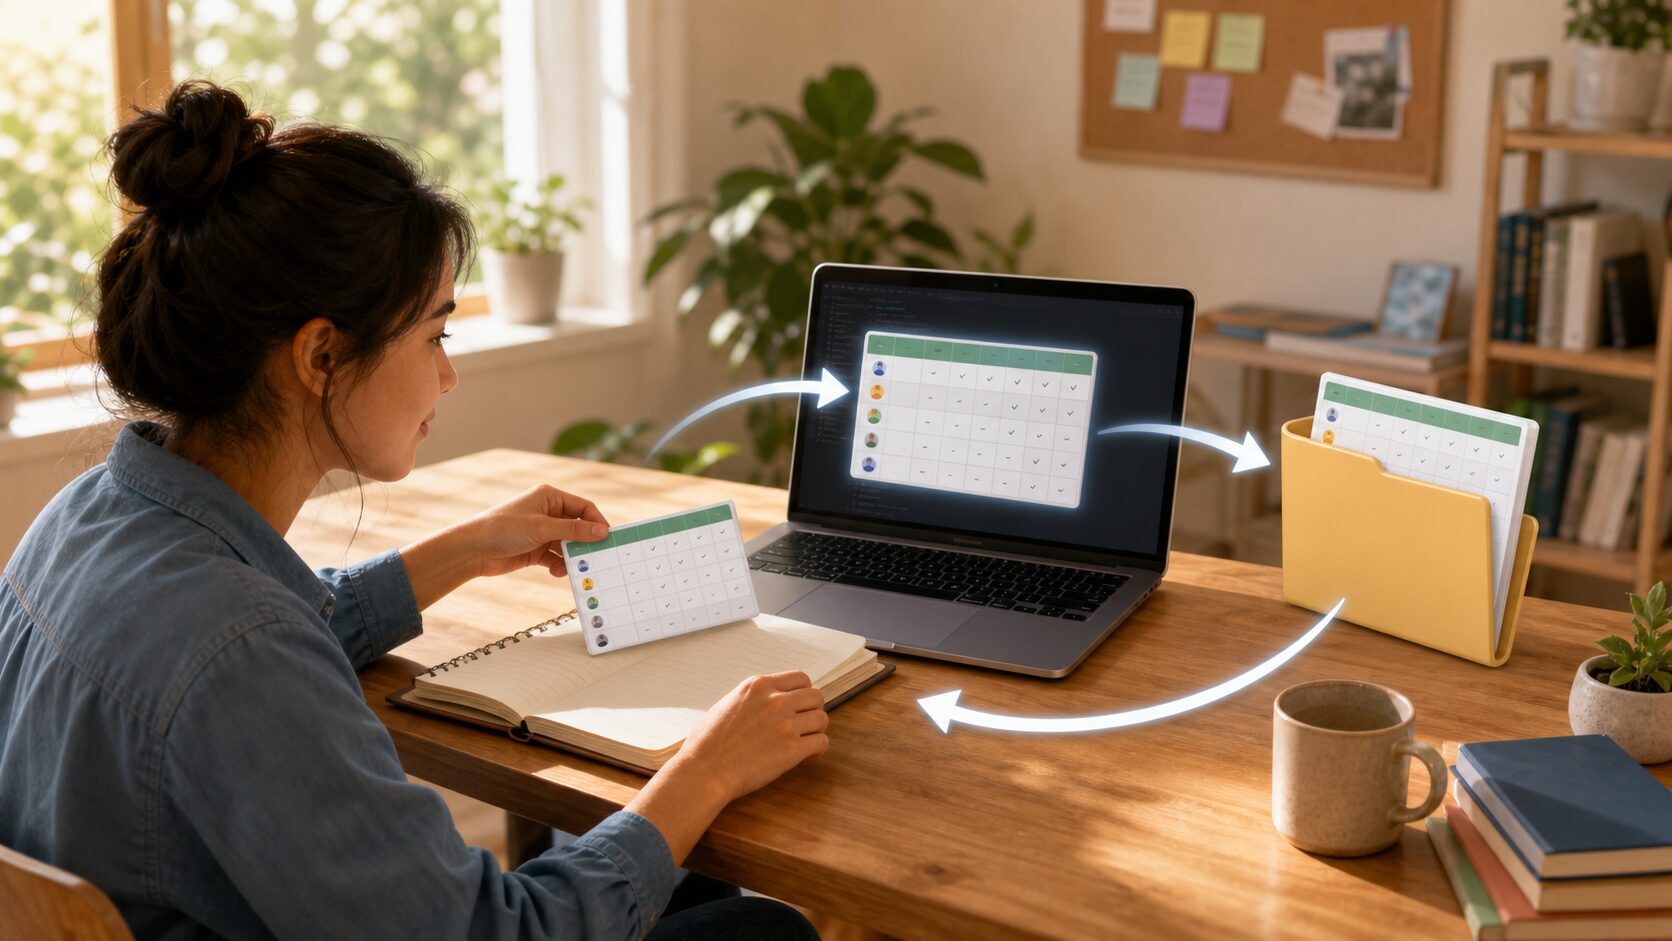
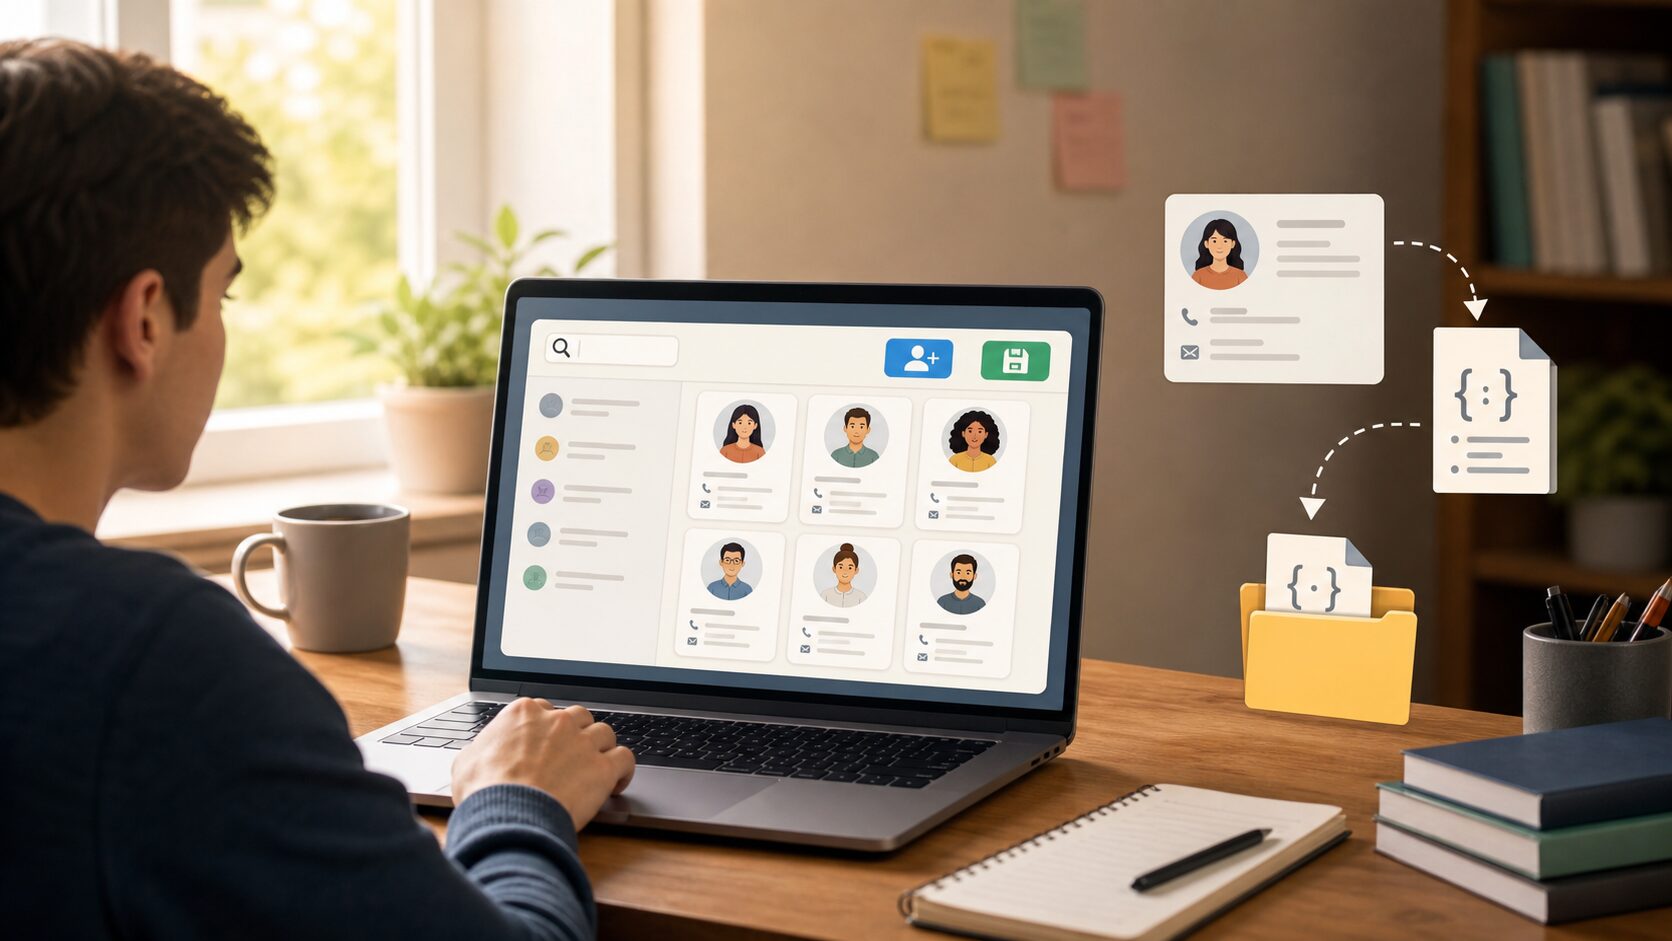
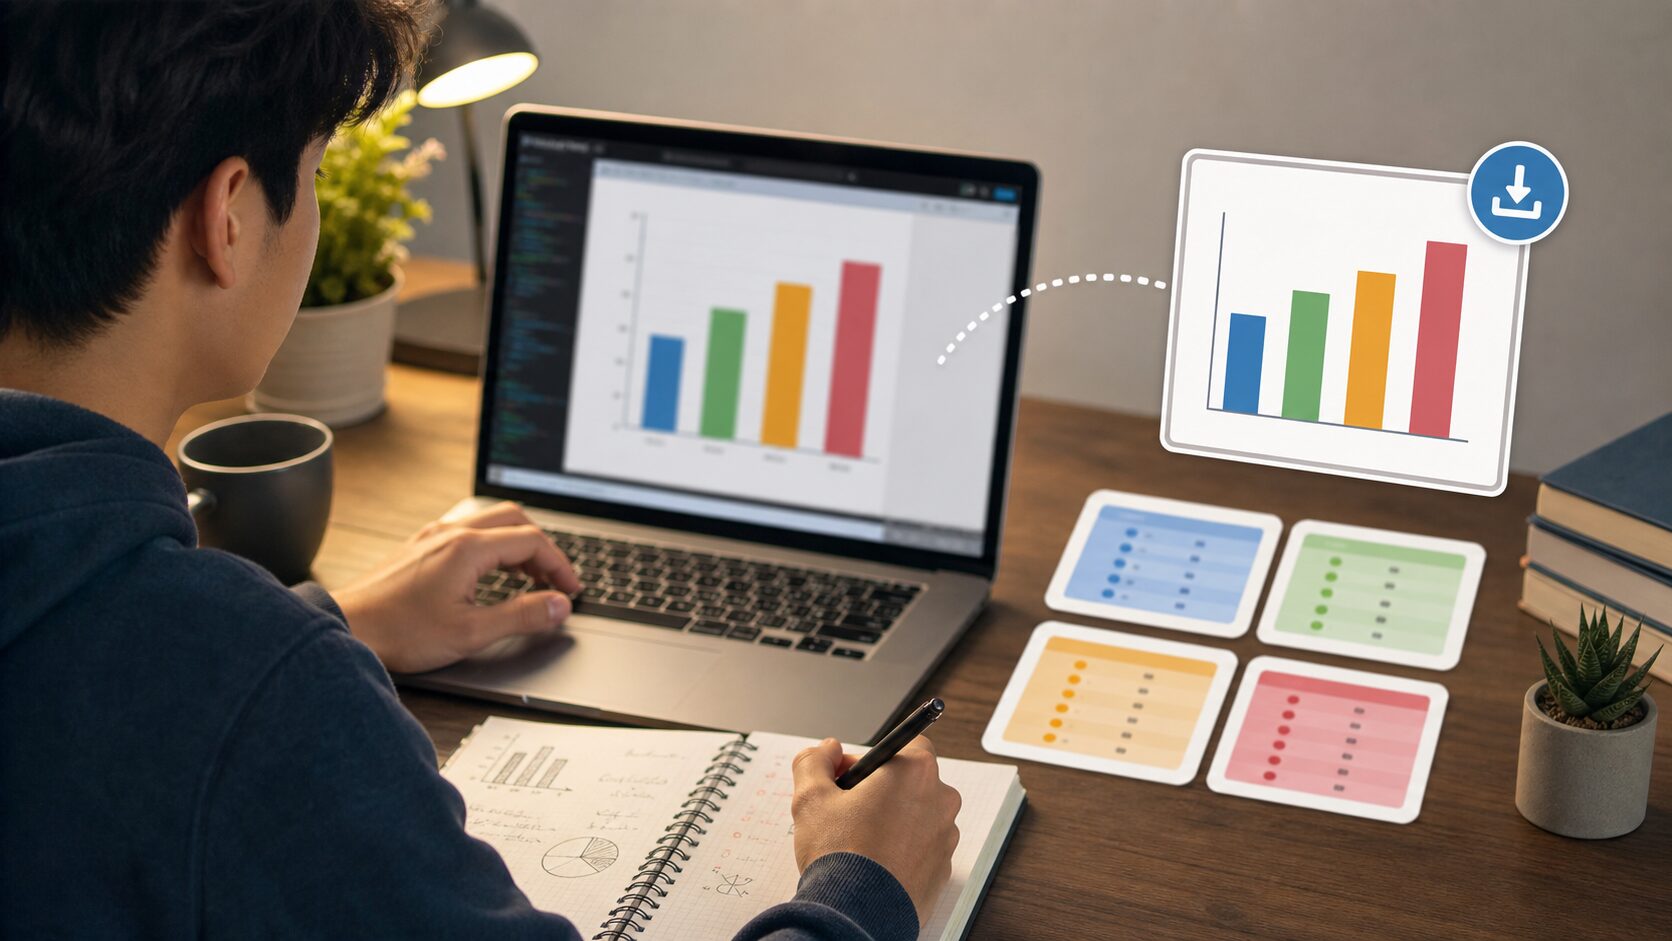
    Python Beginner Lesson 12: Reading and Writing Files and CSV Basics - File input and output lets you save data outside a program and read it again during the next run.
    File input and output lets you save data outside a program and read it again during the next run.

    When learning file handling and CSV, the most important thing is not memorizing grammar names. You need to understand what role this concept plays inside a real program. At the beginner stage, keep asking the following three questions.

    • Where did this value come from?
    • In what order does this code run?
    • Where should I save the result if I want to use it again?

    Look Closely at the Core Concepts

    • open() is a function that opens a file.
    • Using with automatically and safely closes the file.
    • CSV is a simple format that stores table data as lines and commas.
    • encoding is especially important when handling Korean text or any non-ASCII text.

    At first, explanations alone may feel abstract. That is why it is helpful to run the example below right away and check the concept with your own eyes.

    Beginner Terms You Should Know

    TermSimple explanation
    Read modeA mode for reading file contents. Usually r is used.
    Write modeA mode for writing new contents to a file. Usually w is used.
    CSVComma-Separated Values: table data separated by commas

    Practice Setup

    Create a new Python file and run the example below. Using lowercase English letters and numbers in the file name helps reduce errors. For example, save it as lesson.py or practice_01.py. After entering the code, do not change many things at once. Change it little by little while checking the result each time.

    Example Code
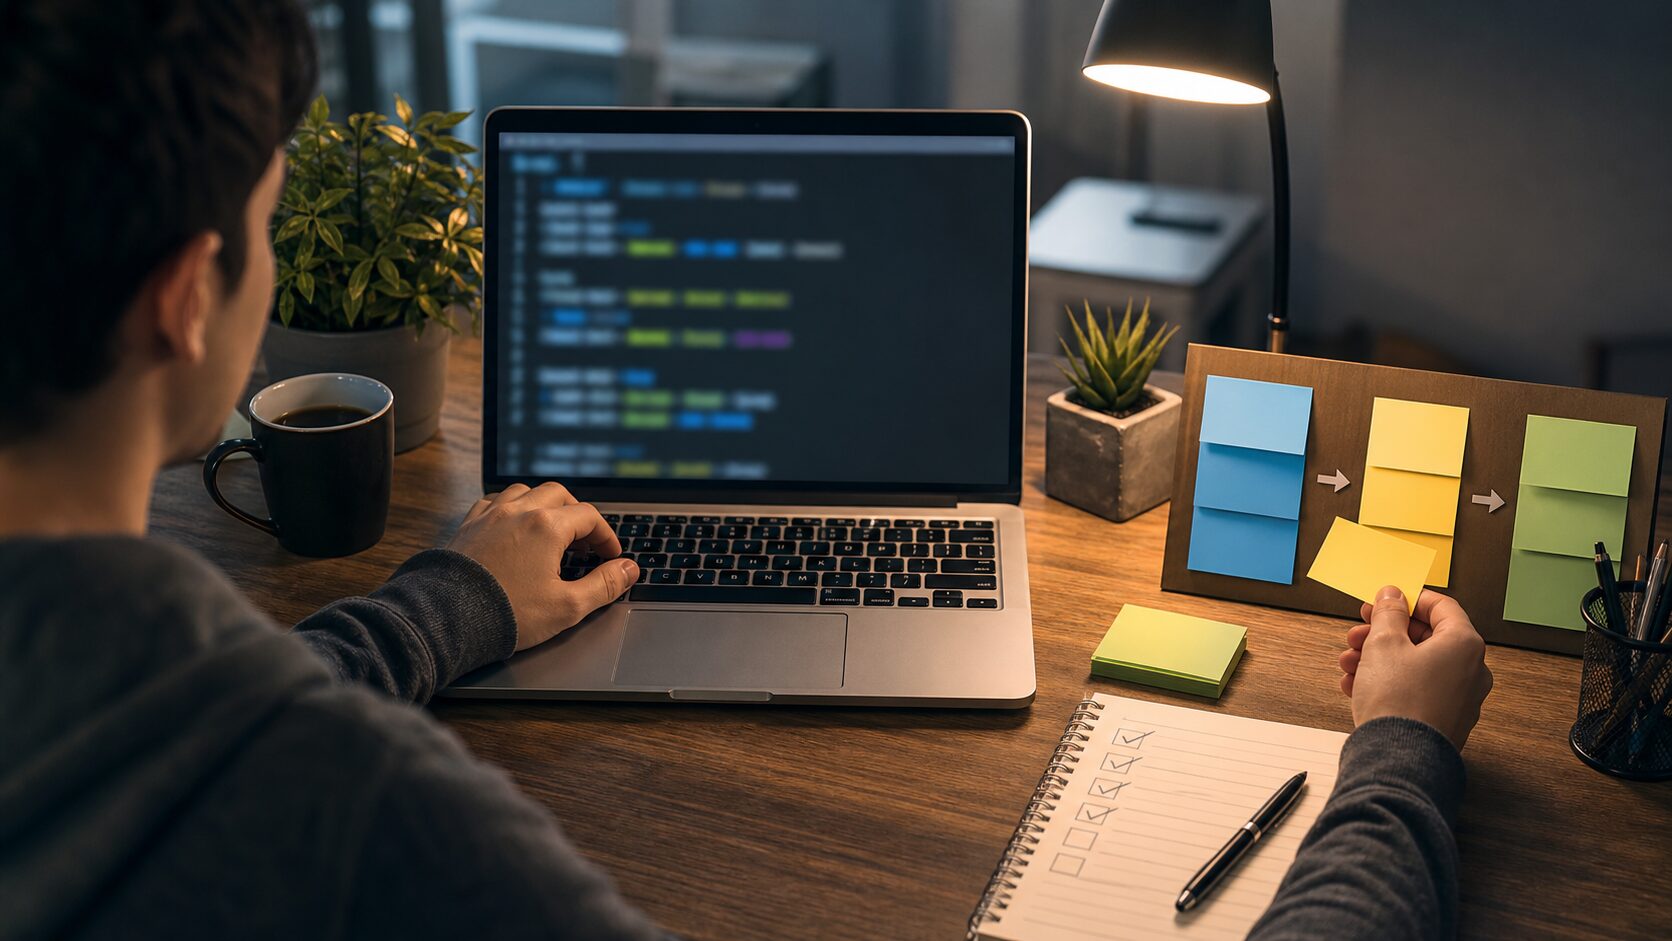
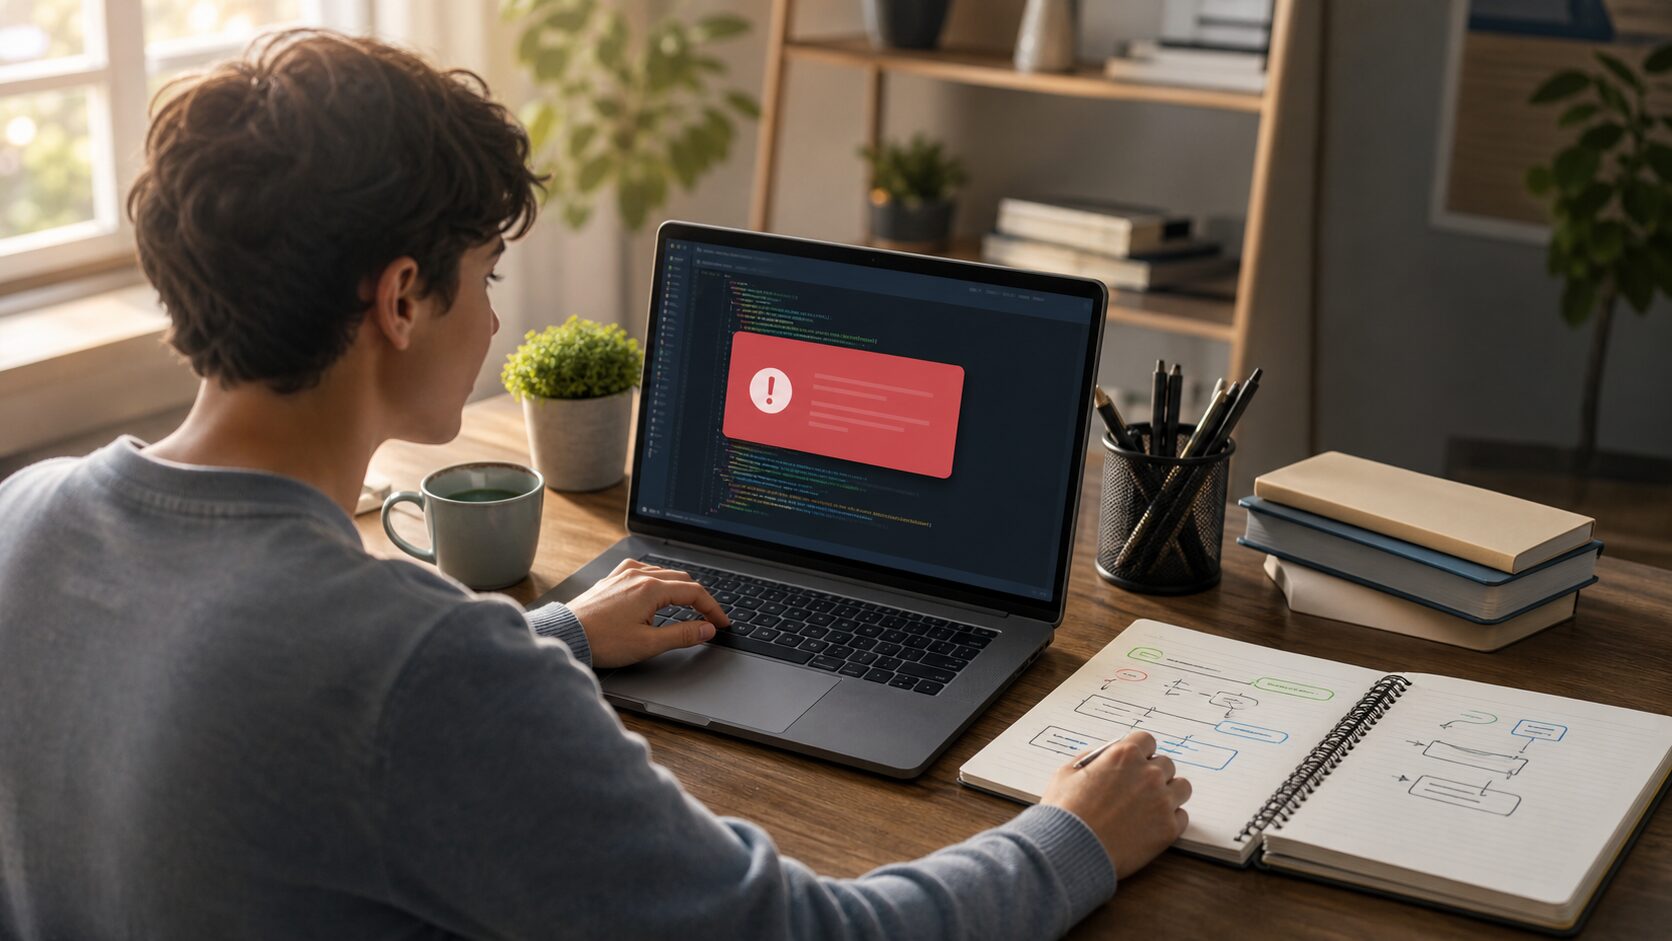
    Python Beginner Lesson 12: Reading and Writing Files and CSV Basics - CSV is a good format for practicing how to save and read data arranged in rows and columns.
    CSV is a good format for practicing how to save and read data arranged in rows and columns.

    CSV is a good format for practicing how to save and read data arranged in rows and columns.

    import csv
    
    rows = [["Name", "Attendance"], ["Minsu", "O"], ["Jiyoung", "X"]]
    with open("attendance.csv", "w", newline="", encoding="utf-8") as f:
        writer = csv.writer(f)
        writer.writerows(rows)
    
    with open("attendance.csv", "r", encoding="utf-8") as f:
        reader = csv.reader(f)
        for row in reader:
            print(row)

    Understand the Code Line by Line

    • The csv module is imported.
    • The attendance.csv file is opened in write mode.
    • writerows() saves several rows at once.
    • The file is opened again in read mode, and each row is printed.

    At this stage, the important thing is the “reading order” of the code. Python runs from top to bottom. Even when there are exceptional flows such as functions or conditionals, beginners should first get used to the basic top-to-bottom flow.

    Change Values and Check the Result

    If the example code ran successfully, now change only a very small part. Start with small changes such as one number, one string, or one variable name so errors are easier to find. After each change, always save and run the code again.

    Part to changeWhat to check
    Input value or variable valueCheck how the result sentence changes.
    Output sentenceCheck whether it becomes a friendlier explanation for the user.
    Code orderCheck whether changing the order causes an error or changes the result.

    Common Errors and How to Fix Them

    Error or situationWhy it happensHow to fix it
    FileNotFoundErrorThis is a common beginner-level problem.It occurs when the file you want to read does not exist or the path is wrong.
    Broken text encodingThis is a common beginner-level problem.Try specifying encoding=”utf-8″.
    Blank lines appearThis is a common beginner-level problem.In CSV writing, specifying newline=”” can reduce line-break problems.

    When an error appears, first look at the last line of the error message. Then check the file name and line number. Most beginner errors come from parentheses, quotation marks, indentation, variable names, and type conversion.

    Practice Problems to Try on Your Own

    • Save a memo as a text file.
    • Save names, scores, and pass/fail status in a CSV file.
    • Add exception handling that prints a guide message when the file does not exist.

    When solving practice problems, do not search for the answer code right away. First write the input, processing, and output flow on paper. Once the flow is visible, the code becomes much easier to write.

    Where Does This Connect in Real Work?

    File handling and csv does not end with a small example. It keeps appearing in business automation when organizing files, in data analysis when reading table data, and in web API work when handling response values. The beginner syntax you learn now also becomes the basic language for using tools such as pandas, requests, and FastAPI later.

    An Analogy for Beginners

    When you first see file handling and CSV, syntax symbols may catch your eye before anything else. But if you see syntax only as symbols, you get tired quickly. A better method is to understand it by role. The core of this lesson is read and write text and CSV files while saving program results. In other words, you are practicing how to decide what task to give Python and write the processing order as code.

    Think of a cooking recipe. You prepare ingredients, process them in order, control the heat, and finally put the result on a plate. Python code is similar. You prepare the necessary values, process them in a defined order, and print or save the result. For beginners, developing this sense of order is most important.

    Follow the Execution Flow Visually

    Before running code, divide your thinking into the three columns below. This habit helps not only with simple examples but also later when you build longer projects.

    SectionCheck questionMeaning in this lesson
    InputWhat value does the program receive first?Values entered by the user or written in advance in the file handling and CSV example.
    ProcessingWhat calculation or decision is made?The part Python runs in order to achieve: read and write text and CSV files while saving program results.
    OutputWhat result does the user check?This may be a print result, saved file, generated graph, or changed data.

    Simply filling in this table yourself improves your code-reading ability. Beginners often struggle because they do not know syntax, but more often because they cannot separate input, processing, and output flow.

    Debugging Routine: What to Check When an Error Happens

    When an error occurs, do not delete code at random. If you check in the following order, you can find most beginner errors on your own.

    • Read the last line of the error message.
    • Check the file name and line number.
    • On that line, check whether parentheses, quotation marks, colons, and commas match.
    • Check whether the variable name is exactly the same as the name defined earlier.
    • Check whether a value that should be calculated as a number is still a string.
    • Undo the part you just changed and run the code again.

    If you repeat this routine, errors begin to look less scary and more like clues. Python skill grows more from reading and fixing errors than from avoiding errors.

    Application Direction: Grow Today’s Lesson a Little Further

    Once you are comfortable with this example, keep file handling and CSV as the base and change one thing among the input value, output message, storage method, or repeat count. You do not need to build a completely new example. At the beginner stage, many small variations are best.

    • Change the variable names in the example to make them more meaningful.
    • Refine the output sentence so it reads like a guide shown to a real user.
    • Intentionally test what happens when invalid input is entered.
    • Explain the code with comments and check what you understand.
    • Try making the same result in a slightly different way.

    Lesson Checkpoints

    • ☐ I can explain in words why file handling and CSV is needed.
    • ☐ I ran the example code myself.
    • ☐ I can explain the role of at least three lines of code.
    • ☐ When an error occurred, I checked the last line and the line number.
    • ☐ I changed and ran at least one practice problem on my own.

    Related Articles

    FAQ

    Can I follow Python file handling and CSV even if I am completely new to Python?

    Yes. This lesson is written for readers who are learning programming for the first time. Focus on understanding the execution result and flow rather than memorizing the code.

    I followed the example exactly, but I get an error. What should I check first?

    Check parentheses, quotation marks, colons, indentation, and variable names first. Many beginner errors happen because quotation marks were entered strangely or a variable name differs by one character.

    The example code looks too short. Should I study longer code?

    At the beginner level, short code is better. The most stable way to improve is to understand short code accurately, then change values and add features one by one.

    What should I do next?

    Change and run at least one practice problem from this lesson. Then move to the next lesson, where the concepts you learned earlier will appear again naturally.

    Next Lesson Preview

    The next lesson is Python Beginner Lesson 13: Errors and Exception Handling with try except. Based on the flow you practiced here, you will explore errors and exception handling in more detail.

    References

    Original Korean article: https://www.thinknote.co.kr/python-beginner-12-file-csv/

  • Python Beginner Lesson 13: Errors and Exception Handling with try except

    In Python Beginner Lesson 13, we cover errors and exception handling in detail at a beginner-friendly level. The final goal of this lesson is to handle expected errors so the program does not suddenly stop. Instead of stopping at copying code, we also check why this syntax is used and where beginners often make mistakes.

    Beginners often panic when an error appears, but an error message is a clue for finding the problem. When you learn exception handling, you can deal with wrong input or file problems more safely. Today’s example is small, but it becomes a basic skeleton for later automation, data analysis, and web API learning.

    What You Will Learn in This Lesson

    • Core topic: errors and exception handling
    • Today’s goal: handle expected errors so the program does not suddenly stop
    • Practice flow: understand the concept → run the example → review the code → try an applied task
    • Recommended study time: 30–50 minutes

    Understand the Big Picture First

    Python Beginner Lesson 13: Errors and Exception Handling with try except - Exception handling is a structure that prepares a recovery path so a program does not immediately stop even when an error occurs.
    Exception handling is a structure that prepares a recovery path so a program does not immediately stop even when an error occurs.

    When learning errors and exception handling, the most important thing is not memorizing grammar names. You need to understand what role this concept plays inside a real program. At the beginner stage, keep asking the following three questions.

    • Where did this value come from?
    • In what order does this code run?
    • Where should I save the result if I want to use it again?

    Look Closely at the Core Concepts

    • A syntax error means the code format is wrong before execution.
    • An exception means an unexpected problem occurred during execution.
    • Write code to try inside try, and write what to do on error inside except.
    • finally can contain code that runs regardless of whether an error occurred.

    At first, explanations alone may feel abstract. That is why it is helpful to run the example below right away and check the concept with your own eyes.

    Beginner Terms You Should Know

    TermSimple explanation
    SyntaxErrorAn error that occurs when the syntax itself is invalid
    ValueErrorAn error that occurs when the shape of a value differs from what is expected
    Exception handlingA way to control program flow in preparation for error situations

    Practice Setup

    Create a new Python file and run the example below. Using lowercase English letters and numbers in the file name helps reduce errors. For example, save it as lesson.py or practice_01.py. After entering the code, do not change many things at once. Change it little by little while checking the result each time.

    Example Code

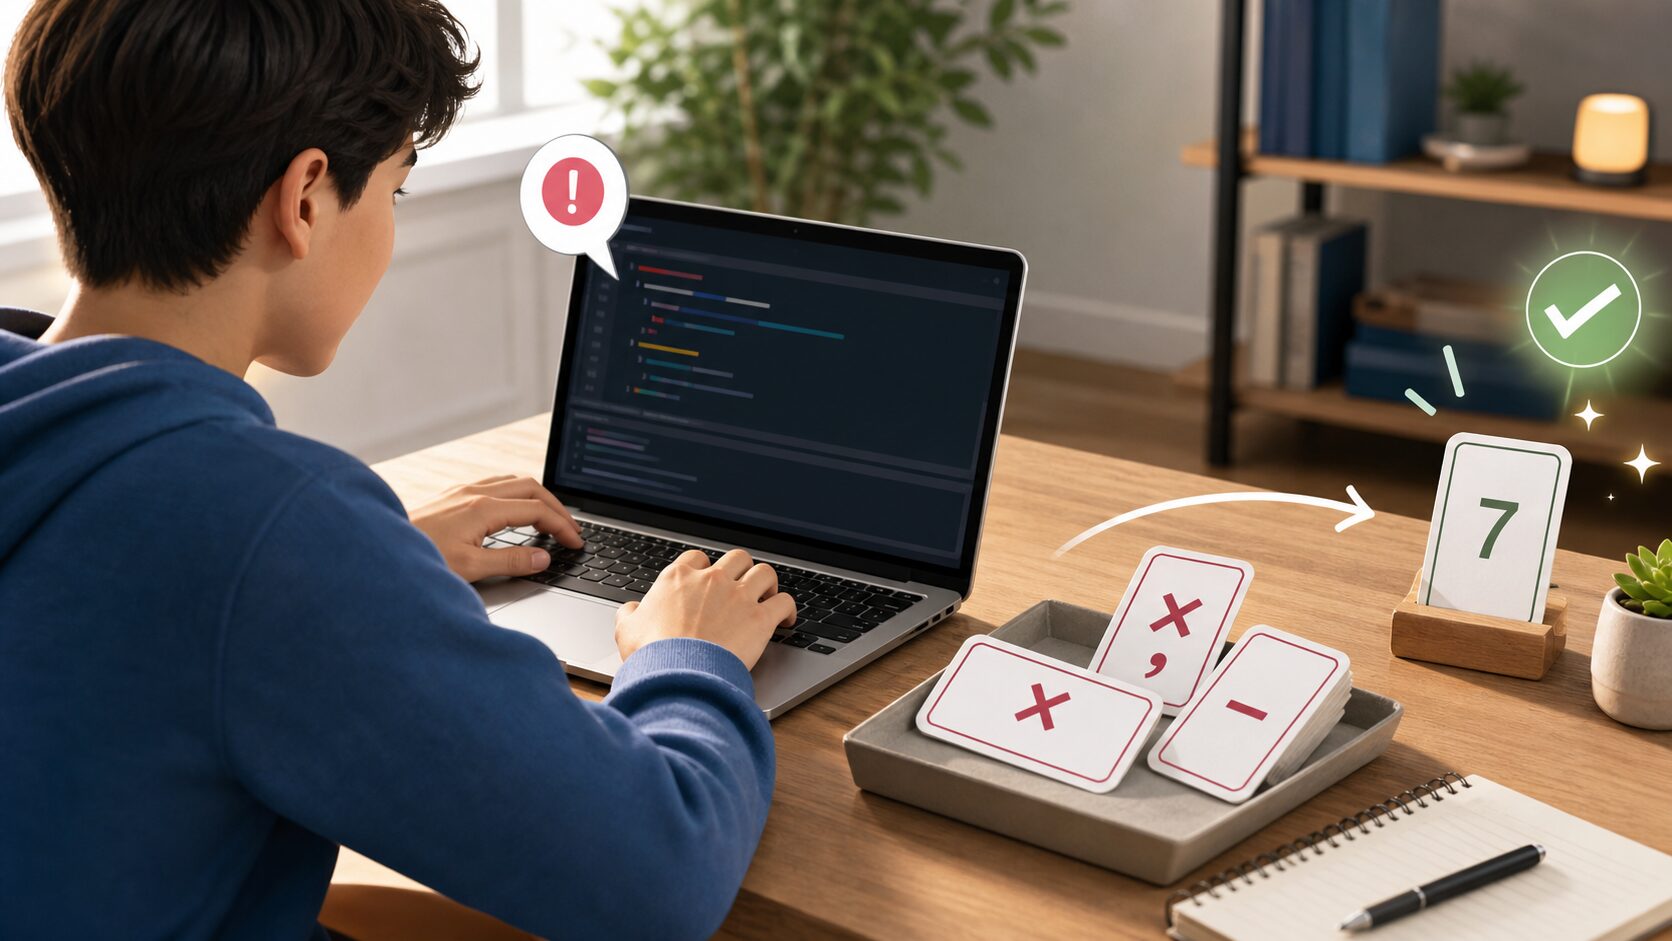
    Python Beginner Lesson 13: Errors and Exception Handling with try except - Practice that filters wrong input and asks again shows the need for try except most clearly.
    Practice that filters wrong input and asks again shows the need for try except most clearly.

    Practice that filters wrong input and asks again shows the need for try except most clearly.

    def get_number():
        while True:
            try:
                value = int(input("Enter a number: "))
                return value
            except ValueError:
                print("Please enter numbers only.")
    
    number = get_number()
    print(f"Twice the number you entered is {number * 2}.")

    Understand the Code Line by Line

    • while True repeats until a valid value is entered.
    • Inside try, the input value is converted to an integer.
    • If integer conversion succeeds, return ends the function.
    • If ValueError occurs, a guide message is printed and input is requested again.

    The important point at this stage is the “reading order” of the code. Python runs from top to bottom. Even when there are exceptional flows such as functions or conditions, beginners should first get used to the basic top-to-bottom flow.

    Change Values and Check the Result

    If the example code runs, now change only a very small part. Start with small changes such as one number, one string, or one variable name so errors are easier to find. After changing something, always save and run the file again.

    Part to changeWhat to check
    Input value or variable valueCheck how the result sentence changes.
    Output sentenceCheck whether the explanation becomes friendlier for the user.
    Code orderCheck whether changing the order causes an error or changes the result.

    Common Errors and How to Fix Them

    Error or situationWhy it happensHow to fix it
    Overusing except ExceptionThis is a common beginner-stage problem.If you hide every error, it becomes hard to find the real problem.
    Ignoring error messagesThis is a common beginner-stage problem.First check the error type and line number on the last line.
    Missing loop exitThis is a common beginner-stage problem.Without return or break after valid input, the loop may continue forever.

    When an error occurs, first look at the last line of the error message. Then check the file name and line number. Most beginner errors happen around parentheses, quotation marks, indentation, variable names, and type conversion.

    Practice Problems to Try on Your Own

    • Print a guide message when a user tries to divide by zero.
    • When reading a missing file, handle it by creating a default file.
    • Use multiple except blocks to print different messages for different errors.

    When solving practice problems, do not look for the answer code right away. First write the input, processing, and output flow on paper. Once the flow is visible, the code becomes much easier to write.

    Where Does This Connect in Real Work?

    Errors and exception handling does not end with a small example. It appears again and again when organizing files in business automation, reading table data in data analysis, and handling response values in web APIs. The beginner syntax you learn now also becomes the basic language you use later with tools such as pandas, requests, and FastAPI.

    A Beginner-Friendly Analogy

    When you first see errors and exception handling, syntax symbols may catch your eye first. But if you look at syntax only as symbols, you will quickly get tired. A better method is to understand it by role. The core of this lesson is to handle expected errors so the program does not suddenly stop. In other words, you are practicing how to decide what job to give Python and write the order of that job as code.

    Think of a cooking recipe. You prepare ingredients, handle them in order, control the heat, and finally serve the dish. Python code is similar. You prepare the needed values, process them in a defined order, and print or save the result. For beginners, building this sense of order is the most important part.

    Follow the Execution Flow Visually

    Before running code, think in the following three boxes. This habit helps not only with simple examples but also later when you build longer projects.

    SectionQuestion to checkMeaning in this lesson
    InputWhat value does the program receive first?Values the user enters or values written in advance in the errors and exception handling example.
    ProcessingWhat calculation or decision happens?The part Python runs in order to achieve the goal: handle expected errors so the program does not suddenly stop.
    OutputWhat result does the user check?This may be a print result, saved file, created graph, or changed data.

    Simply filling in this table yourself improves code comprehension. Beginners struggle partly because they do not know syntax, but more often because they cannot separate input, processing, and output flow.

    Debugging Routine: What to Check When an Error Happens

    When an error appears, do not delete code at random. If you check in the order below, you can find most beginner errors yourself.

    • Read the last line of the error message.
    • Check the file name and line number.
    • On that line, check parentheses, quotation marks, colons, and commas.
    • Check whether the variable name exactly matches the name defined above.
    • Check whether a value that should be calculated as a number is still a string.
    • Undo the part you just changed and run the code again.

    If you repeat this routine, errors begin to look like clues instead of something scary. Python skill grows more from reading and fixing errors than from avoiding them completely.

    Application Ideas: Grow Today’s Lesson a Little

    Once this example feels familiar, keep the errors and exception handling example and change one thing: an input value, an output sentence, a saving method, or a repeat count. You do not need to make a completely new example. At the beginner stage, many small variations are the best practice.

    • Change variable names in the example to make them more meaningful.
    • Refine output sentences so they read like guidance shown to a real user.
    • Deliberately check what happens when invalid input is entered.
    • Explain the code with comments to check your own understanding.
    • Try making the same result in a slightly different way.

    Lesson Checkpoints

    • ☐ I can explain in words why errors and exception handling is needed.
    • ☐ I ran the example code myself.
    • ☐ I can explain the role of at least three lines of code.
    • ☐ When an error occurred, I checked the last line and the line number.
    • ☐ I changed and ran at least one practice problem on my own.

    Related Articles

    • Python Beginner 20-Lesson Complete Guide
    • Previous lesson: Python Beginner Lesson 12: Reading and Writing Files and CSV Basics
    • Next lesson: Python Beginner Lesson 14: Understand Classes and Objects Easily
    • Business automation article collection

    FAQ

    Can I follow Python exception handling even if I am completely new to Python?

    Yes. This lesson is written for readers who are learning programming for the first time. Focus on understanding the execution result and flow rather than memorizing the code.

    I followed the example exactly, but I get an error. What should I check first?

    Check parentheses, quotation marks, colons, indentation, and variable names first. Many beginner errors happen because quotation marks were entered strangely or a variable name differs by one character.

    The example code looks too short. Should I study longer code?

    At the beginner level, short code is better. The most stable way to improve is to understand short code accurately, then change values and add features one by one.

    What should I do next?

    Change and run at least one practice problem from this lesson. Then move to the next lesson, where the concepts you learned earlier will appear again naturally.

    Next Lesson Preview

    The next lesson is Python Beginner Lesson 14: Understand Classes and Objects Easily. Based on the flow you practiced here, you will explore classes and objects in more detail.

    References

    • Python Official Tutorial
    • Python Official Tutorial: Control Flow Tools
    • Python Official Tutorial: Data Structures
    • Python Official Tutorial: Modules
    • Python Official Tutorial: Input and Output

    Original Korean article: https://www.thinknote.co.kr/python-beginner-13-exceptions/

  • Python Beginner Lesson 14: Understand Classes and Objects Easily

    In Python Beginner Lesson 14, we cover classes and objects in detail at a beginner-friendly level. The final goal of this lesson is to think of related data and behavior as one structure. Instead of stopping at copying code, we also check why this syntax is used and where beginners often make mistakes.

    You do not need to memorize object-oriented programming deeply from the start. Still, if you learn the feeling of bundling data with the features that handle it, larger programs become easier to understand. Today’s example is small, but it becomes a basic skeleton for later automation, data analysis, and web API learning.

    What You Will Learn in This Lesson

    • Core topic: classes and objects
    • Today’s goal: think of related data and behavior as one structure
    • Practice flow: understand the concept → run the example → review the code → try an applied task
    • Recommended study time: 30–50 minutes

    Understand the Big Picture First

    Python Beginner Lesson 14: Understand Classes and Objects Easily - A class is a blueprint for creating multiple objects, and an object is an actual bundle of data made from that blueprint.
    A class is a blueprint for creating multiple objects, and an object is an actual bundle of data made from that blueprint.

    When learning classes and objects, the most important thing is not memorizing grammar names. You need to understand what role this concept plays inside a real program. At the beginner stage, keep asking the following three questions.

    • Where did this value come from?
    • In what order does this code run?
    • Where should I save the result if I want to use it again?

    Look Closely at the Core Concepts

    • A class is a blueprint.
    • An object is actual data created from a class.
    • An attribute is a value an object has.
    • A method is an action an object can perform.

    At first, explanations alone may feel abstract. That is why it is helpful to run the example below right away and check the concept with your own eyes.

    Beginner Terms You Should Know

    TermSimple explanation
    classSyntax for defining a new data structure
    selfThe name that points to the current object itself
    __init__An initialization method that runs when an object is created

    Practice Setup

    Create a new Python file and run the example below. Using lowercase English letters and numbers in the file name helps reduce errors. For example, save it as lesson.py or practice_01.py. After entering the code, do not change many things at once. Change it little by little while checking the result each time.

    Example Code

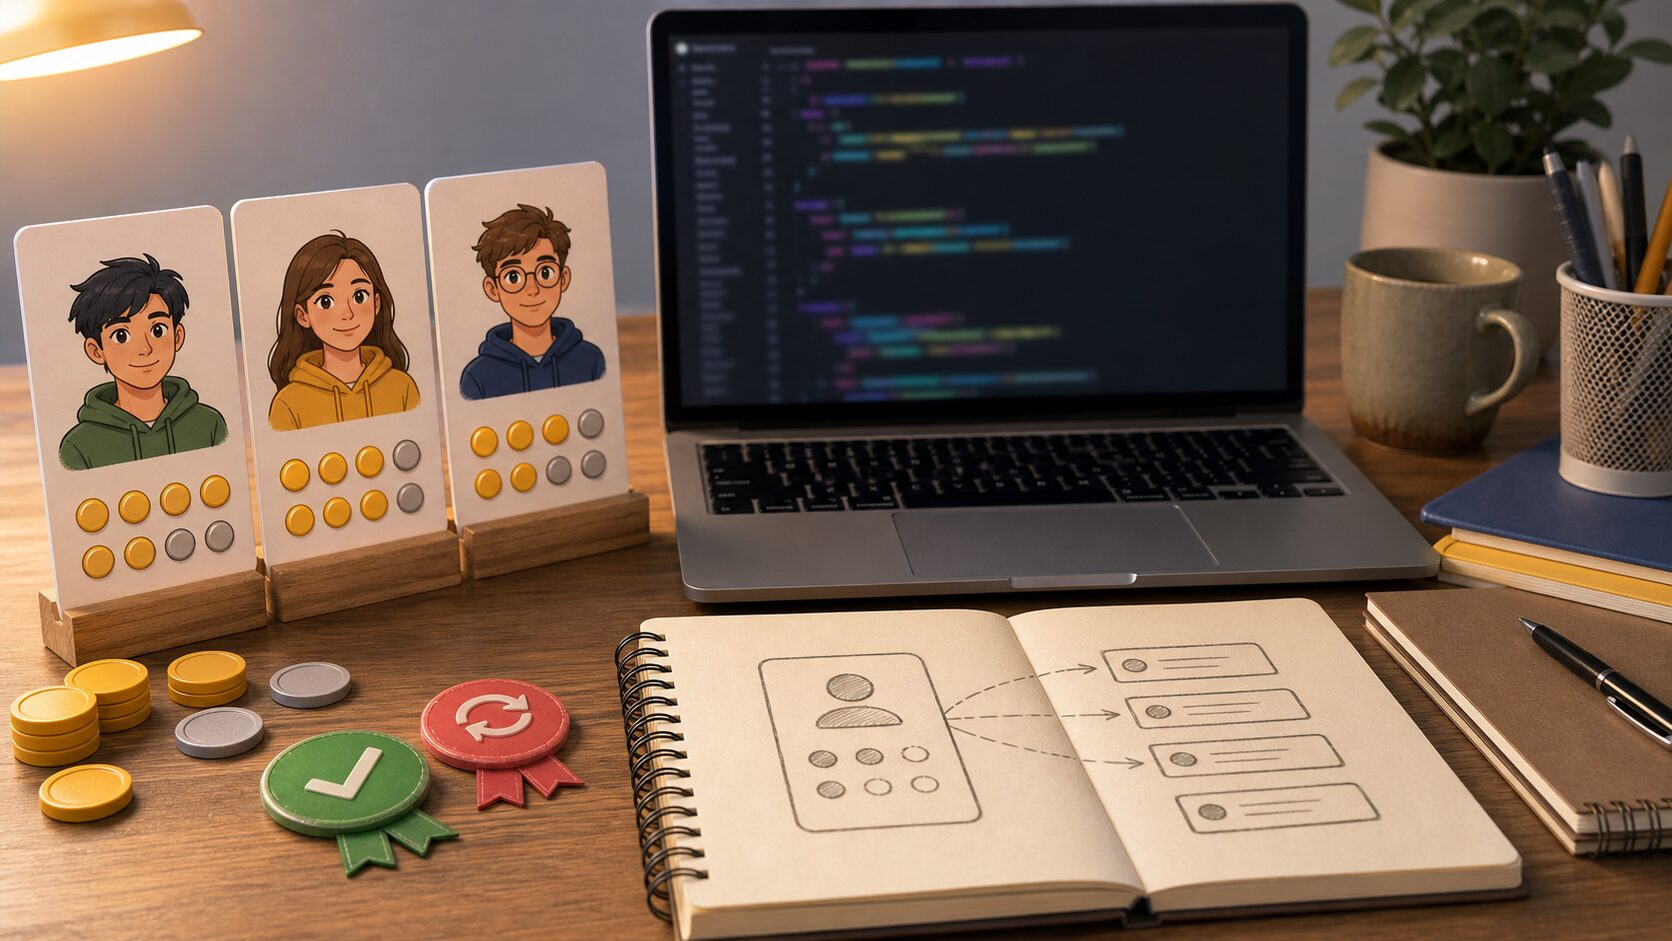
    Python Beginner Lesson 14: Understand Classes and Objects Easily - If you bundle attributes and actions together like a student card, the roles of classes and objects become clearer.
    If you bundle attributes and actions together like a student card, the roles of classes and objects become clearer.

    If you bundle attributes and actions together like a student card, the roles of classes and objects become clearer.

    class Student:
        def __init__(self, name, score):
            self.name = name
            self.score = score
    
        def is_passed(self):
            return self.score >= 60
    
        def introduce(self):
            result = "Passed" if self.is_passed() else "Try again"
            print(f"{self.name}: {self.score} points, {result}")
    
    student = Student("Minsu", 85)
    student.introduce()

    Understand the Code Line by Line

    • The Student class is a blueprint that represents student data.
    • __init__ receives name and score and saves them as object attributes.
    • is_passed() returns whether the student passed based on the score.
    • introduce() uses values in the object to print a sentence.

    The important point at this stage is the “reading order” of the code. Python runs from top to bottom. Even when there are exceptional flows such as functions or conditions, beginners should first get used to the basic top-to-bottom flow.

    Change Values and Check the Result

    If the example code runs, now change only a very small part. Start with small changes such as one number, one string, or one variable name so errors are easier to find. After changing something, always save and run the file again.

    Part to changeWhat to check
    Input value or variable valueCheck how the result sentence changes.
    Output sentenceCheck whether the explanation becomes friendlier for the user.
    Code orderCheck whether changing the order causes an error or changes the result.

    Common Errors and How to Fix Them

    Error or situationWhy it happensHow to fix it
    Missing selfThis is a common beginner-stage problem.Inside a class, the first parameter of a method must be self.
    Confusing class and objectThis is a common beginner-stage problem.A class is a blueprint; an object is the data actually created from it.
    Missing initial valuesThis is a common beginner-stage problem.When creating an object, you must provide all values required by __init__.

    When an error occurs, first look at the last line of the error message. Then check the file name and line number. Most beginner errors happen around parentheses, quotation marks, indentation, variable names, and type conversion.

    Practice Problems to Try on Your Own

    • Create a Book class and store a title and author.
    • Create a Product class with a product name and price.
    • Add a method that changes the score.

    When solving practice problems, do not look for the answer code right away. First write the input, processing, and output flow on paper. Once the flow is visible, the code becomes much easier to write.

    Where Does This Connect in Real Work?

    Classes and objects does not end with a small example. It appears again and again when organizing files in business automation, reading table data in data analysis, and handling response values in web APIs. The beginner syntax you learn now also becomes the basic language you use later with tools such as pandas, requests, and FastAPI.

    A Beginner-Friendly Analogy

    When you first see classes and objects, syntax symbols may catch your eye first. But if you look at syntax only as symbols, you will quickly get tired. A better method is to understand it by role. The core of this lesson is to think of related data and behavior as one structure. In other words, you are practicing how to decide what job to give Python and write the order of that job as code.

    Think of a cooking recipe. You prepare ingredients, handle them in order, control the heat, and finally serve the dish. Python code is similar. You prepare the needed values, process them in a defined order, and print or save the result. For beginners, building this sense of order is the most important part.

    Follow the Execution Flow Visually

    Before running code, think in the following three boxes. This habit helps not only with simple examples but also later when you build longer projects.

    SectionQuestion to checkMeaning in this lesson
    InputWhat value does the program receive first?Values the user enters or values written in advance in the classes and objects example.
    ProcessingWhat calculation or decision happens?The part Python runs in order to achieve the goal: think of related data and behavior as one structure.
    OutputWhat result does the user check?This may be a print result, saved file, created graph, or changed data.

    Simply filling in this table yourself improves code comprehension. Beginners struggle partly because they do not know syntax, but more often because they cannot separate input, processing, and output flow.

    Debugging Routine: What to Check When an Error Happens

    When an error appears, do not delete code at random. If you check in the order below, you can find most beginner errors yourself.

    • Read the last line of the error message.
    • Check the file name and line number.
    • On that line, check parentheses, quotation marks, colons, and commas.
    • Check whether the variable name exactly matches the name defined above.
    • Check whether a value that should be calculated as a number is still a string.
    • Undo the part you just changed and run the code again.

    If you repeat this routine, errors begin to look like clues instead of something scary. Python skill grows more from reading and fixing errors than from avoiding them completely.

    Application Ideas: Grow Today’s Lesson a Little

    Once this example feels familiar, keep the classes and objects example and change one thing: an input value, an output sentence, a saving method, or a repeat count. You do not need to make a completely new example. At the beginner stage, many small variations are the best practice.

    • Change variable names in the example to make them more meaningful.
    • Refine output sentences so they read like guidance shown to a real user.
    • Deliberately check what happens when invalid input is entered.
    • Explain the code with comments to check your own understanding.
    • Try making the same result in a slightly different way.

    Lesson Checkpoints

    • ☐ I can explain in words why classes and objects is needed.
    • ☐ I ran the example code myself.
    • ☐ I can explain the role of at least three lines of code.
    • ☐ When an error occurred, I checked the last line and the line number.
    • ☐ I changed and ran at least one practice problem on my own.

    Related Articles

    • Python Beginner 20-Lesson Complete Guide
    • Previous lesson: Python Beginner Lesson 13: Errors and Exception Handling with try except
    • Next lesson: Python Beginner Lesson 15: Address Book Project Saved to a File
    • Business automation article collection

    FAQ

    Can I follow Python classes even if I am completely new to Python?

    Yes. This lesson is written for readers who are learning programming for the first time. Focus on understanding the execution result and flow rather than memorizing the code.

    I followed the example exactly, but I get an error. What should I check first?

    Check parentheses, quotation marks, colons, indentation, and variable names first. Many beginner errors happen because quotation marks were entered strangely or a variable name differs by one character.

    The example code looks too short. Should I study longer code?

    At the beginner level, short code is better. The most stable way to improve is to understand short code accurately, then change values and add features one by one.

    What should I do next?

    Change and run at least one practice problem from this lesson. Then move to the next lesson, where the concepts you learned earlier will appear again naturally.

    Next Lesson Preview

    The next lesson is Python Beginner Lesson 15: Address Book Project Saved to a File. Based on the flow you practiced here, you will explore an address book project in more detail.

    References

    • Python Official Tutorial
    • Python Official Tutorial: Control Flow Tools
    • Python Official Tutorial: Data Structures
    • Python Official Tutorial: Modules
    • Python Official Tutorial: Input and Output

    Original Korean article: https://www.thinknote.co.kr/python-beginner-14-class-object/

  • Python Beginner Lesson 15: Address Book Project Saved to a File

    In Python Beginner Lesson 15, we cover an address book project in detail at a beginner-friendly level. The final goal of this lesson is to connect adding, searching, saving, and loading contacts. Instead of stopping at copying code, we also check why this syntax is used and where beginners often make mistakes.

    In previous projects, data stayed only while the program was running. The address book project includes file saving, so you practice a structure closer to a real program. Today’s example is small, but it becomes a basic skeleton for later automation, data analysis, and web API learning.

    What You Will Learn in This Lesson

    • Core topic: an address book project
    • Today’s goal: connect adding, searching, saving, and loading contacts
    • Practice flow: understand the concept → run the example → review the code → try an applied task
    • Recommended study time: 30–50 minutes

    Understand the Big Picture First

    Python Beginner Lesson 15: Address Book Project Saved to a File - The address book project is a small-app practice for adding and finding contact data and saving it to a file.
    The address book project is a small-app practice for adding and finding contact data and saving it to a file.

    When learning an address book project, the most important thing is not memorizing grammar names. You need to understand what role this concept plays inside a real program. At the beginner stage, keep asking the following three questions.

    • Where did this value come from?
    • In what order does this code run?
    • Where should I save the result if I want to use it again?

    Look Closely at the Core Concepts

    • Address book data can store names as keys and phone numbers as values.
    • JSON is convenient for saving a dictionary structure to a file.
    • Exception handling is needed in case a file does not exist or is broken.
    • A project becomes easier when you think separately about the data structure, features, and saving method.

    At first, explanations alone may feel abstract. That is why it is helpful to run the example below right away and check the concept with your own eyes.

    Beginner Terms You Should Know

    TermSimple explanation
    JSONA data format that saves dictionaries and lists as text
    CRUDBasic data features such as creating, reading, updating, and deleting contacts
    PersistenceThe property that data remains after the program ends

    Practice Setup

    Create a new Python file and run the example below. Using lowercase English letters and numbers in the file name helps reduce errors. For example, save it as lesson.py or practice_01.py. After entering the code, do not change many things at once. Change it little by little while checking the result each time.

    Example Code

    Python Beginner Lesson 15: Address Book Project Saved to a File - When you handle search and saving together, you can see how dictionaries, files, and JSON connect in a real program.
    When you handle search and saving together, you can see how dictionaries, files, and JSON connect in a real program.

    When you handle search and saving together, you can see how dictionaries, files, and JSON connect in a real program.

    import json
    from pathlib import Path
    
    FILE = Path("contacts.json")
    
    def load_contacts():
        if not FILE.exists():
            return {}
        with open(FILE, "r", encoding="utf-8") as f:
            return json.load(f)
    
    def save_contacts(contacts):
        with open(FILE, "w", encoding="utf-8") as f:
            json.dump(contacts, f, ensure_ascii=False, indent=2)
    
    contacts = load_contacts()
    contacts["Minsu"] = "010-1111-2222"
    save_contacts(contacts)
    print(load_contacts())

    Understand the Code Line by Line

    • Use a Path object to set the save-file path.
    • If the file does not exist, return an empty dictionary.
    • json.load() reads file contents as a dictionary.
    • json.dump() saves a dictionary as a JSON file.

    The important point at this stage is the “reading order” of the code. Python runs from top to bottom. Even when there are exceptional flows such as functions or conditions, beginners should first get used to the basic top-to-bottom flow.

    Change Values and Check the Result

    If the example code runs, now change only a very small part. Start with small changes such as one number, one string, or one variable name so errors are easier to find. After changing something, always save and run the file again.

    Part to changeWhat to check
    Input value or variable valueCheck how the result sentence changes.
    Output sentenceCheck whether the explanation becomes friendlier for the user.
    Code orderCheck whether changing the order causes an error or changes the result.

    Common Errors and How to Fix Them

    Error or situationWhy it happensHow to fix it
    JSONDecodeErrorThis is a common beginner-stage problem.It happens when the file contents are not in JSON format.
    Forgotten saveThis is a common beginner-stage problem.Check whether you called save_contacts() after changing the data.
    File path confusionThis is a common beginner-stage problem.Depending on the run location, the file may be created in a different folder.

    When an error occurs, first look at the last line of the error message. Then check the file name and line number. Most beginner errors happen around parentheses, quotation marks, indentation, variable names, and type conversion.

    Practice Problems to Try on Your Own

    • Add a contact search function.
    • Create a feature that edits a phone number.
    • Before deleting, receive input to confirm whether the user really wants to delete.

    When solving practice problems, do not look for the answer code right away. First write the input, processing, and output flow on paper. Once the flow is visible, the code becomes much easier to write.

    Where Does This Connect in Real Work?

    An address book project does not end with a small example. It appears again and again when organizing files in business automation, reading table data in data analysis, and handling response values in web APIs. The beginner syntax you learn now also becomes the basic language you use later with tools such as pandas, requests, and FastAPI.

    A Beginner-Friendly Analogy

    When you first see an address book project, syntax symbols may catch your eye first. But if you look at syntax only as symbols, you will quickly get tired. A better method is to understand it by role. The core of this lesson is to connect adding, searching, saving, and loading contacts. In other words, you are practicing how to decide what job to give Python and write the order of that job as code.

    Think of a cooking recipe. You prepare ingredients, handle them in order, control the heat, and finally serve the dish. Python code is similar. You prepare the needed values, process them in a defined order, and print or save the result. For beginners, building this sense of order is the most important part.

    Follow the Execution Flow Visually

    Before running code, think in the following three boxes. This habit helps not only with simple examples but also later when you build longer projects.

    SectionQuestion to checkMeaning in this lesson
    InputWhat value does the program receive first?Values the user enters or values written in advance in the an address book project example.
    ProcessingWhat calculation or decision happens?The part Python runs in order to achieve the goal: connect adding, searching, saving, and loading contacts.
    OutputWhat result does the user check?This may be a print result, saved file, created graph, or changed data.

    Simply filling in this table yourself improves code comprehension. Beginners struggle partly because they do not know syntax, but more often because they cannot separate input, processing, and output flow.

    Debugging Routine: What to Check When an Error Happens

    When an error appears, do not delete code at random. If you check in the order below, you can find most beginner errors yourself.

    • Read the last line of the error message.
    • Check the file name and line number.
    • On that line, check parentheses, quotation marks, colons, and commas.
    • Check whether the variable name exactly matches the name defined above.
    • Check whether a value that should be calculated as a number is still a string.
    • Undo the part you just changed and run the code again.

    If you repeat this routine, errors begin to look like clues instead of something scary. Python skill grows more from reading and fixing errors than from avoiding them completely.

    Application Ideas: Grow Today’s Lesson a Little

    Once this example feels familiar, keep the an address book project example and change one thing: an input value, an output sentence, a saving method, or a repeat count. You do not need to make a completely new example. At the beginner stage, many small variations are the best practice.

    • Change variable names in the example to make them more meaningful.
    • Refine output sentences so they read like guidance shown to a real user.
    • Deliberately check what happens when invalid input is entered.
    • Explain the code with comments to check your own understanding.
    • Try making the same result in a slightly different way.

    Lesson Checkpoints

    • ☐ I can explain in words why an address book project is needed.
    • ☐ I ran the example code myself.
    • ☐ I can explain the role of at least three lines of code.
    • ☐ When an error occurred, I checked the last line and the line number.
    • ☐ I changed and ran at least one practice problem on my own.

    Related Articles

    • Python Beginner 20-Lesson Complete Guide
    • Previous lesson: Python Beginner Lesson 14: Understand Classes and Objects Easily
    • Next lesson: Python Beginner Lesson 16: Work with Dates, Paths, and Patterns Using the Standard Library
    • Business automation article collection

    FAQ

    Can I follow Python address book even if I am completely new to Python?

    Yes. This lesson is written for readers who are learning programming for the first time. Focus on understanding the execution result and flow rather than memorizing the code.

    I followed the example exactly, but I get an error. What should I check first?

    Check parentheses, quotation marks, colons, indentation, and variable names first. Many beginner errors happen because quotation marks were entered strangely or a variable name differs by one character.

    The example code looks too short. Should I study longer code?

    At the beginner level, short code is better. The most stable way to improve is to understand short code accurately, then change values and add features one by one.

    What should I do next?

    Change and run at least one practice problem from this lesson. Then move to the next lesson, where the concepts you learned earlier will appear again naturally.

    Next Lesson Preview

    The next lesson is Python Beginner Lesson 16: Work with Dates, Paths, and Patterns Using the Standard Library. Based on the flow you practiced here, you will explore the standard library in more detail.

    References

    • Python Official Tutorial
    • Python Official Tutorial: Control Flow Tools
    • Python Official Tutorial: Data Structures
    • Python Official Tutorial: Modules
    • Python Official Tutorial: Input and Output

    Original Korean article: https://www.thinknote.co.kr/python-beginner-15-address-book-project/

  • Python Beginner Lesson 16: Work with Dates, Paths, and Patterns Using the Standard Library

    In Python Beginner Lesson 16, we cover the standard library in detail at a beginner-friendly level. The final goal of this lesson is to learn date, path, and pattern tools you can use without installation. Instead of stopping at copying code, we also check why this syntax is used and where beginners often make mistakes.

    Even without installing external packages, Python provides many tools by default. If you know the standard library, you can create simple automation right away. Today’s example is small, but it becomes a basic skeleton for later automation, data analysis, and web API learning.

    What You Will Learn in This Lesson

    • Core topic: the standard library
    • Today’s goal: learn date, path, and pattern tools you can use without installation
    • Practice flow: understand the concept → run the example → review the code → try an applied task
    • Recommended study time: 30–50 minutes

    Understand the Big Picture First

    Python Beginner Lesson 16: Work with Dates, Paths, and Patterns Using the Standard Library - The standard library is a toolbox that provides basic features such as dates, paths, and pattern searching without separate installation.
    The standard library is a toolbox that provides basic features such as dates, paths, and pattern searching without separate installation.

    When learning the standard library, the most important thing is not memorizing grammar names. You need to understand what role this concept plays inside a real program. At the beginner stage, keep asking the following three questions.

    • Where did this value come from?
    • In what order does this code run?
    • Where should I save the result if I want to use it again?

    Look Closely at the Core Concepts

    • datetime handles dates and times.
    • pathlib handles file and folder paths like objects.
    • re is a regular-expression tool for finding patterns in strings.
    • For beginners, it is enough to first learn the names of standard libraries and when to use them.

    At first, explanations alone may feel abstract. That is why it is helpful to run the example below right away and check the concept with your own eyes.

    Beginner Terms You Should Know

    TermSimple explanation
    datetimeA standard module for handling dates and times
    pathlibA standard module for handling file paths safely
    Regular expressionA way to express patterns for finding or replacing strings

    Practice Setup

    Create a new Python file and run the example below. Using lowercase English letters and numbers in the file name helps reduce errors. For example, save it as lesson.py or practice_01.py. After entering the code, do not change many things at once. Change it little by little while checking the result each time.

    Example Code

    Python Beginner Lesson 16: Work with Dates, Paths, and Patterns Using the Standard Library - Creating a dated file and finding a pattern in a document helps you build practical intuition for the standard library.
    Creating a dated file and finding a pattern in a document helps you build practical intuition for the standard library.

    Creating a dated file and finding a pattern in a document helps you build practical intuition for the standard library.

    from datetime import date
    from pathlib import Path
    import re
    
    today = date.today().isoformat()
    folder = Path("reports")
    folder.mkdir(exist_ok=True)
    
    file_path = folder / f"report-{today}.txt"
    file_path.write_text("Today’s report", encoding="utf-8")
    
    text = "Order number: A-2026-0712"
    match = re.search(r"A-\d{4}-\d{4}", text)
    print(file_path)
    print(match.group() if match else "No pattern found")

    Understand the Code Line by Line

    • date.today() gets today’s date.
    • Path(“reports”) represents the reports folder.
    • mkdir(exist_ok=True) avoids an error even if the folder already exists.
    • re.search() finds a pattern in a string.

    The important point at this stage is the “reading order” of the code. Python runs from top to bottom. Even when there are exceptional flows such as functions or conditions, beginners should first get used to the basic top-to-bottom flow.

    Change Values and Check the Result

    If the example code runs, now change only a very small part. Start with small changes such as one number, one string, or one variable name so errors are easier to find. After changing something, always save and run the file again.

    Part to changeWhat to check
    Input value or variable valueCheck how the result sentence changes.
    Output sentenceCheck whether the explanation becomes friendlier for the user.
    Code orderCheck whether changing the order causes an error or changes the result.

    Common Errors and How to Fix Them

    Error or situationWhy it happensHow to fix it
    Path separator problemThis is a common beginner-stage problem.Using pathlib instead of string paths reduces operating-system differences.
    Overusing regular expressionsThis is a common beginner-stage problem.For simple replacement, replace() is easier; for splitting, split() is easier.
    NoneType errorThis is a common beginner-stage problem.A re.search() result may be missing, so check whether match exists.

    When an error occurs, first look at the last line of the error message. Then check the file name and line number. Most beginner errors happen around parentheses, quotation marks, indentation, variable names, and type conversion.

    Practice Problems to Try on Your Own

    • Create a memo file that includes today’s date.
    • Automatically create a specific folder if it does not exist.
    • Find a string that looks like an email address in a sentence.

    When solving practice problems, do not look for the answer code right away. First write the input, processing, and output flow on paper. Once the flow is visible, the code becomes much easier to write.

    Where Does This Connect in Real Work?

    The standard library does not end with a small example. It appears again and again when organizing files in business automation, reading table data in data analysis, and handling response values in web APIs. The beginner syntax you learn now also becomes the basic language you use later with tools such as pandas, requests, and FastAPI.

    A Beginner-Friendly Analogy

    When you first see the standard library, syntax symbols may catch your eye first. But if you look at syntax only as symbols, you will quickly get tired. A better method is to understand it by role. The core of this lesson is to learn date, path, and pattern tools you can use without installation. In other words, you are practicing how to decide what job to give Python and write the order of that job as code.

    Think of a cooking recipe. You prepare ingredients, handle them in order, control the heat, and finally serve the dish. Python code is similar. You prepare the needed values, process them in a defined order, and print or save the result. For beginners, building this sense of order is the most important part.

    Follow the Execution Flow Visually

    Before running code, think in the following three boxes. This habit helps not only with simple examples but also later when you build longer projects.

    SectionQuestion to checkMeaning in this lesson
    InputWhat value does the program receive first?Values the user enters or values written in advance in the the standard library example.
    ProcessingWhat calculation or decision happens?The part Python runs in order to achieve the goal: learn date, path, and pattern tools you can use without installation.
    OutputWhat result does the user check?This may be a print result, saved file, created graph, or changed data.

    Simply filling in this table yourself improves code comprehension. Beginners struggle partly because they do not know syntax, but more often because they cannot separate input, processing, and output flow.

    Debugging Routine: What to Check When an Error Happens

    When an error appears, do not delete code at random. If you check in the order below, you can find most beginner errors yourself.

    • Read the last line of the error message.
    • Check the file name and line number.
    • On that line, check parentheses, quotation marks, colons, and commas.
    • Check whether the variable name exactly matches the name defined above.
    • Check whether a value that should be calculated as a number is still a string.
    • Undo the part you just changed and run the code again.

    If you repeat this routine, errors begin to look like clues instead of something scary. Python skill grows more from reading and fixing errors than from avoiding them completely.

    Application Ideas: Grow Today’s Lesson a Little

    Once this example feels familiar, keep the the standard library example and change one thing: an input value, an output sentence, a saving method, or a repeat count. You do not need to make a completely new example. At the beginner stage, many small variations are the best practice.

    • Change variable names in the example to make them more meaningful.
    • Refine output sentences so they read like guidance shown to a real user.
    • Deliberately check what happens when invalid input is entered.
    • Explain the code with comments to check your own understanding.
    • Try making the same result in a slightly different way.

    Lesson Checkpoints

    • ☐ I can explain in words why the standard library is needed.
    • ☐ I ran the example code myself.
    • ☐ I can explain the role of at least three lines of code.
    • ☐ When an error occurred, I checked the last line and the line number.
    • ☐ I changed and ran at least one practice problem on my own.

    Related Articles

    • Python Beginner 20-Lesson Complete Guide
    • Previous lesson: Python Beginner Lesson 15: Address Book Project Saved to a File
    • Next lesson: Python Beginner Lesson 17: Introduction to Folder and File Automation
    • Business automation article collection

    FAQ

    Can I follow Python standard library even if I am completely new to Python?

    Yes. This lesson is written for readers who are learning programming for the first time. Focus on understanding the execution result and flow rather than memorizing the code.

    I followed the example exactly, but I get an error. What should I check first?

    Check parentheses, quotation marks, colons, indentation, and variable names first. Many beginner errors happen because quotation marks were entered strangely or a variable name differs by one character.

    The example code looks too short. Should I study longer code?

    At the beginner level, short code is better. The most stable way to improve is to understand short code accurately, then change values and add features one by one.

    What should I do next?

    Change and run at least one practice problem from this lesson. Then move to the next lesson, where the concepts you learned earlier will appear again naturally.

    Next Lesson Preview

    The next lesson is Python Beginner Lesson 17: Introduction to Folder and File Automation. Based on the flow you practiced here, you will explore file automation in more detail.

    References

    • Python Official Tutorial
    • Python Official Tutorial: Control Flow Tools
    • Python Official Tutorial: Data Structures
    • Python Official Tutorial: Modules
    • Python Official Tutorial: Input and Output

    Original Korean article: https://www.thinknote.co.kr/python-beginner-16-standard-library/

  • Python Beginner Lesson 17: Introduction to Folder and File Automation

    In Python Beginner Lesson 17, we cover file automation in detail at a beginner-friendly level. The final goal of this lesson is to collect file information from a folder and turn it into a CSV report. Instead of stopping at copying code, we also check why this syntax is used and where beginners often make mistakes.

    Business automation does not start with something as grand as AI. Simply organizing a folder’s file list, classifying files by extension, and saving a report can already save time. Today’s example is small, but it becomes a basic skeleton for later automation, data analysis, and web API learning.

    What You Will Learn in This Lesson

    • Core topic: file automation
    • Today’s goal: collect file information from a folder and turn it into a CSV report
    • Practice flow: understand the concept → run the example → review the code → try an applied task
    • Recommended study time: 30–50 minutes

    Understand the Big Picture First

    Python Beginner Lesson 17: Introduction to Folder and File Automation - File automation organizes scattered files by rules and reduces repetitive checking work.
    File automation organizes scattered files by rules and reduces repetitive checking work.

    When learning file automation, the most important thing is not memorizing grammar names. You need to understand what role this concept plays inside a real program. At the beginner stage, keep asking the following three questions.

    • Where did this value come from?
    • In what order does this code run?
    • Where should I save the result if I want to use it again?

    Look Closely at the Core Concepts

    • Folder traversal means checking files inside a specific folder one by one.
    • Information such as file size, extension, and modified date is often used in automated reports.
    • When you first automate, it is safer to avoid changing original files and start with reading and report creation.

    At first, explanations alone may feel abstract. That is why it is helpful to run the example below right away and check the concept with your own eyes.

    Beginner Terms You Should Know

    TermSimple explanation
    iterdirA pathlib method that takes items from a folder one by one
    statA feature that gets information such as file size and modified time
    Report automationSaving repeated checking results as a table or file

    Practice Setup

    Create a new Python file and run the example below. Using lowercase English letters and numbers in the file name helps reduce errors. For example, save it as lesson.py or practice_01.py. After entering the code, do not change many things at once. Change it little by little while checking the result each time.

    Example Code

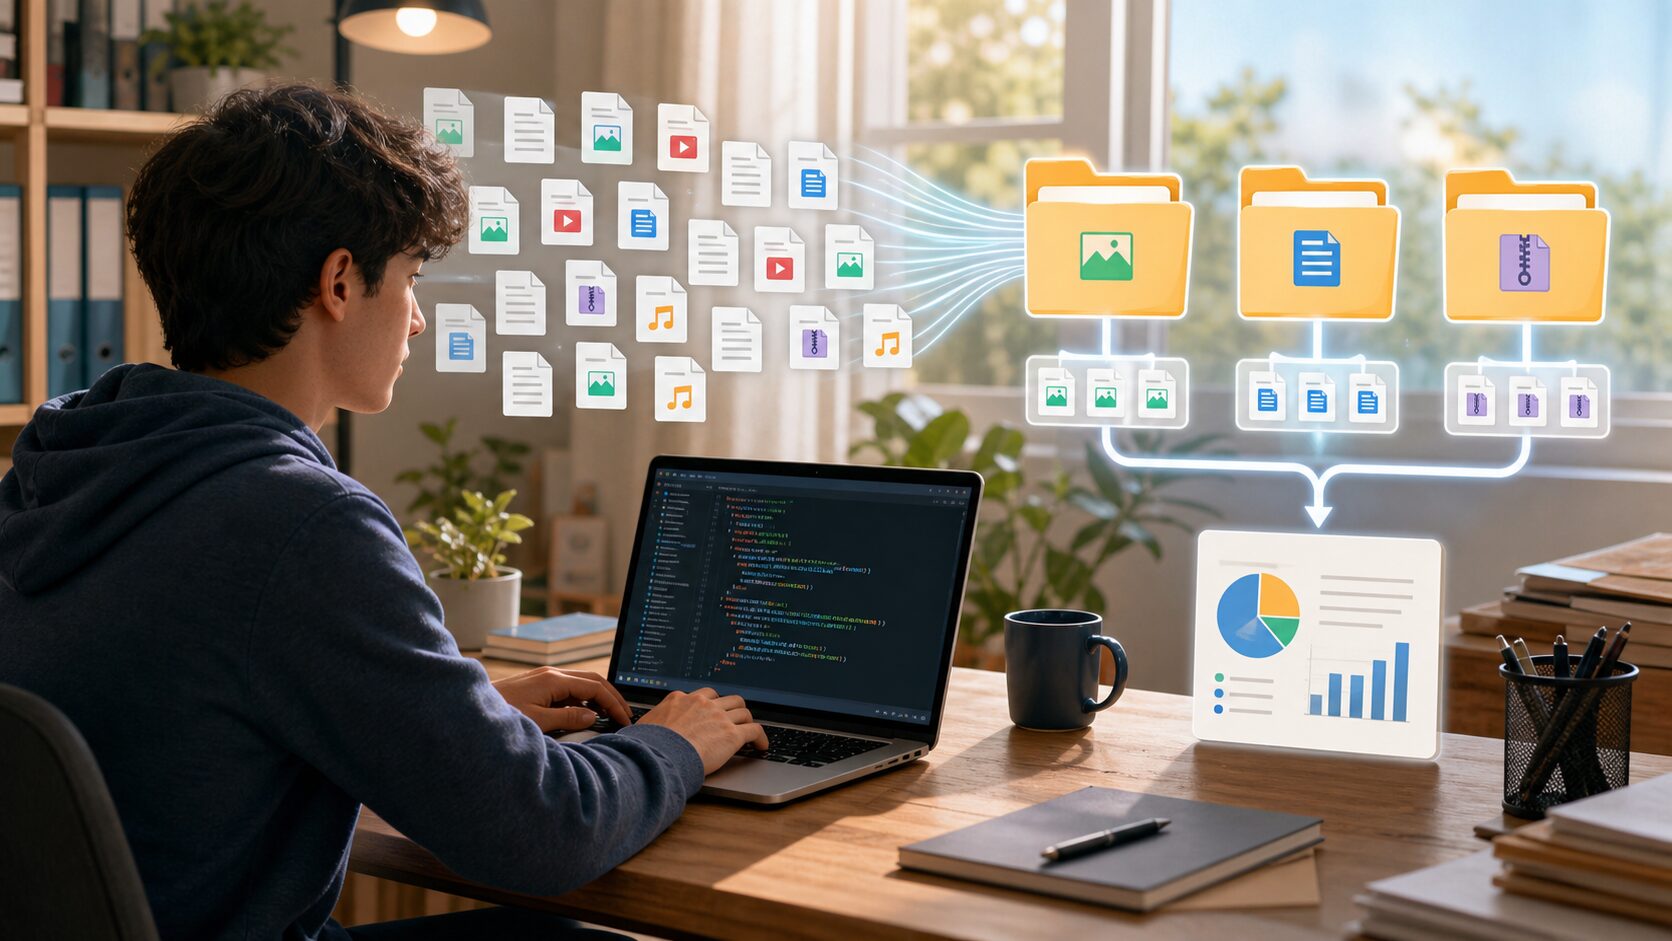
    Python Beginner Lesson 17: Introduction to Folder and File Automation - When you scan a folder, collect file information, and save it as a report, you can immediately feel the effect of automation.
    When you scan a folder, collect file information, and save it as a report, you can immediately feel the effect of automation.

    When you scan a folder, collect file information, and save it as a report, you can immediately feel the effect of automation.

    from pathlib import Path
    import csv
    
    folder = Path(".")
    files = []
    for path in folder.iterdir():
        if path.is_file():
            files.append([path.name, path.suffix, path.stat().st_size])
    
    with open("file_report.csv", "w", newline="", encoding="utf-8") as f:
        writer = csv.writer(f)
        writer.writerow(["File name", "Extension", "Size"])
        writer.writerows(files)
    
    print(f"Saved information for {len(files)} files.")

    Understand the Code Line by Line

    • Set the current folder with Path(“.”).
    • Use iterdir() to check each item in the folder.
    • Use is_file() to select files only.
    • Collect the file name, extension, and size in a list, then save them to CSV.

    The important point at this stage is the “reading order” of the code. Python runs from top to bottom. Even when there are exceptional flows such as functions or conditions, beginners should first get used to the basic top-to-bottom flow.

    Change Values and Check the Result

    If the example code runs, now change only a very small part. Start with small changes such as one number, one string, or one variable name so errors are easier to find. After changing something, always save and run the file again.

    Part to changeWhat to check
    Input value or variable valueCheck how the result sentence changes.
    Output sentenceCheck whether the explanation becomes friendlier for the user.
    Code orderCheck whether changing the order causes an error or changes the result.

    Common Errors and How to Fix Them

    Error or situationWhy it happensHow to fix it
    PermissionErrorThis is a common beginner-stage problem.It happens when you access a file or folder without permission.
    Risk of changing originalsThis is a common beginner-stage problem.Use commands such as rename or unlink only after making a backup.
    Relative path confusionThis is a common beginner-stage problem.Check the current run location with print(Path.cwd()).

    When an error occurs, first look at the last line of the error message. Then check the file name and line number. Most beginner errors happen around parentheses, quotation marks, indentation, variable names, and type conversion.

    Practice Problems to Try on Your Own

    • Include only .txt files in the report.
    • Sort files by largest size first.
    • Look up and use rglob() if you want to include subfolders too.

    When solving practice problems, do not look for the answer code right away. First write the input, processing, and output flow on paper. Once the flow is visible, the code becomes much easier to write.

    Where Does This Connect in Real Work?

    File automation does not end with a small example. It appears again and again when organizing files in business automation, reading table data in data analysis, and handling response values in web APIs. The beginner syntax you learn now also becomes the basic language you use later with tools such as pandas, requests, and FastAPI.

    A Beginner-Friendly Analogy

    When you first see file automation, syntax symbols may catch your eye first. But if you look at syntax only as symbols, you will quickly get tired. A better method is to understand it by role. The core of this lesson is to collect file information from a folder and turn it into a CSV report. In other words, you are practicing how to decide what job to give Python and write the order of that job as code.

    Think of a cooking recipe. You prepare ingredients, handle them in order, control the heat, and finally serve the dish. Python code is similar. You prepare the needed values, process them in a defined order, and print or save the result. For beginners, building this sense of order is the most important part.

    Follow the Execution Flow Visually

    Before running code, think in the following three boxes. This habit helps not only with simple examples but also later when you build longer projects.

    SectionQuestion to checkMeaning in this lesson
    InputWhat value does the program receive first?Values the user enters or values written in advance in the file automation example.
    ProcessingWhat calculation or decision happens?The part Python runs in order to achieve the goal: collect file information from a folder and turn it into a CSV report.
    OutputWhat result does the user check?This may be a print result, saved file, created graph, or changed data.

    Simply filling in this table yourself improves code comprehension. Beginners struggle partly because they do not know syntax, but more often because they cannot separate input, processing, and output flow.

    Debugging Routine: What to Check When an Error Happens

    When an error appears, do not delete code at random. If you check in the order below, you can find most beginner errors yourself.

    • Read the last line of the error message.
    • Check the file name and line number.
    • On that line, check parentheses, quotation marks, colons, and commas.
    • Check whether the variable name exactly matches the name defined above.
    • Check whether a value that should be calculated as a number is still a string.
    • Undo the part you just changed and run the code again.

    If you repeat this routine, errors begin to look like clues instead of something scary. Python skill grows more from reading and fixing errors than from avoiding them completely.

    Application Ideas: Grow Today’s Lesson a Little

    Once this example feels familiar, keep the file automation example and change one thing: an input value, an output sentence, a saving method, or a repeat count. You do not need to make a completely new example. At the beginner stage, many small variations are the best practice.

    • Change variable names in the example to make them more meaningful.
    • Refine output sentences so they read like guidance shown to a real user.
    • Deliberately check what happens when invalid input is entered.
    • Explain the code with comments to check your own understanding.
    • Try making the same result in a slightly different way.

    Lesson Checkpoints

    • ☐ I can explain in words why file automation is needed.
    • ☐ I ran the example code myself.
    • ☐ I can explain the role of at least three lines of code.
    • ☐ When an error occurred, I checked the last line and the line number.
    • ☐ I changed and ran at least one practice problem on my own.

    Related Articles

    • Python Beginner 20-Lesson Complete Guide
    • Previous lesson: Python Beginner Lesson 16: Work with Dates, Paths, and Patterns Using the Standard Library
    • Next lesson: Python Beginner Lesson 18: A Taste of Data Analysis with pandas and matplotlib
    • Business automation article collection

    FAQ

    Can I follow Python automation even if I am completely new to Python?

    Yes. This lesson is written for readers who are learning programming for the first time. Focus on understanding the execution result and flow rather than memorizing the code.

    I followed the example exactly, but I get an error. What should I check first?

    Check parentheses, quotation marks, colons, indentation, and variable names first. Many beginner errors happen because quotation marks were entered strangely or a variable name differs by one character.

    The example code looks too short. Should I study longer code?

    At the beginner level, short code is better. The most stable way to improve is to understand short code accurately, then change values and add features one by one.

    What should I do next?

    Change and run at least one practice problem from this lesson. Then move to the next lesson, where the concepts you learned earlier will appear again naturally.

    Next Lesson Preview

    The next lesson is Python Beginner Lesson 18: A Taste of Data Analysis with pandas and matplotlib. Based on the flow you practiced here, you will explore a taste of data analysis in more detail.

    References

    • Python Official Tutorial
    • Python Official Tutorial: Control Flow Tools
    • Python Official Tutorial: Data Structures
    • Python Official Tutorial: Modules
    • Python Official Tutorial: Input and Output

    Original Korean article: https://www.thinknote.co.kr/python-beginner-17-file-automation/

  • Python Beginner Lesson 18: A Taste of Data Analysis with pandas and matplotlib

    In Python Beginner Lesson 18, we cover a taste of data analysis in detail at a beginner-friendly level. The final goal of this lesson is to read CSV data as a table, summarize it, and save it as a graph. Instead of stopping at copying code, we also check why this syntax is used and where beginners often make mistakes.

    One major reason many people learn Python is data analysis. At the beginner stage, it is more important to experience the flow of reading data, checking averages, and saving a graph than to study complex statistics. Today’s example is small, but it becomes a basic skeleton for later automation, data analysis, and web API learning.

    What You Will Learn in This Lesson

    • Core topic: a taste of data analysis
    • Today’s goal: read CSV data as a table, summarize it, and save it as a graph
    • Practice flow: understand the concept → run the example → review the code → try an applied task
    • Recommended study time: 30–50 minutes

    Understand the Big Picture First

    Python Beginner Lesson 18: A Taste of Data Analysis with pandas and matplotlib - pandas handles table data in a form that is easy to calculate, and matplotlib shows the result as a graph.
    pandas handles table data in a form that is easy to calculate, and matplotlib shows the result as a graph.

    When learning a taste of data analysis, the most important thing is not memorizing grammar names. You need to understand what role this concept plays inside a real program. At the beginner stage, keep asking the following three questions.

    • Where did this value come from?
    • In what order does this code run?
    • Where should I save the result if I want to use it again?

    Look Closely at the Core Concepts

    • pandas handles table data with a structure called a DataFrame.
    • matplotlib is a representative tool for drawing graphs.
    • External packages must be installed with pip install.
    • Analysis is more stable when you proceed in the order of reading, checking, summarizing, and visualizing.

    At first, explanations alone may feel abstract. That is why it is helpful to run the example below right away and check the concept with your own eyes.

    Beginner Terms You Should Know

    TermSimple explanation
    DataFramepandas data in a table shape with rows and columns
    VisualizationThe task of showing data as graphs or charts
    Virtual environmentA way to separate package installation spaces by project

    Practice Setup

    Create a new Python file and run the example below. Using lowercase English letters and numbers in the file name helps reduce errors. For example, save it as lesson.py or practice_01.py. After entering the code, do not change many things at once. Change it little by little while checking the result each time.

    Example Code

    Python Beginner Lesson 18: A Taste of Data Analysis with pandas and matplotlib - If you summarize data and save it as a chart image, you can use the analysis result in other documents or reports.
    If you summarize data and save it as a chart image, you can use the analysis result in other documents or reports.

    If you summarize data and save it as a chart image, you can use the analysis result in other documents or reports.

    import pandas as pd
    import matplotlib.pyplot as plt
    
    data = pd.DataFrame({
        "month": ["Jan", "Feb", "Mar"],
        "sales": [120, 150, 180]
    })
    
    print(data)
    print("Average sales:", data["sales"].mean())
    
    data.plot(kind="bar", x="month", y="sales", legend=False)
    plt.title("Monthly Sales")
    plt.tight_layout()
    plt.savefig("sales.png")

    Understand the Code Line by Line

    • pd.DataFrame creates a small table of data.
    • data[“sales”].mean() calculates the average sales value.
    • plot(kind=”bar”) draws a bar chart.
    • savefig() saves the graph as an image file.

    The important point at this stage is the “reading order” of the code. Python runs from top to bottom. Even when there are exceptional flows such as functions or conditions, beginners should first get used to the basic top-to-bottom flow.

    Change Values and Check the Result

    If the example code runs, now change only a very small part. Start with small changes such as one number, one string, or one variable name so errors are easier to find. After changing something, always save and run the file again.

    Part to changeWhat to check
    Input value or variable valueCheck how the result sentence changes.
    Output sentenceCheck whether the explanation becomes friendlier for the user.
    Code orderCheck whether changing the order causes an error or changes the result.

    Common Errors and How to Fix Them

    Error or situationWhy it happensHow to fix it
    ModuleNotFoundErrorThis is a common beginner-stage problem.Install the packages with pip install pandas matplotlib.
    Broken Korean font renderingThis is a common beginner-stage problem.Font settings may be needed depending on the operating system.
    CSV encoding problemThis is a common beginner-stage problem.Use read_csv(…, encoding=”utf-8″) or cp949 depending on the situation.

    When an error occurs, first look at the last line of the error message. Then check the file name and line number. Most beginner errors happen around parentheses, quotation marks, indentation, variable names, and type conversion.

    Practice Problems to Try on Your Own

    • Create monthly visitor data and calculate the average.
    • Draw a line graph instead of a bar graph.
    • Change the example so it reads a CSV file with read_csv().

    When solving practice problems, do not look for the answer code right away. First write the input, processing, and output flow on paper. Once the flow is visible, the code becomes much easier to write.

    Where Does This Connect in Real Work?

    A taste of data analysis does not end with a small example. It appears again and again when organizing files in business automation, reading table data in data analysis, and handling response values in web APIs. The beginner syntax you learn now also becomes the basic language you use later with tools such as pandas, requests, and FastAPI.

    A Beginner-Friendly Analogy

    When you first see a taste of data analysis, syntax symbols may catch your eye first. But if you look at syntax only as symbols, you will quickly get tired. A better method is to understand it by role. The core of this lesson is to read CSV data as a table, summarize it, and save it as a graph. In other words, you are practicing how to decide what job to give Python and write the order of that job as code.

    Think of a cooking recipe. You prepare ingredients, handle them in order, control the heat, and finally serve the dish. Python code is similar. You prepare the needed values, process them in a defined order, and print or save the result. For beginners, building this sense of order is the most important part.

    Follow the Execution Flow Visually

    Before running code, think in the following three boxes. This habit helps not only with simple examples but also later when you build longer projects.

    SectionQuestion to checkMeaning in this lesson
    InputWhat value does the program receive first?Values the user enters or values written in advance in the a taste of data analysis example.
    ProcessingWhat calculation or decision happens?The part Python runs in order to achieve the goal: read CSV data as a table, summarize it, and save it as a graph.
    OutputWhat result does the user check?This may be a print result, saved file, created graph, or changed data.

    Simply filling in this table yourself improves code comprehension. Beginners struggle partly because they do not know syntax, but more often because they cannot separate input, processing, and output flow.

    Debugging Routine: What to Check When an Error Happens

    When an error appears, do not delete code at random. If you check in the order below, you can find most beginner errors yourself.

    • Read the last line of the error message.
    • Check the file name and line number.
    • On that line, check parentheses, quotation marks, colons, and commas.
    • Check whether the variable name exactly matches the name defined above.
    • Check whether a value that should be calculated as a number is still a string.
    • Undo the part you just changed and run the code again.

    If you repeat this routine, errors begin to look like clues instead of something scary. Python skill grows more from reading and fixing errors than from avoiding them completely.

    Application Ideas: Grow Today’s Lesson a Little

    Once this example feels familiar, keep the a taste of data analysis example and change one thing: an input value, an output sentence, a saving method, or a repeat count. You do not need to make a completely new example. At the beginner stage, many small variations are the best practice.

    • Change variable names in the example to make them more meaningful.
    • Refine output sentences so they read like guidance shown to a real user.
    • Deliberately check what happens when invalid input is entered.
    • Explain the code with comments to check your own understanding.
    • Try making the same result in a slightly different way.

    Lesson Checkpoints

    • ☐ I can explain in words why a taste of data analysis is needed.
    • ☐ I ran the example code myself.
    • ☐ I can explain the role of at least three lines of code.
    • ☐ When an error occurred, I checked the last line and the line number.
    • ☐ I changed and ran at least one practice problem on my own.

    Related Articles

    • Python Beginner 20-Lesson Complete Guide
    • Previous lesson: Python Beginner Lesson 17: Introduction to Folder and File Automation
    • Next lesson: Python Beginner Lesson 19: Fetch Web Data and APIs with requests
    • Business automation article collection

    FAQ

    Can I follow Python data analysis even if I am completely new to Python?

    Yes. This lesson is written for readers who are learning programming for the first time. Focus on understanding the execution result and flow rather than memorizing the code.

    I followed the example exactly, but I get an error. What should I check first?

    Check parentheses, quotation marks, colons, indentation, and variable names first. Many beginner errors happen because quotation marks were entered strangely or a variable name differs by one character.

    The example code looks too short. Should I study longer code?

    At the beginner level, short code is better. The most stable way to improve is to understand short code accurately, then change values and add features one by one.

    What should I do next?

    Change and run at least one practice problem from this lesson. Then move to the next lesson, where the concepts you learned earlier will appear again naturally.

    Next Lesson Preview

    The next lesson is Python Beginner Lesson 19: Fetch Web Data and APIs with requests. Based on the flow you practiced here, you will explore web data and APIs in more detail.

    References

    • Python Official Tutorial
    • Python Official Tutorial: Control Flow Tools
    • Python Official Tutorial: Data Structures
    • Python Official Tutorial: Modules
    • Python Official Tutorial: Input and Output

    Original Korean article: https://www.thinknote.co.kr/python-beginner-18-pandas-matplotlib/

  • Python Beginner Lesson 19: Fetch Web Data and APIs with requests

    In Python Beginner Lesson 19, we cover web data and APIs in detail at a beginner-friendly level. The final goal of this lesson is to send requests to a web API with requests and read JSON responses. Instead of stopping at copying code, we also check why this syntax is used and where beginners often make mistakes.

    Web services and automation tools exchange data through APIs. If you build a feel for HTTP and JSON at the beginner stage, later data collection, chatbots, and business-system integrations become easier to learn. Today’s example is small, but it becomes a basic skeleton for later automation, data analysis, and web API learning.

    What You Will Learn in This Lesson

    • Core topic: web data and APIs
    • Today’s goal: send requests to a web API with requests and read JSON responses
    • Practice flow: understand the concept → run the example → review the code → try an applied task
    • Recommended study time: 30–50 minutes

    Understand the Big Picture First

    Python Beginner Lesson 19: Fetch Web Data and APIs with requests - requests is a tool that sends requests to web servers or APIs and brings response data into your program.
    requests is a tool that sends requests to web servers or APIs and brings response data into your program.

    When learning web data and APIs, the most important thing is not memorizing grammar names. You need to understand what role this concept plays inside a real program. At the beginner stage, keep asking the following three questions.

    • Where did this value come from?
    • In what order does this code run?
    • Where should I save the result if I want to use it again?

    Look Closely at the Core Concepts

    • HTTP is the rule set for exchanging requests and responses on the web.
    • An API is an agreement that lets one program use another program’s features or data.
    • JSON is easy to understand as a structure that mixes dictionaries and lists.
    • Requests can fail, so status codes and exception handling are needed.

    At first, explanations alone may feel abstract. That is why it is helpful to run the example below right away and check the concept with your own eyes.

    Beginner Terms You Should Know

    TermSimple explanation
    HTTP status codeA number such as 200, 404, or 500 that represents the request result
    JSONA data format often used by web APIs
    timeoutA time limit that prevents waiting too long for a response

    Practice Setup

    Create a new Python file and run the example below. Using lowercase English letters and numbers in the file name helps reduce errors. For example, save it as lesson.py or practice_01.py. After entering the code, do not change many things at once. Change it little by little while checking the result each time.

    Example Code

    Python Beginner Lesson 19: Fetch Web Data and APIs with requests - When you practice checking the status code and reading the JSON response, you build the basics for working with external data.
    When you practice checking the status code and reading the JSON response, you build the basics for working with external data.

    When you practice checking the status code and reading the JSON response, you build the basics for working with external data.

    import requests
    
    url = "https://api.github.com"
    response = requests.get(url, timeout=10)
    print("Status code:", response.status_code)
    
    if response.status_code == 200:
        data = response.json()
        print("Current user URL:", data.get("current_user_url"))
    else:
        print("The request failed.")

    Understand the Code Line by Line

    • requests.get() sends a request to the specified URL.
    • timeout=10 makes the program stop if there is no response for more than 10 seconds.
    • If status_code is 200, treat it as a successful response.
    • response.json() lets you read the JSON response like a Python dictionary.

    The important point at this stage is the “reading order” of the code. Python runs from top to bottom. Even when there are exceptional flows such as functions or conditions, beginners should first get used to the basic top-to-bottom flow.

    Change Values and Check the Result

    If the example code runs, now change only a very small part. Start with small changes such as one number, one string, or one variable name so errors are easier to find. After changing something, always save and run the file again.

    Part to changeWhat to check
    Input value or variable valueCheck how the result sentence changes.
    Output sentenceCheck whether the explanation becomes friendlier for the user.
    Code orderCheck whether changing the order causes an error or changes the result.

    Common Errors and How to Fix Them

    Error or situationWhy it happensHow to fix it
    requests is not installedThis is a common beginner-stage problem.Install it with pip install requests.
    TimeoutThis is a common beginner-stage problem.It can happen when the network is slow or the server does not respond.
    JSONDecodeErrorThis is a common beginner-stage problem.It can happen when the response is not in JSON format.

    When an error occurs, first look at the last line of the error message. Then check the file name and line number. Most beginner errors happen around parentheses, quotation marks, indentation, variable names, and type conversion.

    Practice Problems to Try on Your Own

    • Check the status code of another public API.
    • Print the list of keys in the response JSON.
    • Print a more detailed guide message when the request fails.

    When solving practice problems, do not look for the answer code right away. First write the input, processing, and output flow on paper. Once the flow is visible, the code becomes much easier to write.

    Where Does This Connect in Real Work?

    Web data and apis does not end with a small example. It appears again and again when organizing files in business automation, reading table data in data analysis, and handling response values in web APIs. The beginner syntax you learn now also becomes the basic language you use later with tools such as pandas, requests, and FastAPI.

    A Beginner-Friendly Analogy

    When you first see web data and APIs, syntax symbols may catch your eye first. But if you look at syntax only as symbols, you will quickly get tired. A better method is to understand it by role. The core of this lesson is to send requests to a web API with requests and read JSON responses. In other words, you are practicing how to decide what job to give Python and write the order of that job as code.

    Think of a cooking recipe. You prepare ingredients, handle them in order, control the heat, and finally serve the dish. Python code is similar. You prepare the needed values, process them in a defined order, and print or save the result. For beginners, building this sense of order is the most important part.

    Follow the Execution Flow Visually

    Before running code, think in the following three boxes. This habit helps not only with simple examples but also later when you build longer projects.

    SectionQuestion to checkMeaning in this lesson
    InputWhat value does the program receive first?Values the user enters or values written in advance in the web data and APIs example.
    ProcessingWhat calculation or decision happens?The part Python runs in order to achieve the goal: send requests to a web API with requests and read JSON responses.
    OutputWhat result does the user check?This may be a print result, saved file, created graph, or changed data.

    Simply filling in this table yourself improves code comprehension. Beginners struggle partly because they do not know syntax, but more often because they cannot separate input, processing, and output flow.

    Debugging Routine: What to Check When an Error Happens

    When an error appears, do not delete code at random. If you check in the order below, you can find most beginner errors yourself.

    • Read the last line of the error message.
    • Check the file name and line number.
    • On that line, check parentheses, quotation marks, colons, and commas.
    • Check whether the variable name exactly matches the name defined above.
    • Check whether a value that should be calculated as a number is still a string.
    • Undo the part you just changed and run the code again.

    If you repeat this routine, errors begin to look like clues instead of something scary. Python skill grows more from reading and fixing errors than from avoiding them completely.

    Application Ideas: Grow Today’s Lesson a Little

    Once this example feels familiar, keep the web data and APIs example and change one thing: an input value, an output sentence, a saving method, or a repeat count. You do not need to make a completely new example. At the beginner stage, many small variations are the best practice.

    • Change variable names in the example to make them more meaningful.
    • Refine output sentences so they read like guidance shown to a real user.
    • Deliberately check what happens when invalid input is entered.
    • Explain the code with comments to check your own understanding.
    • Try making the same result in a slightly different way.

    Lesson Checkpoints

    • ☐ I can explain in words why web data and APIs is needed.
    • ☐ I ran the example code myself.
    • ☐ I can explain the role of at least three lines of code.
    • ☐ When an error occurred, I checked the last line and the line number.
    • ☐ I changed and ran at least one practice problem on my own.

    Related Articles

    • Python Beginner 20-Lesson Complete Guide
    • Previous lesson: Python Beginner Lesson 18: A Taste of Data Analysis with pandas and matplotlib
    • Next lesson: Python Beginner Lesson 20: Complete a Mini App with a Final Project
    • Business automation article collection

    FAQ

    Can I follow Python API even if I am completely new to Python?

    Yes. This lesson is written for readers who are learning programming for the first time. Focus on understanding the execution result and flow rather than memorizing the code.

    I followed the example exactly, but I get an error. What should I check first?

    Check parentheses, quotation marks, colons, indentation, and variable names first. Many beginner errors happen because quotation marks were entered strangely or a variable name differs by one character.

    The example code looks too short. Should I study longer code?

    At the beginner level, short code is better. The most stable way to improve is to understand short code accurately, then change values and add features one by one.

    What should I do next?

    Change and run at least one practice problem from this lesson. Then move to the next lesson, where the concepts you learned earlier will appear again naturally.

    Next Lesson Preview

    The next lesson is Python Beginner Lesson 20: Complete a Mini App with a Final Project. Based on the flow you practiced here, you will explore the final mini project in more detail.

    References

    • Python Official Tutorial
    • Python Official Tutorial: Control Flow Tools
    • Python Official Tutorial: Data Structures
    • Python Official Tutorial: Modules
    • Python Official Tutorial: Input and Output

    Original Korean article: https://www.thinknote.co.kr/python-beginner-19-web-api-requests/

  • Python Beginner Lesson 20: Complete a Mini App with a Final Project

    In Python Beginner Lesson 20, we cover final mini project in detail at a beginner-friendly level. The final goal is to combine beginner syntax into one complete flow. That flow covers data input, processing, storage, and visualization. Instead of stopping at copied code, we check why each part is used. We also note where beginners often make mistakes.

    The goal of the final lesson is not to add many new grammar rules. It is to connect the basics you have learned so far into one small result and build the feeling that “I can make something with Python too.” Today’s example is small, but it becomes a basic skeleton for later automation, data analysis, and web API learning.

    What You Will Learn in This Lesson

    • Core topic: final mini project
    • Today’s goal: combine beginner syntax into a complete flow for data input, processing, storage, and visualization
    • Practice flow: understand the concept → run the example → review the code → try an applied task
    • Recommended study time: 30–50 minutes

    Understand the Big Picture First

    Python Beginner Lesson 20: Complete a Mini App with a Final Project - A final project connects loading data, summarizing it, saving a chart, and checking the result into one app flow.
    A final project connects loading data, summarizing it, saving a chart, and checking the result into one app flow.

    When learning final mini project, the most important thing is not memorizing grammar names. You need to understand what role this concept plays inside a real program. At the beginner stage, keep asking the following three questions.

    • Where did this value come from?
    • In what order does this code run?
    • Where should I save the result if I want to use it again?

    Look Closely at the Core Concepts

    • Projects are easier to finish when you split features into small pieces.
    • The structure becomes clearer when you separate input, processing, storage, and output steps.
    • A README should describe how to run the project, required packages, and the file structure.
    • After finishing, leave improvement tasks so the project connects to your next stage of learning.

    At first, explanations alone may feel abstract. That is why it is helpful to run the example below right away and check the concept with your own eyes.

    Beginner Terms You Should Know

    TermSimple explanation
    Project structureAn organized shape for files, functions, and data flow
    READMEA document that explains the project and how to run it
    RefactoringImproving code readability while keeping the same behavior

    Practice Setup

    Create a new Python file and run the example below. Using lowercase English letters and numbers in the file name helps reduce errors. For example, save it as lesson.py or practice_01.py. After entering the code, do not change many things at once. Change it little by little while checking the result each time.

    Example Code

    Python Beginner Lesson 20: Complete a Mini App with a Final Project - The moment you check the finished mini app is when the syntax and tools learned earlier become a real result.
    The moment you check the finished mini app is when the syntax and tools learned earlier become a real result.

    The moment you check the finished mini app is when the syntax and tools learned earlier become a real result.

    import pandas as pd
    import matplotlib.pyplot as plt
    
    
    def load_data():
        return pd.DataFrame({
            "category": ["Food", "Transport", "Study", "Food"],
            "amount": [120000, 45000, 80000, 30000]
        })
    
    
    def summarize(data):
        return data.groupby("category")["amount"].sum()
    
    
    def save_chart(summary):
        summary.plot(kind="bar")
        plt.title("Spending by Category")
        plt.tight_layout()
        plt.savefig("expense-summary.png")
    
    
    data = load_data()
    summary = summarize(data)
    print(summary)
    save_chart(summary)

    Understand the Code Line by Line

    • load_data() prepares sample data. In a real project, you could replace it with CSV reading.
    • summarize() adds up amounts by category.
    • save_chart() saves the summarized result as a graph.
    • The last four lines run the whole flow in order.

    The important point at this stage is the “reading order” of the code. Python runs from top to bottom. Even when there are exceptional flows such as functions or conditions, beginners should first get used to the basic top-to-bottom flow.

    Change Values and Check the Result

    If the example code runs, now change only a very small part. Start with small changes such as one number, one string, or one variable name so errors are easier to find. After changing something, always save and run the file again.

    Part to changeWhat to check
    Input value or variable valueCheck how the result sentence changes.
    Output sentenceCheck whether the explanation becomes friendlier for the user.
    Code orderCheck whether changing the order causes an error or changes the result.

    Common Errors and How to Fix Them

    Error or situationWhy it happensHow to fix it
    Starting too bigThis is a common beginner-stage problem.Complete one small function first, then attach the next feature.
    Missing package installationThis is a common beginner-stage problem.It is helpful to write required packages in requirements.txt.
    Hard to rerunThis is a common beginner-stage problem.Leave the input file location and run command in the README.

    When an error occurs, first look at the last line of the error message. Then check the file name and line number. Most beginner errors happen around parentheses, quotation marks, indentation, variable names, and type conversion.

    Practice Problems to Try on Your Own

    • Change load_data() to a read_csv() approach.
    • Print the spending category with the largest total.
    • Write installation and run instructions in a README.md file.

    When solving practice problems, do not look for the answer code right away. First write the input, processing, and output flow on paper. Once the flow is visible, the code becomes much easier to write.

    Where Does This Connect in Real Work?

    Final mini project does not end with a small example. It appears again and again when organizing files in business automation, reading table data in data analysis, and handling response values in web APIs. The beginner syntax you learn now also becomes the basic language you use later with tools such as pandas, requests, and FastAPI.

    A Beginner-Friendly Analogy

    When you first see final mini project, syntax symbols may catch your eye first. But if you look at syntax only as symbols, you will quickly get tired. A better method is to understand it by role. The core of this lesson is to combine beginner syntax into a complete flow for data input, processing, storage, and visualization. In other words, you are practicing how to decide what job to give Python and write the order of that job as code.

    Think of a cooking recipe. You prepare ingredients, handle them in order, control the heat, and finally serve the dish. Python code is similar. You prepare the needed values, process them in a defined order, and print or save the result. For beginners, building this sense of order is the most important part.

    Follow the Execution Flow Visually

    Before running code, think in the following three boxes. This habit helps not only with simple examples but also later when you build longer projects.

    SectionQuestion to checkMeaning in this lesson
    InputWhat value does the program receive first?Values the user enters or values written in advance in the final mini project example.
    ProcessingWhat calculation or decision happens?The part Python runs in order to achieve the goal: combine beginner syntax into a complete flow for data input, processing, storage, and visualization.
    OutputWhat result does the user check?This may be a print result, saved file, created graph, or changed data.

    Simply filling in this table yourself improves code comprehension. Beginners struggle partly because they do not know syntax, but more often because they cannot separate input, processing, and output flow.

    Debugging Routine: What to Check When an Error Happens

    When an error appears, do not delete code at random. If you check in the order below, you can find most beginner errors yourself.

    • Read the last line of the error message.
    • Check the file name and line number.
    • On that line, check parentheses, quotation marks, colons, and commas.
    • Check whether the variable name exactly matches the name defined above.
    • Check whether a value that should be calculated as a number is still a string.
    • Undo the part you just changed and run the code again.

    If you repeat this routine, errors begin to look like clues instead of something scary. Python skill grows more from reading and fixing errors than from avoiding them completely.

    Application Ideas: Grow Today’s Lesson a Little

    Once this example feels familiar, keep the final mini project example and change one thing: an input value, an output sentence, a saving method, or a repeat count. You do not need to make a completely new example. At the beginner stage, many small variations are the best practice.

    • Change variable names in the example to make them more meaningful.
    • Refine output sentences so they read like guidance shown to a real user.
    • Deliberately check what happens when invalid input is entered.
    • Explain the code with comments to check your own understanding.
    • Try making the same result in a slightly different way.

    Lesson Checkpoints

    • ☐ I can explain in words why final mini project is needed.
    • ☐ I ran the example code myself.
    • ☐ I can explain the role of at least three lines of code.
    • ☐ When an error occurred, I checked the last line and the line number.
    • ☐ I changed and ran at least one practice problem on my own.

    Related Articles

    • Python Beginner 20-Lesson Complete Guide
    • Previous lesson: Python Beginner Lesson 19: Fetch Web Data and APIs with requests
    • Business automation article collection

    FAQ

    Can I follow Python final project even if I am completely new to Python?

    Yes. This lesson is written for readers who are learning programming for the first time. Focus on understanding the execution result and flow rather than memorizing the code.

    I followed the example exactly, but I get an error. What should I check first?

    Check parentheses, quotation marks, colons, indentation, and variable names first. Many beginner errors happen because quotation marks were entered strangely or a variable name differs by one character.

    The example code looks too short. Should I study longer code?

    At the beginner level, short code is better. The most stable way to improve is to understand short code accurately, then change values and add features one by one.

    What should I do next?

    Change and run at least one practice problem from this lesson. Then move to the next lesson, where the concepts you learned earlier will appear again naturally.

    Next Lesson Preview

    After completing Beginner Lesson 20, you can expand into intermediate topics such as virtual environments, package structure, testing, data analysis, web APIs, and automation projects.

    References

    • Python Official Tutorial
    • Python Official Tutorial: Control Flow Tools
    • Python Official Tutorial: Data Structures
    • Python Official Tutorial: Modules
    • Python Official Tutorial: Input and Output

    Original Korean article: https://www.thinknote.co.kr/python-beginner-20-final-project/

  • How to Install Claude Code in Windows PowerShell: From First Setup to First Run

    How to Install Claude Code in Windows PowerShell: From First Setup to First Run

    If you are installing Claude Code on Windows for the first time, starting from PowerShell is the simplest path. The essentials are three steps: first confirm that you are in PowerShell, run the official installation command, then finish login and a launch test with the `claude` command.

    Explanatory image showing the Claude Code installation flow in Windows PowerShell
    Image: created by Thinknote, summary of the Claude Code PowerShell installation flow

    This article is based on Windows PowerShell. Commands may differ in CMD, and WSL, macOS and Linux installation methods use separate commands.

    First Check: Are You in PowerShell or CMD?

    The most common mistake is running PowerShell commands in CMD, or CMD commands in PowerShell. If the prompt starts with PS C:\, you are in PowerShell. If you only see C:\, it is likely CMD.

    SituationMeaningWhat to do
    The prompt starts with PS C:\You are using PowerShellFollow the commands in this article as written.
    The prompt starts with C:\You are probably using CMDOpen PowerShell from the Start menu, or choose a PowerShell tab in Windows Terminal.
    You are using Windows TerminalMultiple shells may be availableCheck the tab name and select PowerShell before running the installation command.

    Step 1: Check Whether You Need Node.js

    According to Anthropic’s official documentation, Claude Code can be used on Windows 10 1809 or later, or Windows Server 2019 or later. Installation methods broadly include the official native installation and npm installation. For beginners, it is easier to use the official PowerShell installation command first. The npm method can be used as an alternative in an environment with Node.js 22 or later.

    node --version
    npm --version

    If the commands above show version numbers, Node.js and npm are installed. If not, you can install Node.js LTS with WinGet as shown below. However, if you use the official native installation command, you do not necessarily have to install Node.js first.

    winget install OpenJS.NodeJS.LTS

    Step 2: Install Claude Code in PowerShell

    In Windows PowerShell, use Anthropic’s official quick installation command. Open PowerShell and run the command below.

    irm https://claude.ai/install.ps1 | iex

    If you are concerned about security, you can view the installation script before executing it directly. Even in this case, it is important to develop the habit of confirming that the source is the official domain.

    irm https://claude.ai/install.ps1

    Step 3: Verify the Installation

    When installation is complete, open a new PowerShell window and check the version. The official documentation says that a normal installation displays Claude Code together with a version number.

    claude --version

    For a more detailed check, run the diagnostic command. This command does not start a session; it checks installation status and configuration issues in read-only mode.

    claude doctor

    Step 4: Sign In and Start Your First Session

    Claude Code cannot be used with only the free Claude.ai plan. According to the official documentation, it requires a Pro, Max, Team, Enterprise or Console account. After installation, running the command below opens the browser login flow.

    claude

    If you want to use API-based billing, you can choose Console account authentication. Advanced users who already use API key environment variables may have a different authentication method, but the principle is that key values should never be written directly into a blog post or code repository.

    claude auth login --console
    claude auth status --text

    Step 5: Run It from a Project Folder

    Claude Code is not a tool that simply opens a chatbot. It is a coding agent that reads the code and files in the current folder, modifies them when necessary, and runs commands. So it is best to move into the project folder you want to work on before running it.

    cd C:\Users\me\Workspace\my-project
    claude

    On first launch, you may see a prompt asking whether you trust the folder. Approve only projects you created yourself or repositories you can trust. For unfamiliar folders, downloaded archives or code of unclear origin, it is safer to inspect the contents first.

    Alternative: Installing with npm

    If you already use Node.js 22 or later, global npm installation is also possible. According to the official documentation, the npm package downloads and links the native binary for each platform.

    npm install -g @anthropic-ai/claude-code
    claude --version
    Installation methodRecommended forNotes
    Official PowerShell installationWindows users installing for the first timeThe command is short and close to the official Windows quick installation flow.
    npm installationDevelopers already using Node.js 22 or laterConvenient for people who manage an existing Node/npm environment.
    WSL, macOS or Linux installationUsers working outside native Windows PowerShellUse the separate commands and setup flow for that environment.

    Common Errors and Fixes

    Error or symptomPossible causeFix
    irm not foundA PowerShell command was run in CMDOpen PowerShell and run it again.
    &&-related errorA CMD-style command was run in PowerShellDistinguish PowerShell commands from CMD commands.
    claude not recognized after installationPATH has not refreshed or installation did not completeOpen a new PowerShell window, then run claude --version and claude doctor.
    Login does not proceedAccount plan, browser or network issueConfirm your account type, default browser and network access, then try again.

    Recommended Commands for the First Run

    After installation, it is better to start with a small request asking Claude Code to explain the current project rather than immediately assigning a large task. This lets you see how Claude Code reads the repository structure.

    claude
    
    # Enter inside Claude Code
    Briefly explain this project structure.
    If there are runnable test or build commands, tell me those too.

    Related Articles

    FAQ

    What is the command to install Claude Code in Windows PowerShell?

    The official quick installation command is irm https://claude.ai/install.ps1 | iex. It must be run in PowerShell, and CMD requires different commands.

    Is Node.js required to install Claude Code?

    If you use the official native installation, you do not have to install Node.js first. However, installing with npm requires an environment with Node.js 22 or later.

    Can Claude Code be used with a free Claude account?

    According to the official documentation, Claude Code requires a Pro, Max, Team, Enterprise or Console account. It cannot be used with only the free Claude.ai plan.

    What command should I check first after installation?

    Check the version with claude --version, and if there is a problem, inspect the installation status with claude doctor.

    Why should I run it from a project folder?

    Claude Code works based on the files and code structure in the current folder. Move to the desired project folder and run claude to reduce the chance of reading the wrong folder.

    References

    In short, on Windows you can open PowerShell, run the official installation command, and then check in the order claude --version, claude doctor and claude. What matters more than installation itself is execution location and permissions. Start in a trusted project folder, and never leave API keys or account information directly in code.

    Original Korean Article

    This article is a full-fidelity English translation draft of the original Korean post: Claude Code PowerShell installation Korean article on Thinknote.

  • How to Install Android OS Dual Boot on a Samsung Laptop: A Safe Setup Guide for Using It Alongside Windows

    How to Install Android OS Dual Boot on a Samsung Laptop: A Safe Setup Guide for Using It Alongside Windows

    Image showing the concept of Windows and Android dual boot split across a laptop screen on a bright desk
    For Android OS dual boot, backup and confirming the boot method before installation are the most important steps.

    When using a Samsung laptop, there are times when you want to keep Windows as it is while running Android apps directly on the laptop screen. One option for that is Android OS dual boot.

    Dual boot means choosing, when you turn on the computer, whether to enter Windows or Android OS. However, if you select the wrong partition during installation, Windows data can be damaged. For that reason, this article focuses on the safe preparation and installation flow for Samsung laptops.

    This article is written for recent Samsung laptops that boot in UEFI mode, such as the Samsung Galaxy Book and Samsung Notebook series. BIOS screen names may differ slightly depending on the model.

    What You Must Know Before Installation

    When installing Android OS on a laptop, the following distributions are commonly used.

    • Bliss OS: an Android-based OS for PC installation
    • Android-x86: an open-source project for running Android on x86 PCs
    • PrimeOS: an Android-based OS emphasizing gaming and desktop usability

    If you are a beginner, choosing either Bliss OS or Android-x86 first is a reasonable path. Samsung laptops may differ by model in Wi-Fi, touchpad and sound compatibility, so it is best to run a live USB test before installation.

    What You Need

    ItemDescription
    Samsung laptopAssumes Windows is already installed
    USB flash drive8GB or larger recommended
    Android OS ISO fileBliss OS or Android-x86 ISO
    Rufus or balenaEtcherTool for creating a bootable USB
    Backup storageExternal SSD, USB drive, cloud storage, etc.
    BitLocker recovery keyRequired if Windows device encryption is enabled

    Before installation, be sure to back up important files. Dual-boot installation involves partitions, and mistakes can be difficult to recover from.

    The Full Installation Flow at a Glance

    Image showing the Android OS dual boot installation flow from backup to USB boot, partitioning and boot menu
    The full process is easiest to understand as backup, bootable USB, installation space and boot menu confirmation.

    The installation flow may look complicated, but in practice it follows this order.

    1. Back up Windows data
    2. Download the Android OS ISO
    3. Create a bootable USB
    4. Secure Android installation space in Windows
    5. Set USB boot in Samsung BIOS/UEFI
    6. Install Android OS
    7. Confirm Windows and Android selection in the boot menu

    Step 1: Check Whether Your Laptop Uses UEFI

    Most recent Samsung laptops use UEFI. You can check in Windows with the following command.

    msinfo32

    When the System Information window opens, check the BIOS Mode item.

    • If it displays UEFI, you can proceed with the method in this article.
    • If it displays Legacy, the installation method may differ.

    If you want to check with a command, you can use the following in PowerShell.

    Get-ComputerInfo | Select-Object BiosFirmwareType

    Step 2: Back Up Windows and Check BitLocker

    Some Samsung laptops may have Windows device encryption or BitLocker enabled. If you change boot settings in this state, Windows may ask for the recovery key.

    Open PowerShell as administrator and run the following command.

    manage-bde -status

    If BitLocker is enabled, check the recovery key in your Microsoft account or suspend protection before installation.

    manage-bde -protectors -disable C:

    You can enable protection again after installation is complete.

    manage-bde -protectors -enable C:

    Step 3: Download the Android OS ISO

    Download the ISO file for the Android-based OS you want.

    • Bliss OS: an Android distribution for PC installation
    • Android-x86: a lightweight and basic Android PC version
    • PrimeOS: focused on gaming and desktop usability

    After downloading, it is best to verify the checksum to make sure the file is not corrupted. In Windows PowerShell, use the following command.

    Get-FileHash .ndroid-os.iso -Algorithm SHA256

    On Linux or WSL, you can check it as follows.

    sha256sum android-os.iso

    If it matches the SHA256 value provided on the official download page, the file is normal.

    Step 4: Create a Bootable USB

    On Windows, Rufus is commonly used.

    Example Rufus settings are as follows.

    ItemRecommended setting
    Boot selectionDownloaded Android OS ISO
    Partition schemeGPT
    Target systemUEFI
    File systemFAT32 or NTFS
    Write modeISO image mode recommended

    Creating the USB will erase the files inside it. Move any needed files elsewhere first.

    Step 5: Create Space for Android Installation

    Bright disk partition image with Windows, Android installation space and free space divided into colored blocks
    Before touching the Windows partition, make a backup and secure separate free space for Android installation.

    You need to create separate space for Android OS in Windows. Usually, 32GB or more is recommended, and 64GB or more is better if you have room.

    Proceed in Windows Disk Management.

    1. Press Win + X.
    2. Open Disk Management.
    3. Right-click the C: drive.
    4. Select Shrink Volume.
    5. Enter the capacity to use for Android OS.
    6. Leave the space created after shrinking as unallocated.

    The important point is not to delete the Windows partition, EFI partition or Recovery partition. Android OS should be installed only in the newly secured empty space.

    Step 6: Enter BIOS/UEFI on a Samsung Laptop

    Samsung laptops usually use the following keys immediately after power-on.

    FunctionCommon key
    Enter BIOS/UEFI setupF2
    Boot device selection menuF10 or Esc

    It may vary by model. When the Samsung logo appears right after turning on the power, press the key repeatedly to enter.

    The BIOS items to check are as follows.

    ItemRecommended setting
    Boot ModeUEFI
    Secure BootDisabled if needed
    Fast BIOS ModeDisabled if the USB does not appear
    USB BootEnabled

    If the Android OS installation USB does not appear, check Secure Boot and Fast BIOS Mode settings.

    Step 7: Boot from USB and Test Live Mode First

    Before installing immediately, if possible, first run it in Live Mode or Try without installing mode.

    Check the following items.

    • Does Wi-Fi connect?
    • Does the touchpad work?
    • Is keyboard input normal?
    • Can you adjust screen brightness?
    • Does sound play?

    Some devices may not work immediately depending on the Samsung laptop model. Wi-Fi and sound in particular differ by distribution version.

    Step 8: Install Android OS

    On Android-x86-family installation screens, the typical flow is as follows.

    1. Select Installation or Install Android-x86 to harddisk
    2. Select the Android installation partition
    3. Select the file system
    4. Choose whether to install the GRUB bootloader
    5. Reboot after installation completes

    You need to be most careful on the partition selection screen.

    Examples of partitions you must never select
    - EFI System Partition
    - The C: partition where Windows is installed
    - Recovery partition
    
    Partition you should select
    - The newly created empty space or new partition dedicated to Android

    The file system is usually one of the following.

    File systemCharacteristics
    ext4A safe choice for Android installation
    ntfsFor compatibility in some environments
    fat32May be unsuitable for large installations

    In general, ext4 is recommended.

    Step 9: Configure the GRUB Bootloader

    During installation, you may be asked whether to install GRUB. A bootloader is required for dual booting.

    In most cases, choose as follows.

    Install GRUB bootloader? → Yes
    Make system directory read-write? → Optional

    However, because you need to keep the Windows boot entry, after installation you should check that Windows Boot Manager has not disappeared from the BIOS boot order.

    Step 10: Reboot and Check the Boot Menu

    When installation is complete, remove the USB and reboot. If everything is normal, you should be able to choose Android OS and Windows from the boot menu.

    If it boots directly only into Android or only into Windows, check the boot order in Samsung BIOS.

    After entering BIOS, check the following item.

    Boot Priority
    1. Android or GRUB-related item
    2. Windows Boot Manager

    If you want to return to Windows, move Windows Boot Manager to first priority.

    Common Problems and Fixes

    When the USB Boot Entry Does Not Appear

    Check the following.

    - Check whether the USB was created properly
    - Enable USB Boot in BIOS
    - Disable Fast BIOS Mode
    - Disable Secure Boot
    - Recreate it in Rufus using GPT / UEFI mode

    When Windows Does Not Appear After Installation

    Do not panic; check whether Windows Boot Manager exists in BIOS. If you did not delete the Windows partition, it is usually a boot-entry issue.

    If you have a Windows installation USB or recovery environment, you can recover the boot entry with the following command.

    bcdboot C:\Windows /f UEFI

    However, if Windows is assigned a different drive letter, it may not be C:. In the recovery environment, check the drive letter first.

    diskpart
    list volume
    exit

    When Wi-Fi Does Not Work

    Android OS may not immediately support the laptop’s wireless LAN chipset. In this case, try the following methods.

    - Test another Android OS distribution version
    - Use USB tethering
    - Use a USB Wi-Fi dongle
    - Use an ISO with a newer kernel version

    When the Screen Freezes Black

    Some graphics environments may require a boot option. On the GRUB screen, edit the boot entry and try adding the following option.

    nomodeset

    An example is shown below.

    linux /kernel root=/dev/ram0 androidboot.selinux=permissive quiet nomodeset

    Basic Settings Checklist After Installation

    After booting into Android OS, check the following settings.

    • Whether you are signed in to a Google account
    • Wi-Fi connection
    • Korean keyboard settings
    • Screen resolution
    • Sound output
    • Sleep mode
    • Touchpad sensitivity
    • Whether the Play Store is available
    • Whether the Windows boot entry is preserved

    For Korean input, it is convenient to add a keyboard in Android settings or install Gboard.

    If You Want to Remove It and Use Only Windows Again

    To delete Android OS and use only Windows, proceed as follows.

    1. Boot into Windows.
    2. Delete the Android partition in Disk Management.
    3. Extend the Windows partition.
    4. Set Windows Boot Manager as the first priority in BIOS.

    If the Windows boot entry becomes tangled, you can use the following command in the recovery environment.

    bcdboot C:\Windows /f UEFI

    Things to Be Especially Careful About on Samsung Laptops

    Samsung laptops have slightly different BIOS menu names depending on the model. But the core points are the same.

    • Enter BIOS setup with F2.
    • If the USB does not appear, turn off Fast BIOS Mode.
    • If Secure Boot blocks booting, temporarily disable it.
    • Do not delete Windows Boot Manager.
    • Install Android on a separate partition.

    Especially if it is a work laptop, company security policies, BitLocker or device encryption may be enabled. In that case, you must check with the administrator before installing dual boot personally.

    Wrap-Up

    The core of installing Android OS as dual boot on a Samsung laptop is not difficult. What matters is the preparation before pressing the install button.

    To summarize, the following three points are most important.

    1. Back up Windows data and the recovery key first.
    2. Create a separate Android-only partition.
    3. Check USB boot and boot order in Samsung BIOS.

    If you want to use Android apps directly on a laptop, dual boot is a fairly attractive method. However, compatibility differs by model, so it is safest to first check Wi-Fi, touchpad and sound with a live USB before installation.

    FAQ

    If I Install Android OS on a Samsung Laptop, Will Windows Be Deleted?

    If you install Android OS on a separate partition, Windows is not deleted. However, if you choose the wrong Windows partition during installation, data may be damaged, so you must be careful during the partition selection step.

    Can Dual Boot Be Installed on a Samsung Galaxy Book?

    Many models can support it, but Wi-Fi, sound and touchpad compatibility differ depending on the model and Android OS distribution. It is best to test first with a live USB before installation.

    Do I Have to Turn Off Secure Boot?

    It depends on the Android OS distribution and laptop settings. If USB boot is blocked or you cannot enter the installation screen, you can try temporarily disabling Secure Boot.

    Can I Run Only Android Apps in Windows Instead of Installing Android OS?

    Yes. If dual boot feels burdensome, it may be safer to first consider an Android emulator, an Android app runtime for Windows, or a cloud-based app player.

    How Do I Go Back to Using Only Windows After Installation?

    Boot into Windows, delete the Android partition in Disk Management, and extend the Windows partition. After that, set Windows Boot Manager as the first priority in BIOS.

    Related Articles

    ## Original Korean Article This article is a full-fidelity English translation draft of the original Korean post: Samsung laptop Android OS dual boot Korean article on Thinknote.
  • Turn HWP Documents Into AI Voice Briefings and HTML Share Pages

    Turn HWP Documents Into AI Voice Briefings and HTML Share Pages

    The Korean source introduces a practical workflow for turning HWP documents into AI voice briefings and HTML share pages. The real problem is not simply file conversion. In schools, public institutions, and community organizations, HWP notices are often difficult to read, translate, summarize, or share quickly. AI can turn a static document into audio, web pages, PDFs, and viewer-friendly links.

    HWP document AI voice briefing
    HWP document AI voice briefing.

    Original Korean article: 한글 HWP 문서, AI 음성 브리핑과 HTML 공유 페이지로 바꾸는 방법

    The Problem This Tool Solves

    HWP upload to multilingual briefing workflow
    HWP upload to multilingual briefing workflow.

    HWP documents remain common in Korea, especially in education and administration. But recipients may not have the right viewer, may not read Korean fluently, or may not have time to parse a long notice.

    The tool described in the source solves the communication gap by extracting the document, summarizing it, generating a voice briefing, and creating a shareable HTML page that includes the core information.

    Workflow From Upload to Share Link

    AI document summary and MP3 output
    AI document summary and MP3 output.

    The basic flow is simple: upload the HWP file, choose the briefing style and language, let AI analyze the content, generate audio and supporting files, and share the final link.

    The value of this workflow is that one document can become multiple formats. A teacher, staff member, or administrator can send a short audio briefing, a web page, a PDF, and an HWP viewer reference instead of asking every reader to open the original file.

    Why Briefing Style and Language Matter

    HTML share page for public documents
    HTML share page for public documents.

    A school notice for parents should not sound like a legal memo. A policy guide may need a more formal tone. A multicultural parent notice may need simpler language and translation support.

    The source emphasizes style and language choice because AI output is not only a technical artifact. It is communication. The same HWP document may need a concise summary, a friendly briefing, or a step-by-step instruction depending on the audience.

    Gemini API and ElevenLabs Integration

    school and public agency document communication
    school and public agency document communication.

    Gemini handles document understanding, extraction, summarization, and generation. ElevenLabs handles natural-sounding voice output. Together, they transform text-heavy HWP information into listenable briefings.

    This division of labor is practical. A language model interprets the document and structures the message, while a voice model delivers it in a format that busy users can consume on the move.

    Result Outputs: MP3, HTML, PDF, and Viewer Support

    The expected outputs include an MP3 voice briefing, an HTML share page, a PDF version, and access to the original or viewer-supported document. The HTML page becomes the center because it can link or embed the other formats.

    This is especially useful when organizations need fast distribution. A share page can include title, summary, key dates, action items, contact information, audio playback, and document references in one place.

    Use Case: Multicultural Parent Communication

    The source gives multicultural parent guidance as a strong use case. Parents who are not comfortable reading Korean HWP files may miss important school information about schedules, applications, events, or deadlines.

    A multilingual voice briefing and HTML summary can reduce that gap. It does not replace official documents, but it makes the message easier to access and understand.

    Limitations of a Free MVP Service

    The article is careful that a free MVP should be tested before operational use. File size, document layout, tables, embedded images, API cost, language quality, and privacy handling may all have limits.

    Users should verify the generated summary against the original document. AI can misunderstand a deadline, omit a condition, or simplify an exception too much. Human review remains necessary.

    Checklist Before Practical Deployment

    Before using this workflow in real work, check whether the document contains personal information, whether API keys are managed safely, whether the output language is accurate, and whether recipients can access the share page.

    Also decide what must remain official. The generated briefing should support communication, while the original notice or approved PDF remains the authoritative document when legal or administrative precision matters.

    Practical Implications for Readers

    For readers using this article as a working reference, the practical lesson is to move from abstract interest to a concrete audit. Identify where the topic touches your own work, which assumptions are already outdated, what data or tools are missing, and which decision could be tested on a small scale before a larger commitment. Write that test down, assign an owner, and review evidence rather than impressions.

    The Korean source repeatedly treats technology, strategy, and human judgment together. That is why the safest next step is not blind adoption or passive worry. It is disciplined experimentation: define the problem, compare alternatives, verify results, protect sensitive information, and keep the human purpose visible while the tool or trend evolves.

    Related Reading

    Continue with these related Thinknote English articles in the Digital Transformation cluster.

    FAQ

    What is this article about?

    This article explains a digital transformation, platform, market-structure, or technology-adoption topic with Korea-specific context and global implications.

    How should I use this guide?

    Use it to understand market signals and strategic patterns. Combine it with current market data before making business or investment decisions.

    Where can I read the original Korean article?

    The original Korean article is available here: Turn HWP Documents Into AI Voice Briefings and HTML Share Pages.