
# AI Web Design Workflow: How to Build a Landing Page with ChatGPT Mockups and Claude Design
AI web design is no longer just a story about “enter a prompt and a site comes out.” The more important change is a division-of-labor workflow: first visualize the design standard, then have another AI implement that standard.
Darrel Wilson’s video shows this flow well. First, he creates website screenshots with ChatGPT Sol, then passes a preferred mockup to Claude Design and turns it into a responsive web page. For beginners, it is a fast experimentation tool. For practitioners, it is a way to reduce the gap between a brief and implementation.
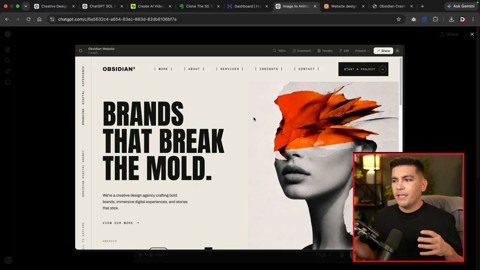
The core is “creating a visual standard,” not “generating code”
A common mistake when building a website with AI is to start with the prompt, “Create a cool landing page in HTML.” Even if the result looks plausible, the brand tone, image direction, section density, and typography can easily drift.
The video’s approach is different. It first asks ChatGPT Sol to create screenshots that look like finished websites by providing the industry, mood, image style, and layout requirements. Those screenshots become a visual brief that can be given to another AI.
Step 1: Create multiple design mockups with ChatGPT Sol
The text prompt should not simply say, “Make a website.” It should include specific design conditions, such as the following.
- Industry and site purpose
- Desired mood and brand tone
- Image direction for the hero section
- Layout characteristics such as vertical or horizontal text
- CTA buttons, menus, and section structure
- Whether to use high-resolution images
The purpose of this step is not to obtain code that can be deployed immediately. It is to compare several mockups quickly and choose the strongest direction.
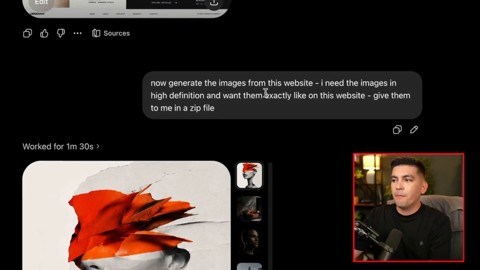
Step 2: Extract image assets separately and pass them to Claude
Even if a strong mockup is produced, the final result weakens sharply if the images turn into placeholders during implementation. That is why the video extracts the images inside the screenshot as high-resolution files and downloads them as a ZIP file.
The reason this process matters is simple. Claude Design can follow not only the layout, but also the image assets that created the mood of the original mockup.
In real work, one more check is needed at this stage. You must review the commercial usability of AI-generated images, human depictions, brand similarity, and copyright risk.
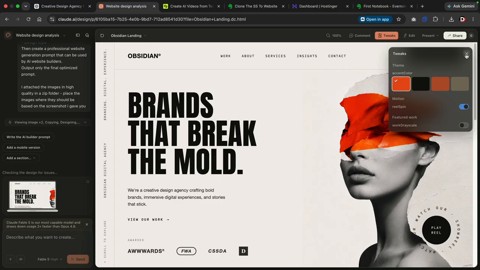
Step 3: Implement the mockup as a responsive web page with Claude Design
The next step is to upload the selected screenshot and image ZIP to Claude Design. In the video, Wilson instructs Claude to follow the original mockup as closely as possible and, if necessary, turns off Claude’s default design system.
The prompt can be short. What matters is not saying only “Make a similar website based on this image,” but giving the following standards as well.
- Preserve the original mockup’s layout first.
- Do not replace the image assets with placeholders.
- Consider both desktop and mobile responsiveness.
- Connect the menu, CTAs, and section order like a real site.
- Structure it so it can later expand into About, Services, and Contact pages.
Step 4: Do not stop at the homepage; expand the site structure
In the video, after creating the homepage, he generates additional pages such as About, Services, Insight, and Contact in the same design language. This part is important. Even if a single landing page looks beautiful, it is hard to use as a real website if the internal pages are empty.
AI website production should not stop at “the first screen looks pretty.” At minimum, you need to check the following.
- Do navigation links lead to actual pages?
- Do the menu and CTA work naturally on mobile?
- Do the contact form, buttons, and external links function correctly?
- Is the copy not duplicated across pages?
- Are SEO titles and meta descriptions separated by page?
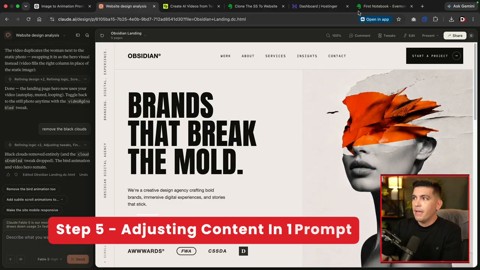
Step 5: Refine copy and animation separately afterward
Claude’s first result is a starting point. In the video, industry information is entered again to customize all text, and animations such as birds, clouds, and human video elements are added.
Animation, however, should be handled carefully. Background videos and moving objects can improve the first impression, but they can also reduce mobile speed and accessibility. On small screens in particular, text readability comes first.
In practice, the following order is stable.
- Complete the structure and sections first.
- Have a human review the brand copy.
- Fix the mobile layout.
- Add animation in minimal units.
- Check speed, accessibility, and SEO last.
What this method changes is the work sequence, not the tools
The message of the video is not “designers and developers are no longer needed.” Rather, it means the human role is moving further toward the front end and the back end of the process.
At the front end, people must create good visual briefs and judge which direction to choose among multiple mockups. At the back end, they must verify whether the result meets real service standards.
As AI becomes faster, the standards humans need to check must also become clearer.
Checklist for trying it right away
- Do not try to finish everything at once; separate mockup creation, implementation, revision, and deployment.
- Give ChatGPT the “design direction” and Claude the “implementation standards.”
- Pass image assets along with the screenshot.
- Check the mobile screen with a separate prompt.
- Before actual deployment, check links, forms, speed, accessibility, and SEO.
Recommended reading
- 15 Front-End Basics Vibe Coding Beginners Must Know
- Why Vibe Coding Beginners Get Stuck: The IT Map You Need Before Coding
- Creating AI Skills: Starting Claude and GPT Work Automation with Three Files
- How to Shift to AI-Native Work: Changing Work with a Digital Brain and AI Agents
FAQ
Q1. Can ChatGPT Sol complete a website by itself?
The core of the video is not to finish with Sol alone. ChatGPT Sol creates design mockups and image assets, while Claude Design implements those mockups as actual web pages. It is closer to a division of labor.
Q2. Why create a screenshot first instead of asking Claude to build it directly?
A screenshot is a visual brief that communicates layout, images, typography, and mood all at once. Compared with text alone, it gives the AI a much more concrete standard to follow.
Q3. Does this method replace Figma?
For simple mockups and landing page experiments, it can reduce some work before Figma. However, it is hard to say that it fully replaces team collaboration, component management, design systems, and detailed UX validation.
Q4. Can I use an AI-generated website commercially right away?
It is safer to use it after review rather than immediately. Image rights, responsive quality, accessibility, performance, personal-data handling in forms, and search optimization all need to be checked separately.
Q5. Is this workflow useful for beginners?
Yes. It is especially useful for beginners who lack design confidence because they can view multiple mockups first and choose a direction. However, they should not trust the final result as-is, but verify it step by step with a checklist.