
1. Advance preparation
The installation process below is carried out in an Ubuntu 22 environment. If you need to prepare in advance, please refer to the steps below:
Original Korean article: Nextcloud installation and settings
- Install Ubuntu 22.04.1 (VirtualBox)
- ubuntu update and upgrade
- Install and enable Ubuntu firewall iptables
- Ubuntu firewall iptables setup and management
- Install Ubuntu OpenSSH and install MobaXterm
- Setting up and connecting Ubuntu SSH ports
- Install Nginx web server (ubuntu)
- Install PHP 8 (ubuntu)
- Setting up Nginx + Php8
- Installing and managing MariaDB (MySQL)
- Install OpenSSL
- Free HTTPS setup (Let’s Encrypt, Cloudflare)
- Install memory caching APCu, Redis, Memcached
2. Understanding Installable Cloud Nextcloud
Nextcloud is a cloud storage and collaboration platform for personal and enterprise use. Nextcloud is open source software developed by Frank Karlitschek after leaving the ownCloud project in 2016. members of the ownCloud community gathered together to create Nextcloud and began development.
1) Nextcloud Features
Nextcloud is widely used by individuals and businesses as a secure and efficient cloud storage and collaboration tool.
- File Sync and Share: Nextcloud allows you to sync and share files across multiple devices.
- Security: Nextcloud provides a variety of security features, including data encryption and two-factor authentication, to enhance user data protection.
- Collaboration tools: Include collaboration tools like document editing, calendar, address book, and more to help you accomplish a variety of tasks with your team.
- App Ecosystem: We offer a variety of apps and extensions to extend Nextcloud to fit your needs.
- Self-hosted: Nextcloud is available on-premise or in the cloud, allowing users to run their own servers to manage their data.
2) Advantages
- Privacy Protection: Nextcloud is easy to protect personal information because users can directly manage their data.
- Extensibility: A variety of apps and extensions allow you to extend Nextcloud to fit your needs.
- Collaboration features: It provides various collaboration tools such as document editing and calendar, making it easy to work with team members.
3) Disadvantages
- Technical Knowledge Required: Must have a technical understanding of server setup and maintenance.
- Initial setup complexity: Initially setting up Nextcloud can be a bit complicated.
4) System Requirements
Platform Options Operating System (64-bit) Ubuntu 22.04 LTS (recommended) Ubuntu 20.04 LTS Red Hat Enterprise Linux 8 (recommended) Debian 12 Linux Enterprise Server 15 openSUSE Leap 15.4 CentOS Stream Database MySQL 8.0+ or MariaDB 10.3/10.4/10.5/ 10.6 (recommended) Oracle Database 11g (enterprise) (only as part of subscription) ) PostgreSQL 10/11/12/13/14/15 SQLite (recommended for testing and minimum instances only) ) Web server Apache 2.4 and or (recommended) mod_phpphp-fpm nginx php-fpm PHP runtime 8.0 (deprecated)) 8.1 8.2 (recommended)
3) Hardware Requirements
- Processor: 1 GHz or faster dual core processor
- Memory: At least 512MB RAM (recommended: 2GB or more)
- Storage space: At least 10GB of free space
- Network: Network interface for Internet connection
2. Install Nextcloud
Nextcloud installation includes all-in-one VM, all-in-one Docker, and web installer installation methods. Here, we will proceed with the installation using the web installer.
1) Create folder and download installation file
Create a folder to install nextcloud. Create a logs folder to store web logs and a public folder to install nextcloud.
sudo mkdir  /var/www/nc.skdream.com
sudo mkdir  /var/www/nc.skdream.com/logs
sudo mkdir  /var/www/nc.skdream.com/public
Download the installation file to the public folder. https://download.nextcloud.com/server/installer/setup-nextcloud.php
cd /var/www/nc.skdream.com/public
sudo wget
https://download.nextcloud.com/server/installer/setup-nextcloud.php
Change the public folder user to www-data.
sudo chown -R www-data:www-data /var/www/nc.skdream.com/public2) Creating Nginx server block
Create a server block file for domain connection.
sudo nano /etc/nginx/sites-available/nc.skdream.comPaste the code below and change the domain part to your own domain.
upstream php-handler {
        server unix:/var/run/php/php8.2-fpm.sock;

}
# Set the `immutable` cache control options only for assets with a cache busting `v` argument
map $arg_v $asset_immutable {
        "" "";
        default "immutable";
}
server {
        listen 443 ssl http2;
        listen [::]:443 ssl http2;

        server_name example.com;

        ssl_certificate /etc/letsencrypt/live/example.com/fullchain.pem;
        ssl_certificate_key /etc/letsencrypt/live/example.com/privkey.pem;
        ssl_trusted_certificate /etc/letsencrypt/live/example.com/chain.pem;
        ssl_dhparam /etc/ssl/certs/dhparam.pem;

        ssl_protocols TLSv1.2 TLSv1.3;
        ssl_prefer_server_ciphers on;
        ssl_ciphers TLS_AES_256_GCM_SHA384:TLS_CHACHA20_POLY1305_SHA256:TLS_AES_128_GCM_SHA256:ECDHE-RSA-AES256-GCM-SHA384:DHE-RSA-AES256-GCM-SHA384:ECDHE-RSA-AES128-GCM-SHA256;
        ssl_ecdh_curve secp384r1;
        ssl_session_timeout 10m;
        ssl_session_cache shared:SSL:10m;
        ssl_session_tickets off;
        ssl_stapling on;
        ssl_stapling_verify on;
        resolver 1.1.1.1 1.0.0.1 valid=300s;
        resolver_timeout 5s;

        access_log /var/www/nc.skdream.com/logs/access.log;
        error_log /var/www/nc.skdream.com/logs/error.log;

        root /var/www/nc.skdream.com/public/;
        #index index.php index.html;

        #Nextcloud
        # Prevent nginx HTTP Server Detection
        server_tokens off;

        # HSTS settings
        # WARNING: Only add the preload option once you read about
        # the consequences in https://hstspreload.org/. This option
        # will add the domain to a hardcoded list that is shipped
        # in all major browsers and getting removed from this list
        # could take several months.
        add_header Strict-Transport-Security "max-age=15768000; includeSubDomains; preload" always;

        # set max upload size and increase upload timeout:
        client_max_body_size 512M;
        client_body_timeout 300s;
        fastcgi_buffers 64 4K;

        # Enable gzip but do not remove ETag headers
        gzip on;
        gzip_vary on;
        gzip_comp_level 4;
        gzip_min_length 256;
        gzip_proxied expired no-cache no-store private no_last_modified no_etag auth;
        gzip_types application/atom+xml text/javascript application/javascript application/json application/ld+json application/manifest+json application/rss+xml application/vnd.geo+json application/vnd.ms-fontobject application/wasm application/x-font-ttf application/x-web-app-manifest+json application/xhtml+xml application/xml font/opentype image/bmp image/svg+xml image/x-icon text/cache-manifest text/css text/plain text/vcard text/vnd.rim.location.xloc text/vtt text/x-component text/x-cross-domain-policy;

        # Pagespeed is not supported by Nextcloud, so if your server is built
        # with the `ngx_pagespeed` module, uncomment this line to disable it.
        #pagespeed off;

        # The settings allows you to optimize the HTTP2 bandwitdth.
        # See https://blog.cloudflare.com/delivering-http-2-upload-speed-improvements/
        # for tunning hints
        client_body_buffer_size 512k;

        # HTTP response headers borrowed from Nextcloud `.htaccess`
        add_header Referrer-Policy                   "no-referrer"       always;
        add_header X-Content-Type-Options            "nosniff"           always;
        #add_header X-Download-Options                "noopen"            always;
        add_header X-Frame-Options                   "SAMEORIGIN"        always;
        add_header X-Permitted-Cross-Domain-Policies "none"              always;
        add_header X-Robots-Tag                      "noindex, nofollow" always;
        add_header X-XSS-Protection                  "1; mode=block"     always;

        # Remove X-Powered-By, which is an information leak
        fastcgi_hide_header X-Powered-By;

        # Add .mjs as a file extension for javascript
        # Either include it in the default mime.types list
        # or include you can include that list explicitly and add the file extension
        # only for Nextcloud like below:
        include mime.types;

        # Specify how to handle directories -- specifying `/index.php$request_uri`
        # here as the fallback means that Nginx always exhibits the desired behaviour
        # when a client requests a path that corresponds to a directory that exists
        # on the server. In particular, if that directory contains an index.php file,
        # that file is correctly served; if it doesn't, then the request is passed to
        # the front-end controller. This consistent behaviour means that we don't need
        # to specify custom rules for certain paths (e.g. images and other assets,
        # `/updater`, `/ocs-provider`), and thus
        # `try_files $uri $uri/ /index.php$request_uri`
        # always provides the desired behaviour.
        index index.php index.html /index.php$request_uri;
        #types {
        #        text/javascript js mjs;
        #}
        # Rule borrowed from `.htaccess` to handle Microsoft DAV clients
        location = / {
                if ( $http_user_agent ~ ^DavClnt ) {
                        return 302 /remote.php/webdav/$is_args$args;
                }
        }

        location = /robots.txt {
                allow all;
                log_not_found off;
                access_log off;
        }


        # Make a regex exception for `/.well-known` so that clients can still
        # access it despite the existence of the regex rule
        # `location ~ /(\.|autotest|...)` which would otherwise handle requests
        # for `/.well-known`.
        location ^~ /.well-known {
                # The rules in this block are an adaptation of the rules
                # in `.htaccess` that concern `/.well-known`.

                location = /.well-known/carddav { return 301 /remote.php/dav/; }
                location = /.well-known/caldav  { return 301 /remote.php/dav/; }

                location /.well-known/acme-challenge    { try_files $uri $uri/ =404; }
                location /.well-known/pki-validation    { try_files $uri $uri/ =404; }

                # Let Nextcloud's API for `/.well-known` URIs handle all other
                # requests by passing them to the front-end controller.
                return 301 /index.php$request_uri;
        }


        # Rules borrowed from `.htaccess` to hide certain paths from clients
        location ~ ^/(?:build|tests|config|lib|3rdparty|templates|data)(?:$|/)  { return 404; }
        location ~ ^/(?:\.|autotest|occ|issue|indie|db_|console)                { return 404; }

        # Ensure this block, which passes PHP files to the PHP process, is above the blocks
        # which handle static assets (as seen below). If this block is not declared first,
        # then Nginx will encounter an infinite rewriting loop when it prepends `/index.php`
        # to the URI, resulting in a HTTP 500 error response.

        # to the URI, resulting in a HTTP 500 error response.
        location ~ \.php(?:$|/) {
                # Required for legacy support
                rewrite ^/(?!index|remote|public|cron|core\/ajax\/update|status|ocs\/v[12]|updater\/.+|ocs-provider\/.+|.+\/richdocumentscode\/proxy) /index.php$request_uri;

                fastcgi_split_path_info ^(.+?\.php)(/.*)$;
                set $path_info $fastcgi_path_info;

                try_files $fastcgi_script_name =404;

                include fastcgi_params;
                fastcgi_param SCRIPT_FILENAME $document_root$fastcgi_script_name;
                fastcgi_param PATH_INFO $path_info;
                fastcgi_param HTTPS on;

                fastcgi_param modHeadersAvailable true;         # Avoid sending the security headers twice
                fastcgi_param front_controller_active true;     # Enable pretty urls
                fastcgi_pass php-handler;

                fastcgi_intercept_errors on;
                fastcgi_request_buffering off;

                fastcgi_max_temp_file_size 0;
        }
        # Javascript mimetype fixes for nginx
        # Note: The block below should be removed, and the js|mjs section should be
        # added to the block below this one. This is a temporary fix until Nginx
        # upstream fixes the js mime-type
        location ~* \.(?:js|mjs)$ {
            types {
                text/javascript js mjs;
            }
            default_type "text/javascript";
            try_files $uri /index.php$request_uri;
            add_header Cache-Control "public, max-age=15778463, $asset_immutable";
            access_log off;
        }

        # Serve static files
        location ~ \.(?:css|svg|gif|png|jpg|ico|wasm|tflite|map|ogg|flac)$ {
            try_files $uri /index.php$request_uri;
            add_header Cache-Control "public, max-age=15778463, $asset_immutable";
            access_log off;     # Optional: Don't log access to assets

            location ~ \.wasm$ {
                default_type application/wasm;
            }
        }
        location ~ \.woff2?$ {
                try_files $uri /index.php$request_uri;
                expires 7d;         # Cache-Control policy borrowed from `.htaccess`
                access_log off;     # Optional: Don't log access to assets
        }

        # Rule borrowed from `.htaccess`
        location /remote {
                return 301 /remote.php$request_uri;
        }

        location / {
                try_files $uri $uri/ /index.php$request_uri;
        }


}

server {
        listen 80;
        listen [::]:80;

        server_name example.com;
        # Prevent nginx HTTP Server Detection
        server_tokens off;

        return 301 https://example.com$request_uri;
}
Set up the symbolic link and restart nginxt.
sudo ln -s /etc/nginx/sites-available/example.com /etc/nginx/sites-enabled/
sudo systemctl restart nginx
3) DB creation and permission granting
Connect to MariaDB with the command below.
mysql -u root -pIf you have not installed MariaDB, please refer to the following article: Installing and Managing MariaDB (MySQL) – Thinknote
Create a database to use with Nextcloud.
CREATE DATABASE nextcloud;Create a new user. If you want to connect an existing user, you can omit it.
CREATE USER '[example example]'@'localhost' IDENTIFIED BY '[example]';Grant permissions for the new database to the created user.
GRANT ALL PRIVILEGES ON [example example].* TO '[example example]'@'localhost';Apply the changed permission settings.
FLUSH PRIVILEGES;
exit;
4) php requirements
To use Nextcloud, an additional PHP module is required. Below are the requirements presented in the Nextcloud manual.
- PHP (see System requirements for a list of supported versions)
- PHP module ctype
- PHP module curl
- PHP module dom
- PHP module fileinfo (included with PHP)
- PHP module filter (only on Mageia and FreeBSD)
- PHP module GD
- PHP module hash (only on FreeBSD)
- PHP module JSON (included with PHP >= 8.0)
- PHP module libxml (Linux package libxml2 must be >=2.7.0)
- PHP module mbstring
- PHP module openssl (included with PHP >= 8.0)
- PHP module posix
- PHP module session
- PHP module SimpleXML
- PHP module XMLReader
- PHP module XMLWriter
- PHP module zip
- PHP module zlib
Enter the code below to install uninstalled modules. If PHP8 is not installed, please refer to the following article. Install PHP 8 (ubuntu) – Thinknote
sudo apt install php8.2-ctype php8.2-curl php8.2-dom php8.2-gd php8.2-mbstring php8.2-zip php8.2-intl php8.2-gmp php8.2-bcmath libmagickcore-6.q16-6-extra php8.2-apcu php8.2-bz2 php8.2-imagick php8.2-imap php8.2-ldap php8.2-mysql php8.2-smbclient php8.2-xml php8.2-zipRestart php.
sudo systemctl restart php8.2-fpm3. Installation via web installer
Access the web installer on your domain and proceed with the installation.
https://example.com/setup-nextcloud.php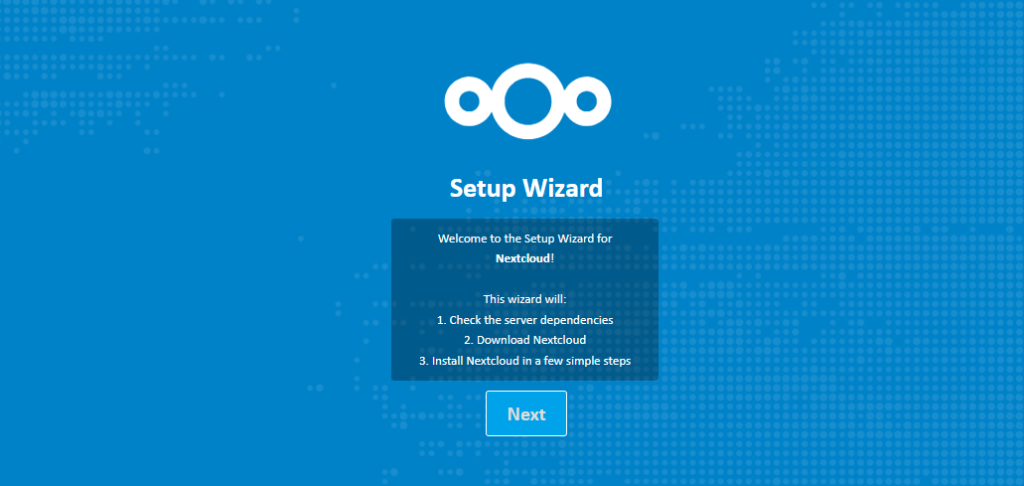
If the error Fatal error: Uncaught ValueError: Invalid or uninitialized Zip object in occurs, it is because the decompression path is /var/www/html. In this case, you must unzip and install it yourself. If it is unzipped, you can access it using the domain URL.
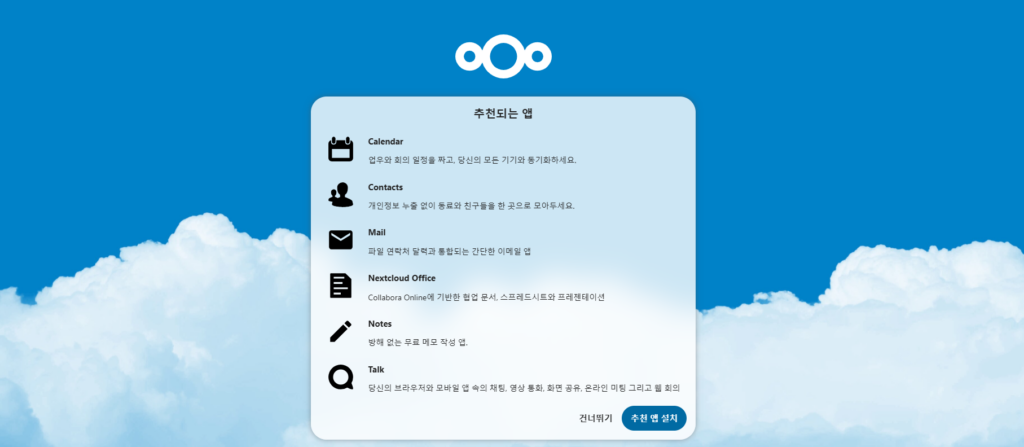
Installation is complete.
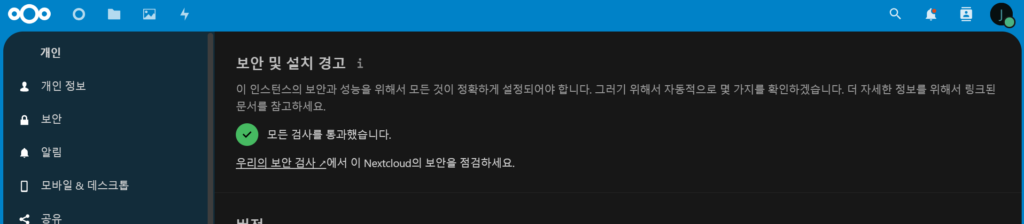
4. Check security and alerts
Log in as administrator and go to administrator settings. If a security and installation warning message appears at this time, please refer to the solutions for each item.
1) Errors related to file integrity
Uncomment clear_env = no in /etc/php/8.2/fpm/pool.d/www.conf
sudo nano /etc/php/8.2/fpm/pool.d/www.conf
clear_env = no #example
2) Error in system environment variable getenv(‘path’)
Check the list of files related to the integrity of the administrator settings and delete problematic files. Then run the code below to check if the integrity issue is resolved.
sudo -u www-data php occ integrity:check-core3) PHP memory limitations
In php.ini, set the memory_limit value and upload_max_filesize to 512M or more.
Memory_limit = 1G
upload_max_filesize = 1G
4) Set country phone number
Add the following to the nextcloud config.php file:
'default_phone_region' => 'kr'5) Improved transaction performance – memcached configuration
Please refer to the following article for memcached configuration. Memory caching APCu, Redis, Memcached installation – Thinknote
To use memcached with transaction file locking, you must also install redis.
Once installation is complete, add the following to the nextcloud config.php file:
'memcache.local' => '\\OC\\Memcache\\Redis',
'memcache.distributed' => '\\OC\\Memcache\\Redis',
'memcache.locking' => '\\OC\\Memcache\\Redis',
'filelocking.enabled' => 'true',
'redis' =>
    array (
        'host' => 'localhost',
        'port' => 0,
        'timeout' => 0.0,
),
6) Check security and background operations
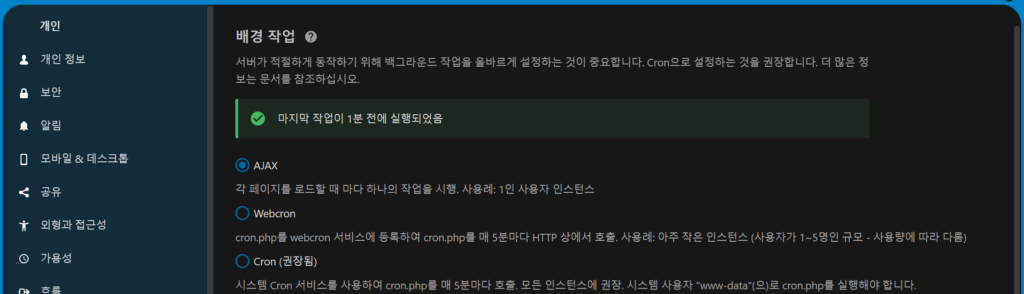
Thinknote
Related Reading
Continue with these related Thinknote English articles in the Server & Infrastructure cluster.
- Install memory caching APCu, Redis, Memcached
- Free HTTPS setup (Let’s Encrypt, Cloudflare)
- Install OpenSSL
- Installing and managing MariaDB (MySQL)
- Setting up Nginx + Php8
- Install PHP 8 (ubuntu)
FAQ
What is this article about?
This article is part of Thinknote’s English server and infrastructure archive. It focuses on practical Linux, Ubuntu, web-server, database, SSH, firewall, or hosting operations that readers can adapt to their own environment.
How should I use this guide?
Use it as a practical checklist and concept guide. Before applying commands on a live server, verify package names, OS versions, ports, and backup requirements for your own setup.
Where can I read the original Korean article?
The original Korean article is available here: Original Korean article.